


VI.1 Seed selection criteria
In this didactic unit, we transmit the importance of having vegetal biodiversity in our edible gardens and garden forests with the purpose of obtaining a cultivated ecosystem that is as similar to nature as possible. We can obtain our seeds by using our own resources and thus closing the cycles. The seeds enable us to assure a proper nutritional diversity and the continuity of food for the next generations.
A good selection of our seeds occurs when we interact with the surrounding seed networks, networks that ensure us plant material that’s appropriate for the area through traditional knowledge. This material comes from reliable sources and has been reproduced in an ecological or responsible way, and therefore assures a high germination rate.
All this allows us to collect high quality seeds from mother plants and maintain an offspring line that ensures the continuity of crops.
One criterion for selecting a mother plant is by looking at its morphological characteristics taking into account the evolution of its growth: a vigorous growth and healthy appearance, a good blossoming, a productive plant with fruit that has the same size and characteristics as the fruit from the original plant. These plants should be resistant to diseases and parasites and be regular in the germination process. On the plants that we want to obtain seeds we would have to leave as much of them as possible to flower, to guarantee a higher purity and a high percentage of seed production since some could be damaged.
We never choose a plant that tends to flower prematurely or the first adult plants that are going to bloom, that has overgrown, or that does not have the same appearance as the other plants (Figure VI.1).
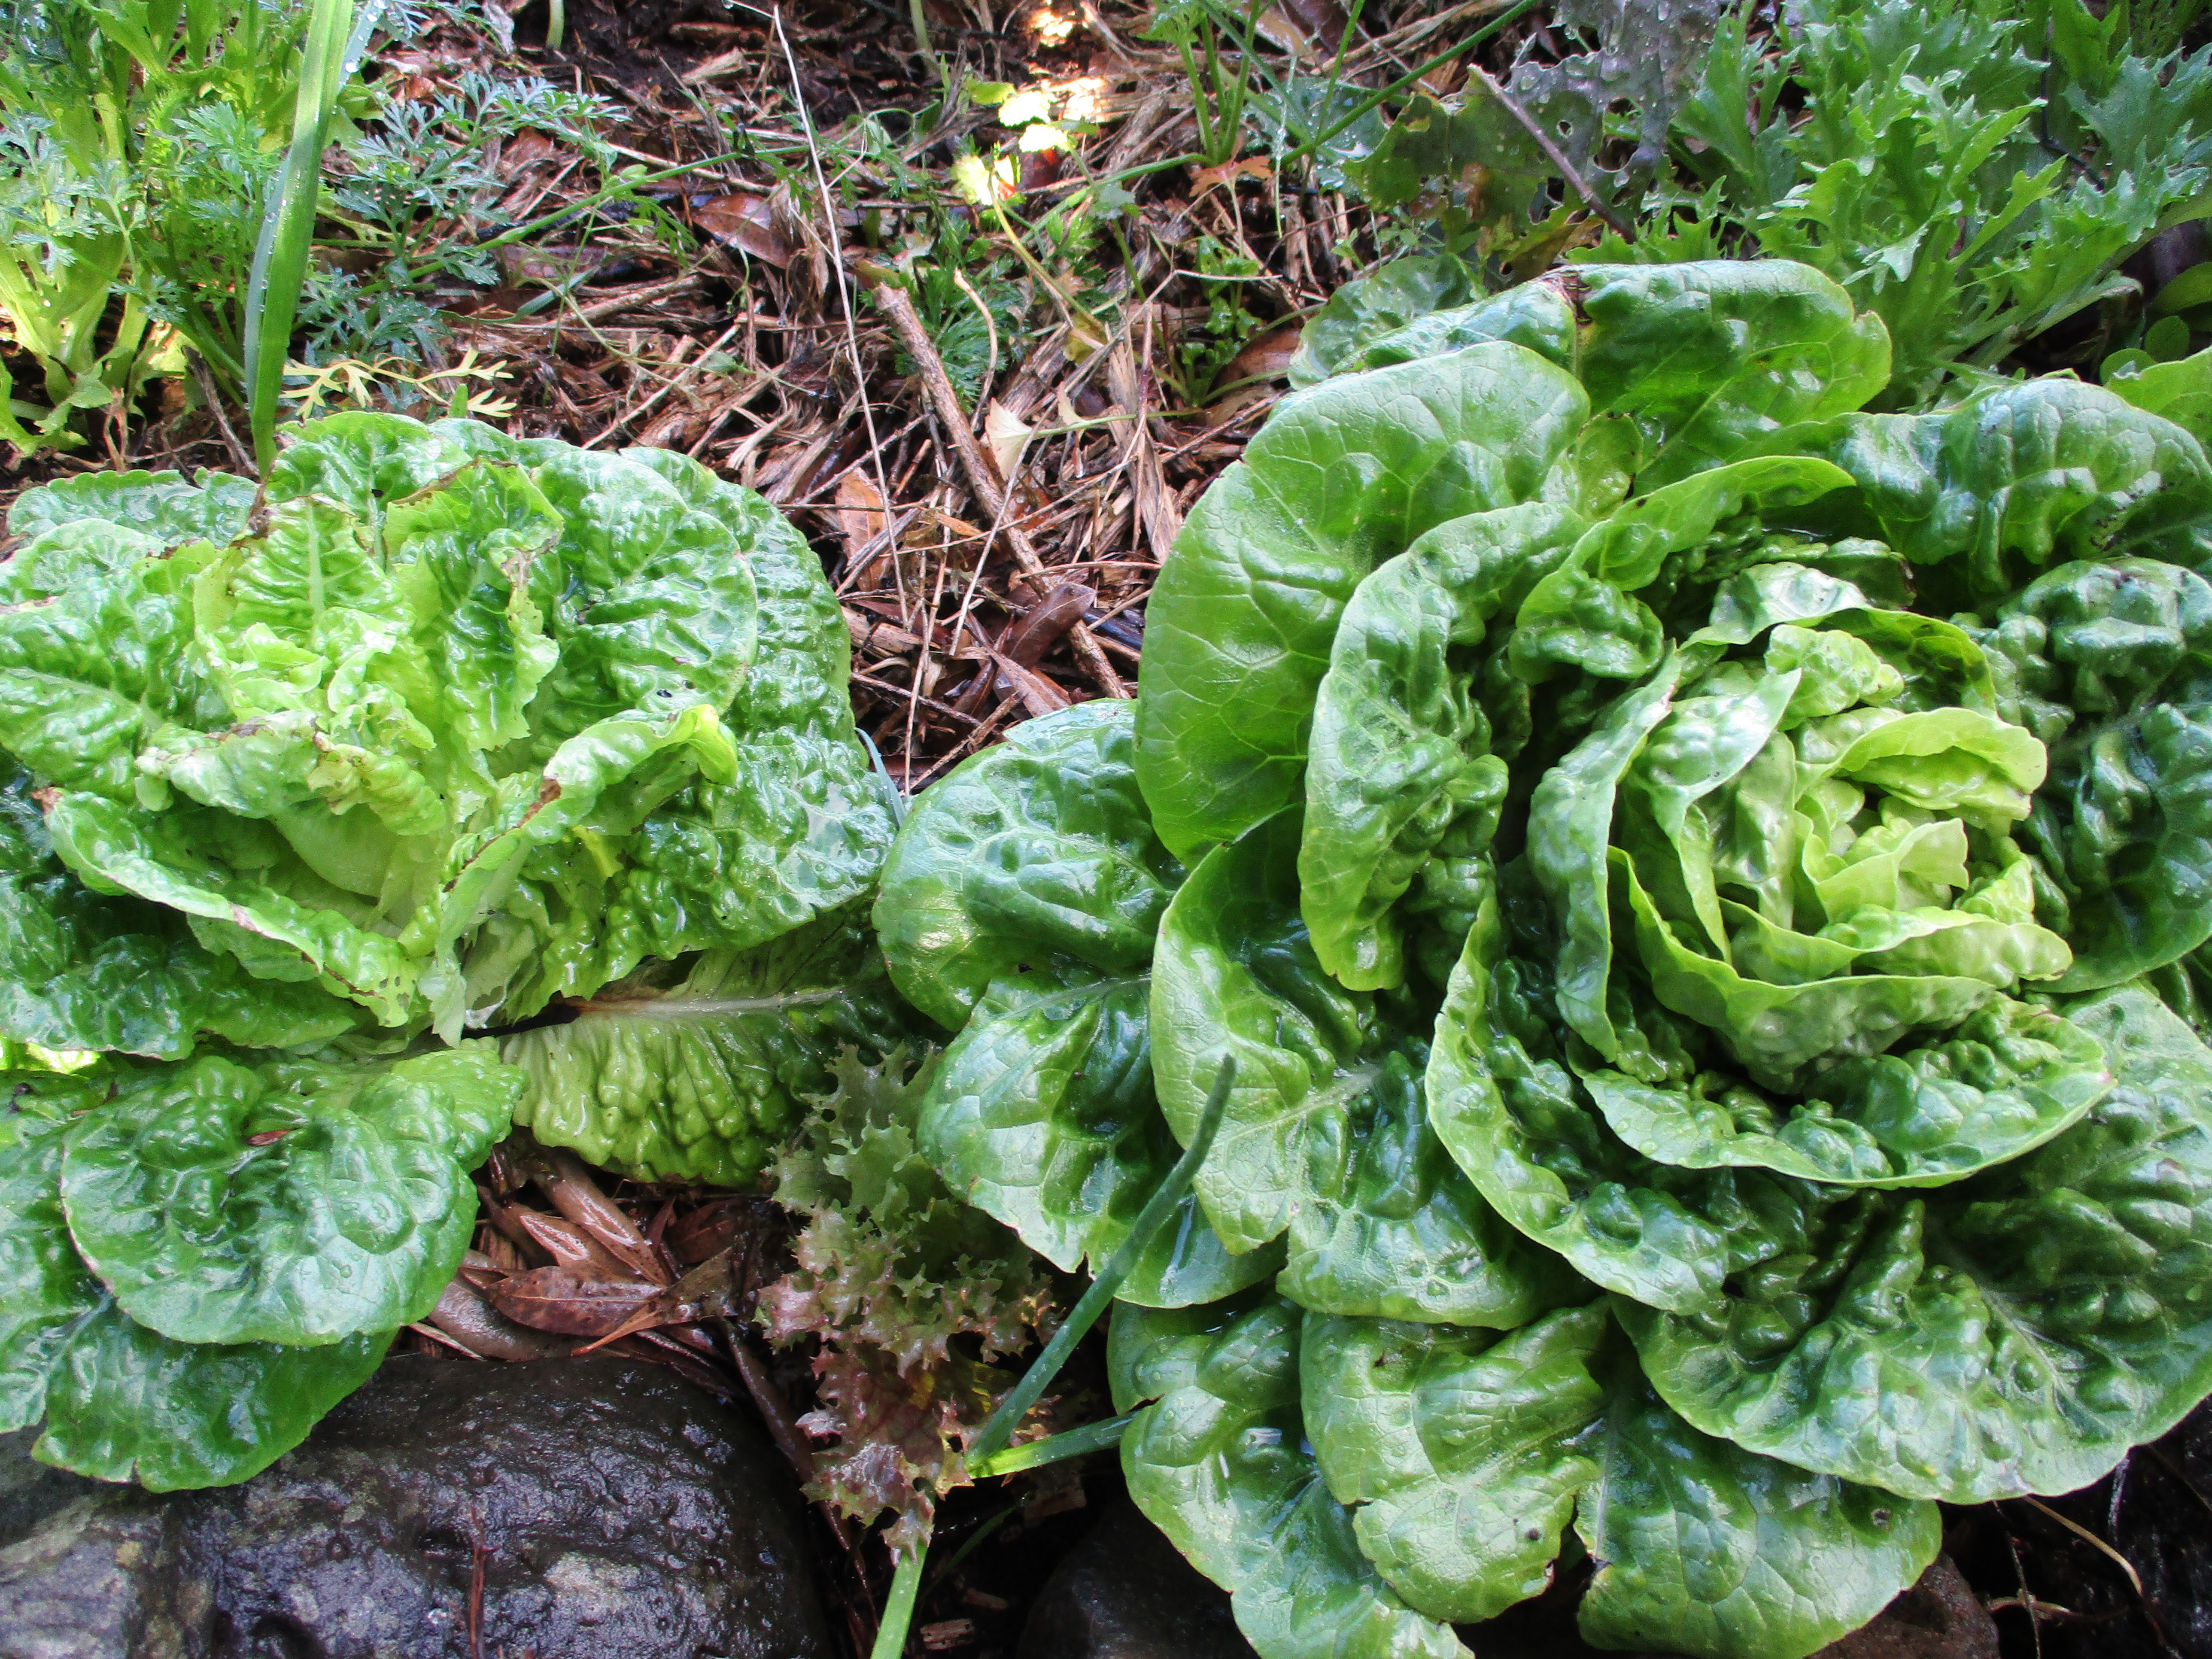
Figure VI.1.- The plant we keep for its seeds is the one on the right so it can it flower, whereas the one on the left, which hasn’t formed the bud, we don’t let it go to flower
The information sources we rely on when cultivating plants in order to obtain seeds are the traditional knowledge and the bibliography about the hybridization of certain plants.
To avoid hybridization of plants among species or varieties, we can isolate them in space, in time or with a handcrafted technique.
The spatial isolation of plants is used for the purpose of obtaining seeds from different plants, planting them with the maximum distance so that they don’t hybridize. However, this is the least recommended technique when it comes to keeping the purity of our plants due to the high percentage of hybridization through insects and wind. If we want to succeed, we need a big area to protect the plants from other’s pollen, or we could also use nets or thermal blankets.
With spatial isolation we prevent plants from flowering at the same time: for example, if we want to obtain two different types of corn seeds, we need to study its temporality and plant them at different times to prevent them from flowering at the same time and hybridizing.
It could also happen that some plants produce hybrid offspring in a natural way or because we did not notice we planted them too close to each other. For example, if we allow different types of radish, a red one and a black one, to flower in the same environment, their seeds could develop into the original radish or into a purple or black variety that has the characteristics of the red one or vice versa (Figure VI.2).
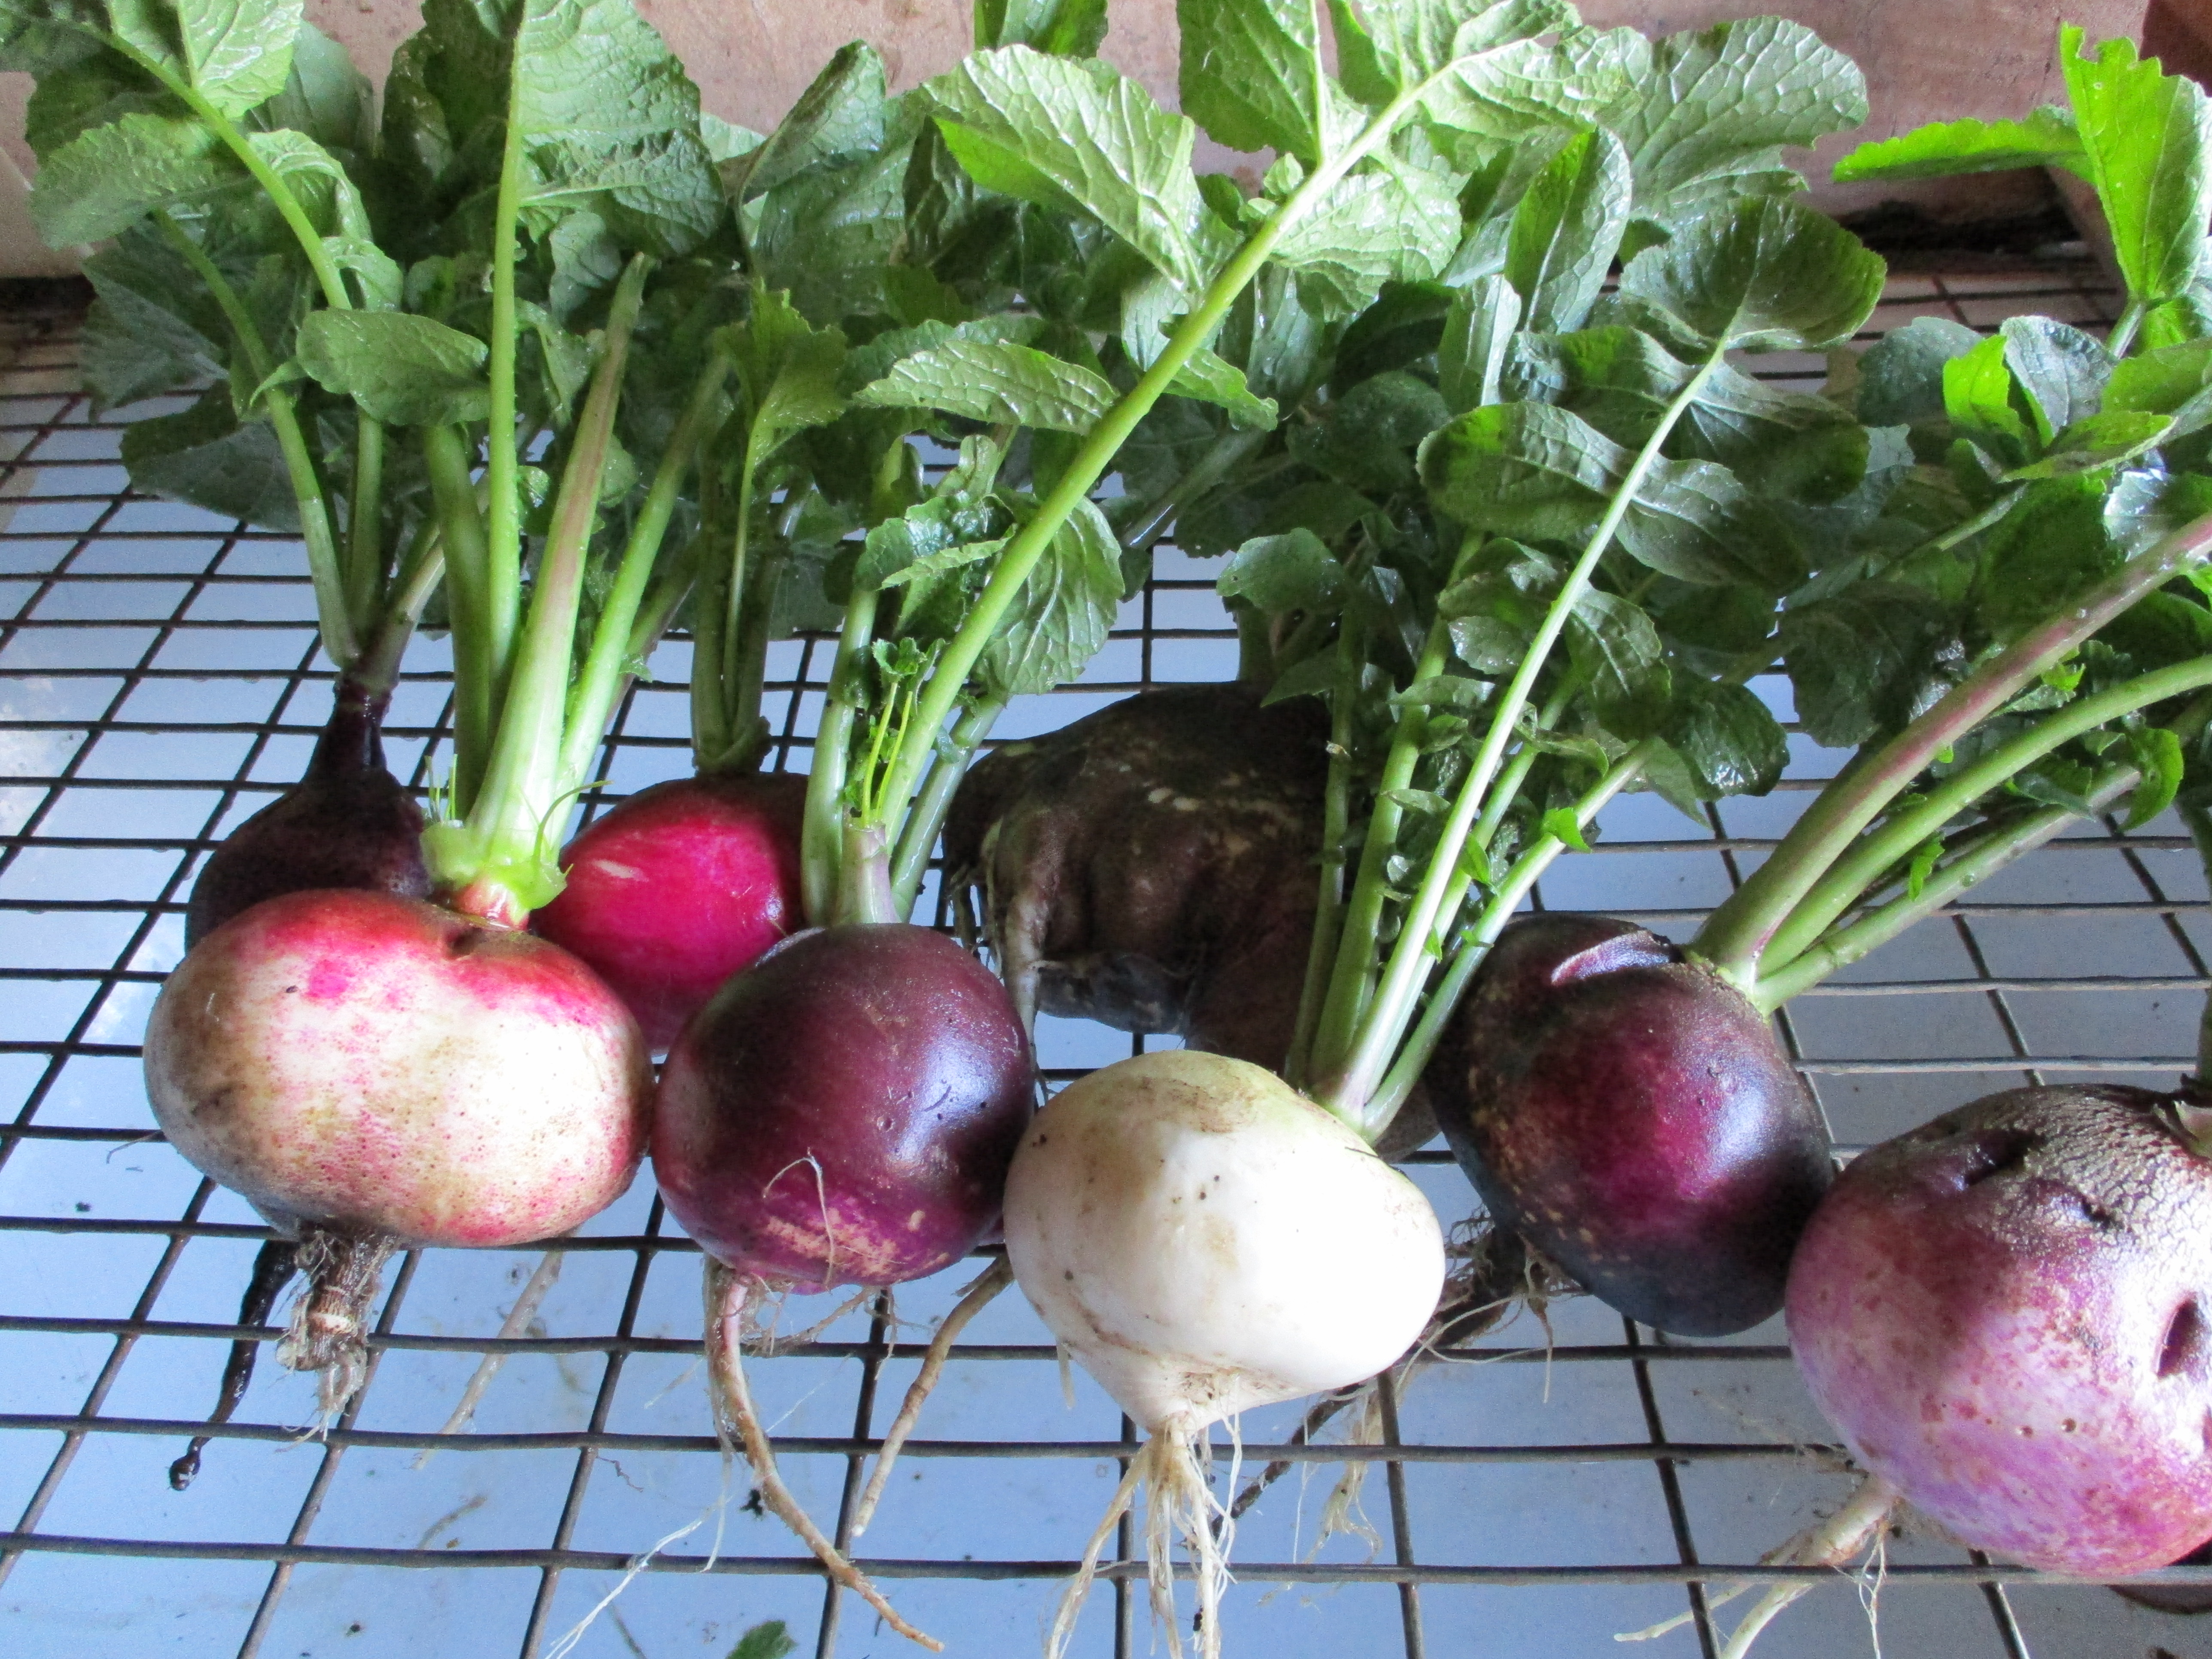
Figure VI.2.- Hybrid radishes
If we do not want this to happen, we need to rotate the different varieties throughout the year to maintain their purity, but from a hybrid offspring we can obtain a new variety that, if we maintain its morphologic characteristics during several generations, will end up transforming into a different local seed.
VI.2 Time to collect our seeds
The process of maturation in order to collect seeds varies depending on the type of plant. Let’s see some examples:
To guarantee the seeds of lettuce we choose several plants from the same variety according to the criteria previously discussed.
With the help of the participants of the course we mark the plants with a stick, a rope or a handkerchief to know which ones not to cut since they have been picked out to go to seeds (Figure VI.3).
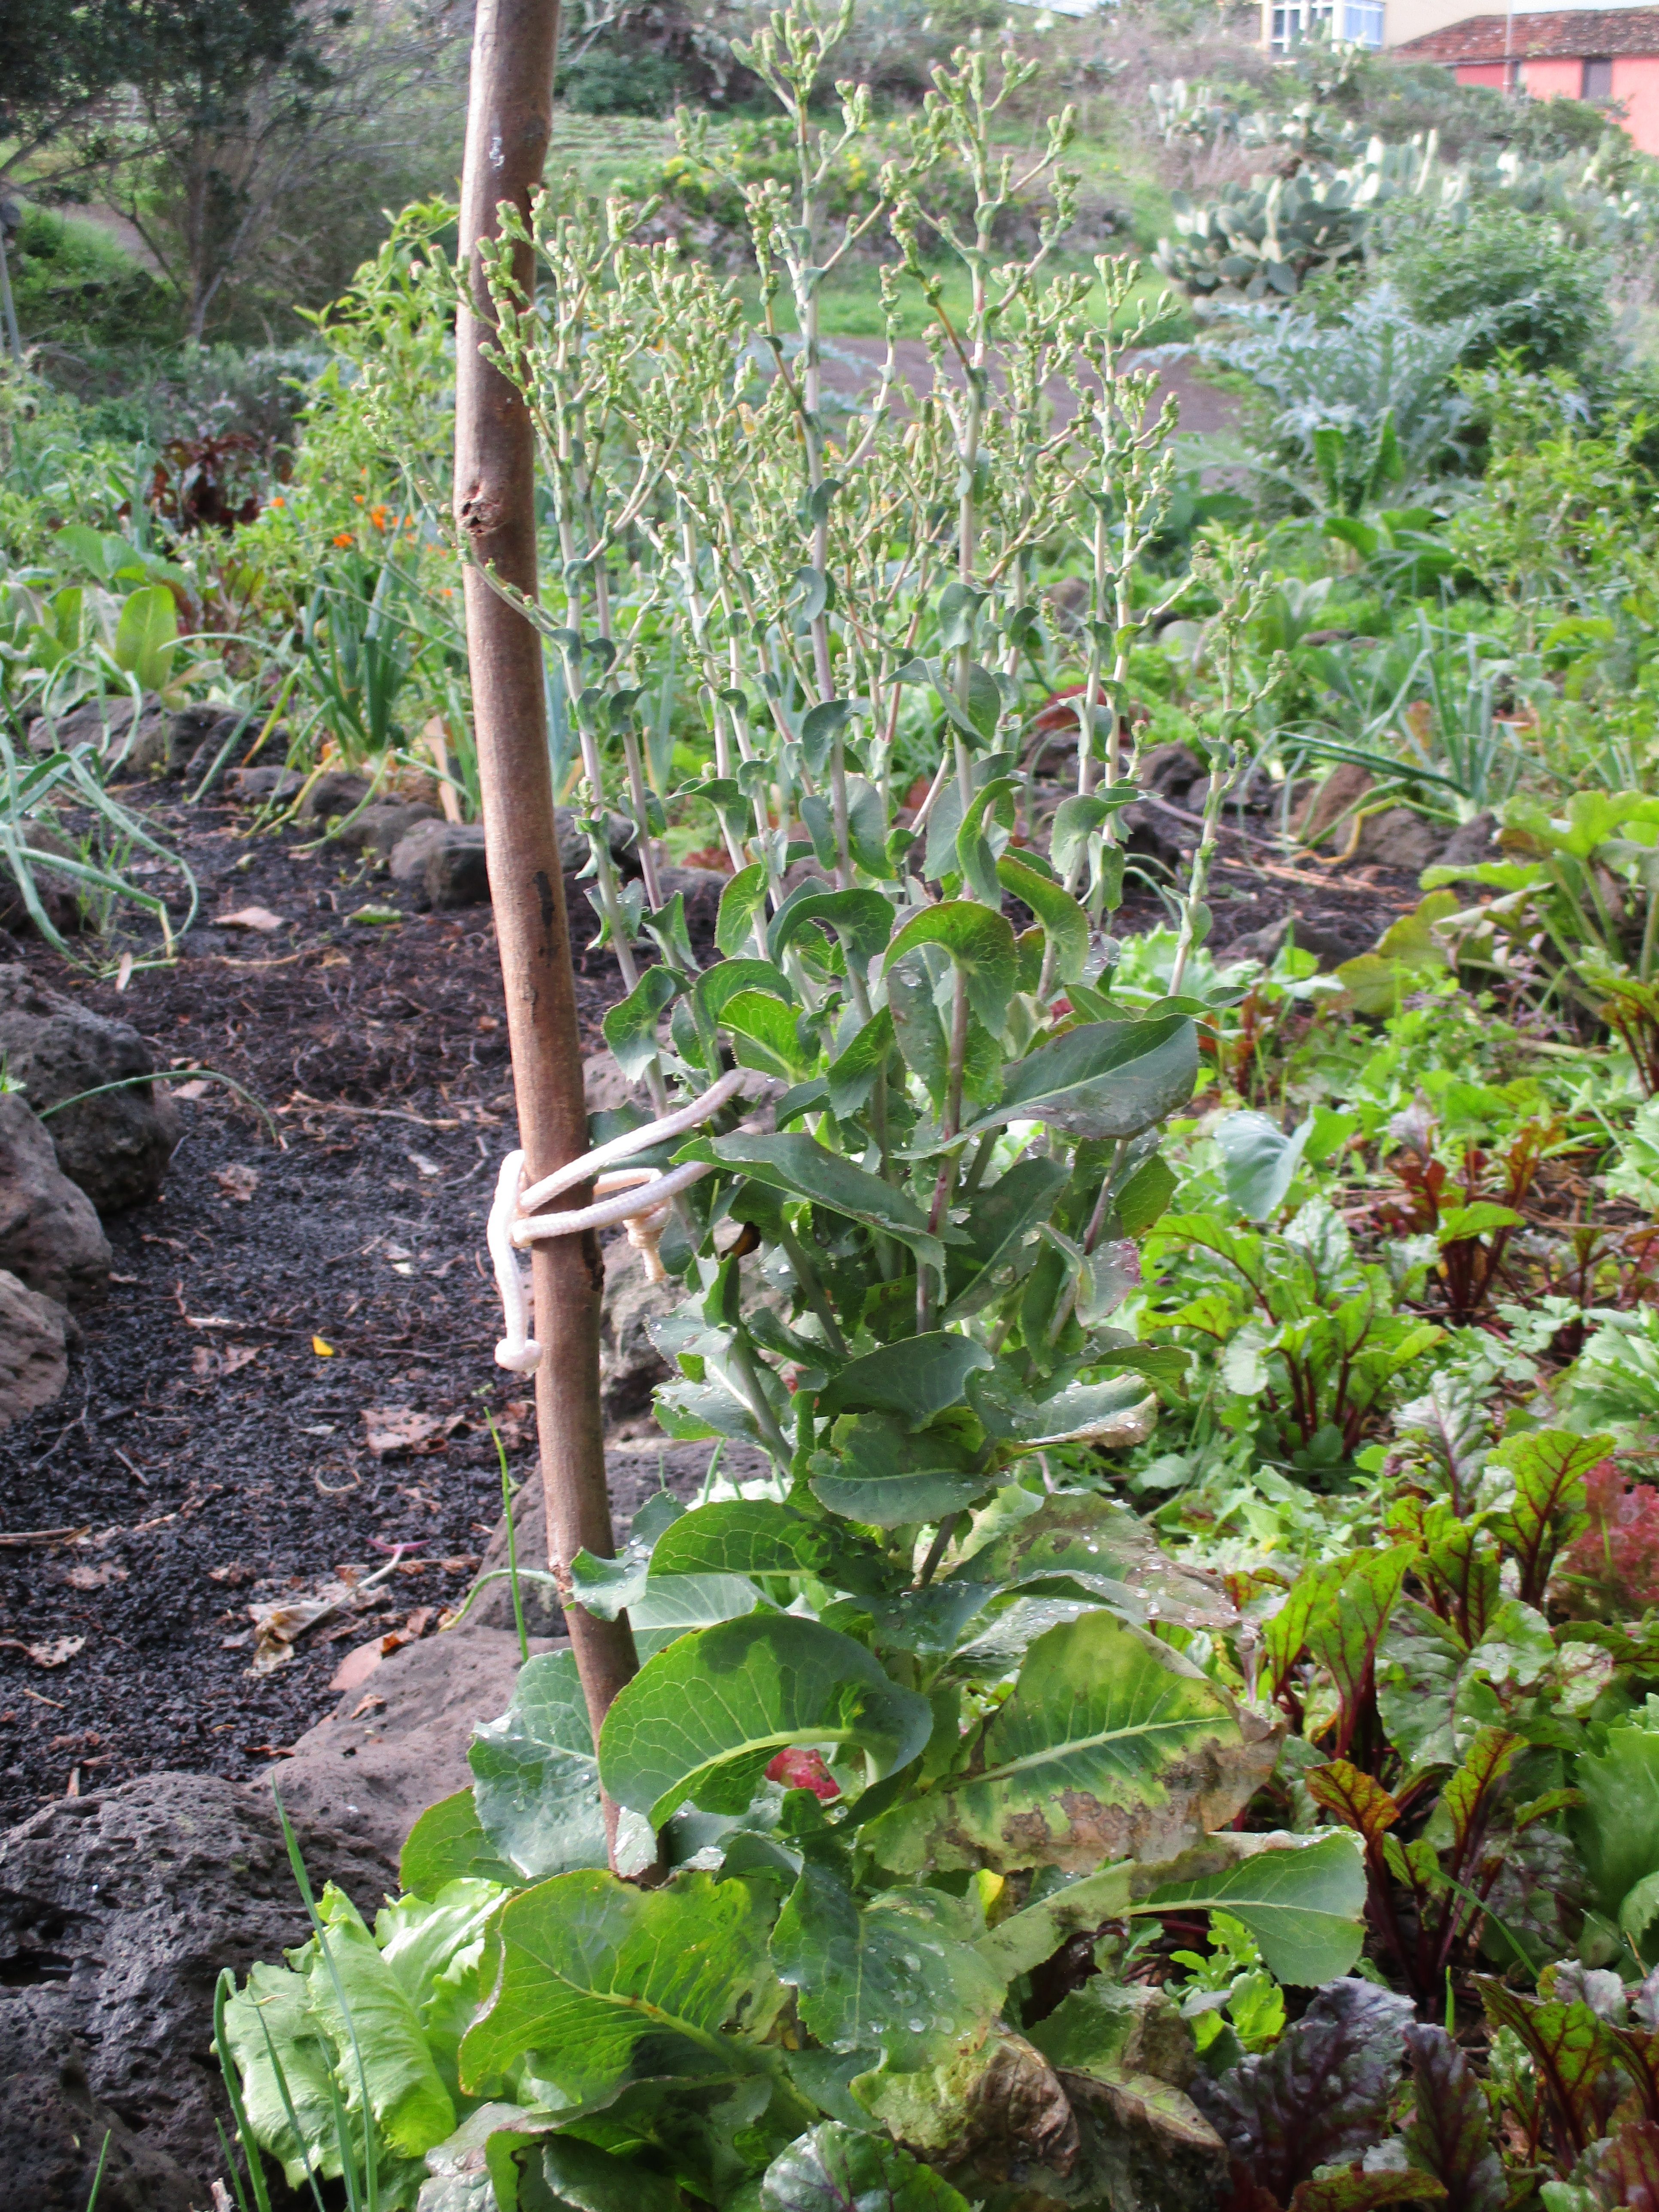
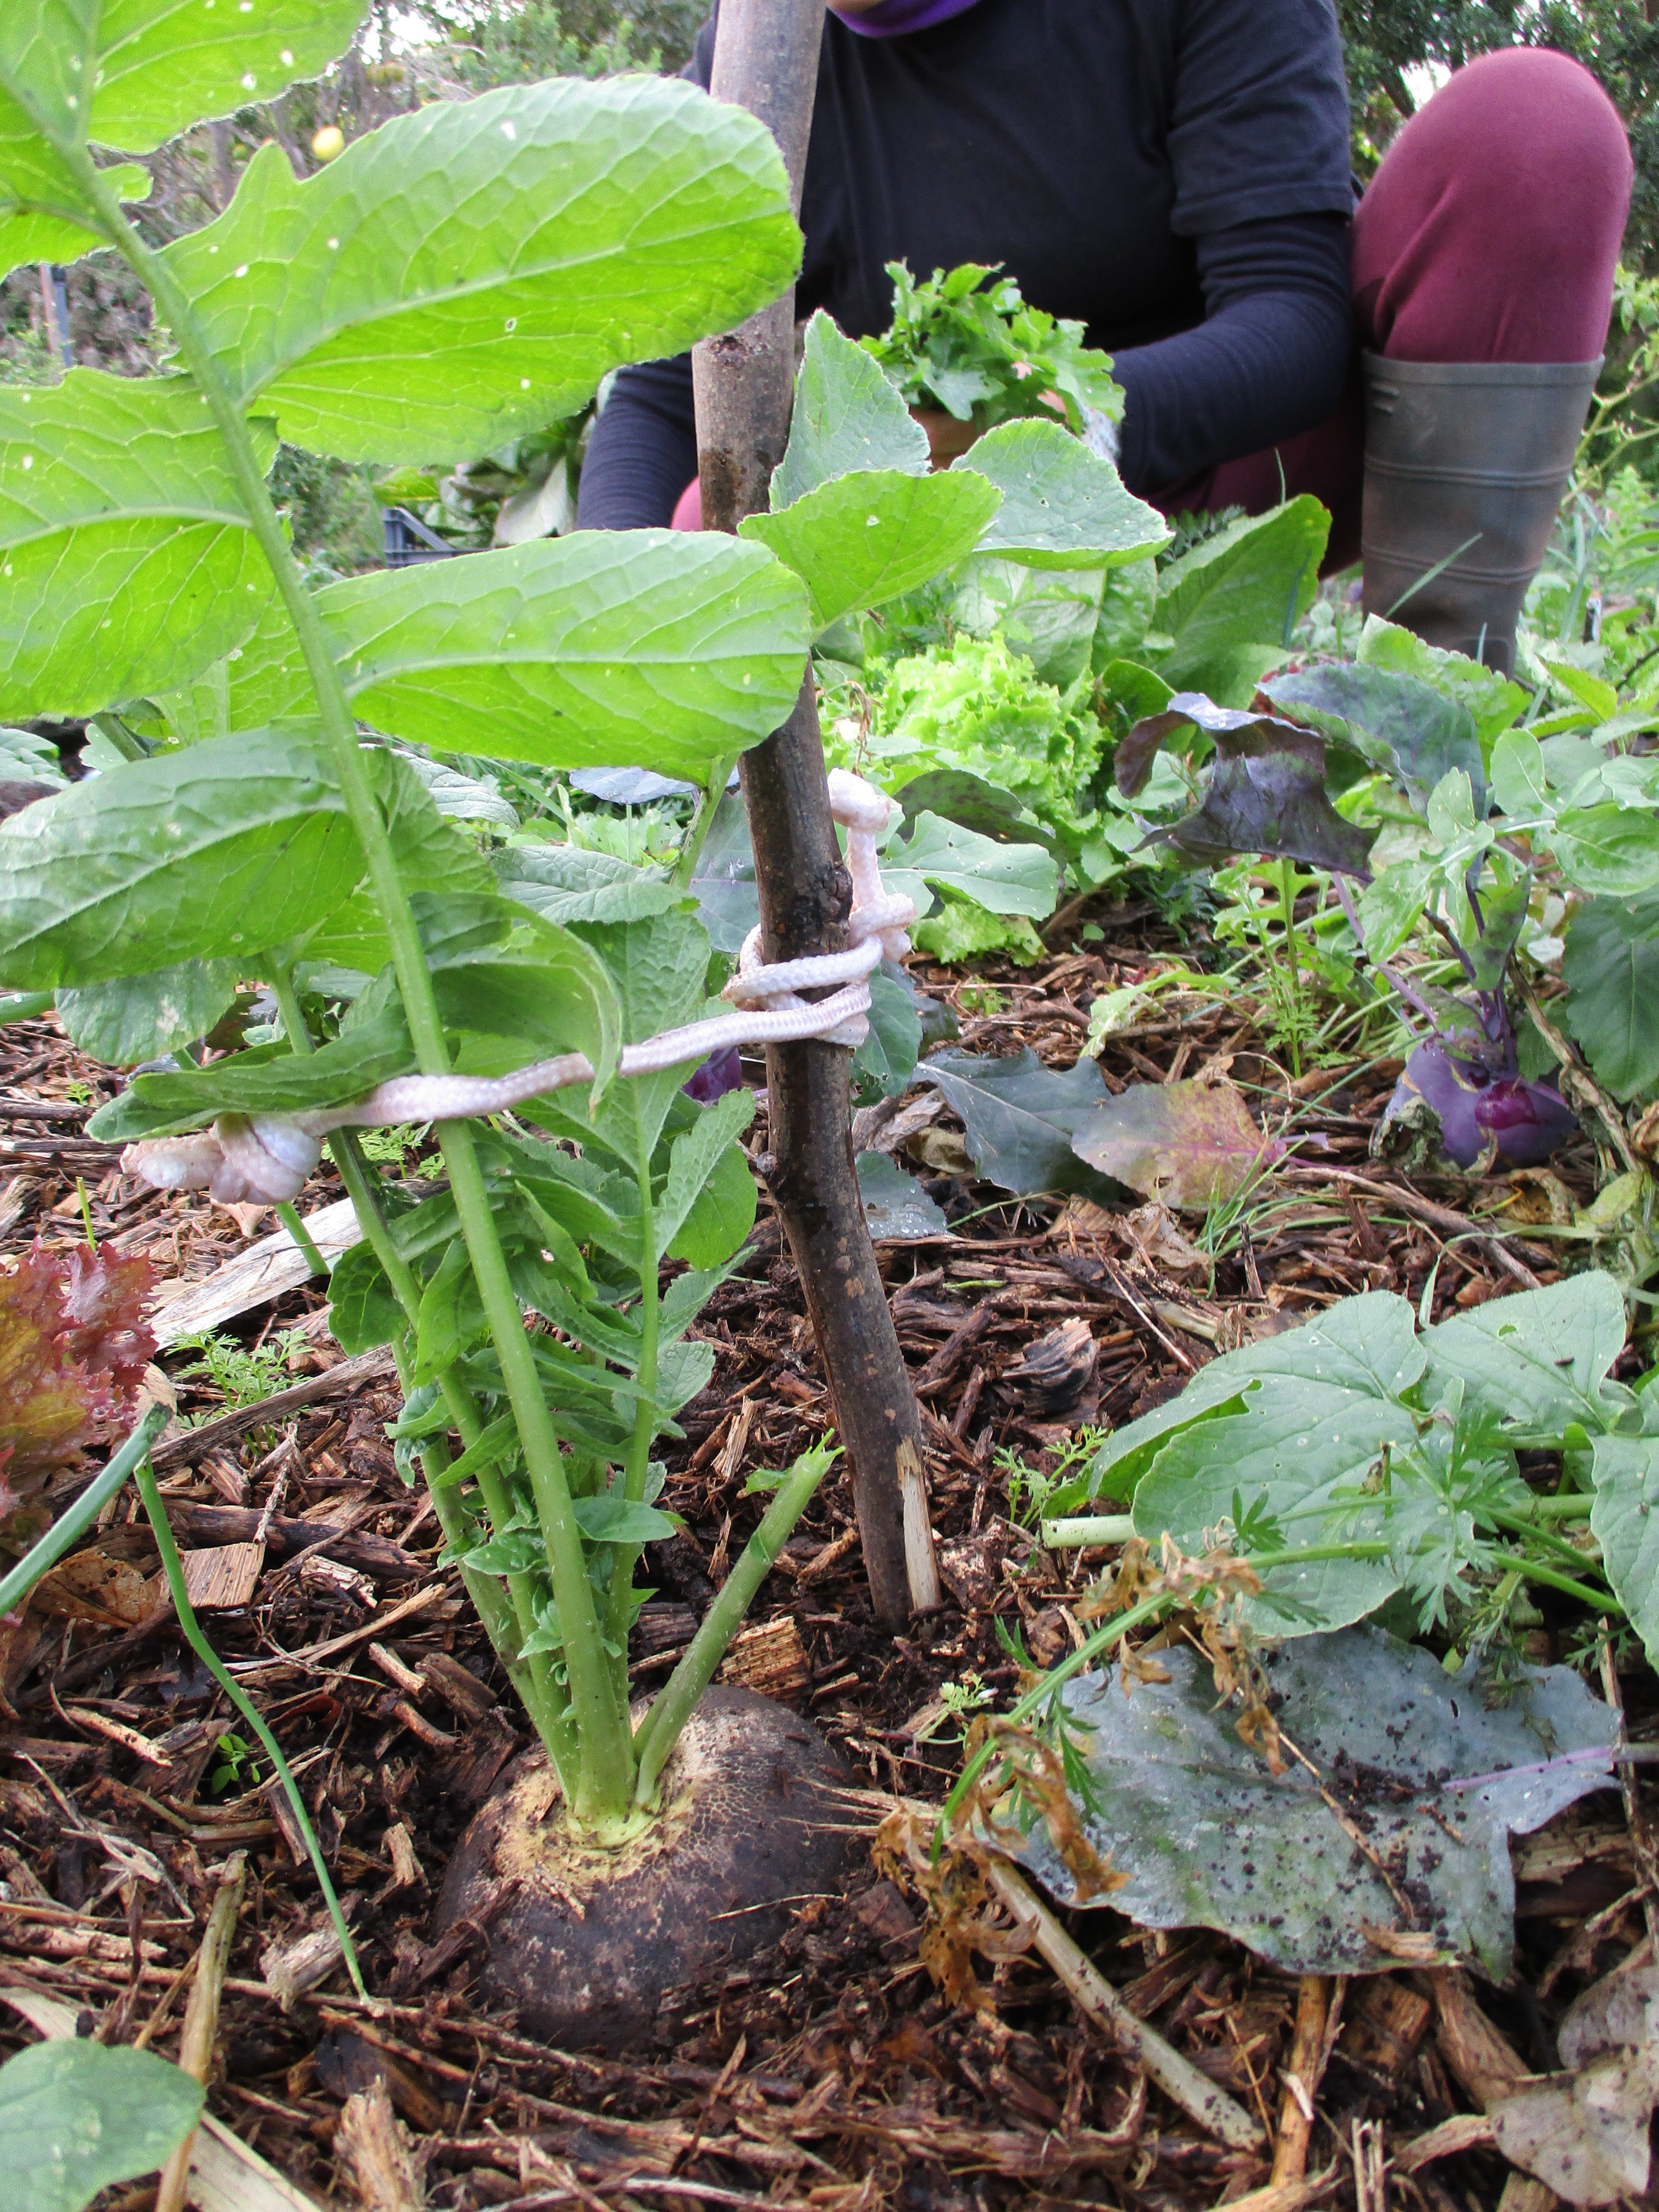
Figure VI.3.- Marking lettuce and black radish plants for seeds with a stick and a rope
When the lettuce reaches its final growth stage, and the time for collection has passed it tends to bolt and to flower. We can see how the lettuce gets longer, its leaves get progressively smaller, they get separated from each other and they get dull. The lettuce loses its edible aspect and the central stem becomes uncovered (Figure VI.4).
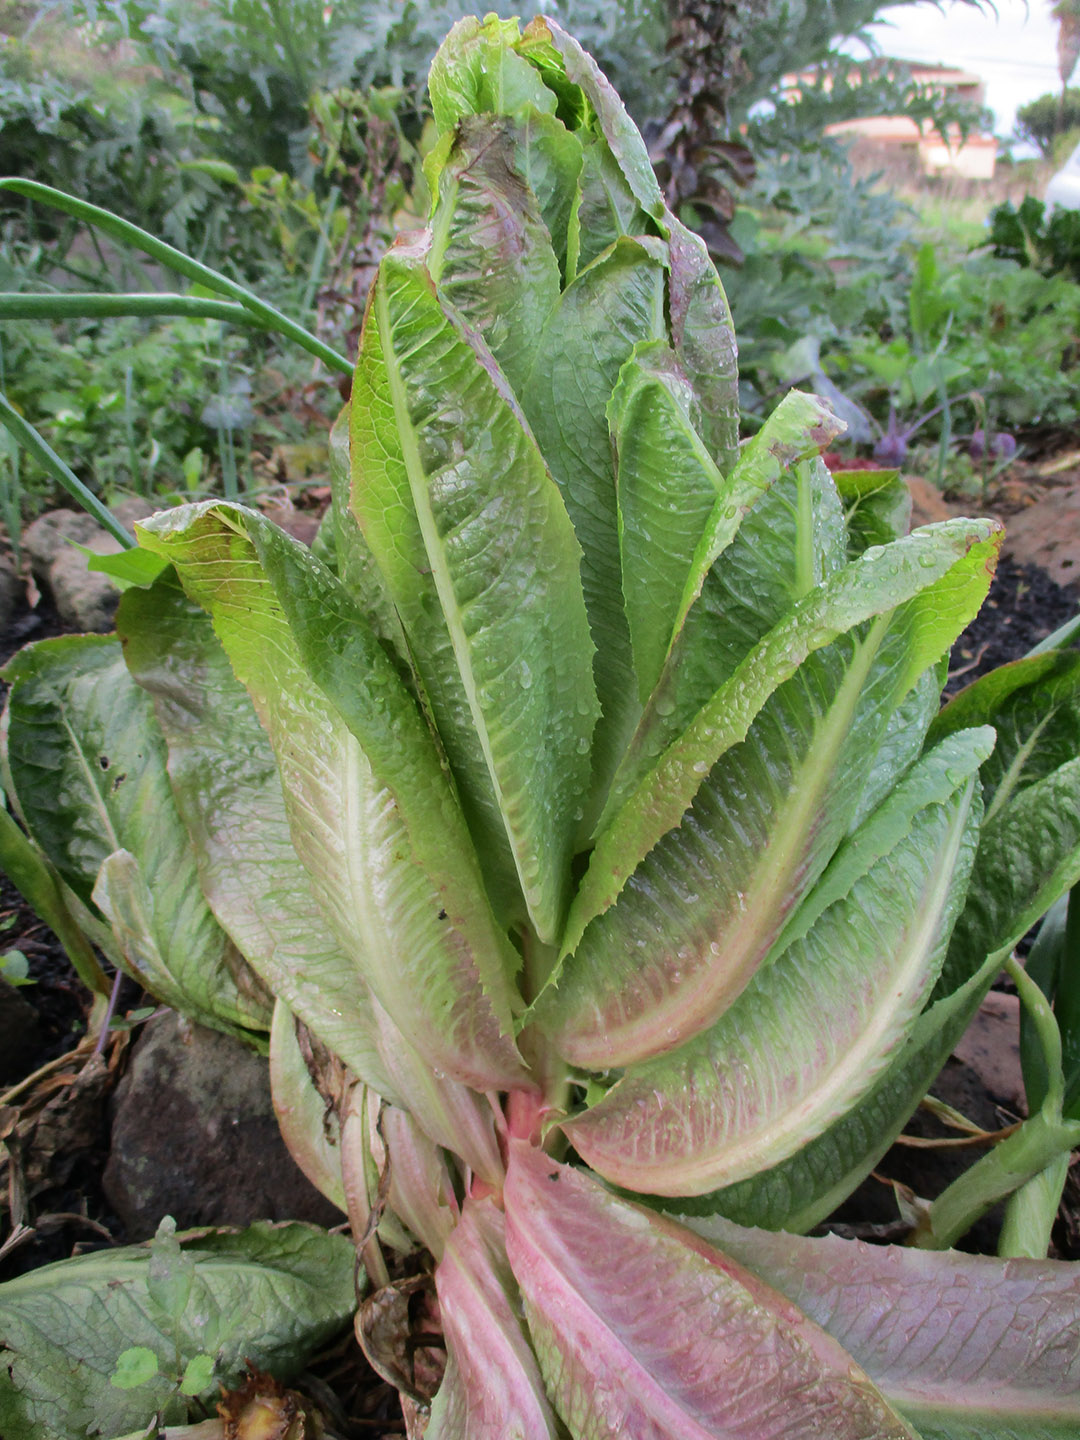
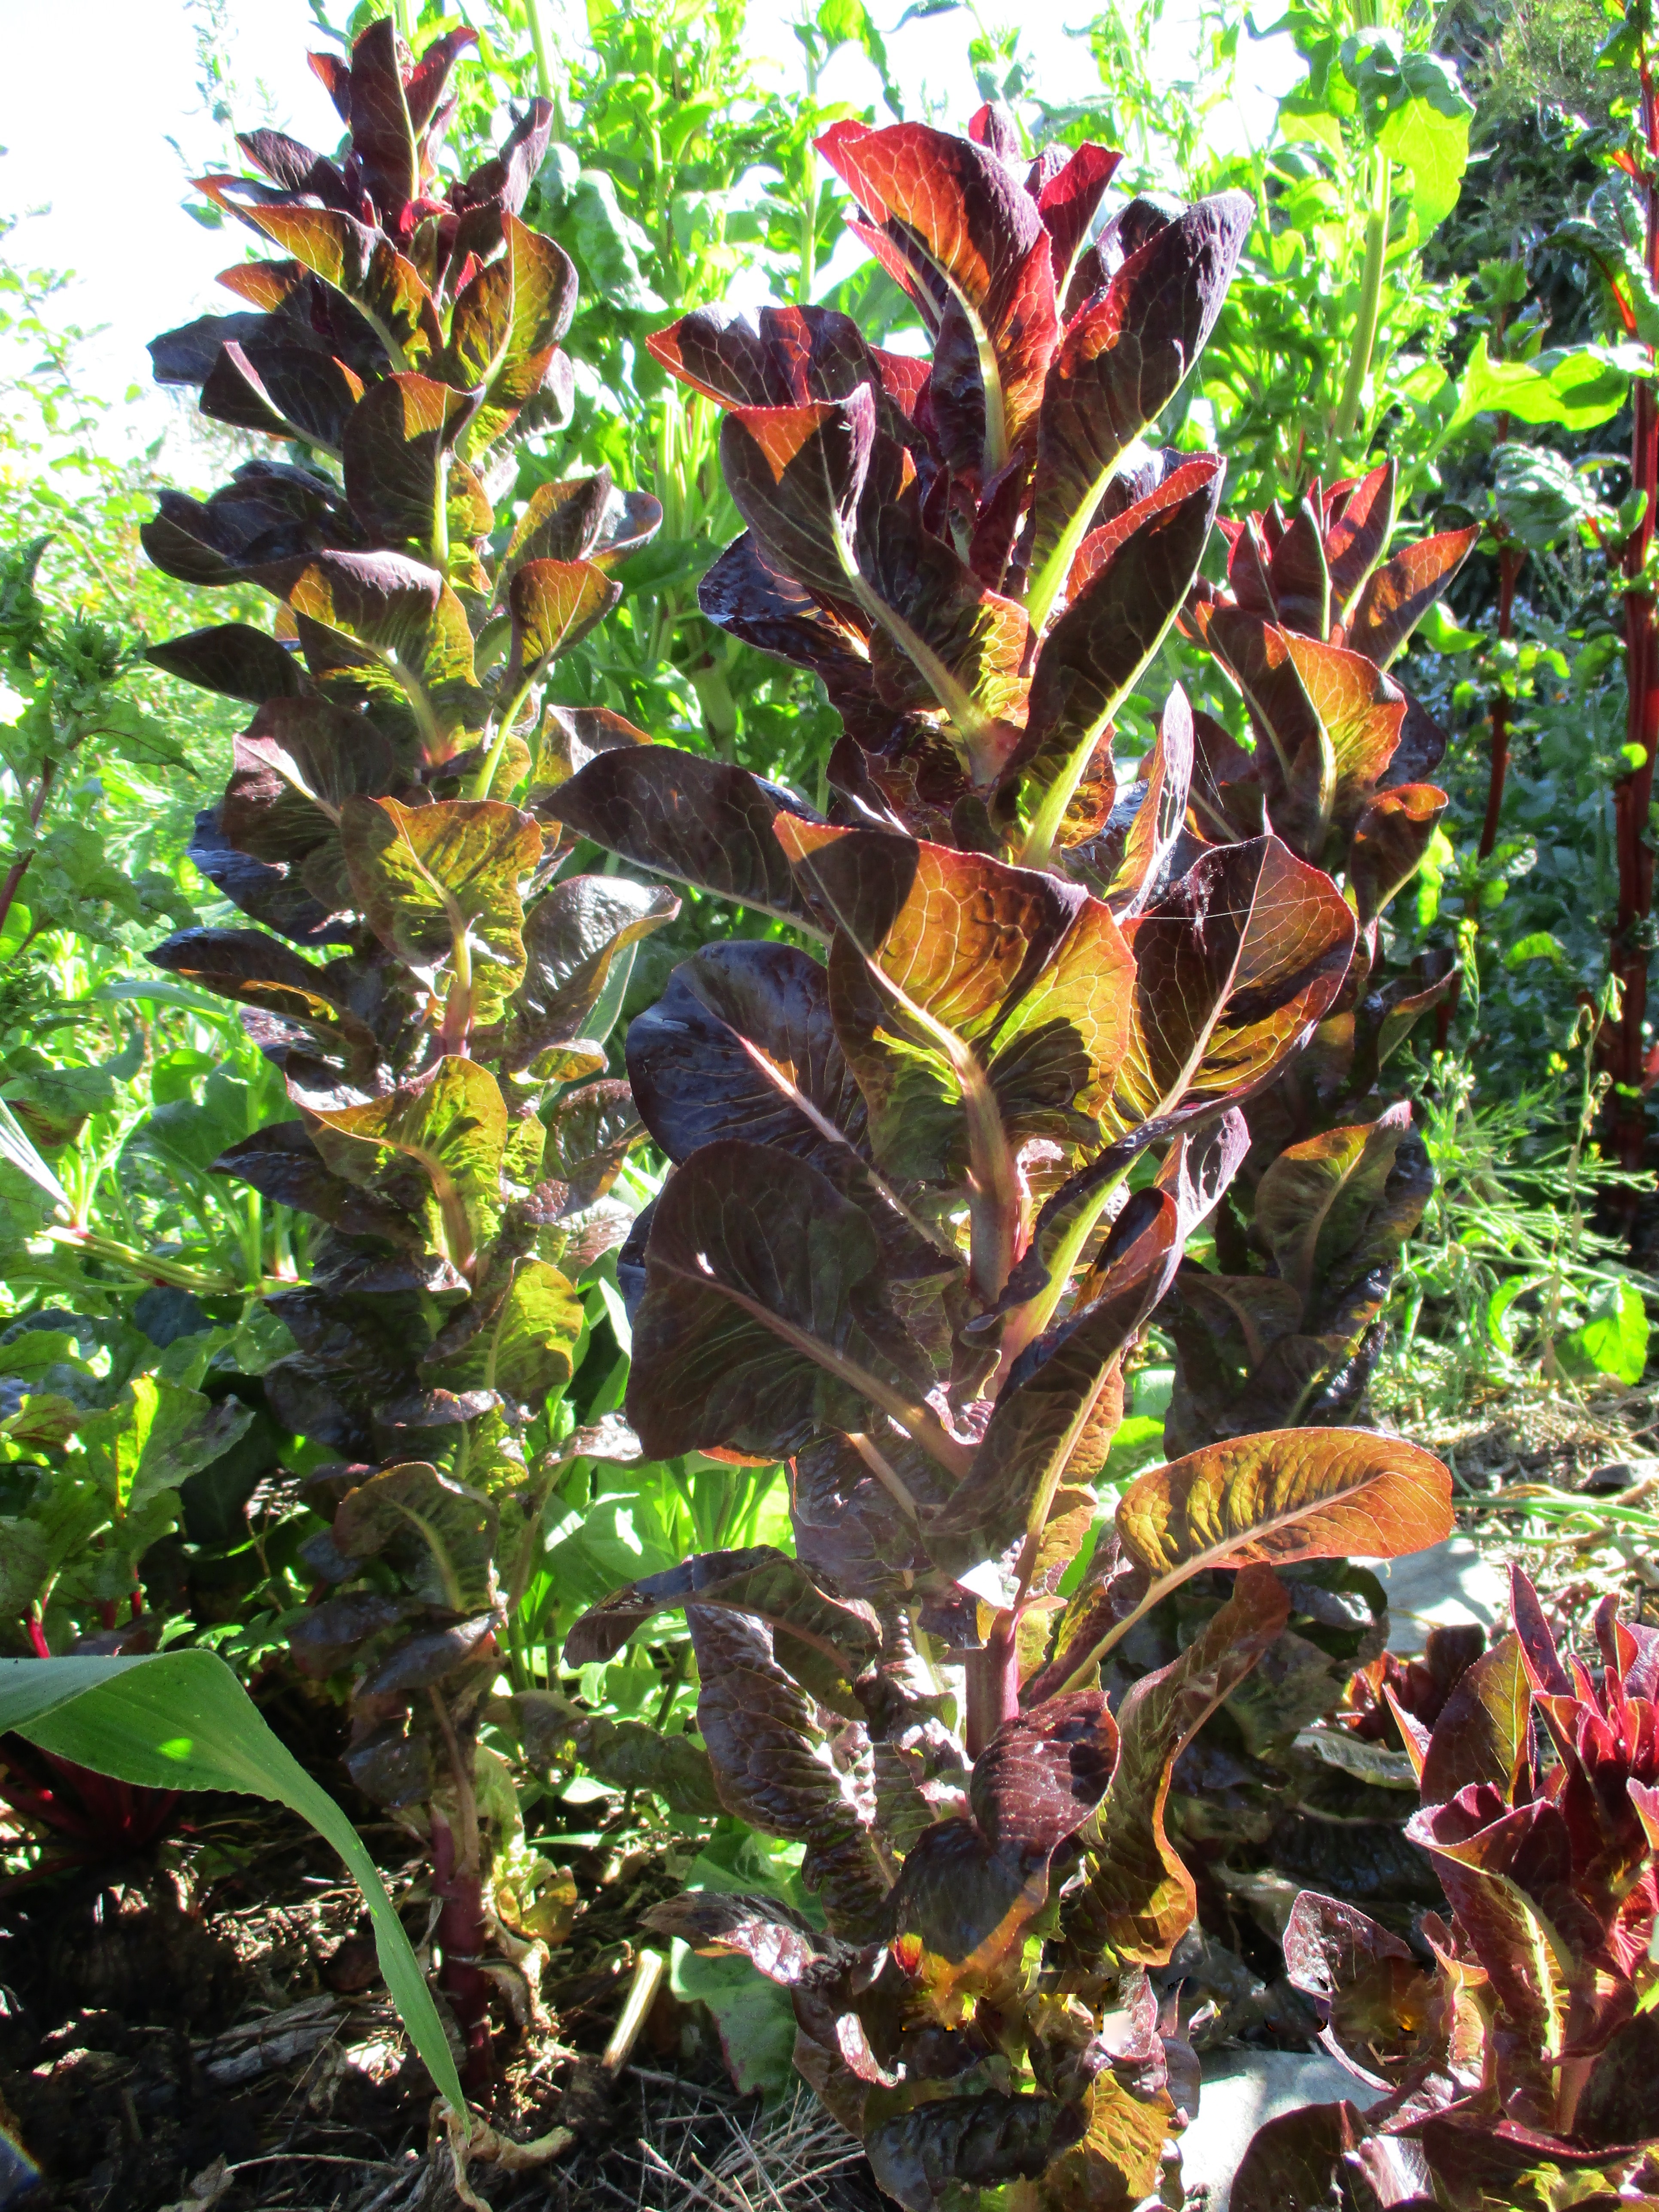
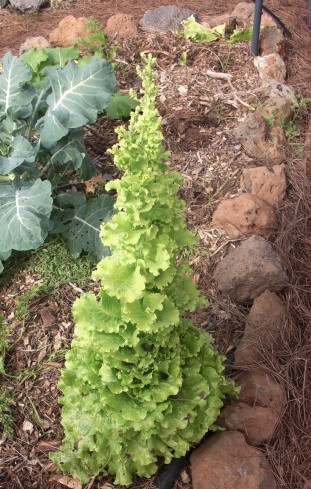
Figure VI.4.- Transformation of different lettuces flowering
This transformation is a great opportunity for students to observe the interesting evolution of this vegetable.
In the next stage, the lettuce starts to branch from a third of its height and ends with an inflorescence formed by numerous yellow flowers, which dry out and give us seeds provided with a feathery pappus (Figure VI.5).

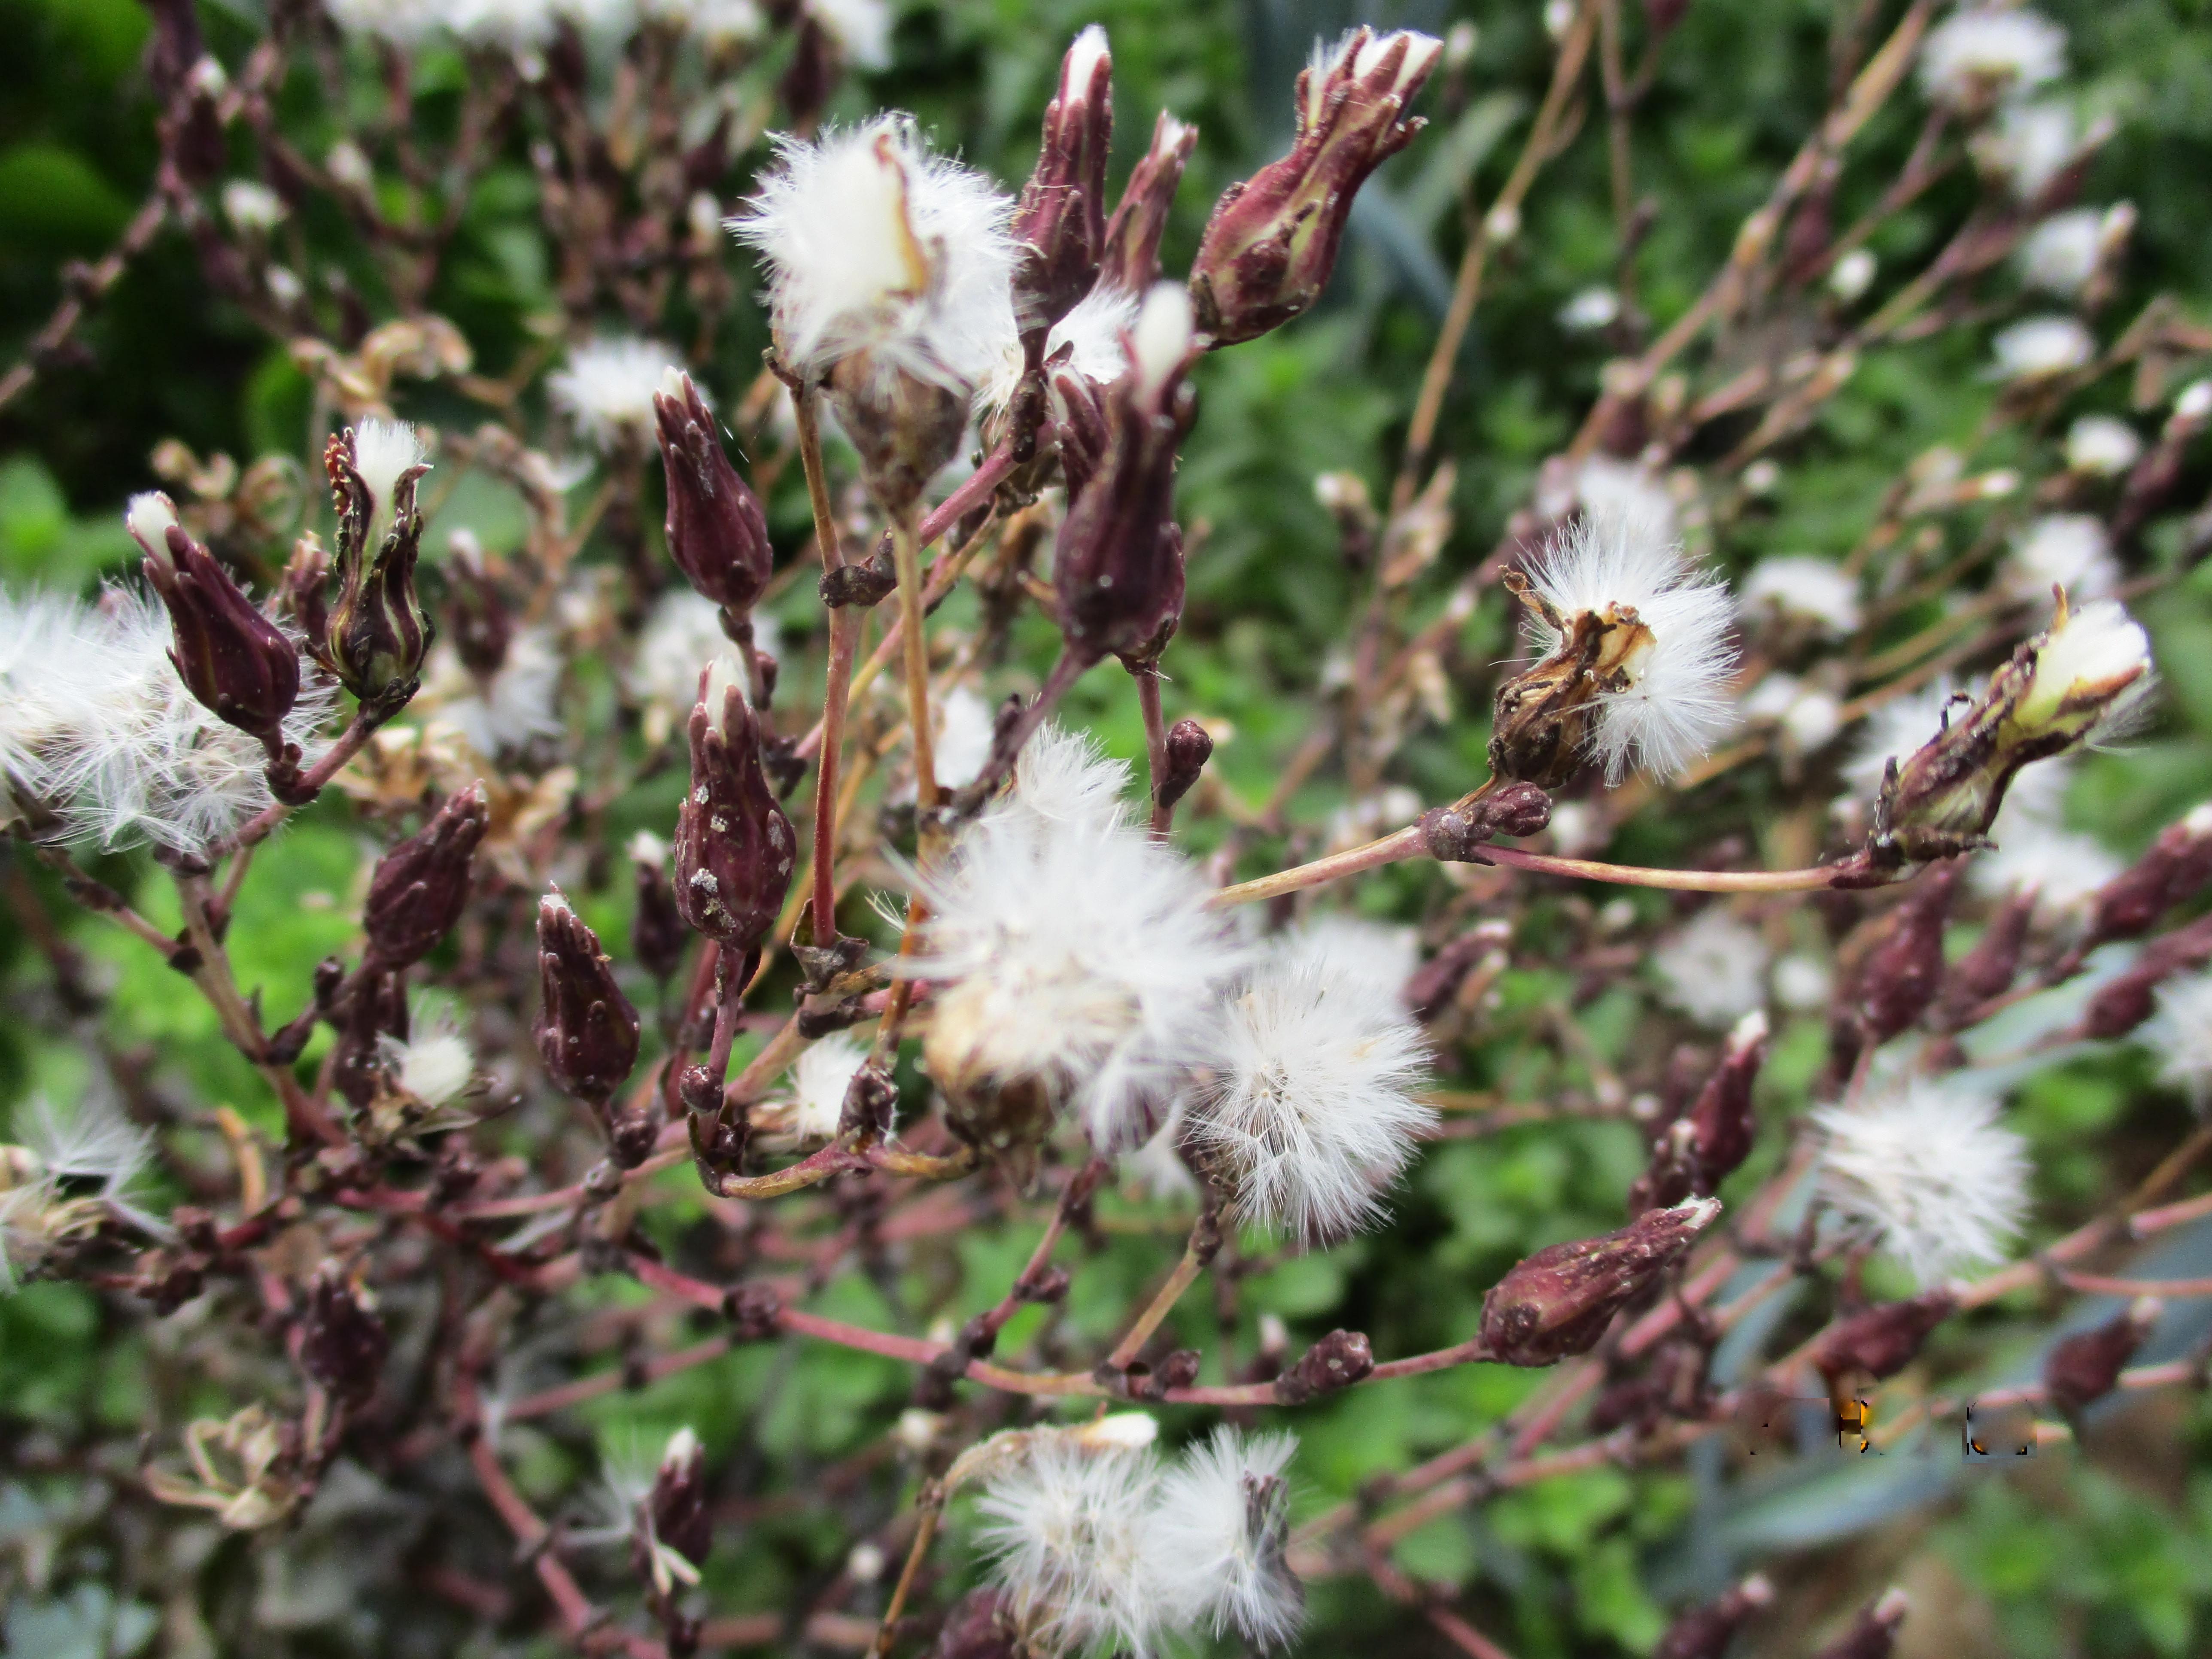
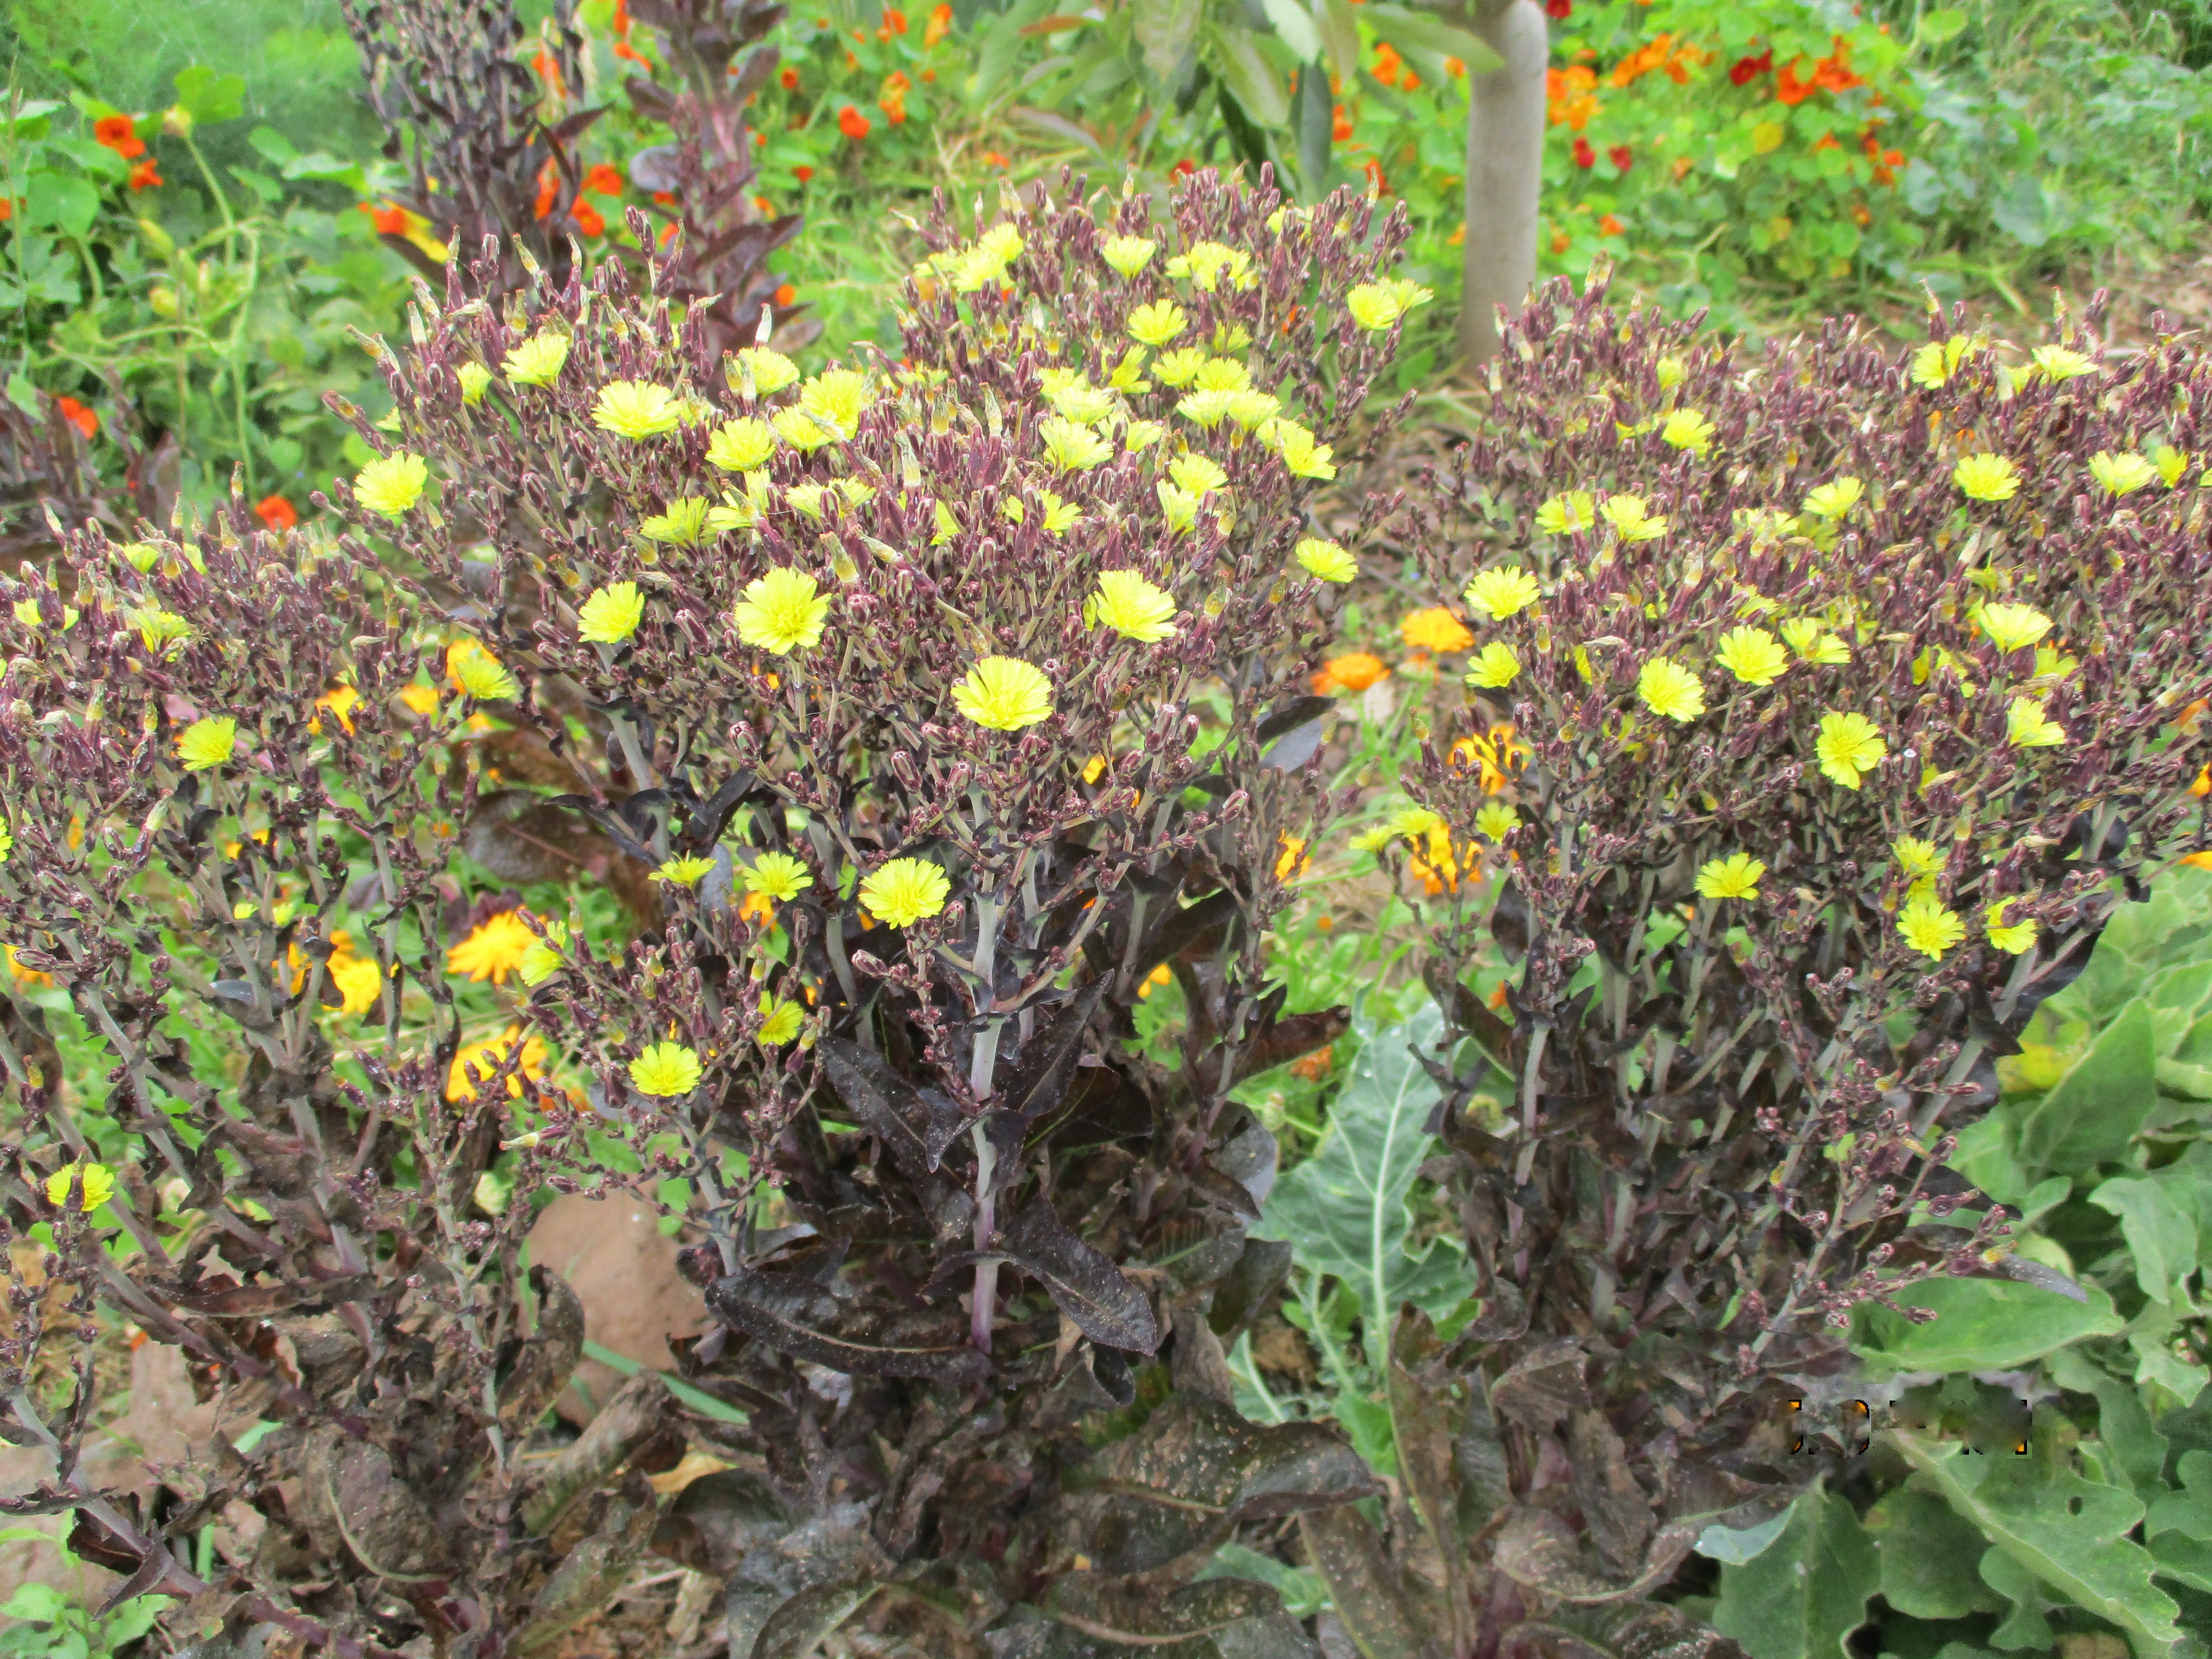
Figure VI.5.- Lettuces in bloom and with feathery pappus
The ideal time to collect the seeds is when the pappus covers between 20 and 30 % of the totality of the surface. At that moment we cut the lower part of the stem and we introduce it in a paper bag so it can completely dry in a dry and vented place.
The moment of cutting the stem is a great opportunity for the users to check that if we pull one of the feathers from the pappus, we can see that the seeds are attached to each one of those feathers, and the curious and magical design that is useful to transport the seeds with the help of the wind or animals (Figure VI.6).
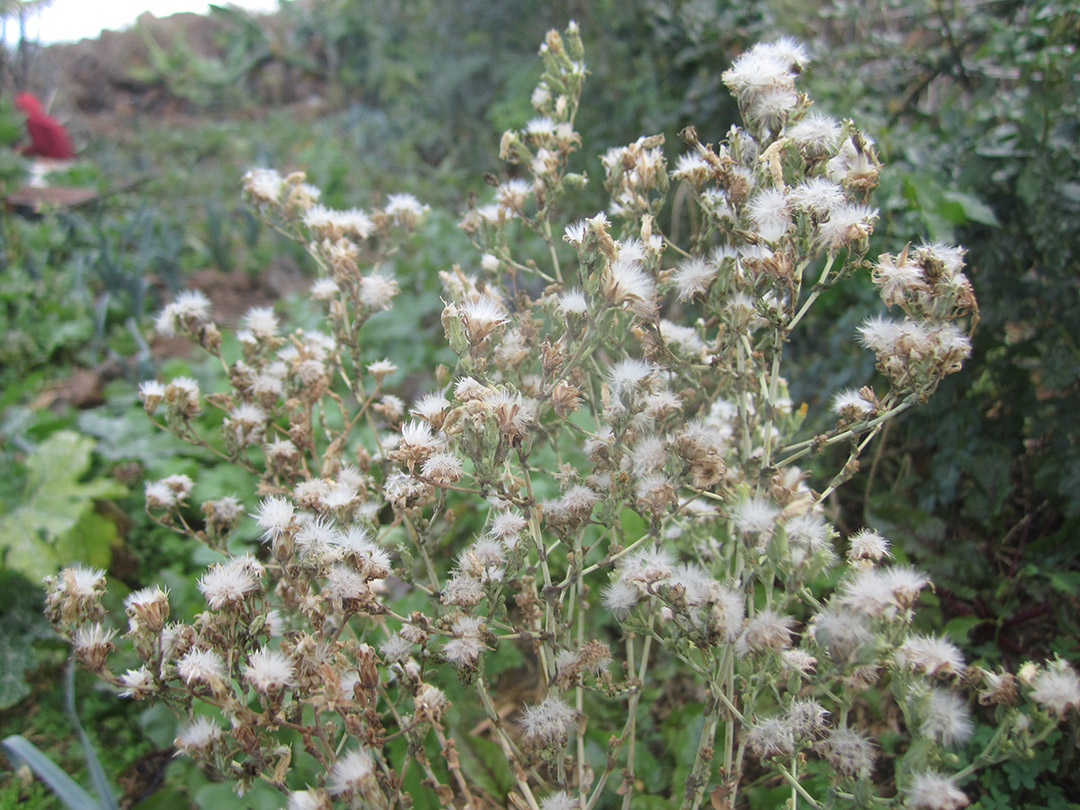
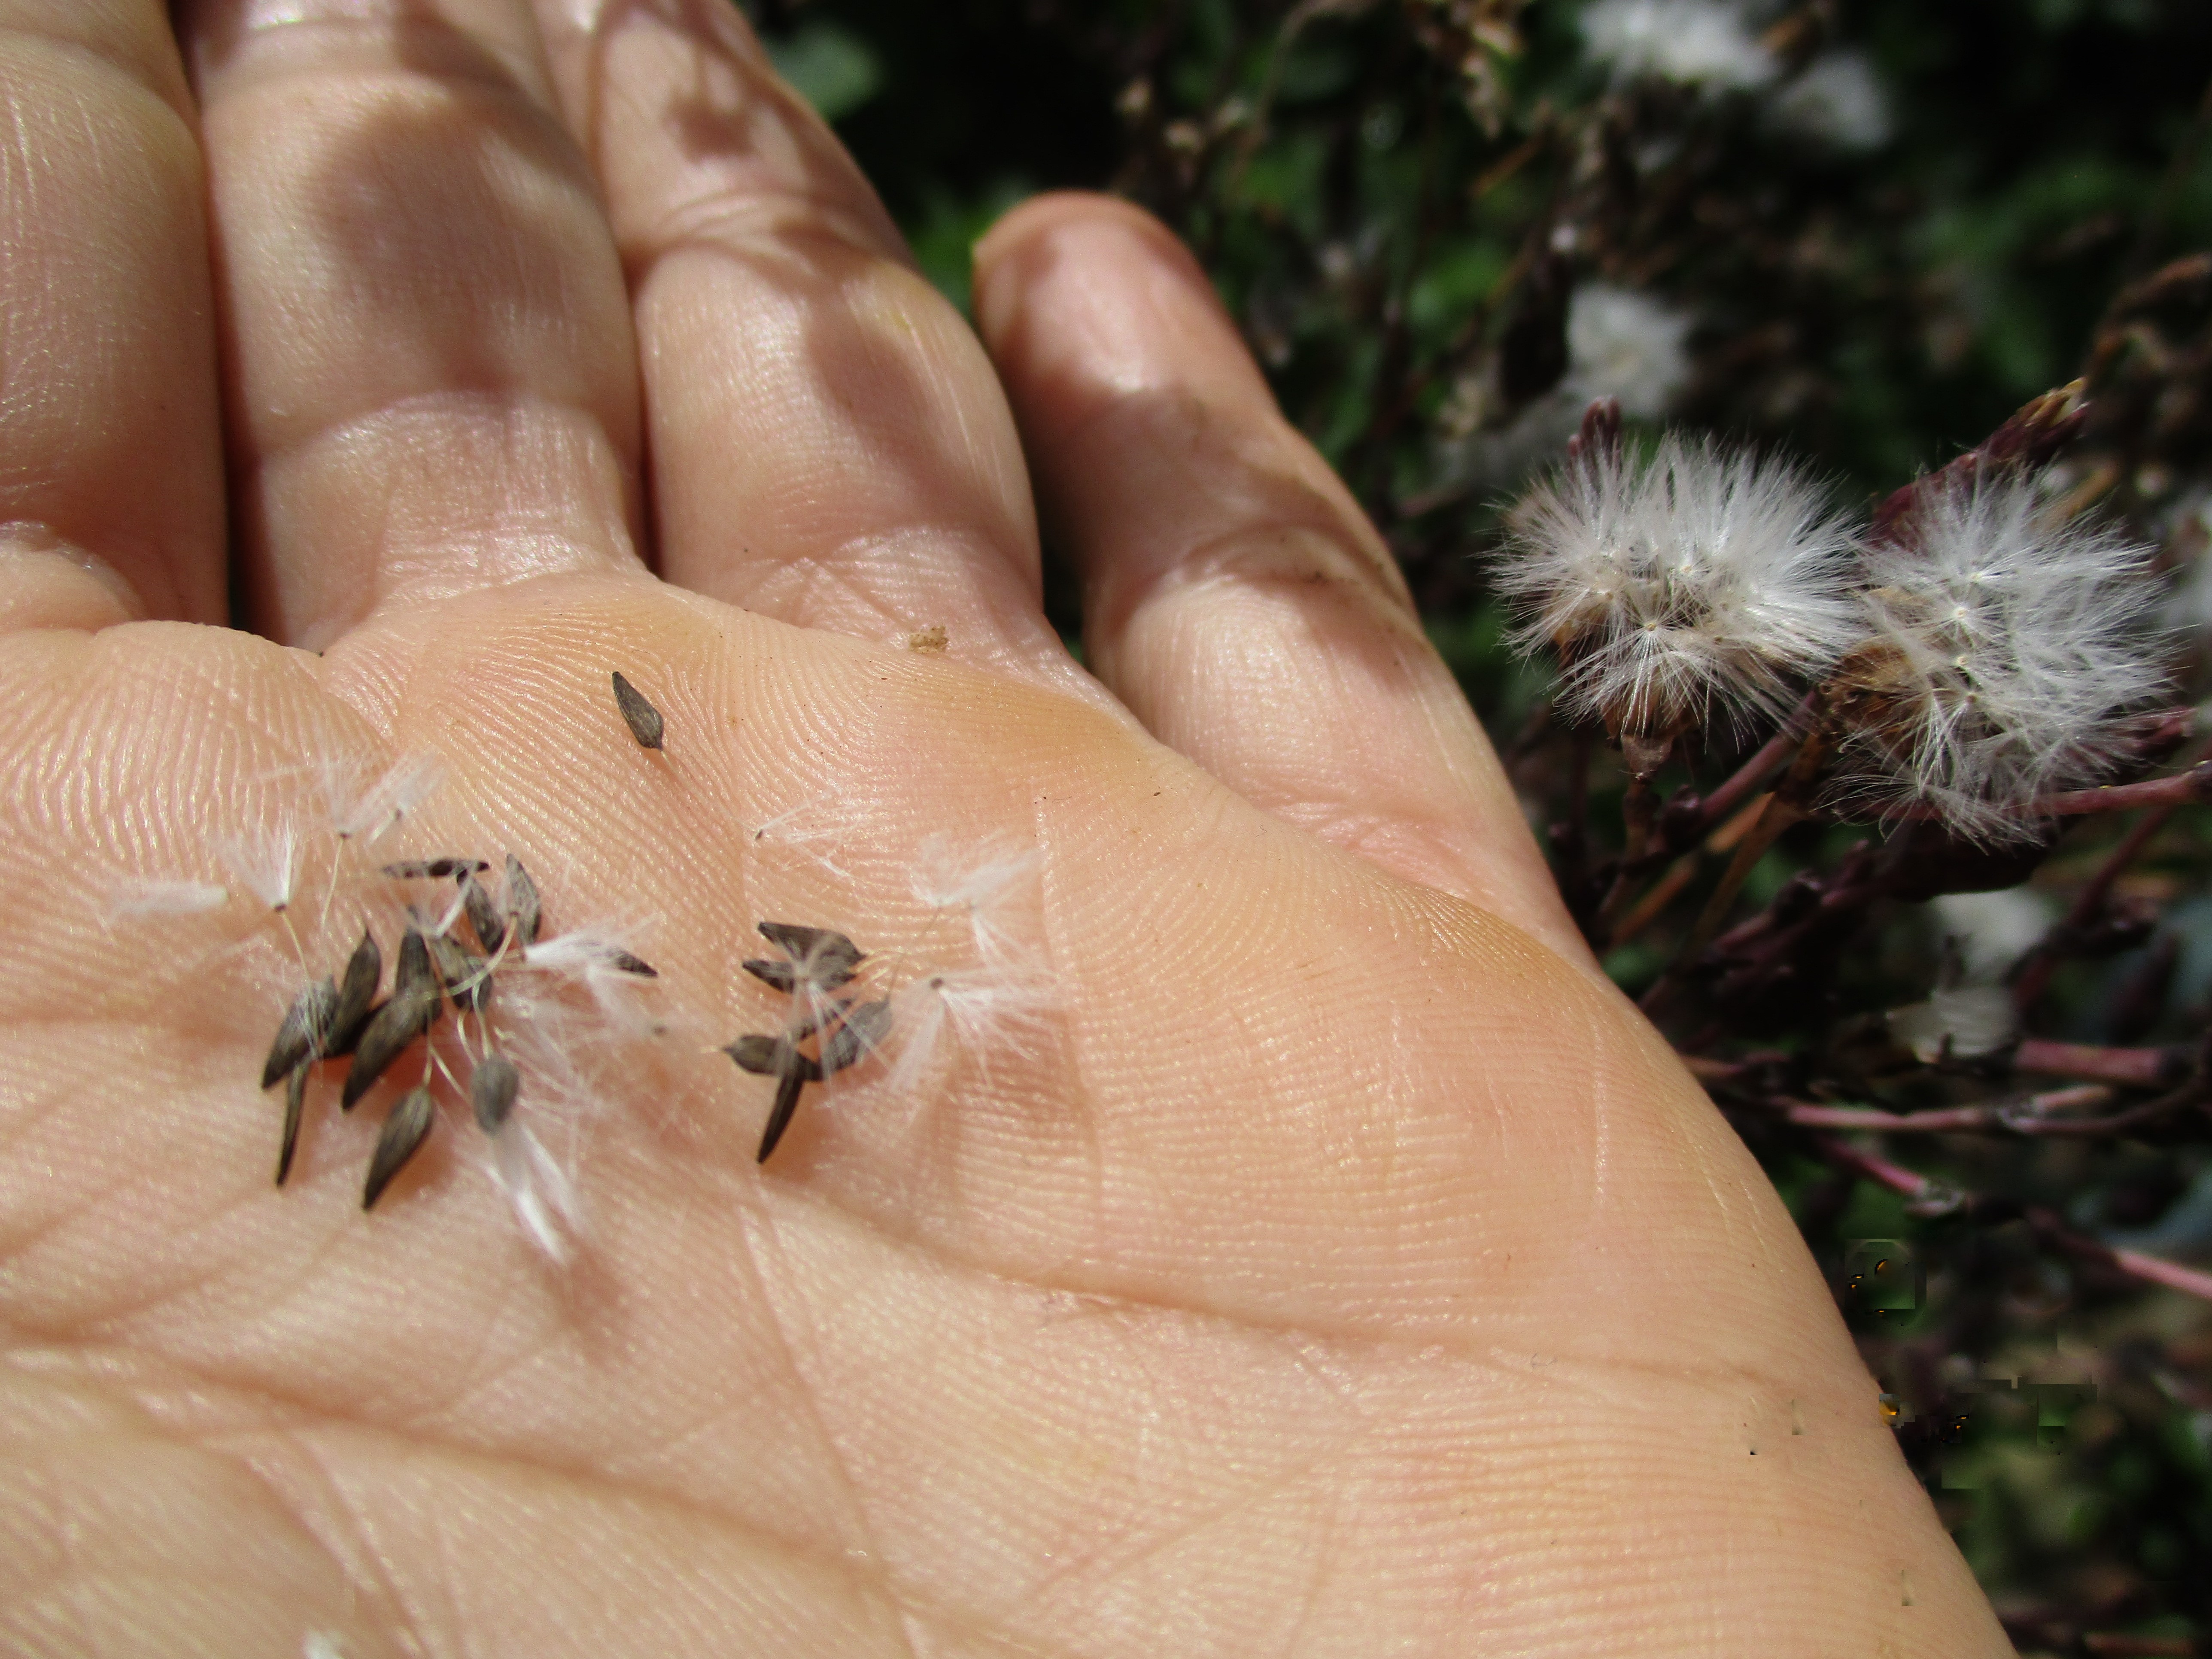
Figure VI.6.- Image of a lettuce with pappus to collect the seeds from, and image showing the seeds and its pappus
Once the plant is dry we rub its flowers between our hands above a clean, dry and clear surface where the seeds will fall down (Figure VI.7). We then clean the seeds.


Figure VI.7.- Dried lettuce and rubbing them to obtain their seeds
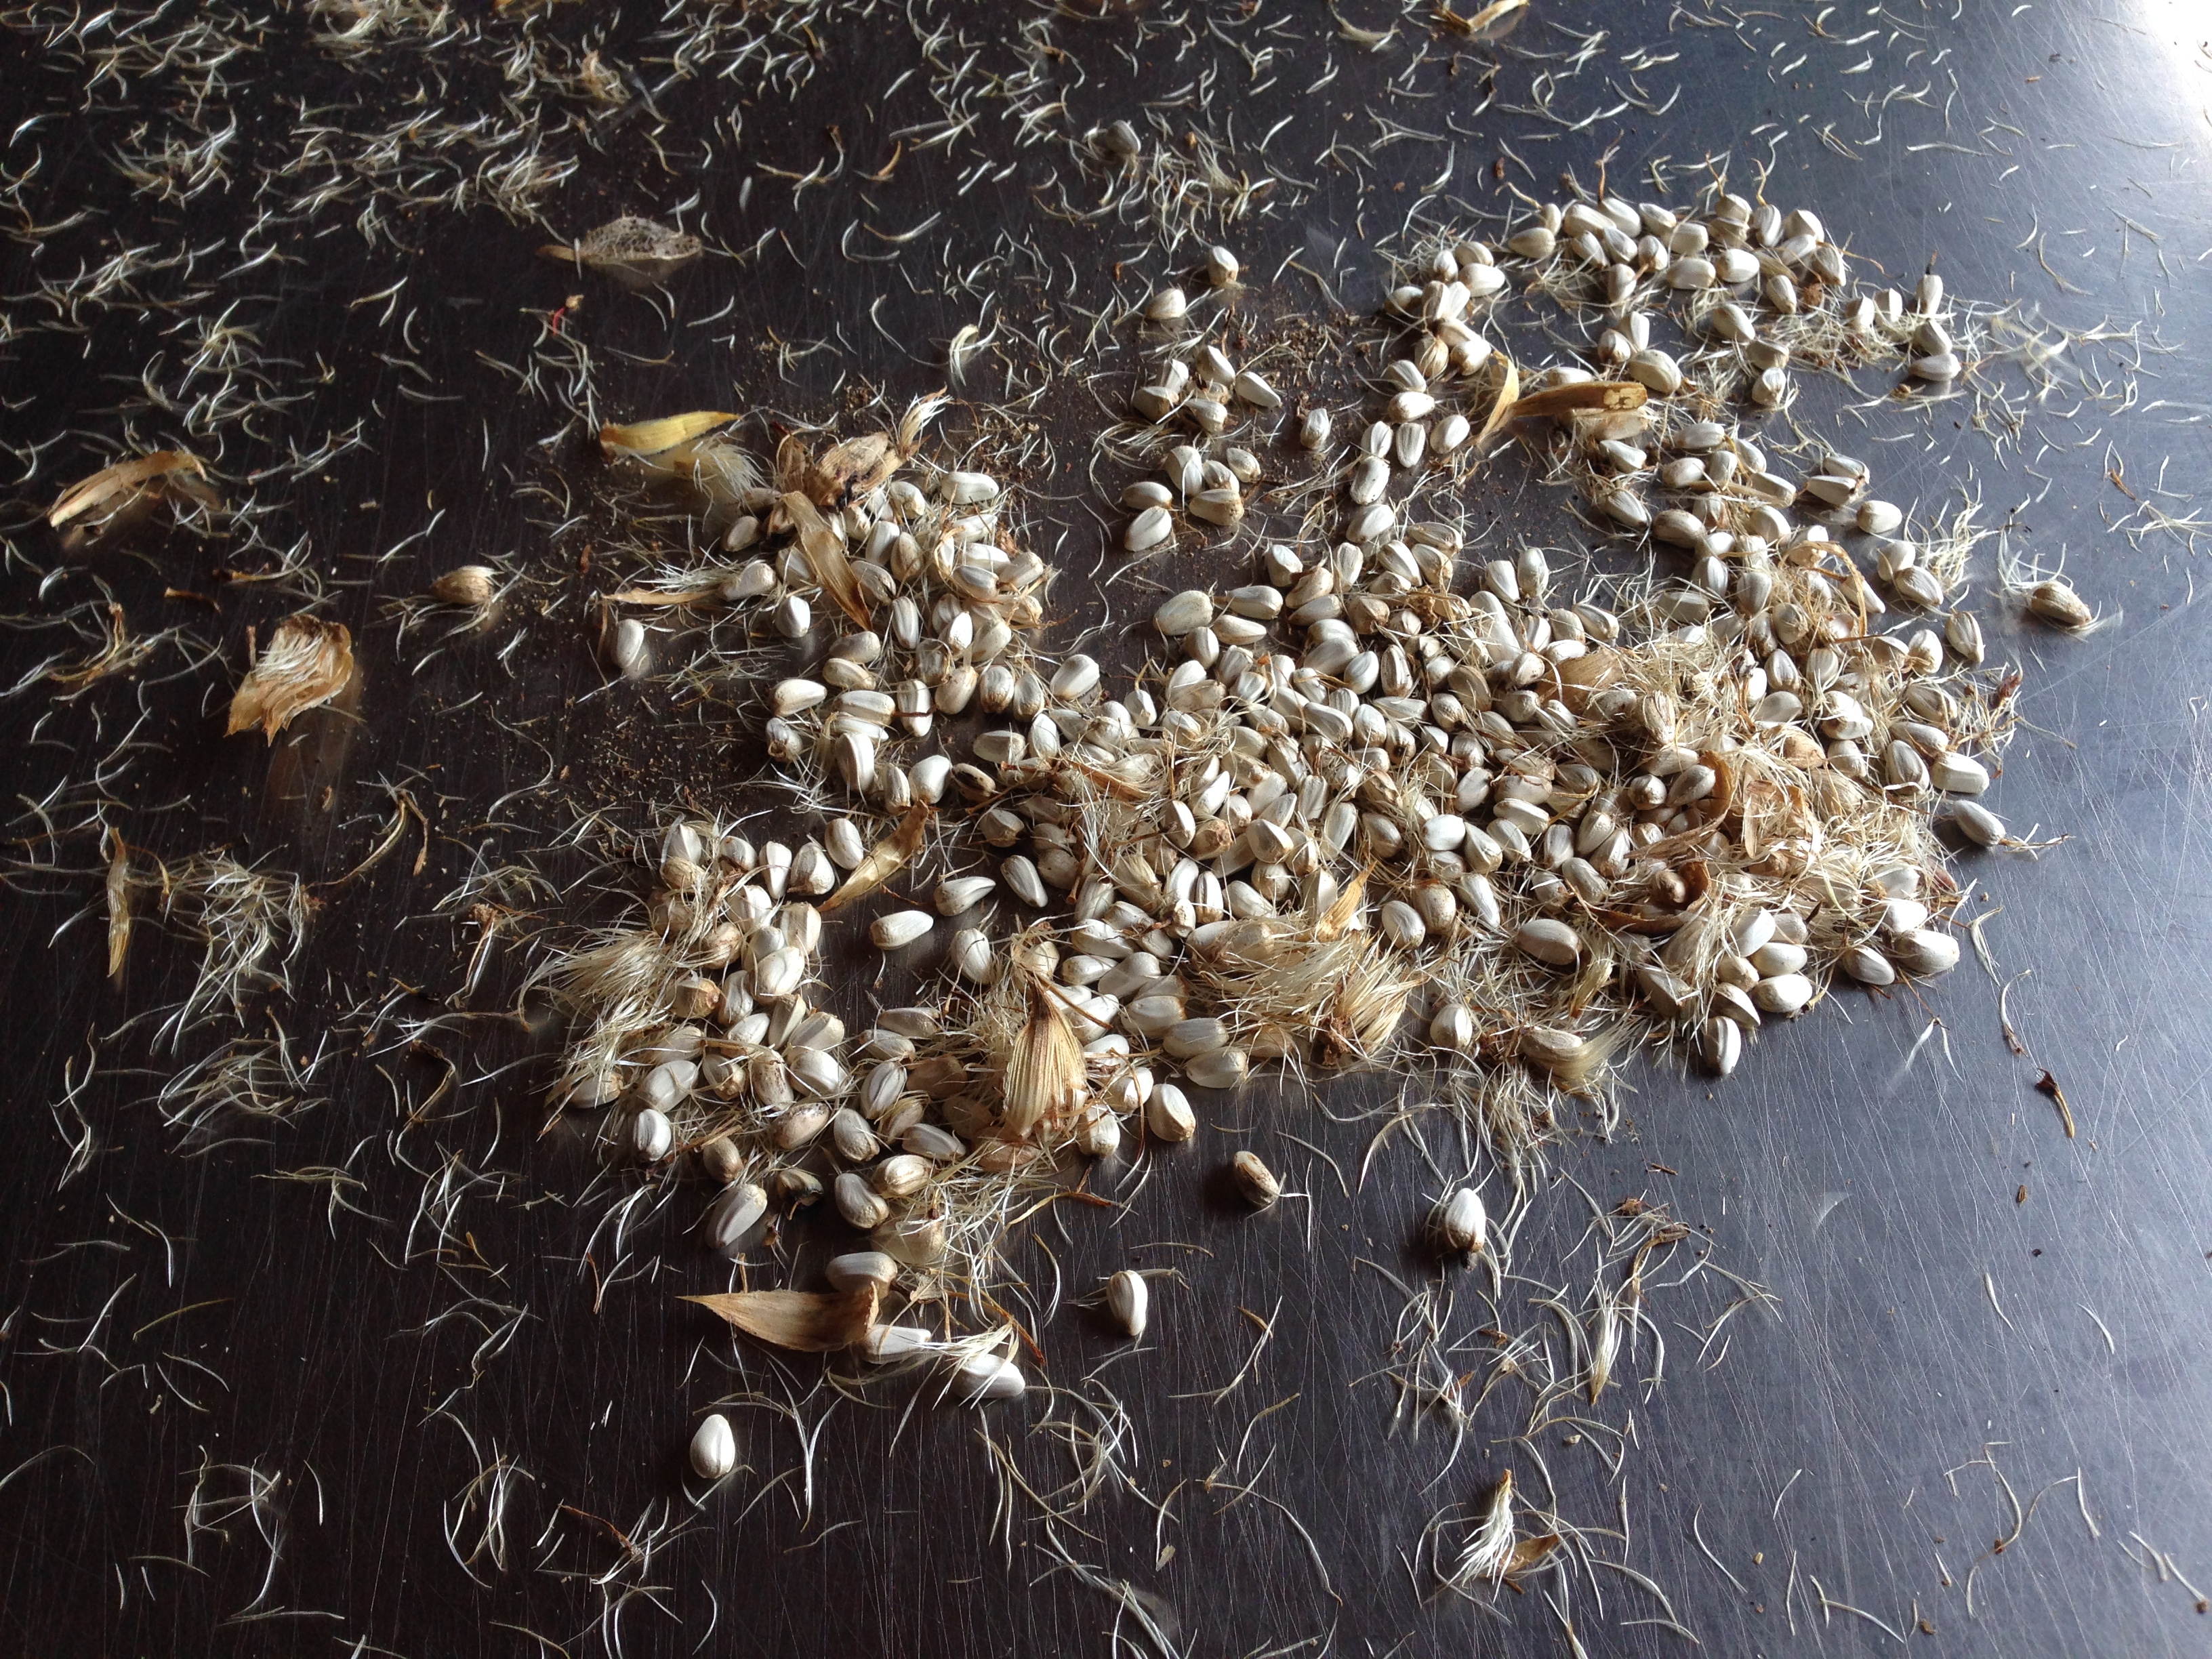
The cleaning of the seeds can be done through handicrafts or even by intuition; we will practice this task with the students. Cleaning is an easy task that requires time, dedication and patience, which the people who we work with can also develop (Figure VI.8).
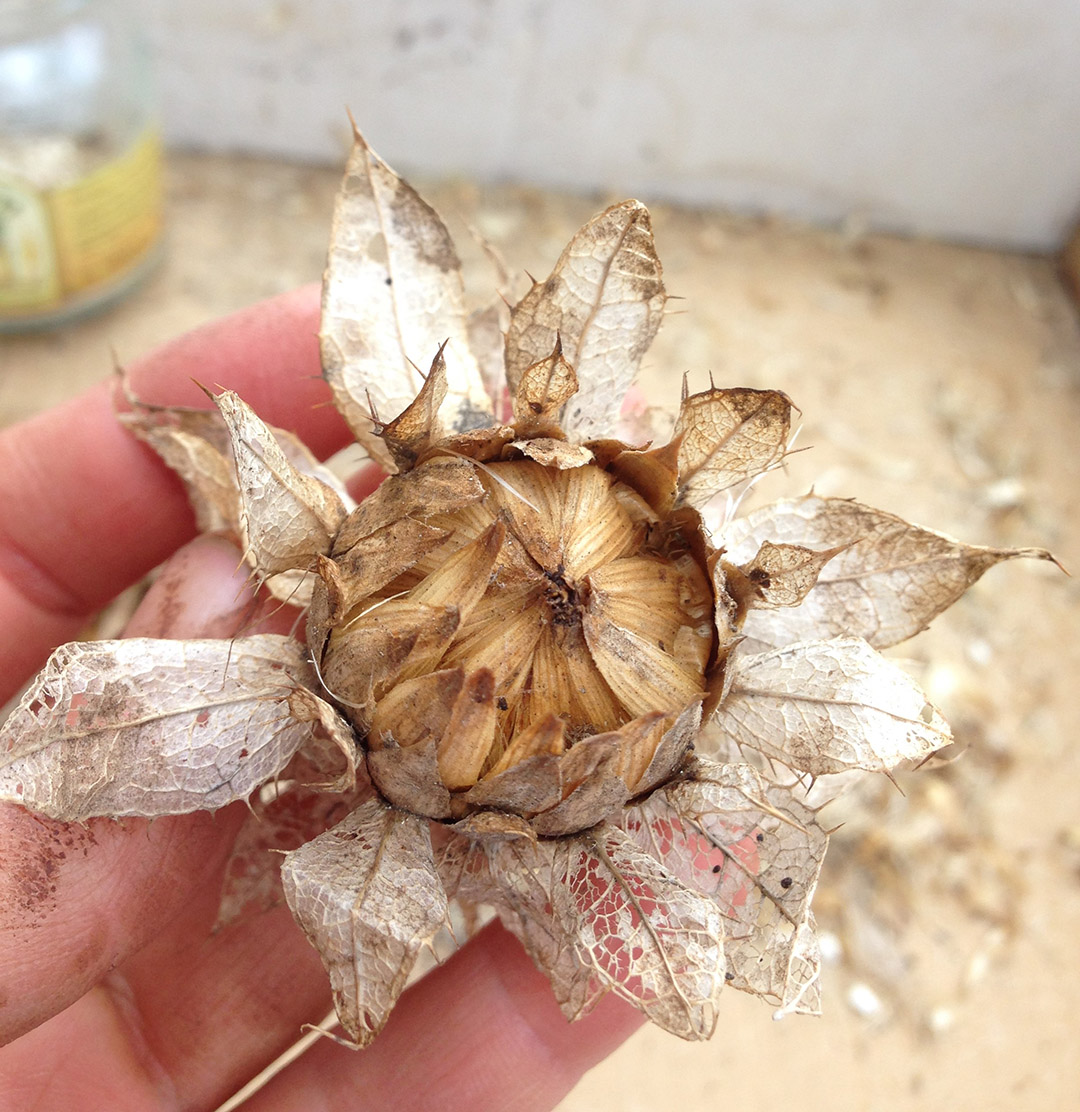
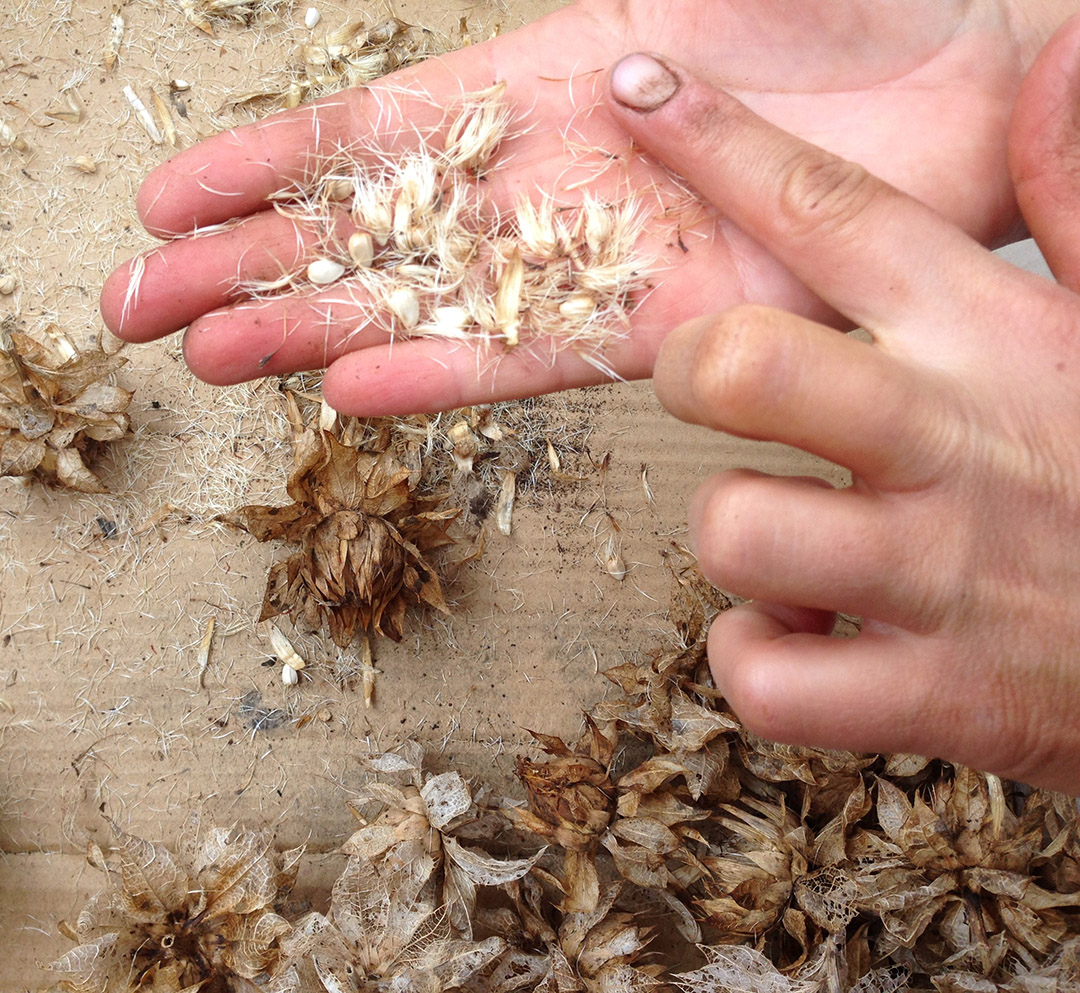
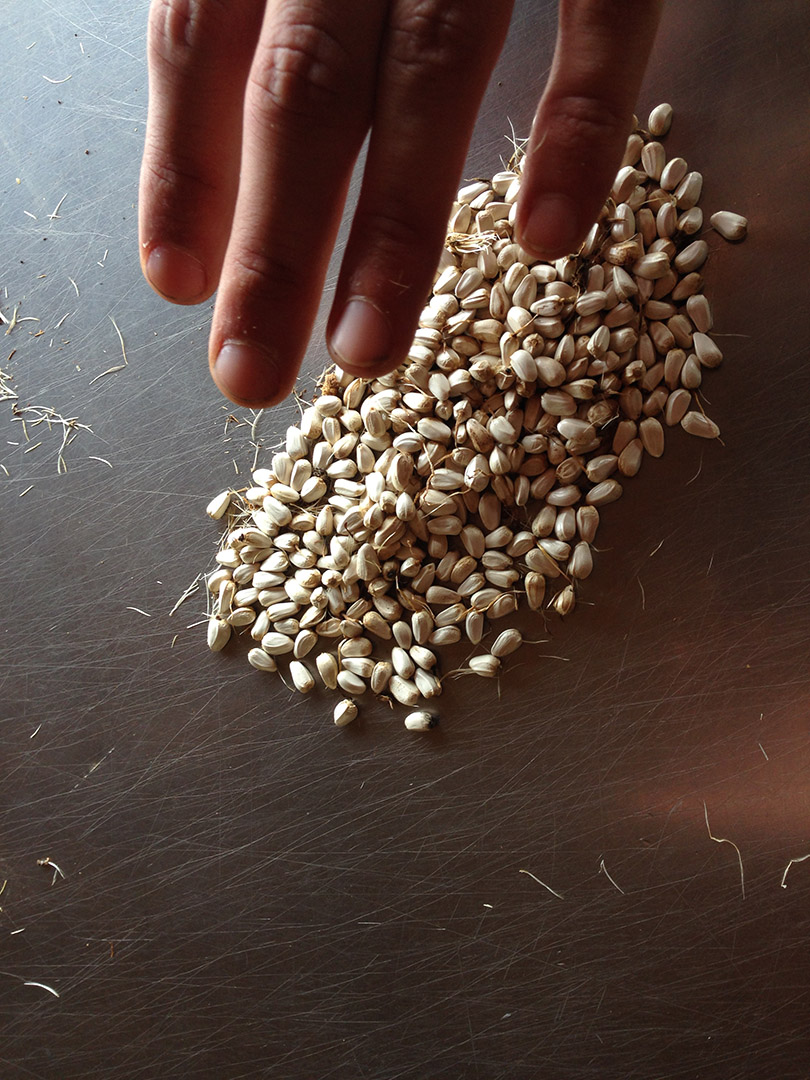
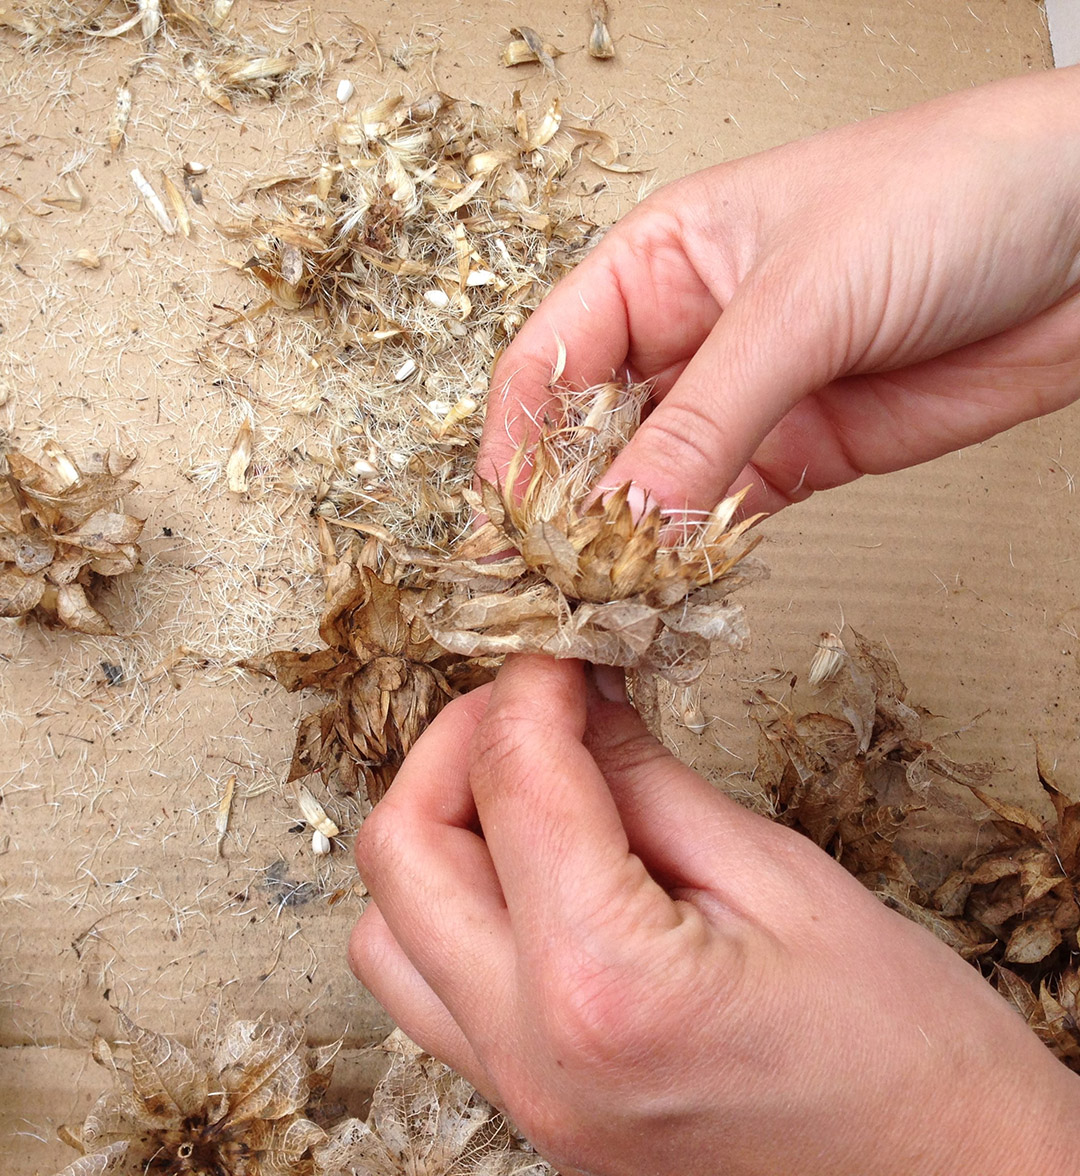
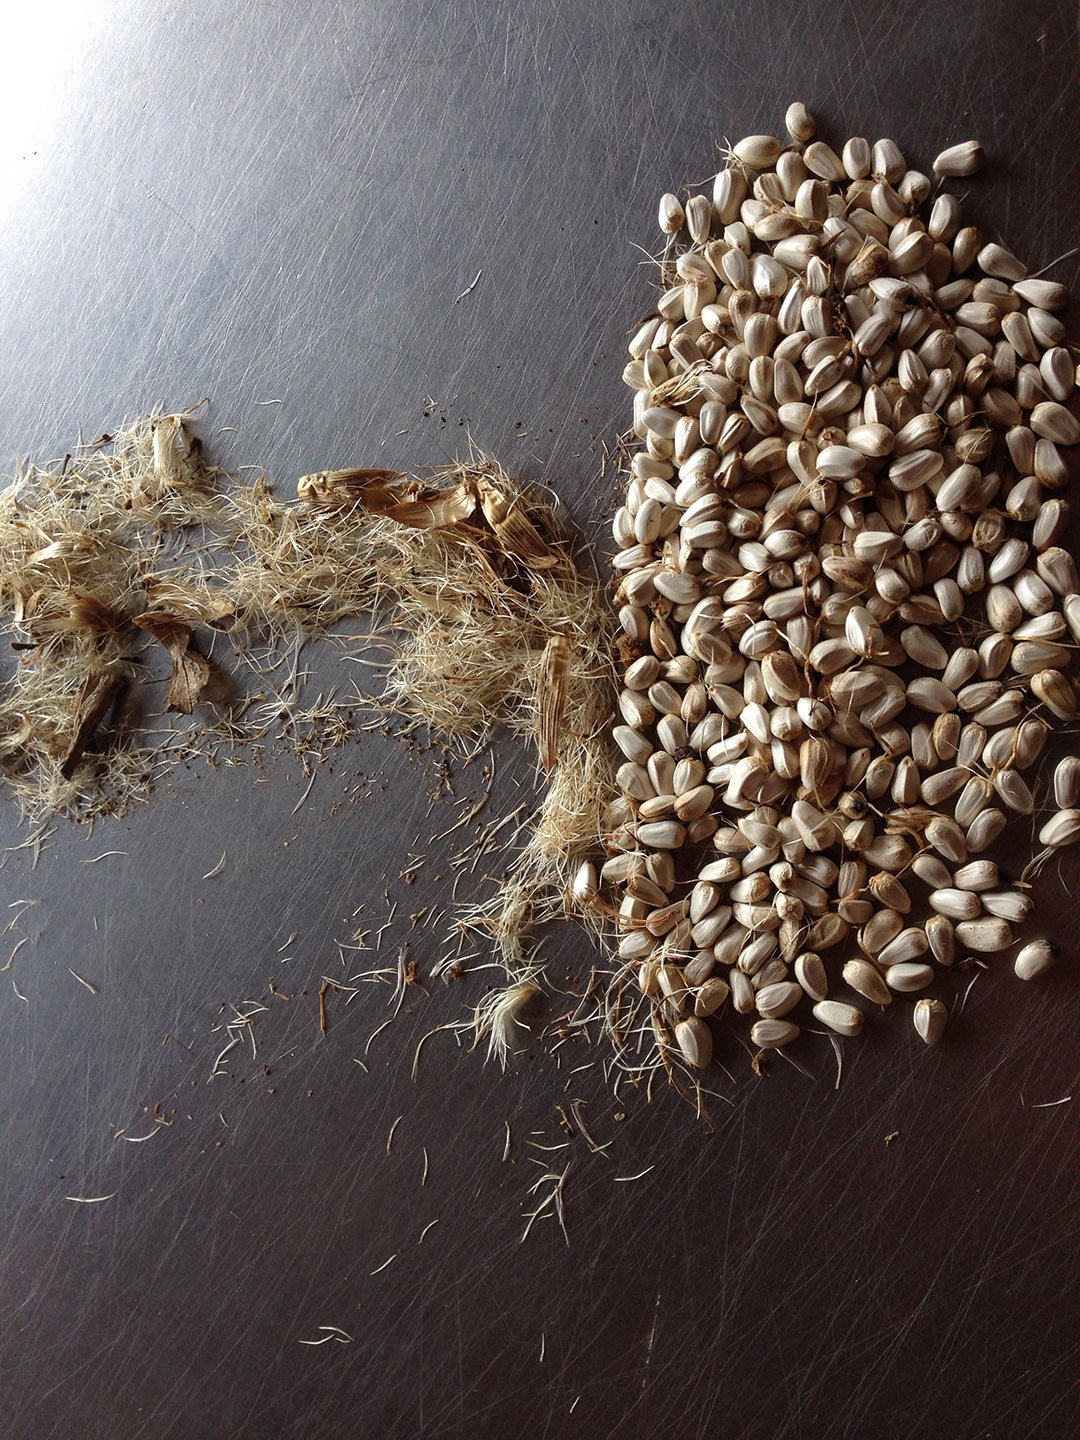
Figure VI.8.- Cleaning Canary saffron seeds
Let´s see some examples. We pass the seeds through sieves and strainers of different sizes until they are as clean as possible (Figure VI.9).
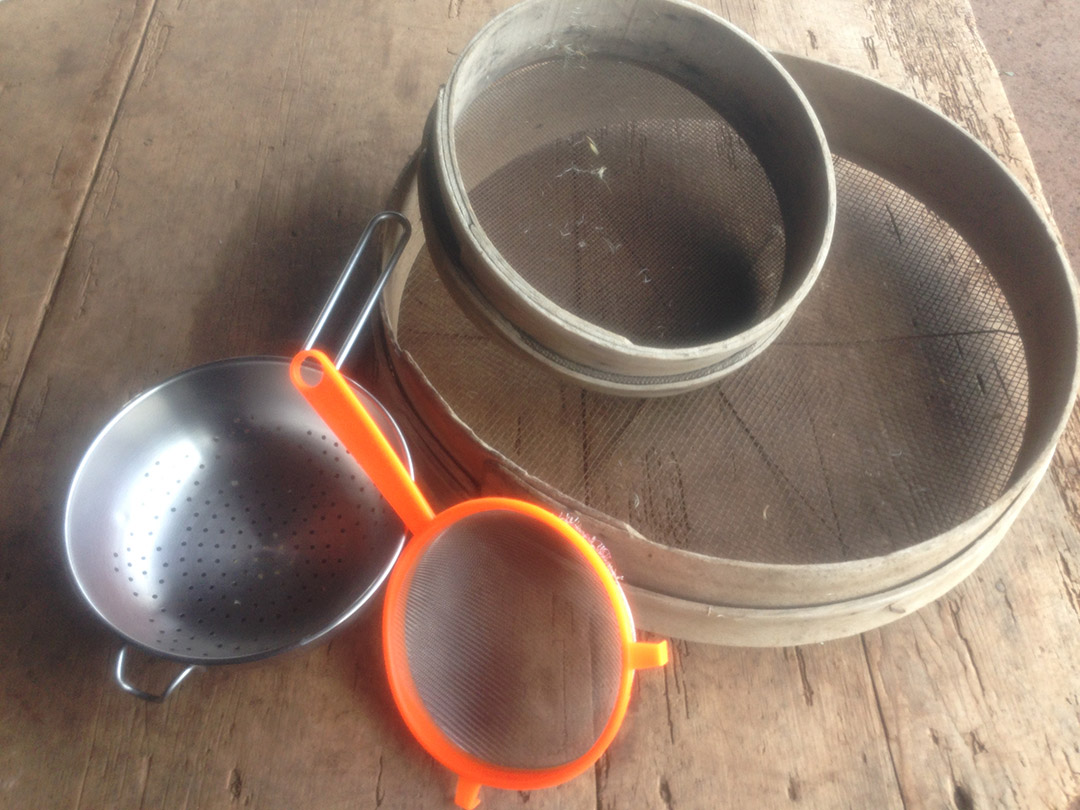

Figure VI.9.- Sieves and strainers to clean the seeds
If the seeds are still not clean after straining them, we can make small piles with them and gently blow in order to separate the seeds from the dry remains (Figure VI.10).
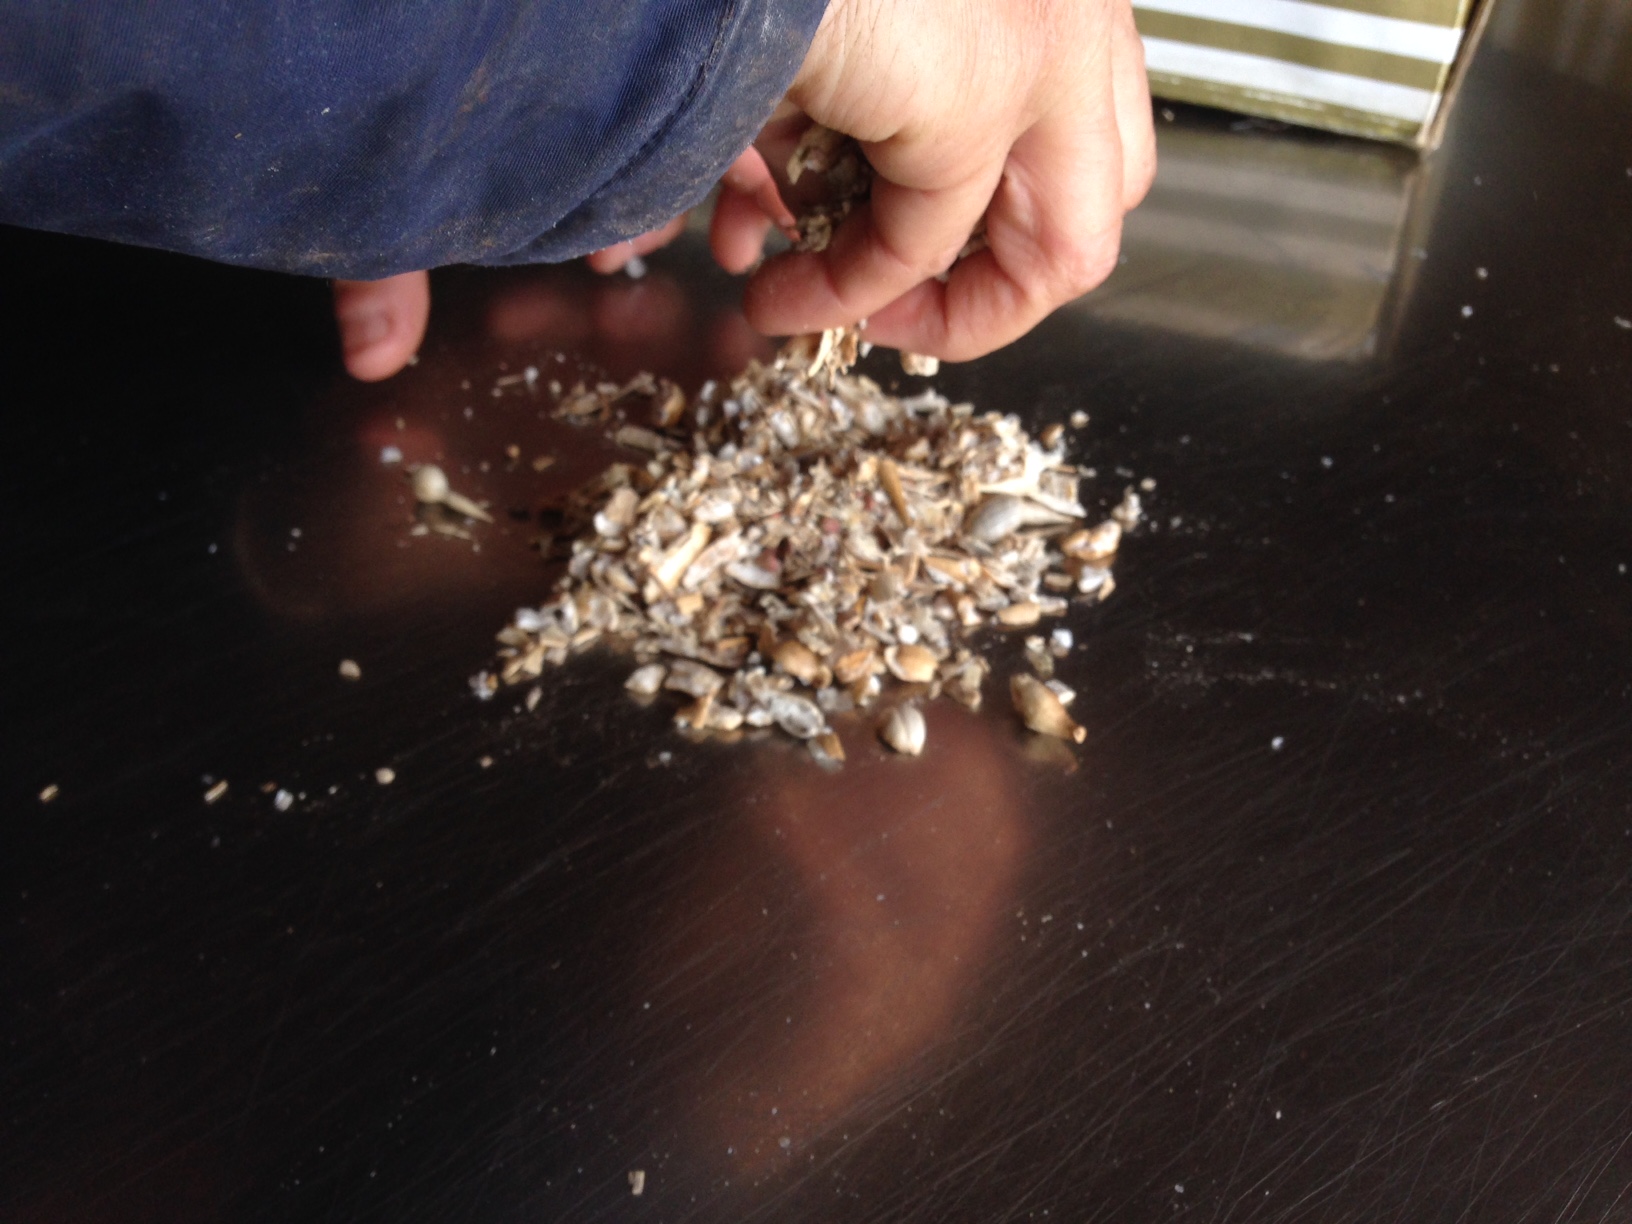
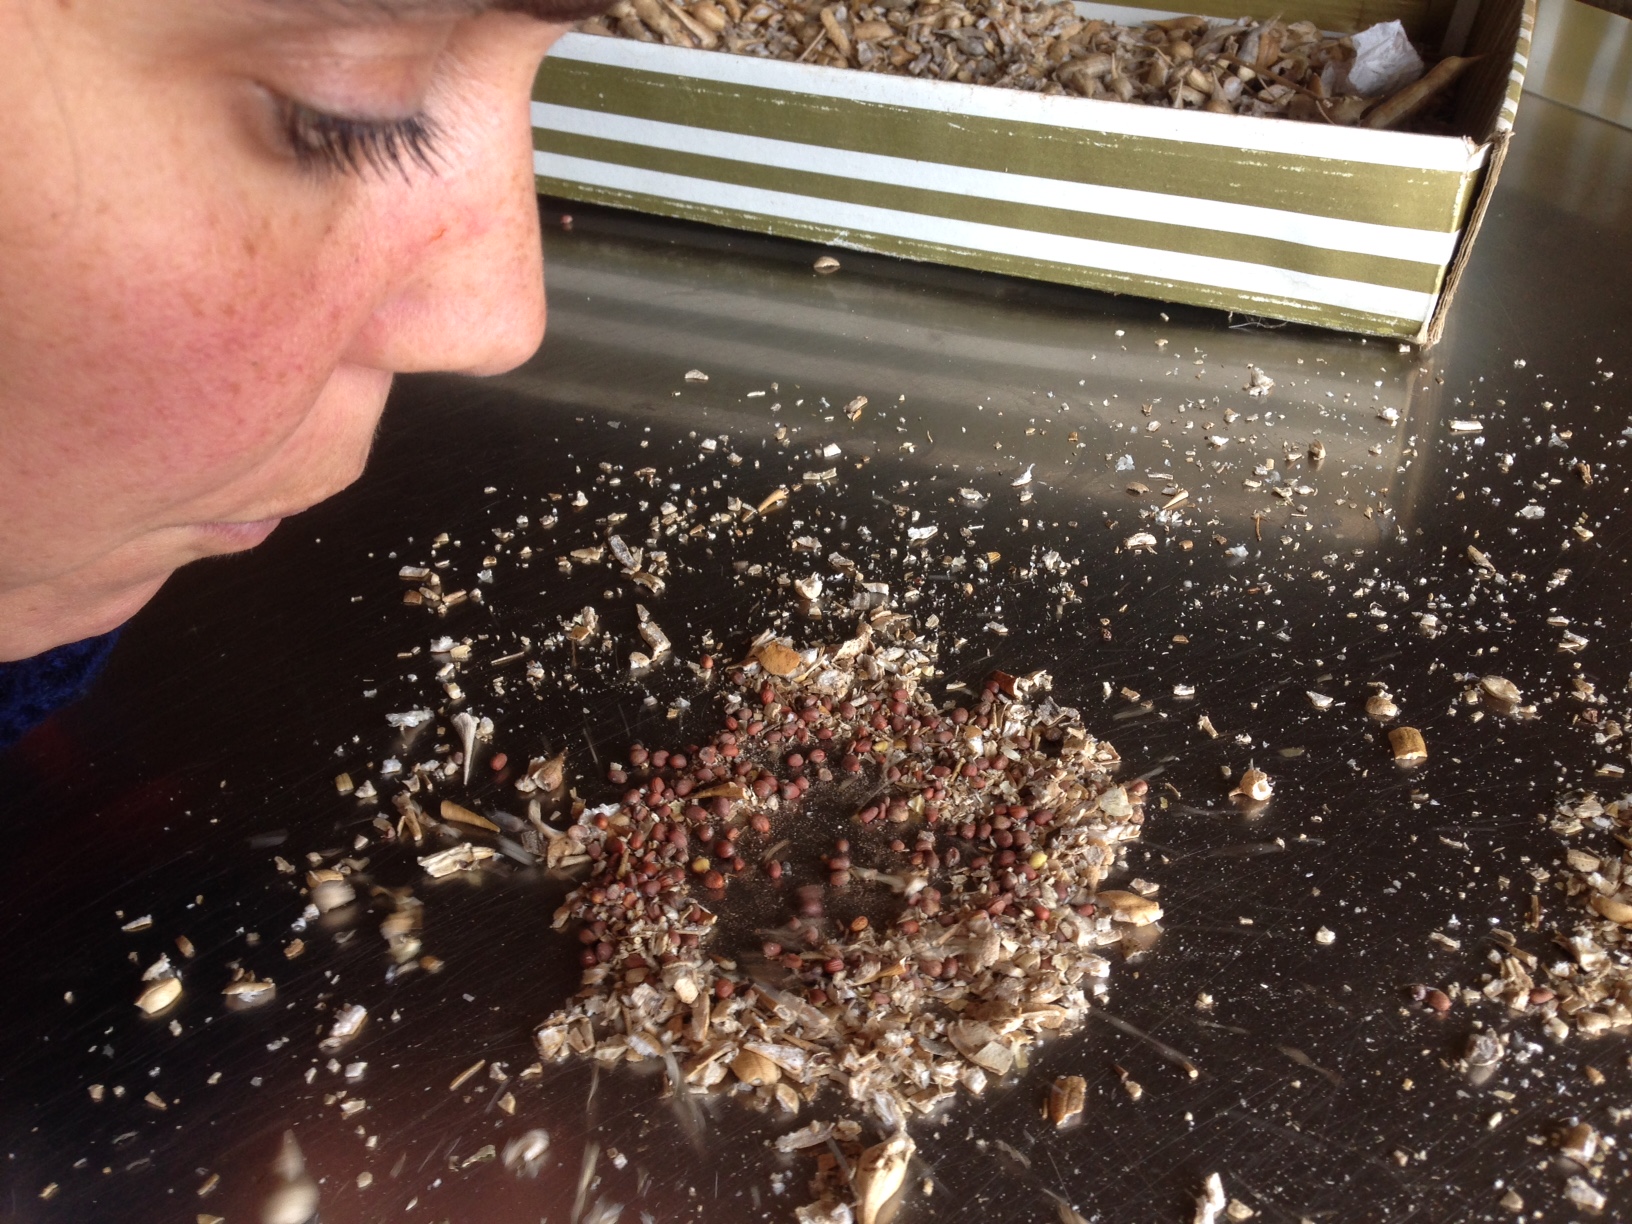
Figure VI.10.- Images of the cleaning of radish seeds
Once the seeds are clean we introduce them into recycled jars, preferably dark in order to conserve the seeds better. The jars can be collected from the neighbourhood by the users of the PERMIND course (Figure VI.11).
Each jar has to be labeled with relevant information about the seed (year, variety, place of collection…). The place we choose to store the jars must be cool, dry and dark; we can even store the jars in the lower part of a fridge in order to extend the life of the seeds.
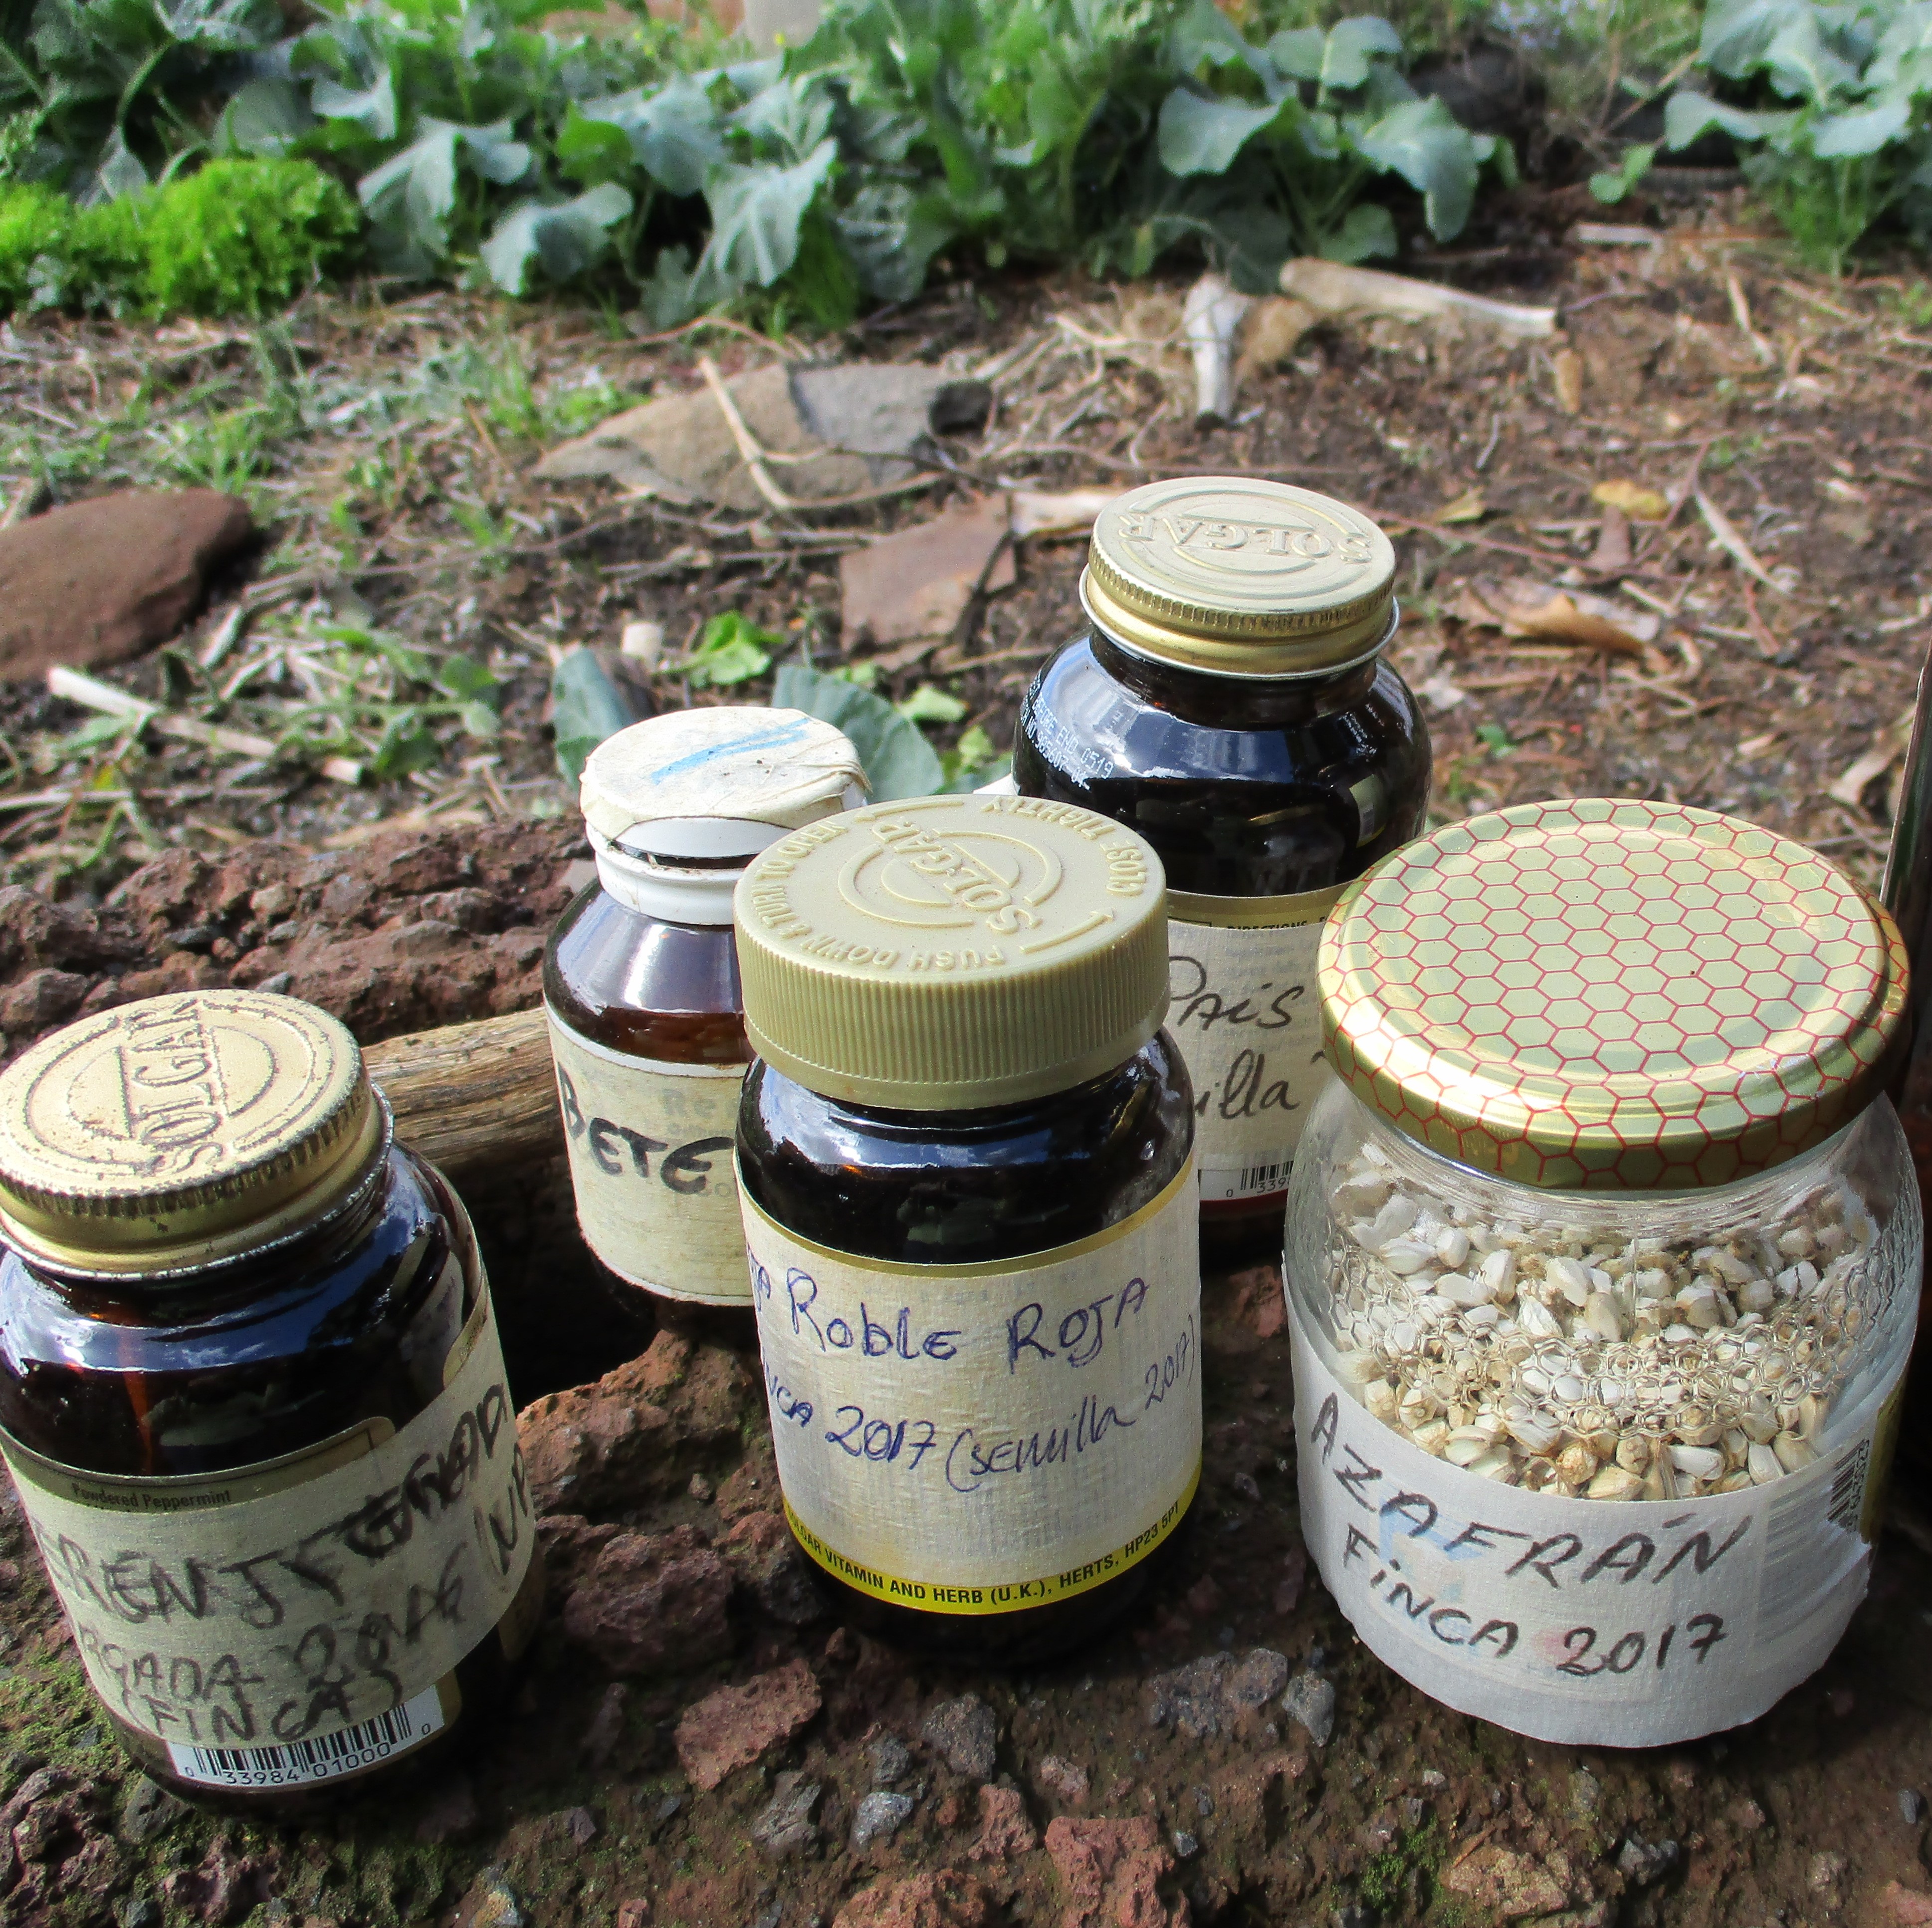
Figure VI.11.- Labeled jars to conserve the seeds
In the case of the zucchini, from the Cucurbitaceae family, the ideal fruit to select to obtain the seeds from is between the 5th and 8th fruit from the plant we have identified according to the selection criteria we have previously discussed. After the 5th fruit, the plant is mature enough for us to recognize its positive characteristics.
Once we have chosen and marked the fruit with a stick, rope or a handkerchief, we leave it on the plant until it reaches an excessive size and changes color. When the plant finishes its cycle and completely dries out, we cut the fruit before winter so that the seeds can develop enough. We leave the selected fruit to ripen in a shaded and ventilated place (Figure VI.12). When we notice that the fruit starts spoiling we extract the seeds.
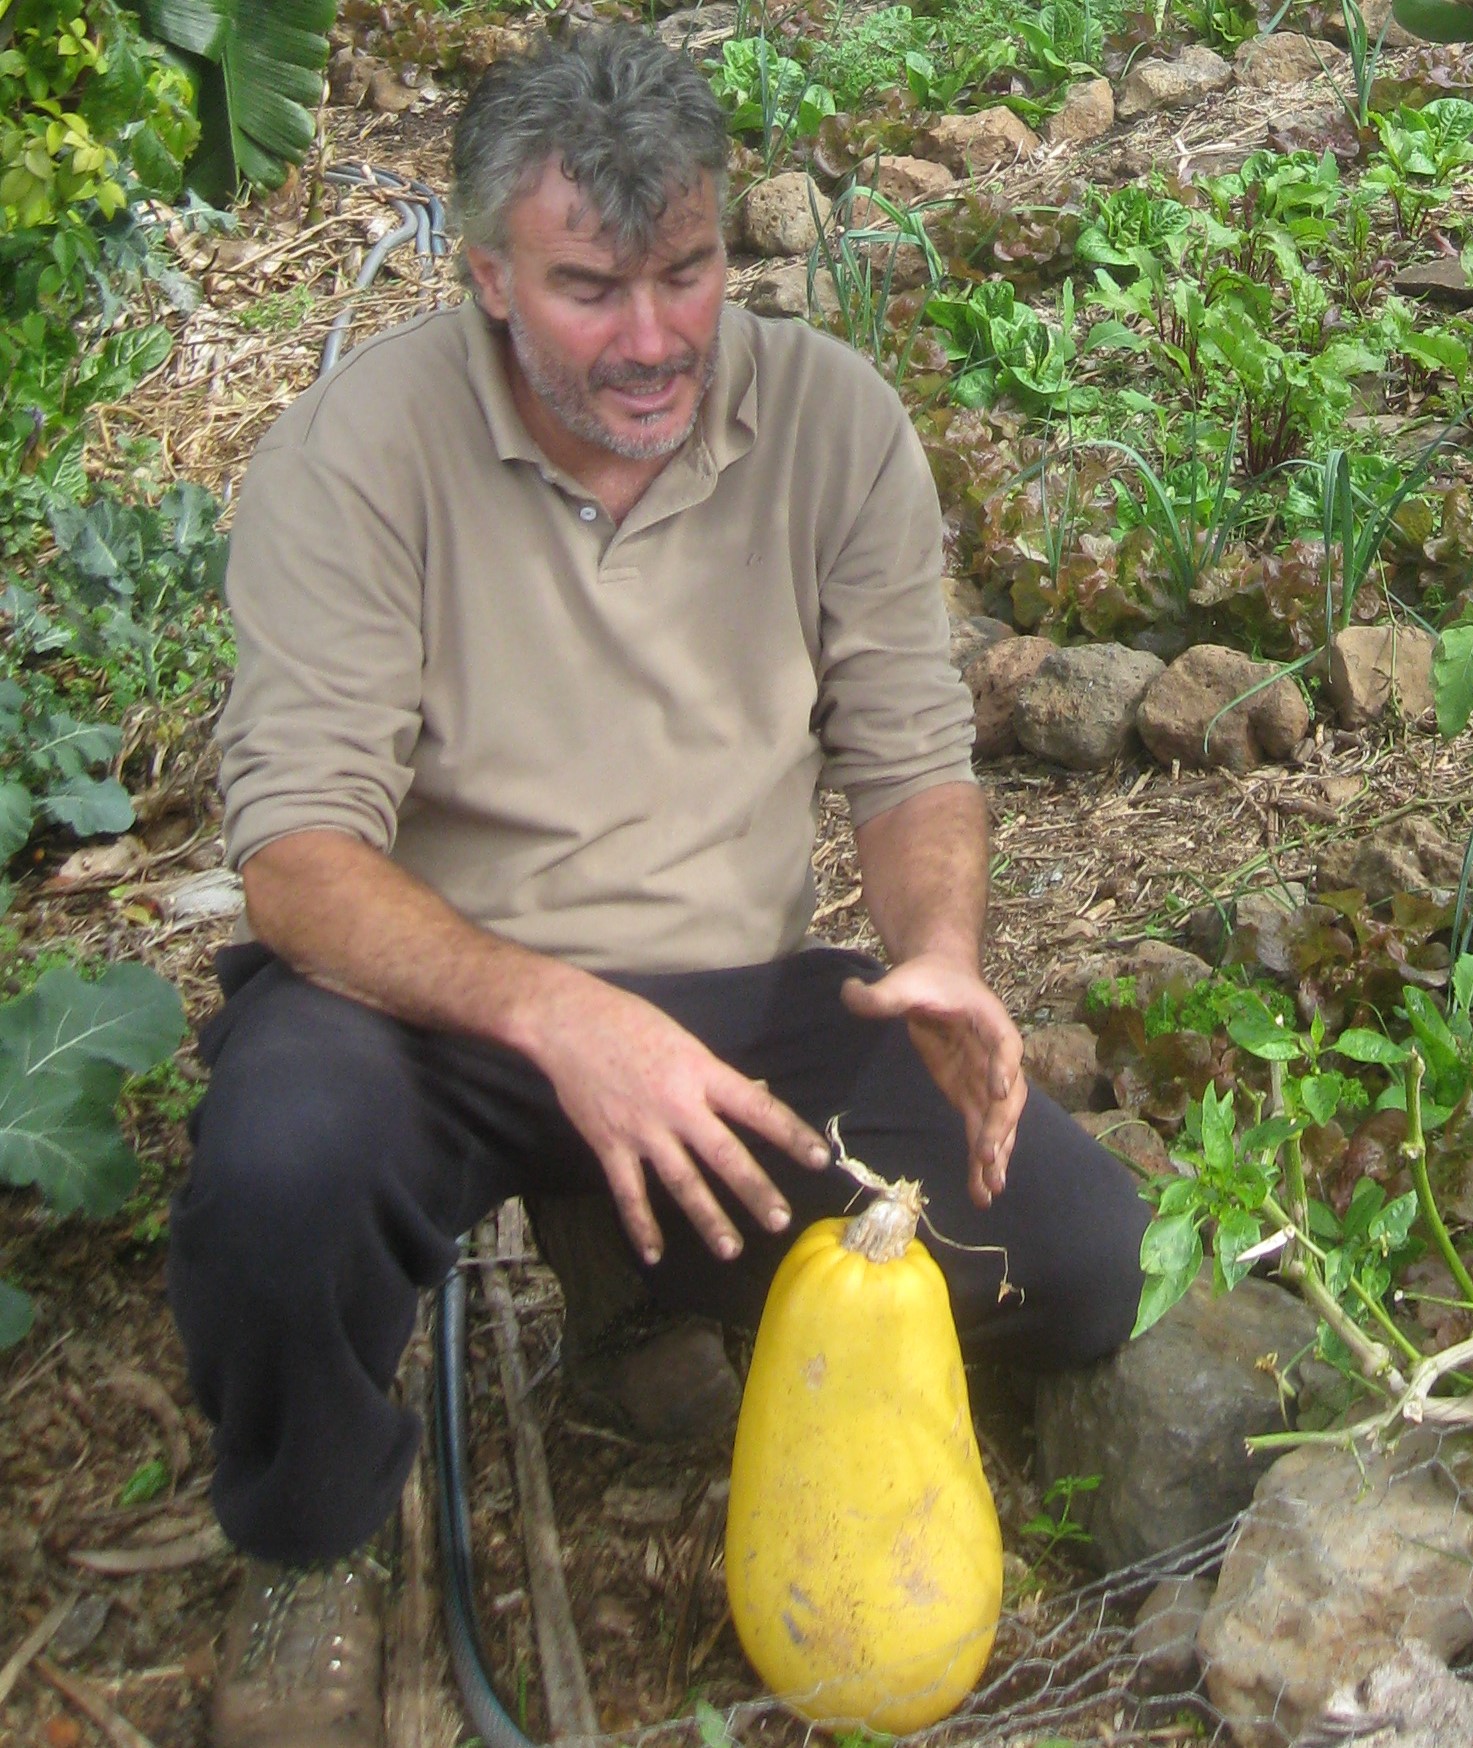
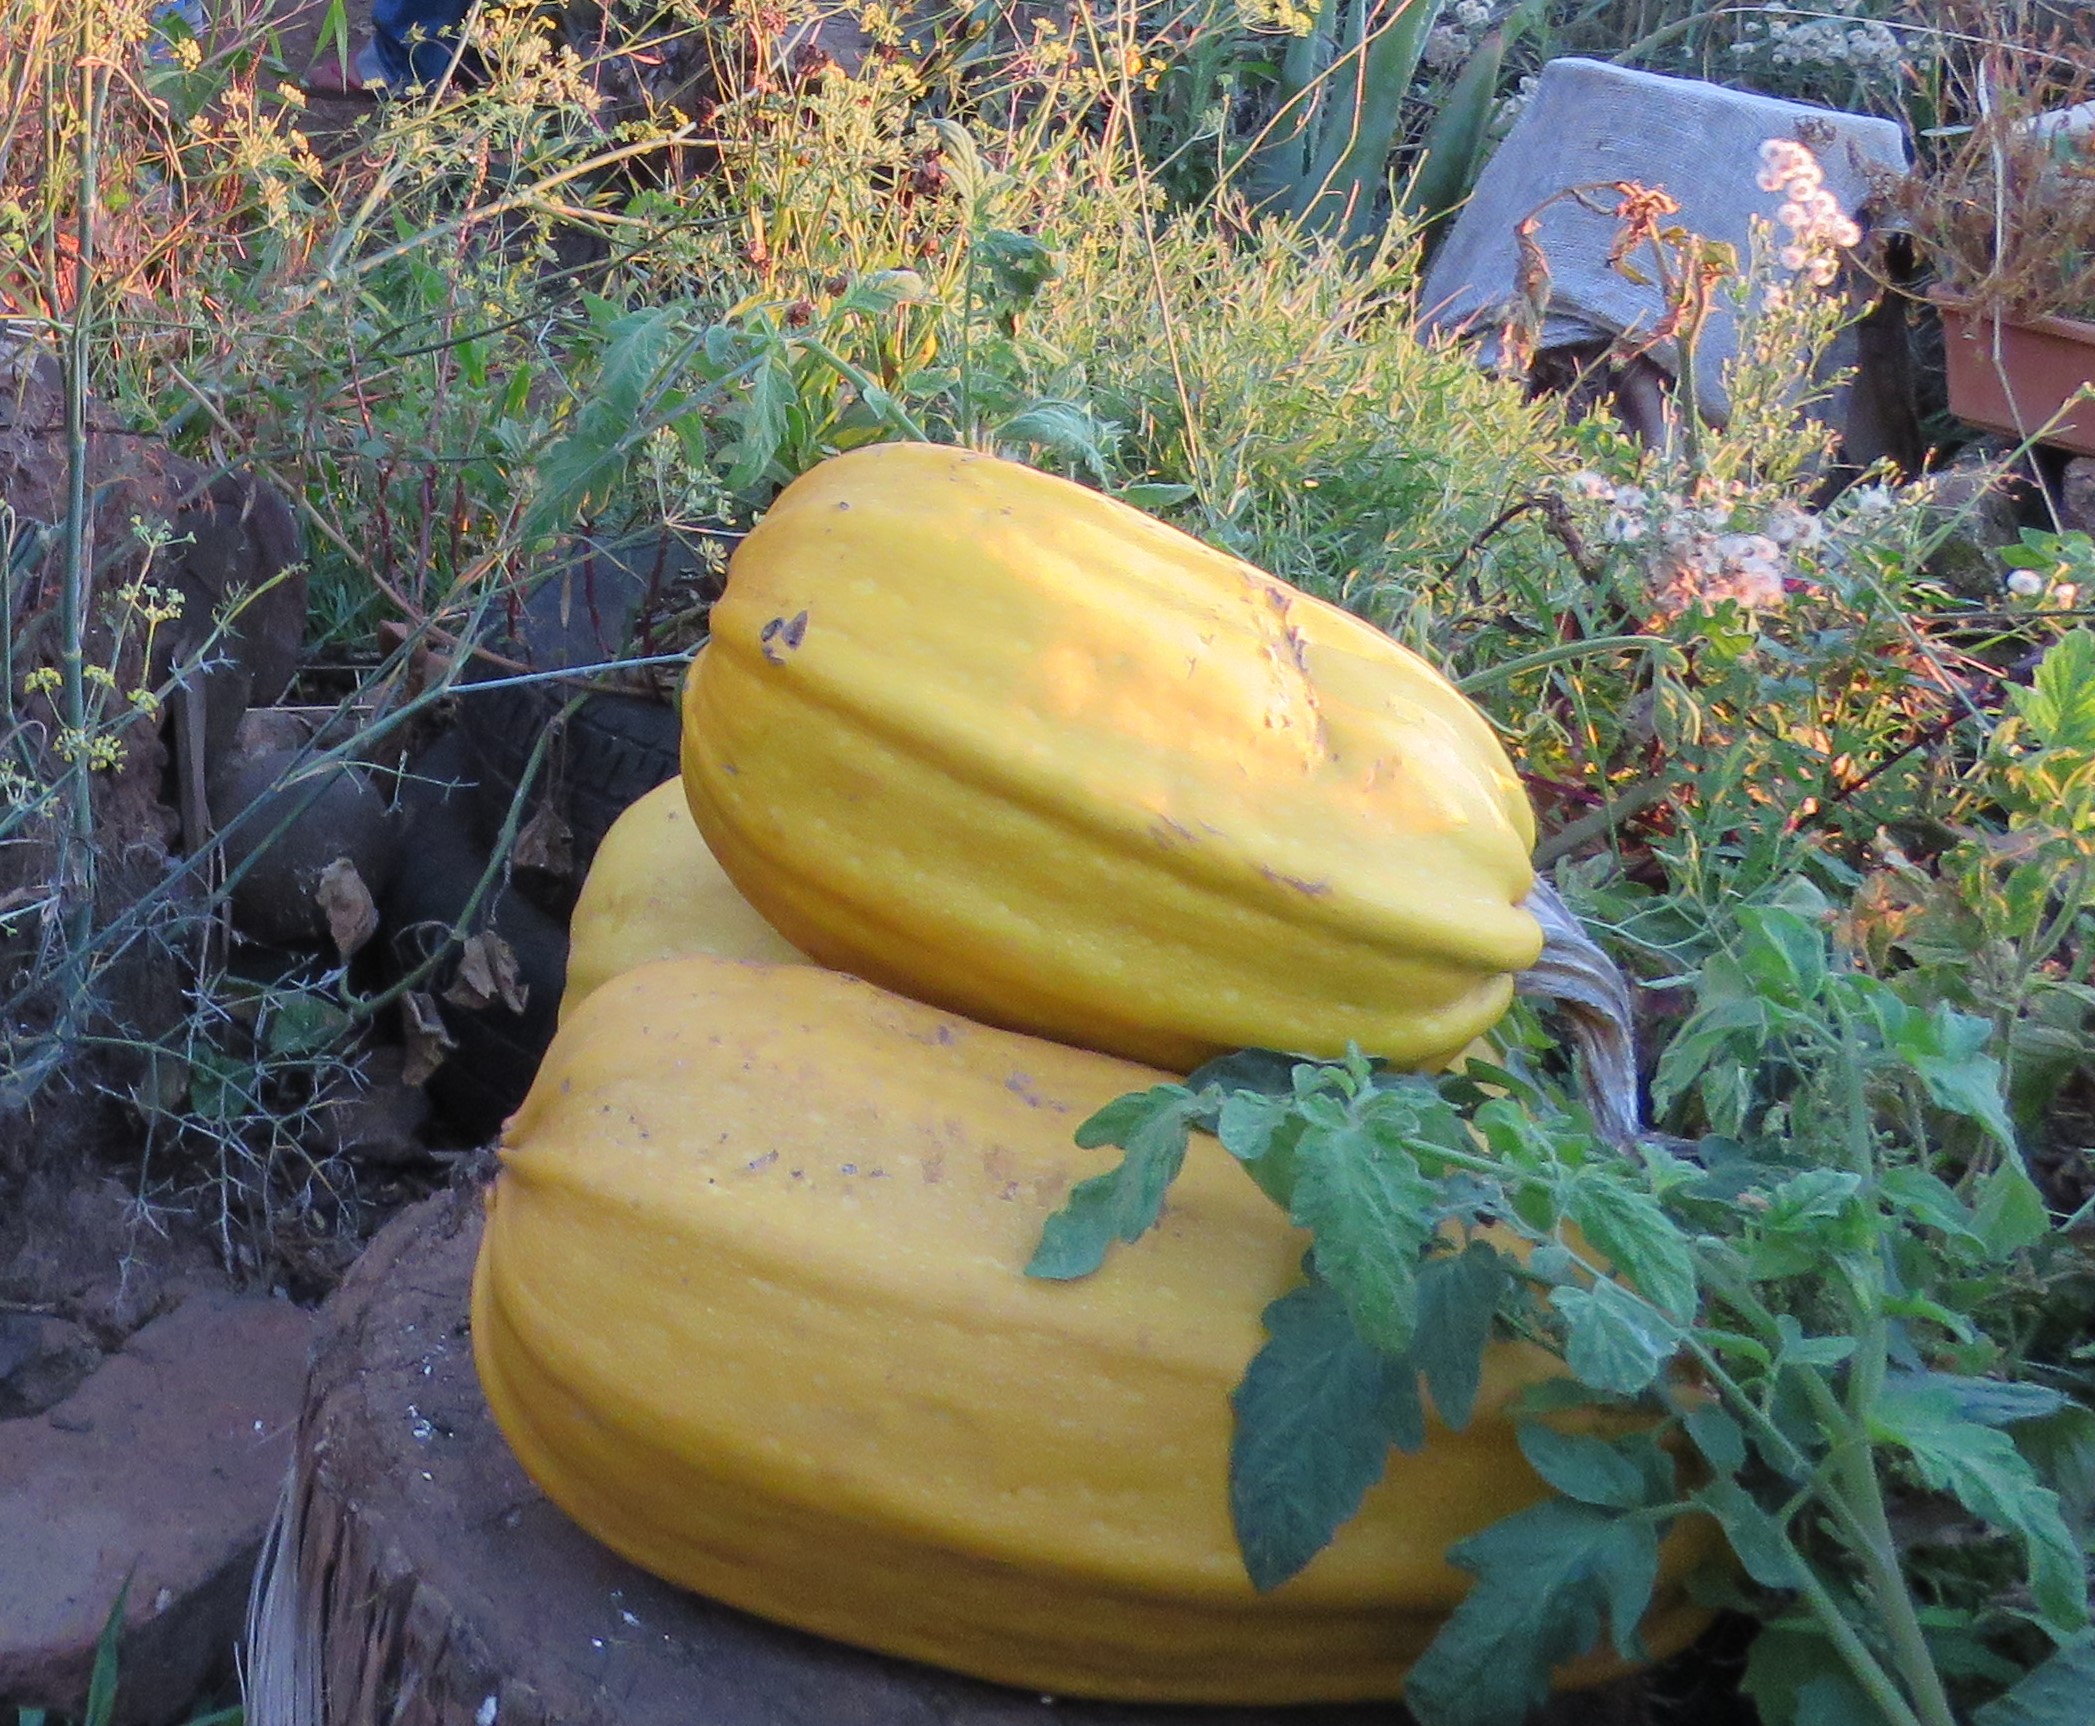
Figure VI.12.- Collecting a zucchini and drying some marrows to obtain seeds
In order to obtain and clean the seeds of our zucchini we need to open it in half, extract the seeds, wash them with a strainer and then dry them during several days (Figure VI.13). It is important to dry the seeds mainly on sunny days. After making sure they are completely dry we put them into the dark jars and label the jars.
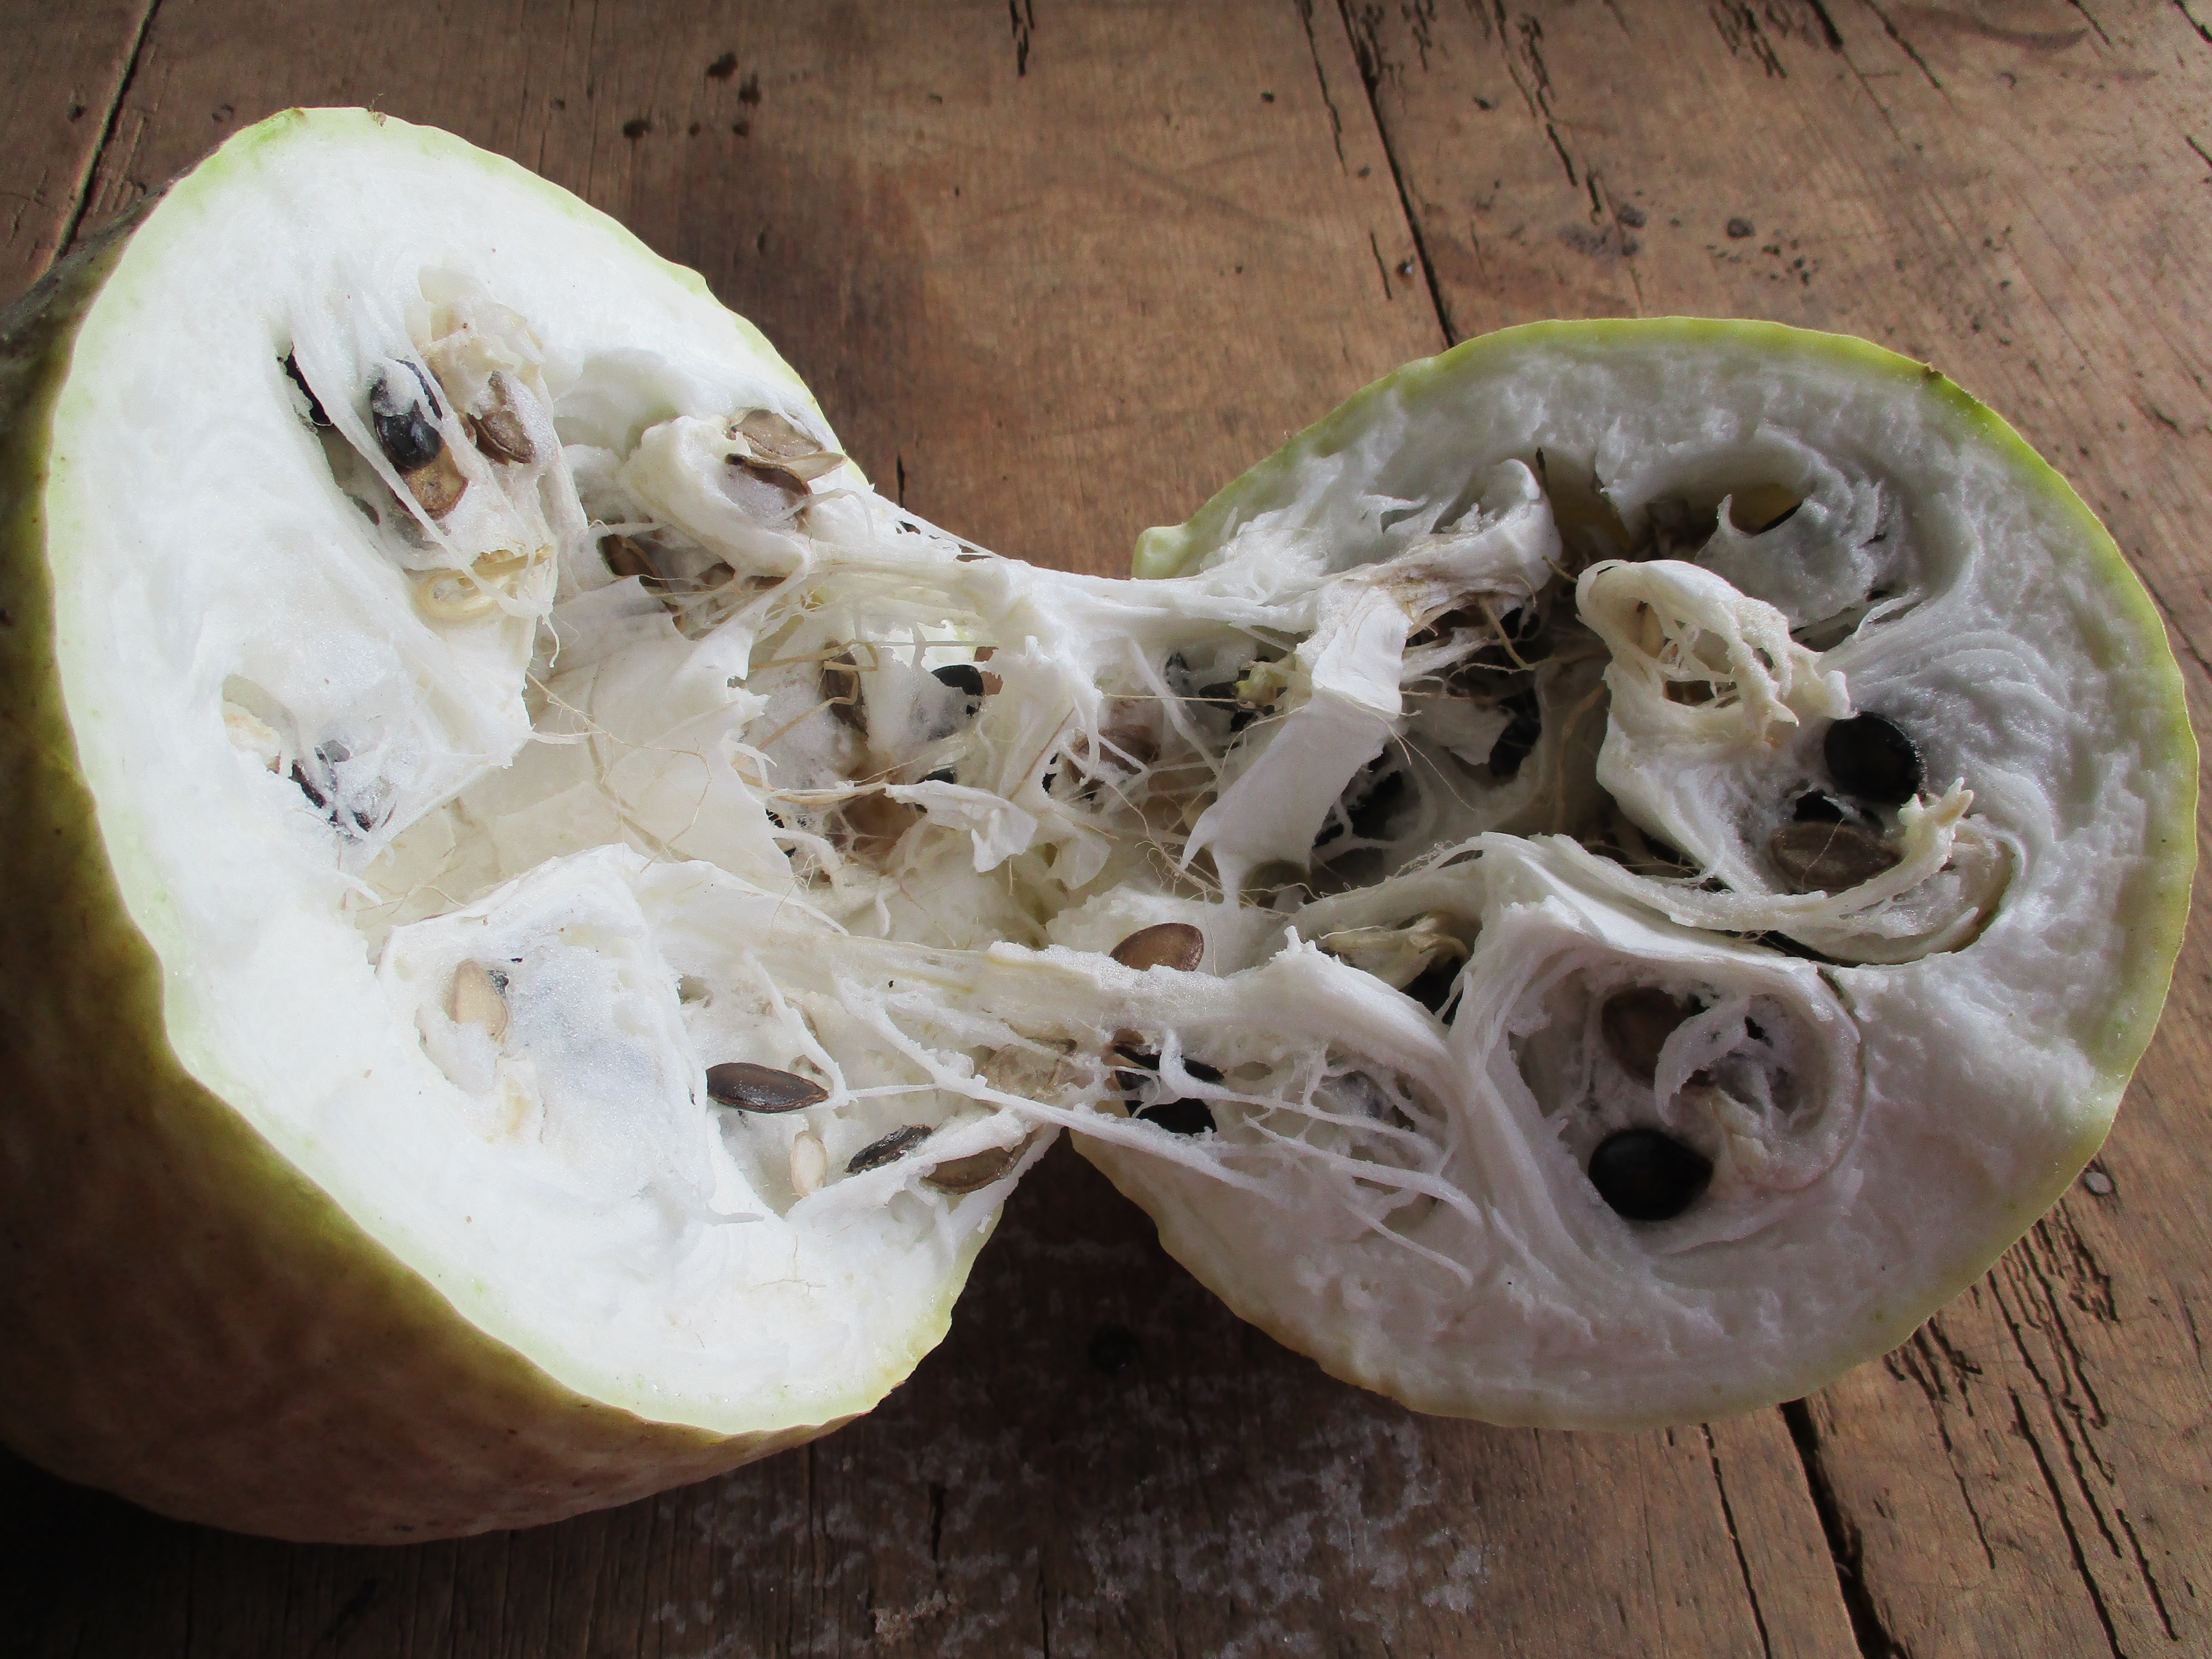
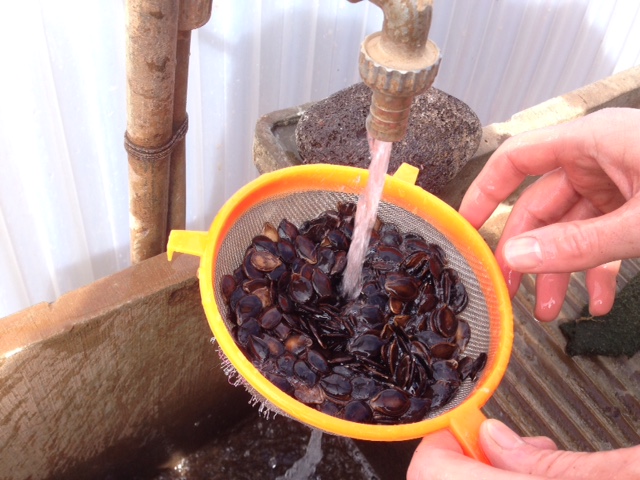
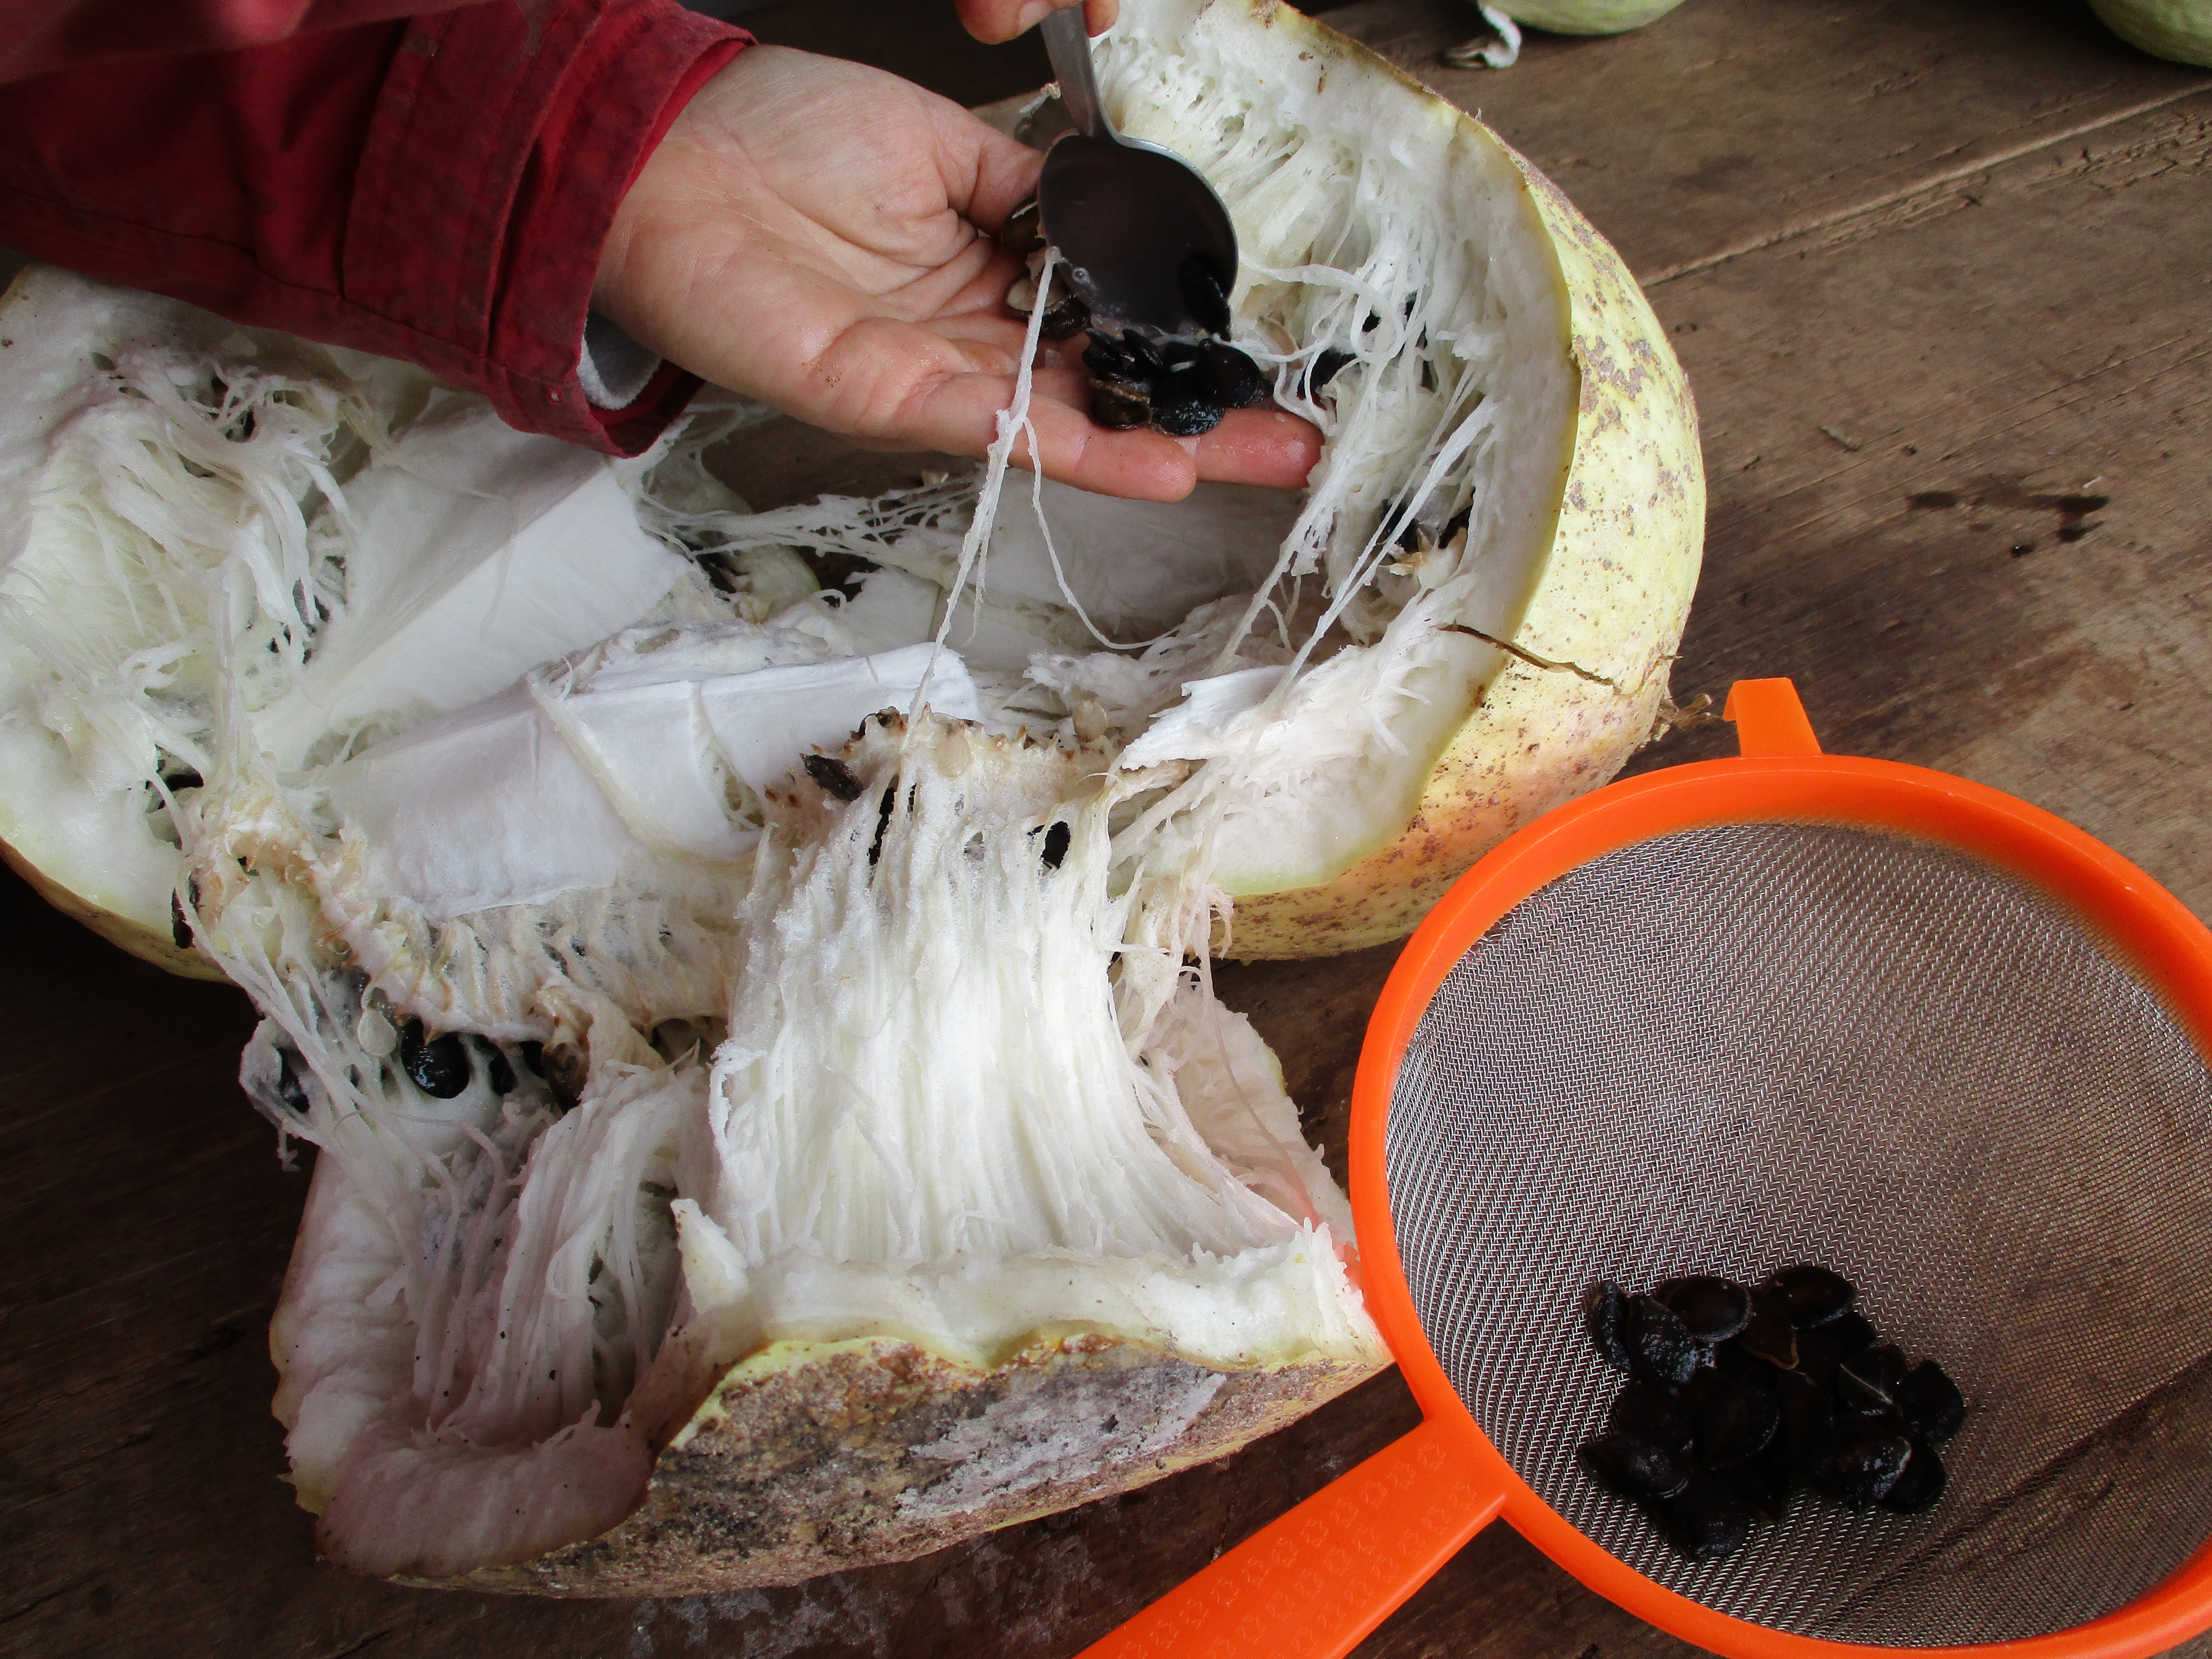

Figure VI.13.- Images of the extraction, cleaning and drying of the seeds from the black seed squash (Cucurbitaceae)
To clean the type of seeds coming from onion, leekand garlic plants, we need to rub the flowers and then introduce the seeds into water to clean them well. We can see how the good seeds sink, whereas the empty or bad ones float. We remove the bad, upper part and then spread out the good, sunken ones on a surface so that they dry quicker and we can easily stir them once in a while in order to let them dry (Figure VI.14).
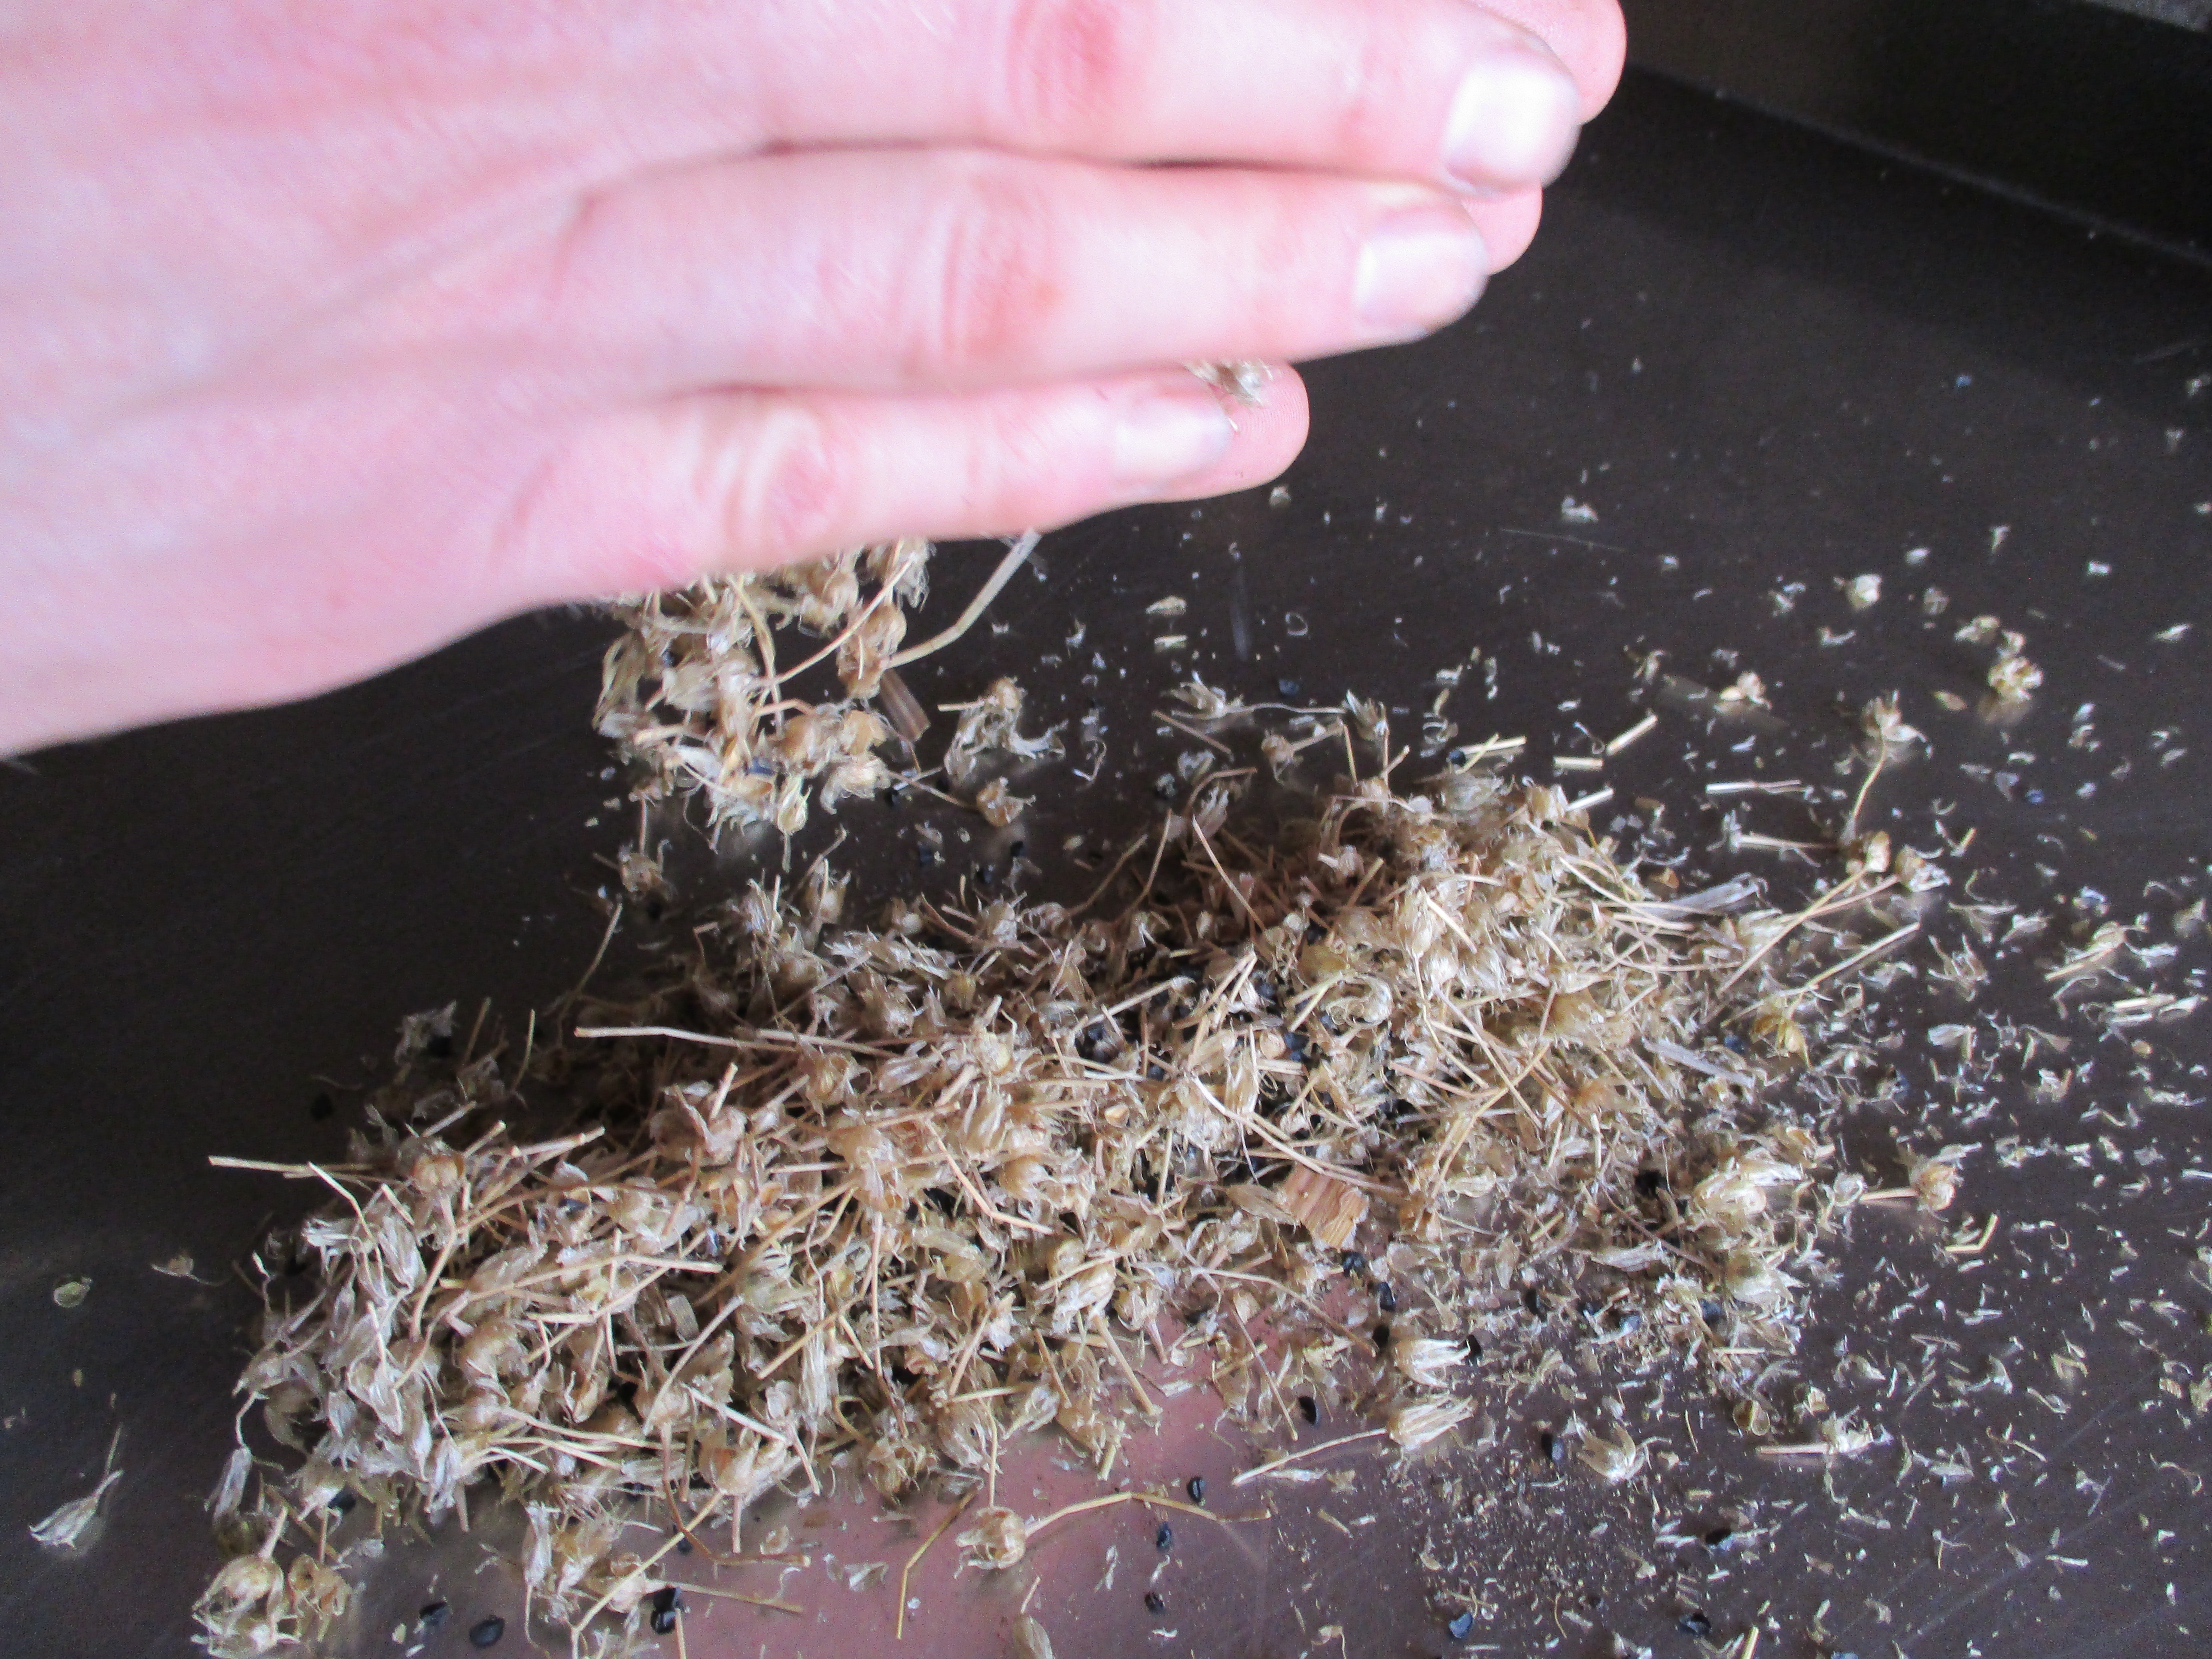
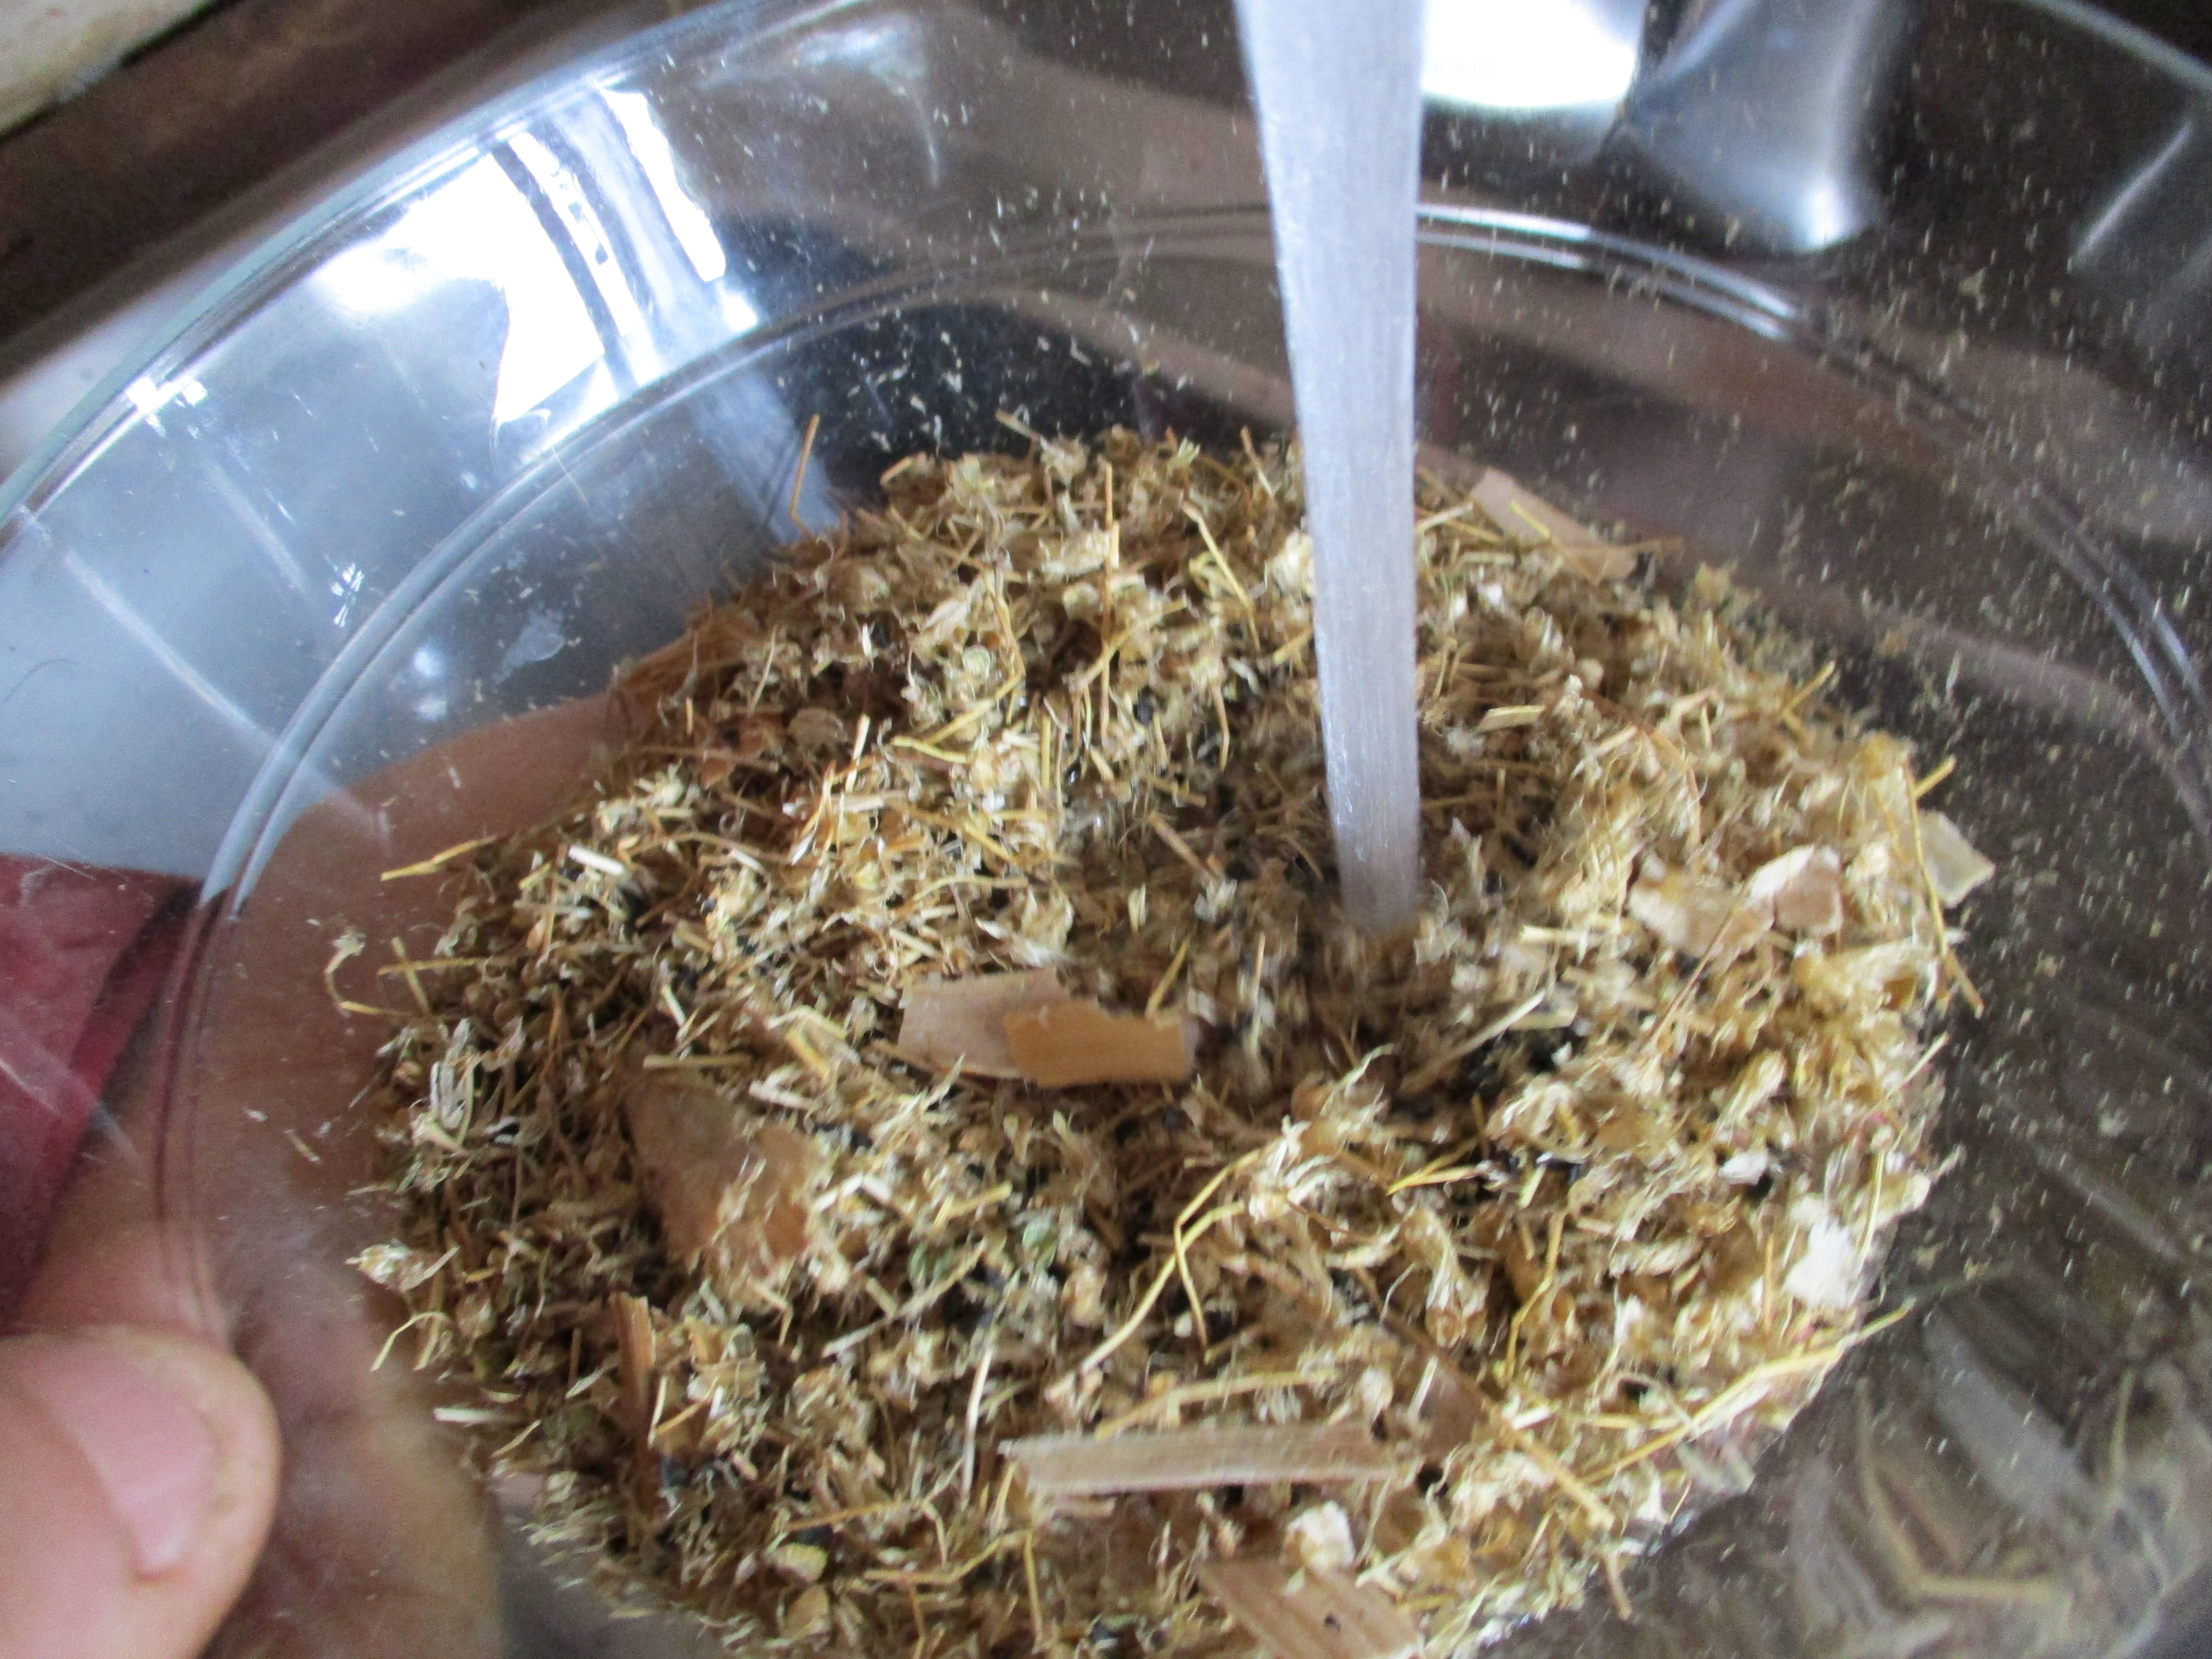

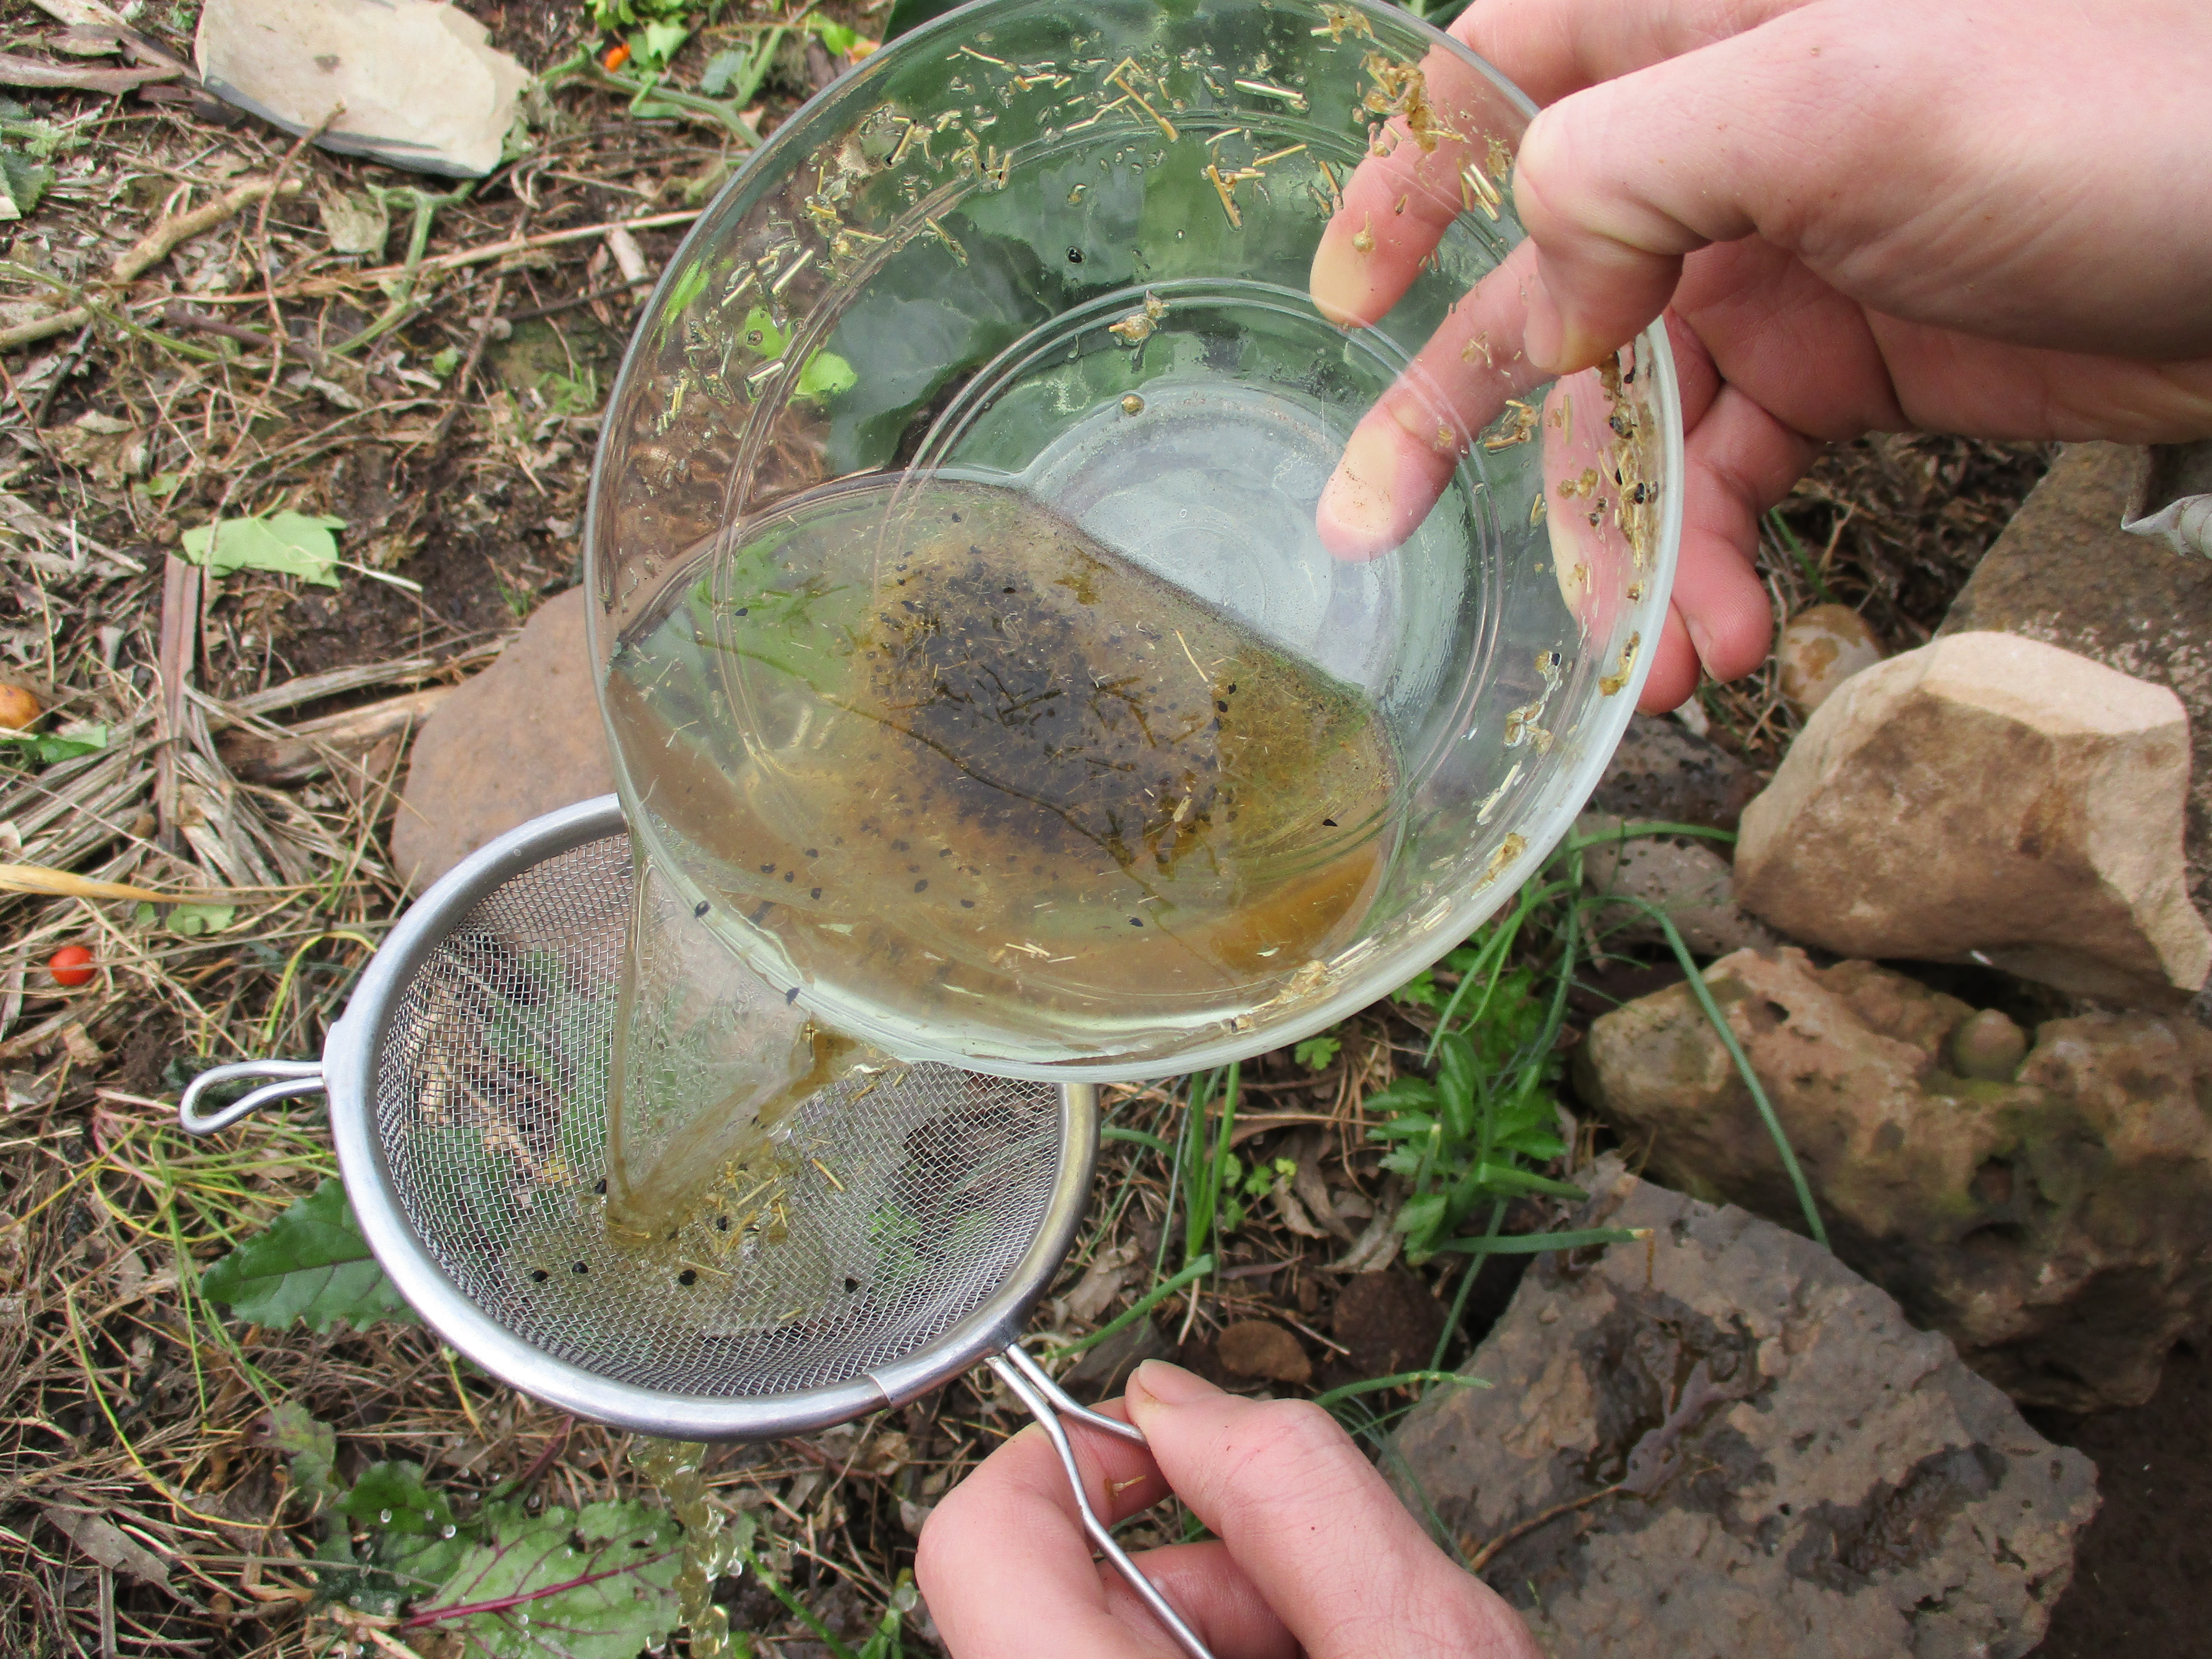
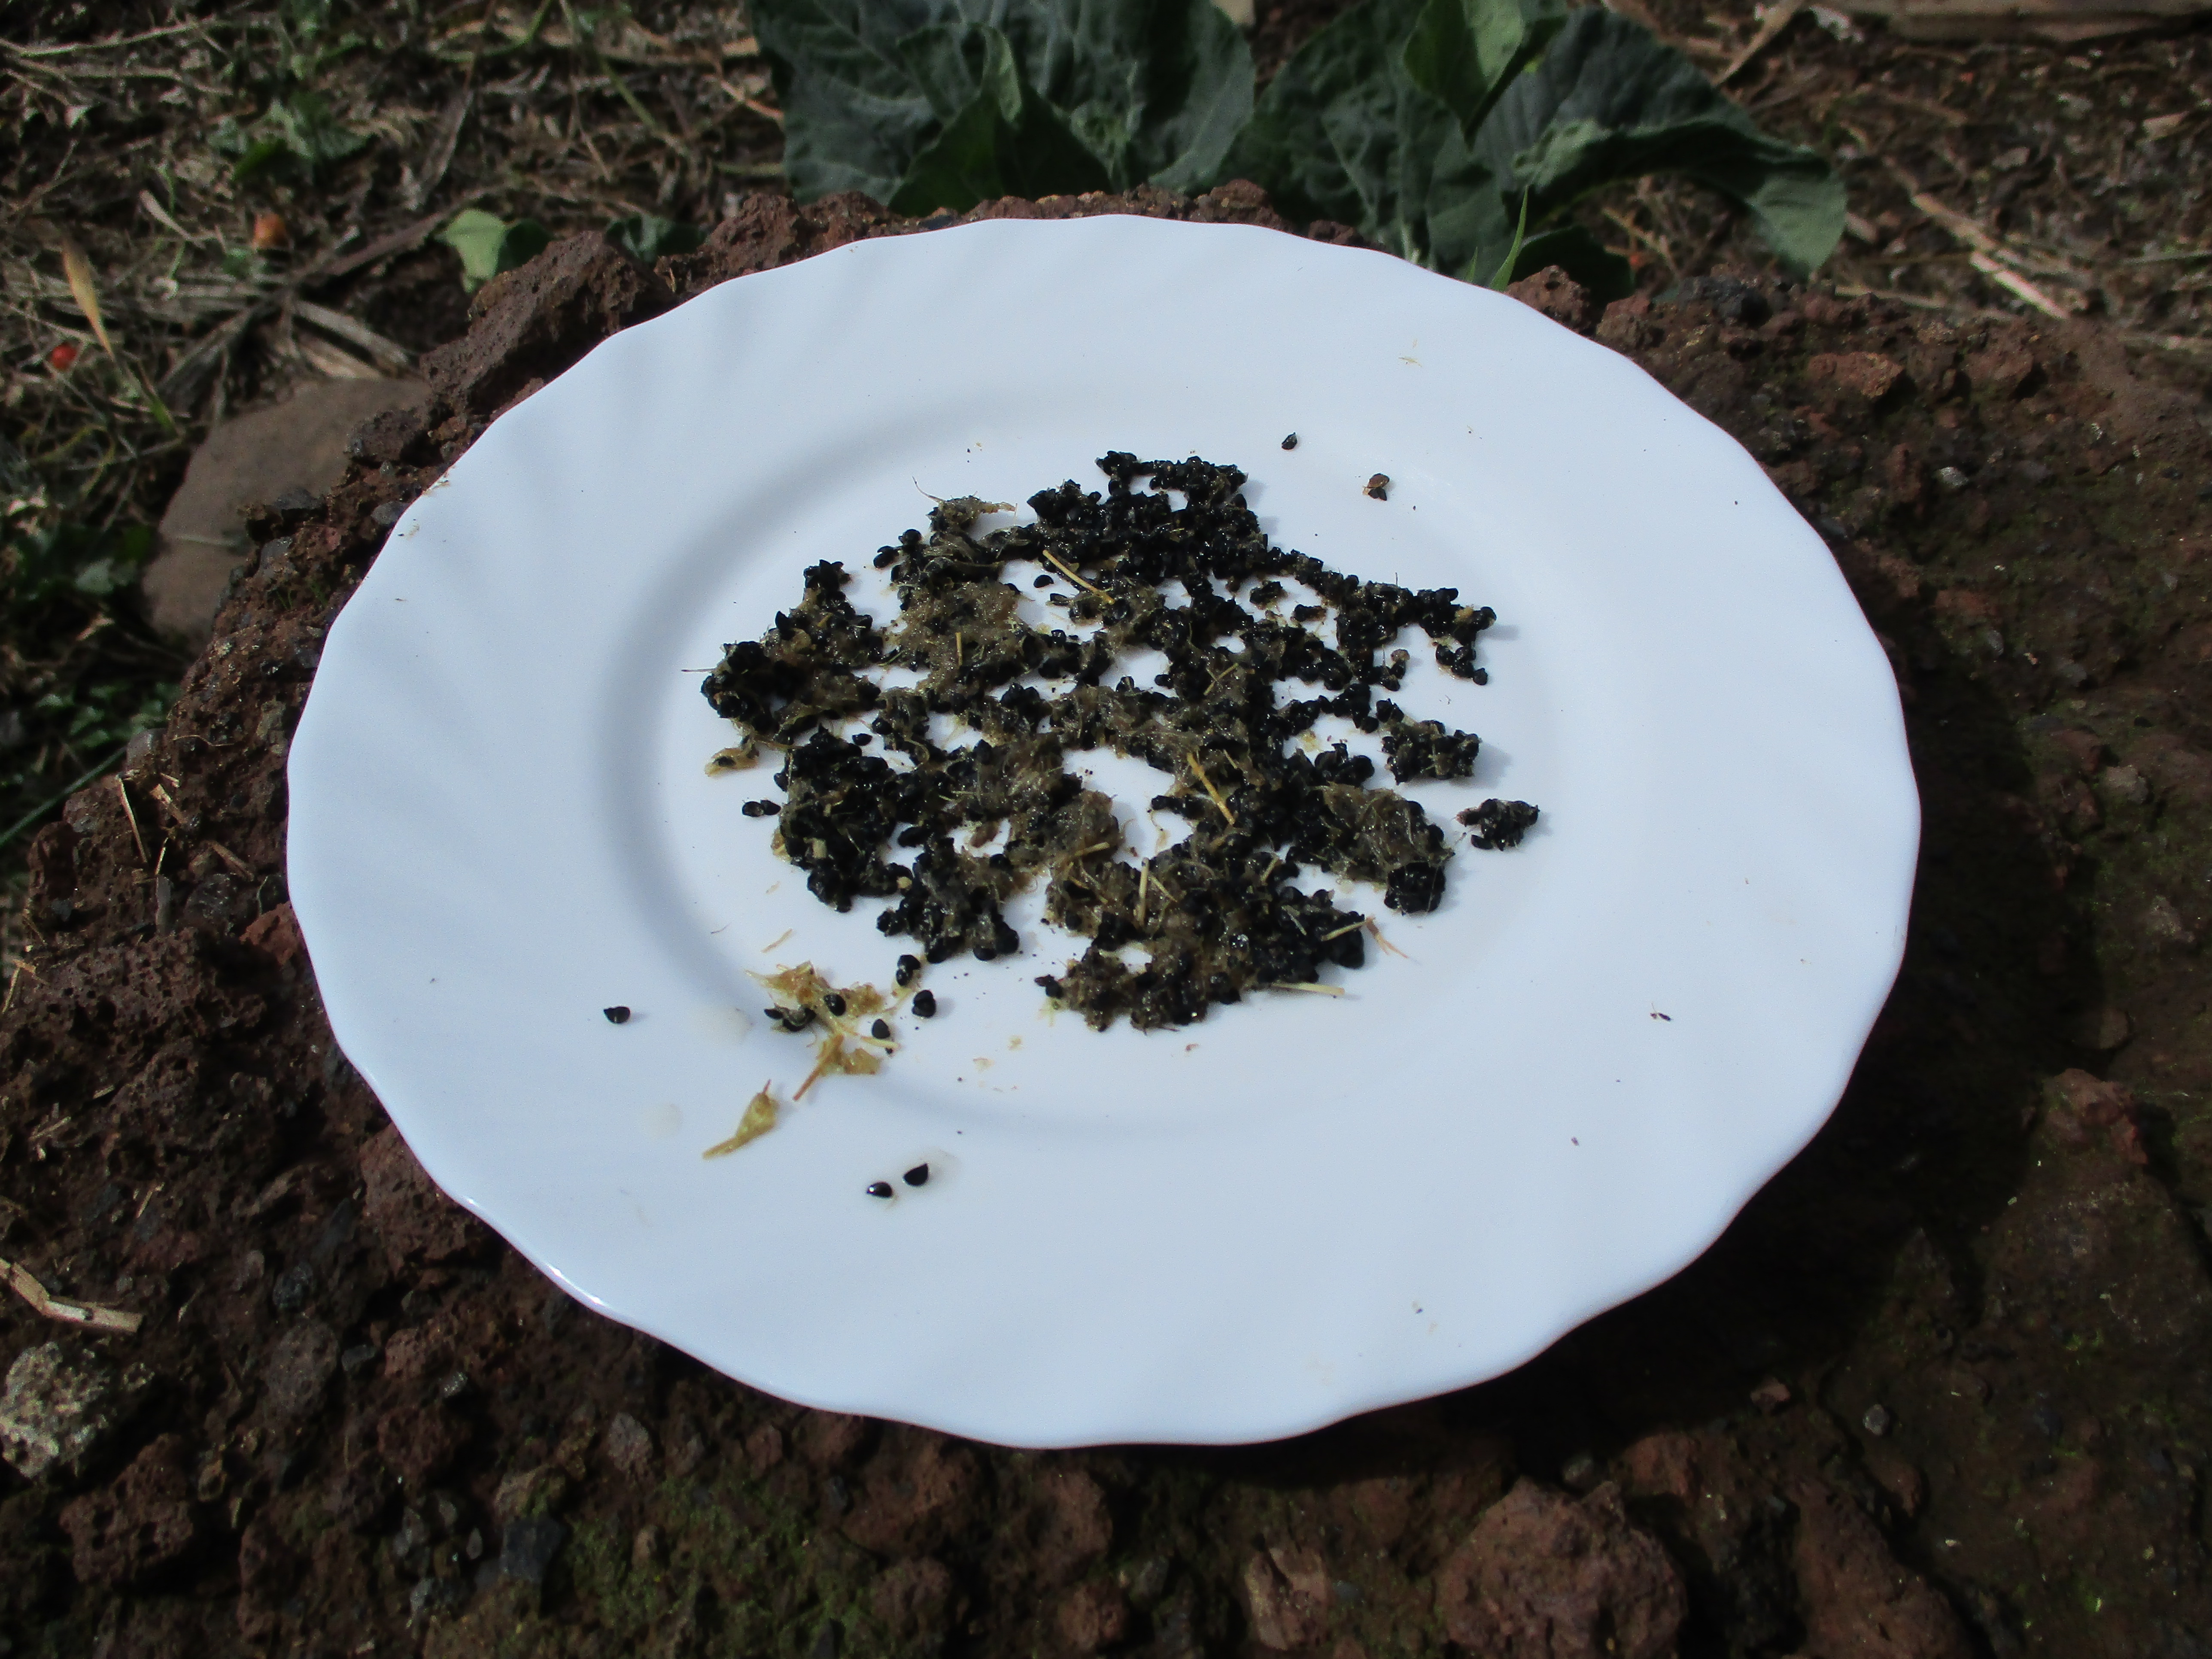
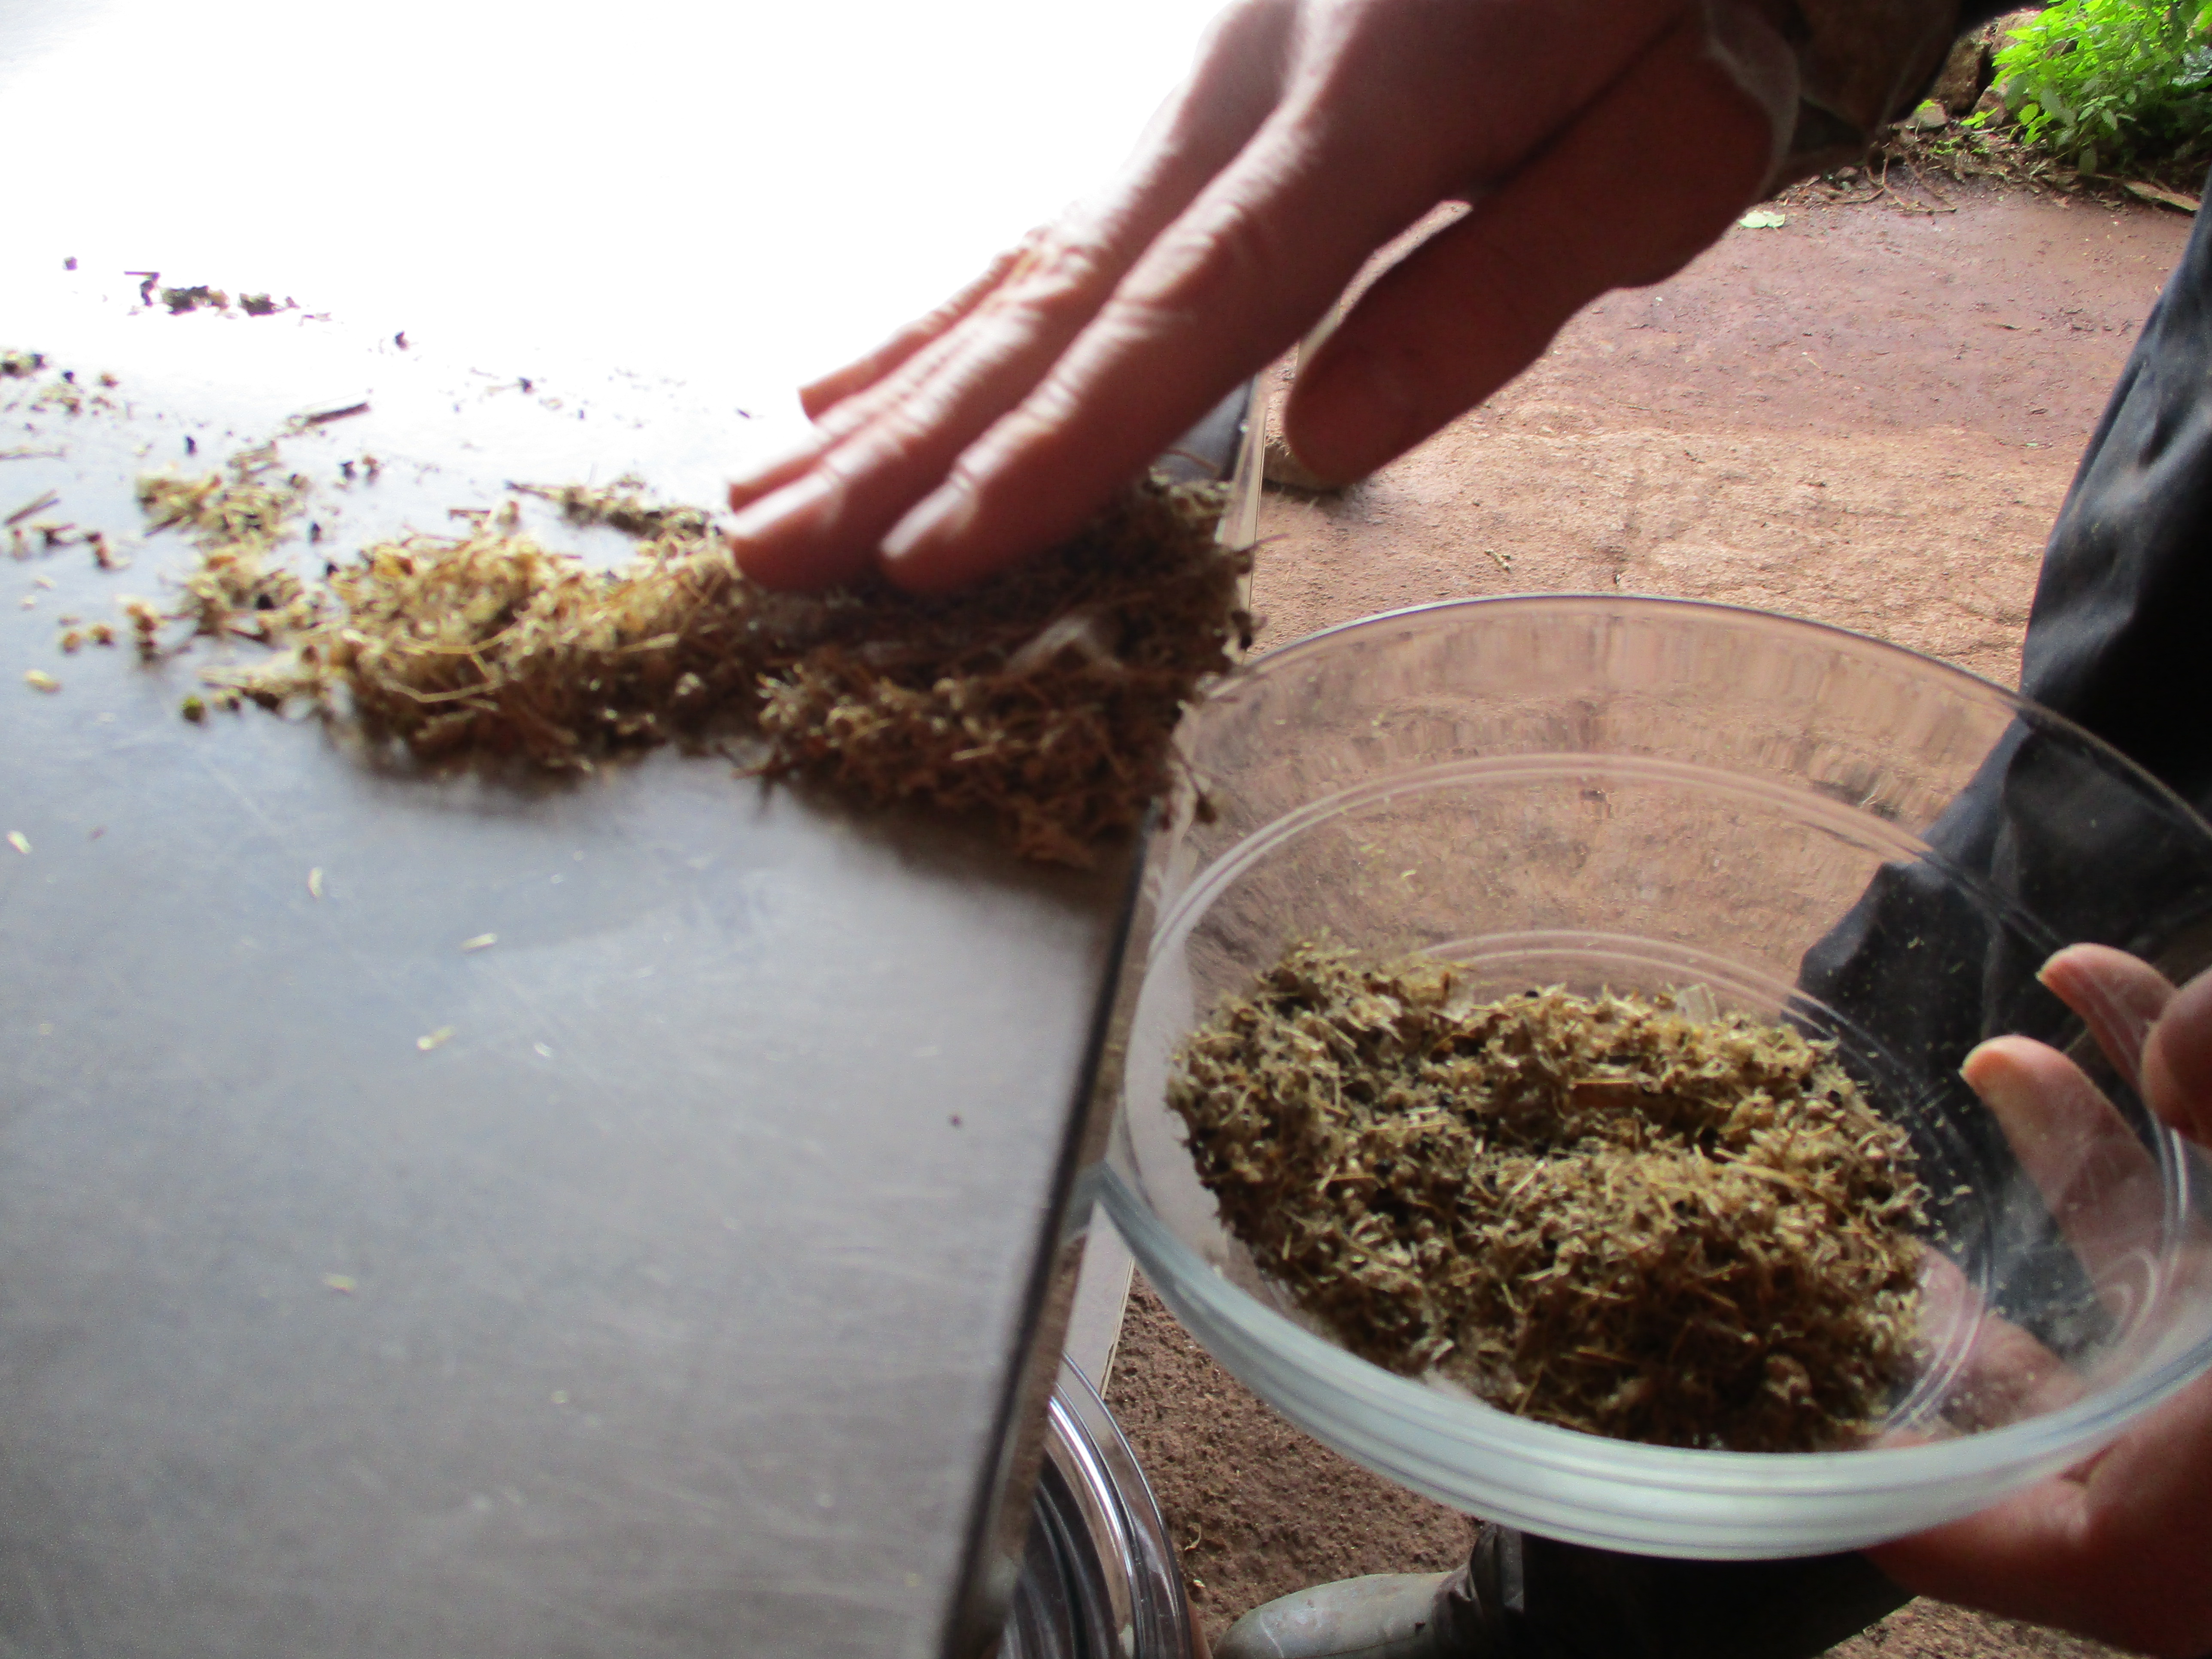
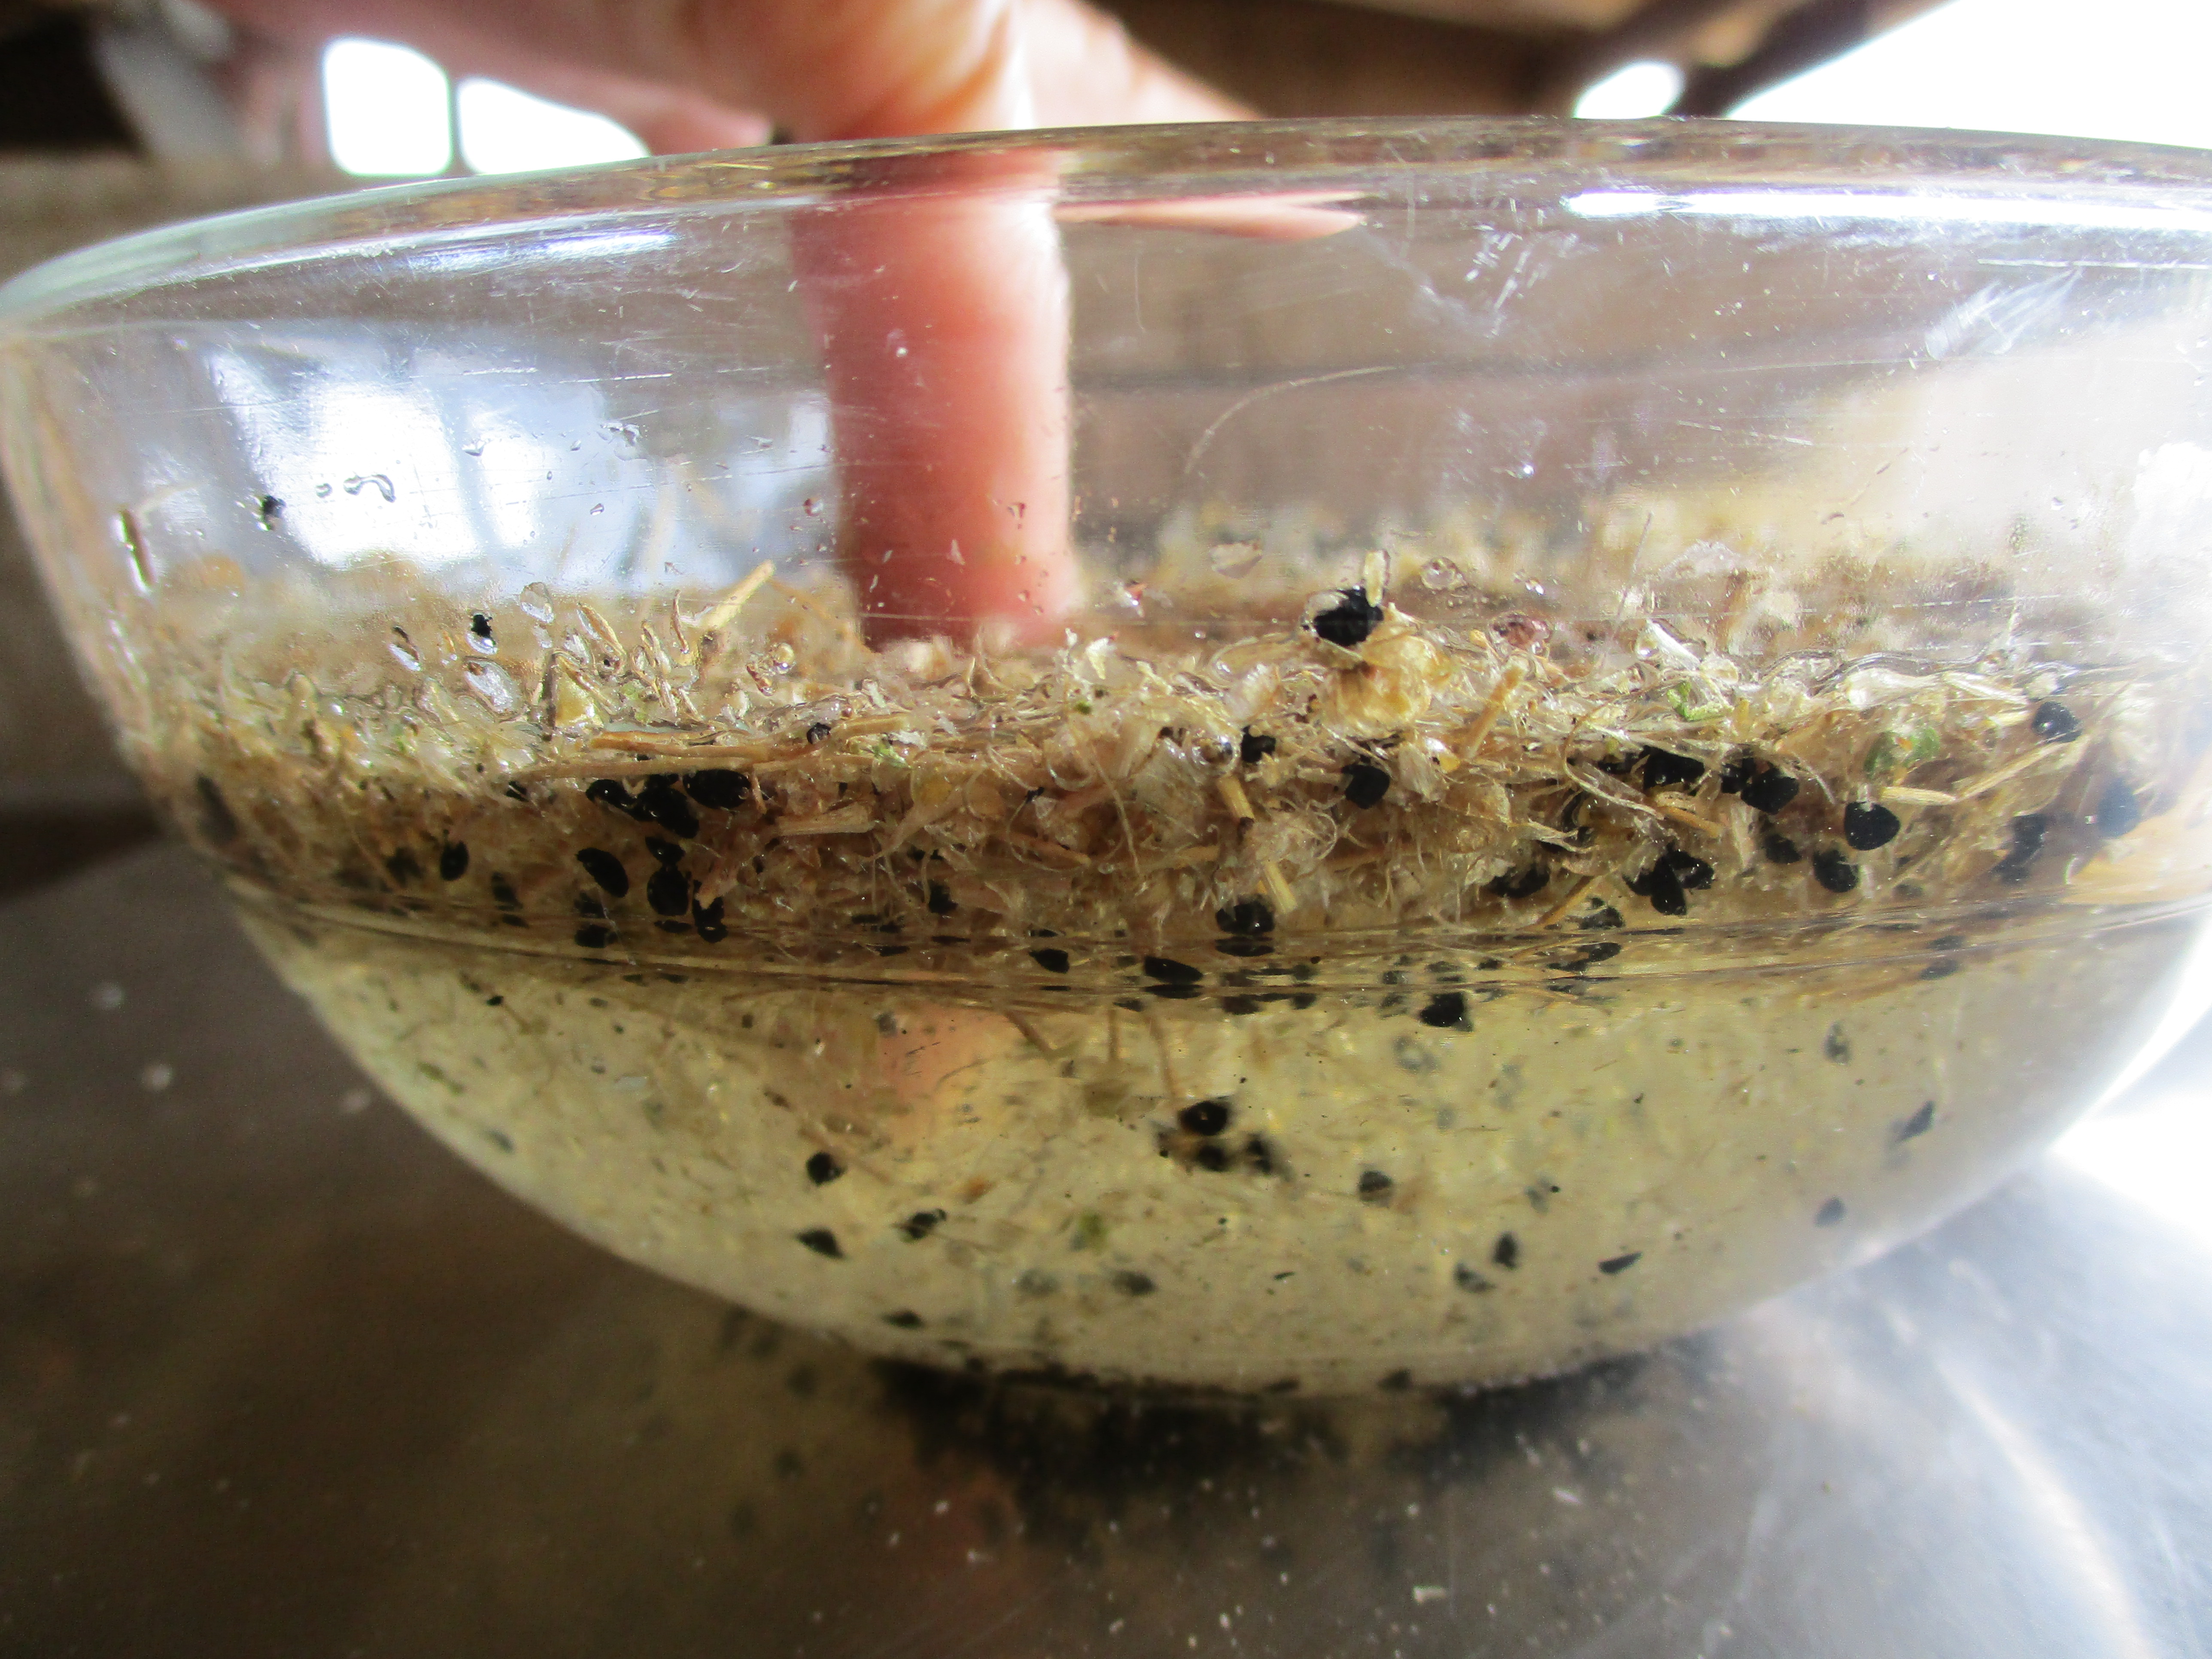
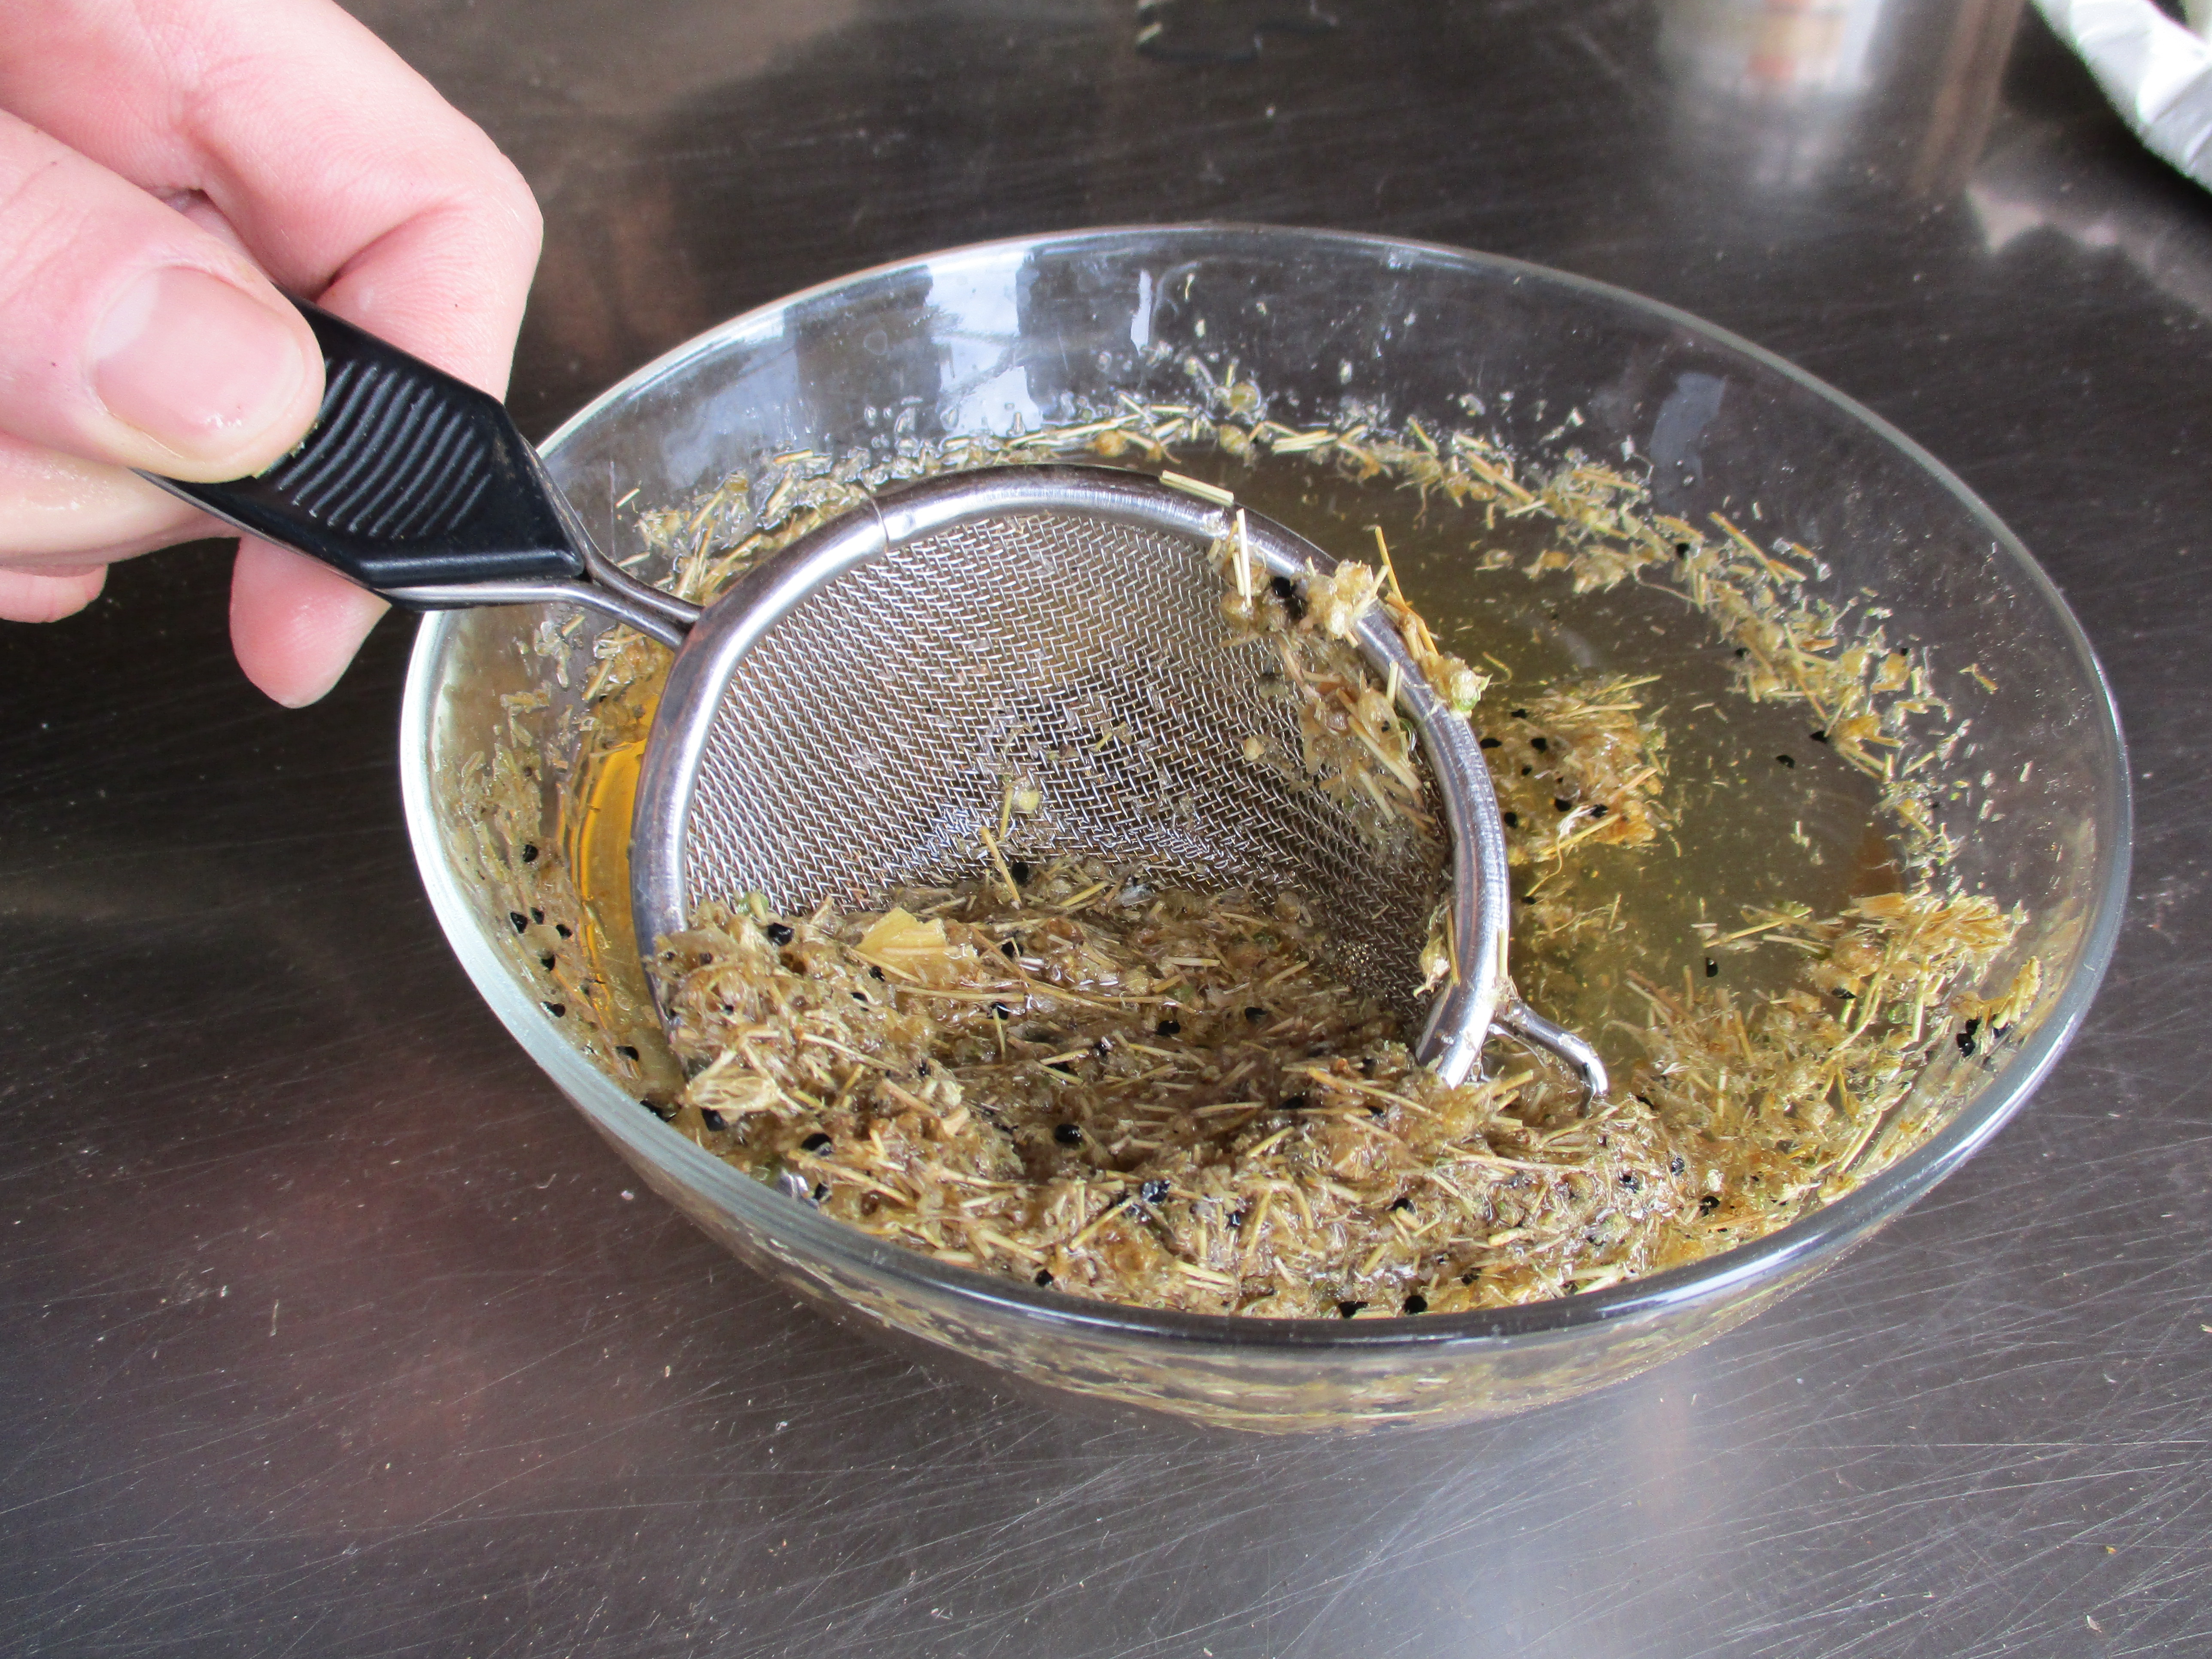

Figure VI.14.- Rubbing, selecting and drying onion seeds
The drying of the seeds must be done on very sunny days whilst watching out for the wind. We will never leave the seeds outside during the night since the dew would make them wet again. We will stir and dry the seeds during several days depending on the amount of sun. Once they are completely dry we will insert the seeds into jars and store them.
Good cultivation, selection, harvest and storage conditions guarantee an optimal germination of the seeds. The cleaning process is a great moment to detect their quality: ensuring that the seeds are filled. To examine this, we can press them slightly to make sure they aren’t empty. Observing the seeds also helps us because empty seeds look different than filled ones.
In places with strong winter conditions, we can carry out the whole seed process as a recreational activity with the students, inside the classrooms.
We can check the vitality of a seed by doing a germination test that could also be a playful and instructive activity for the students. The test consists of putting a few seeds inside a glass of water. We leave the seeds submerged for 24 hours, and then we drain and place them on a plate covered with another plate so that they are in complete darkness for a few days and they take less time to germinate.
We wet the seeds once a day so they stay humid. By doing so we ensure that they keep growing and we can check the germination rate (Figure VI.15). The time seeds take to germinate is different depending on the type of seeds we put on the plate. For example, 2 to 4 days after having put radish seeds on a plate we can see how some of them already have sprouted.
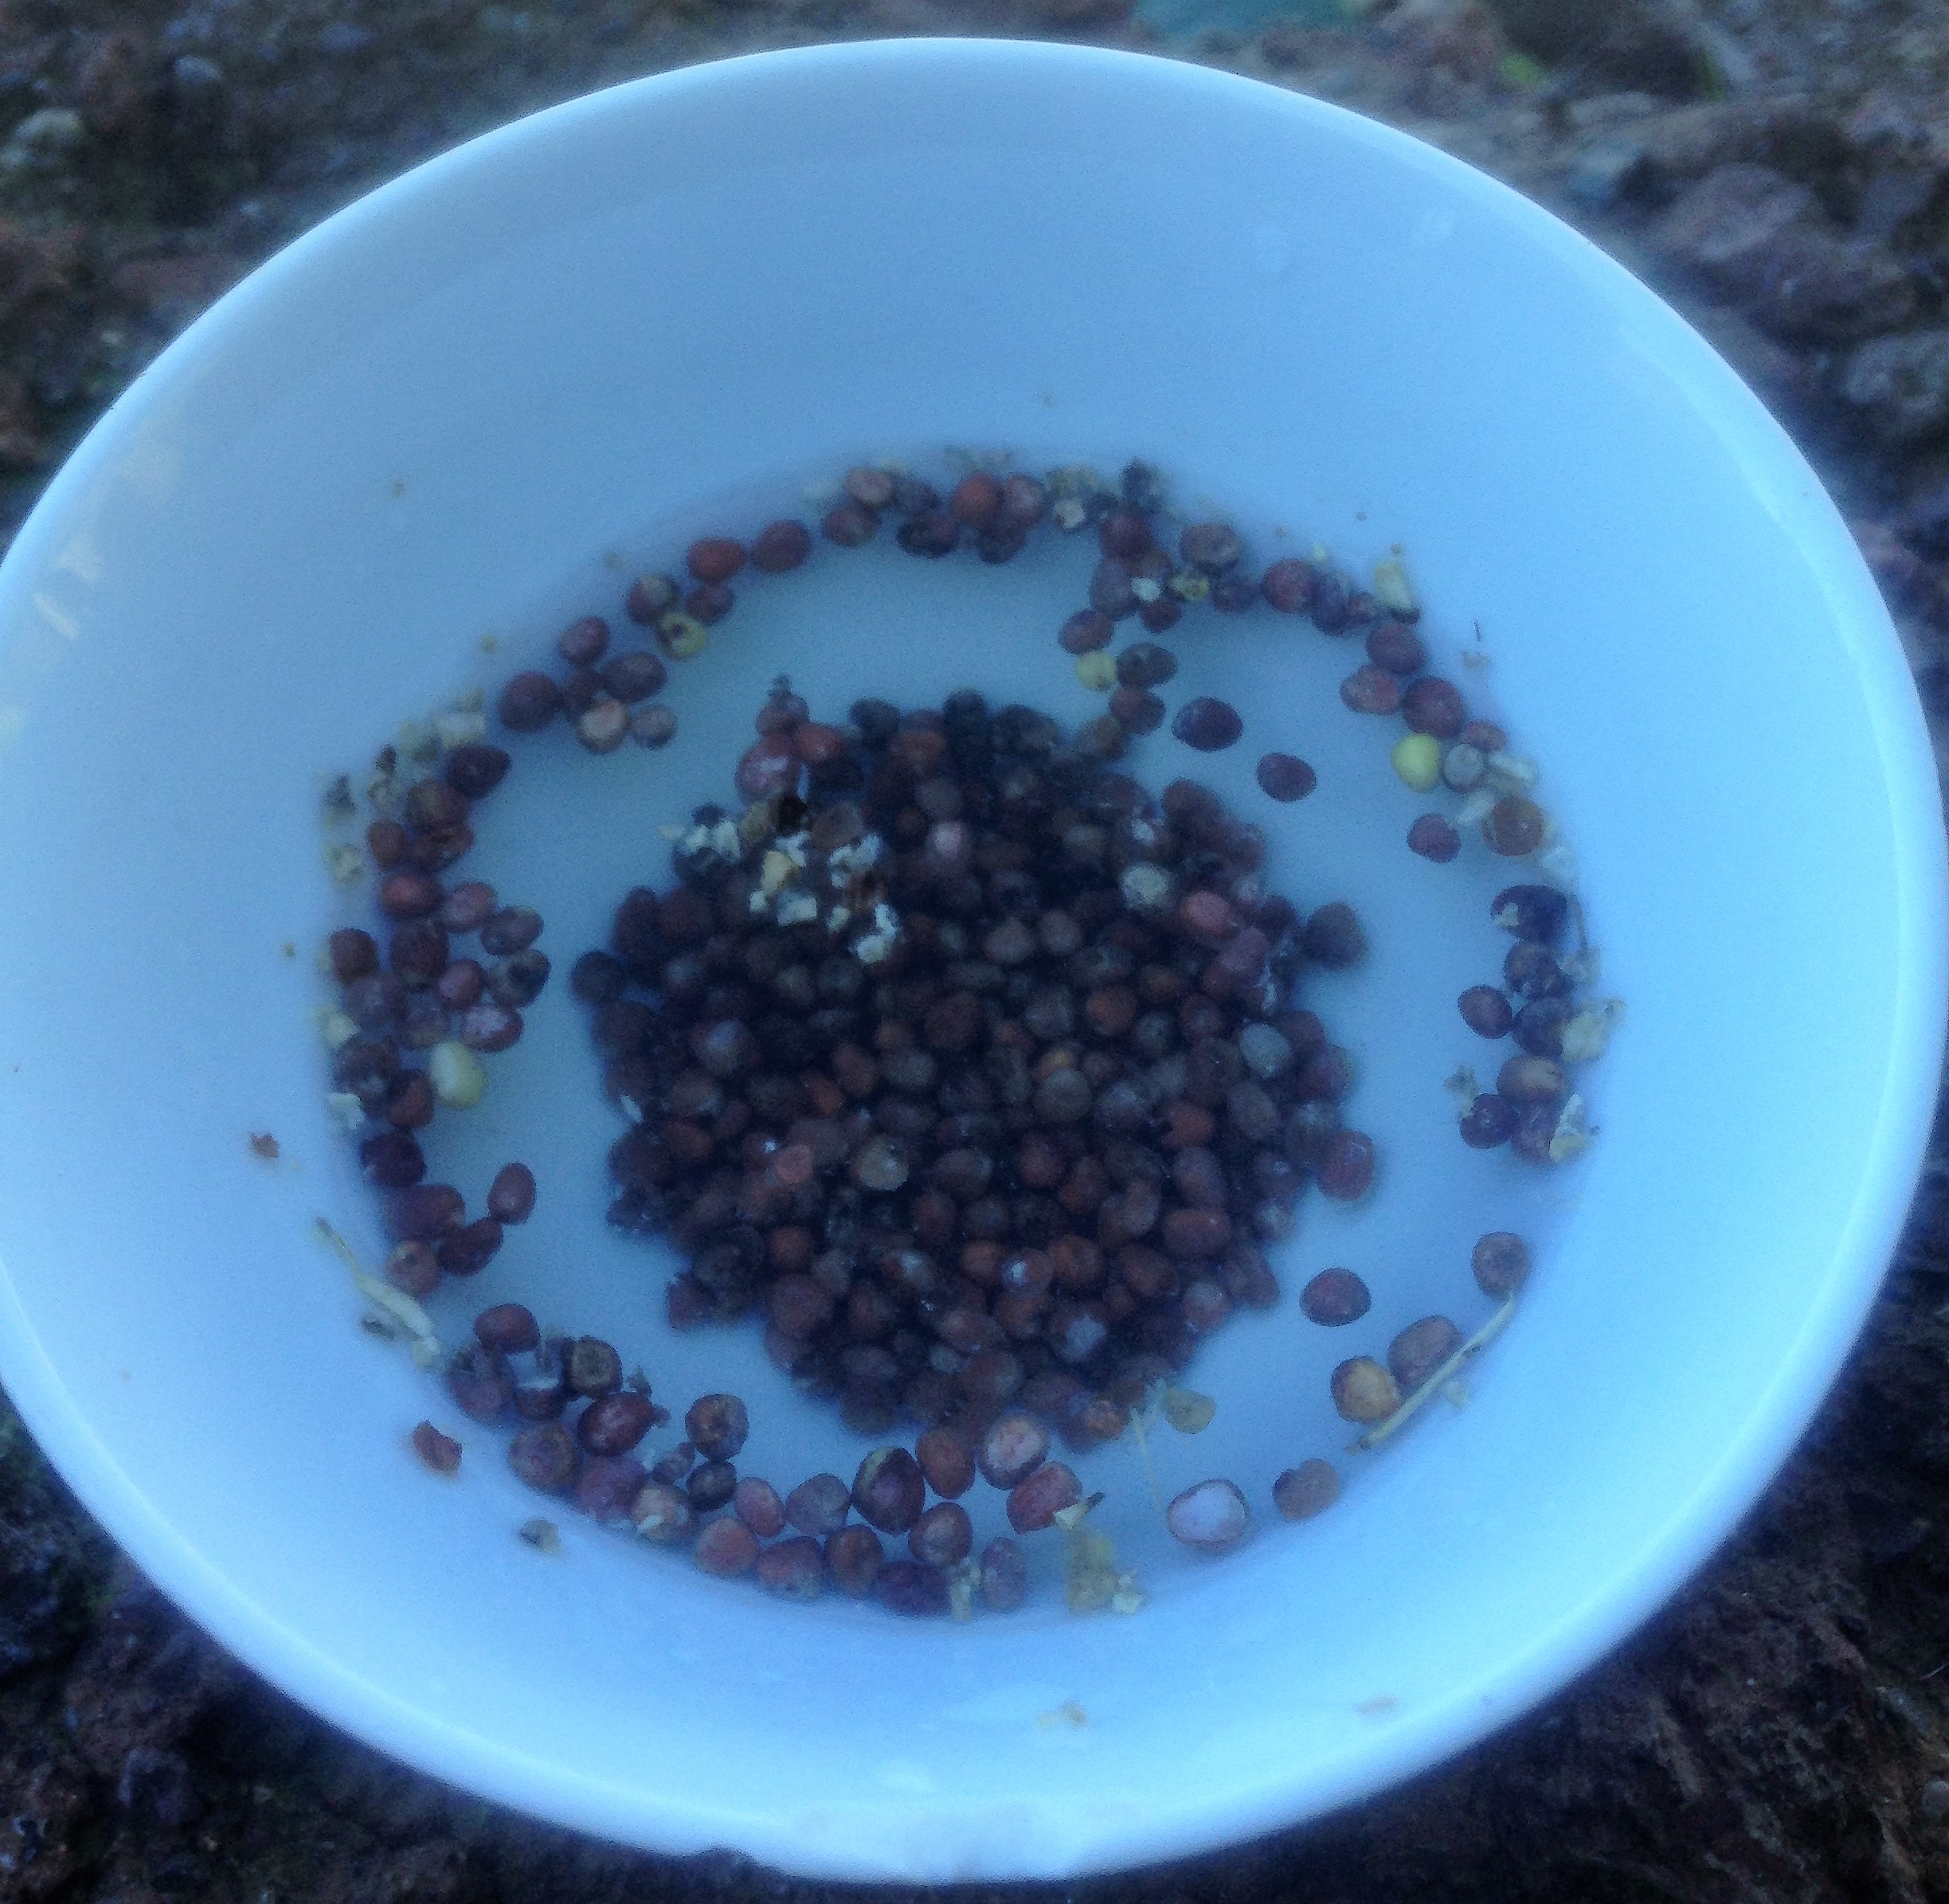
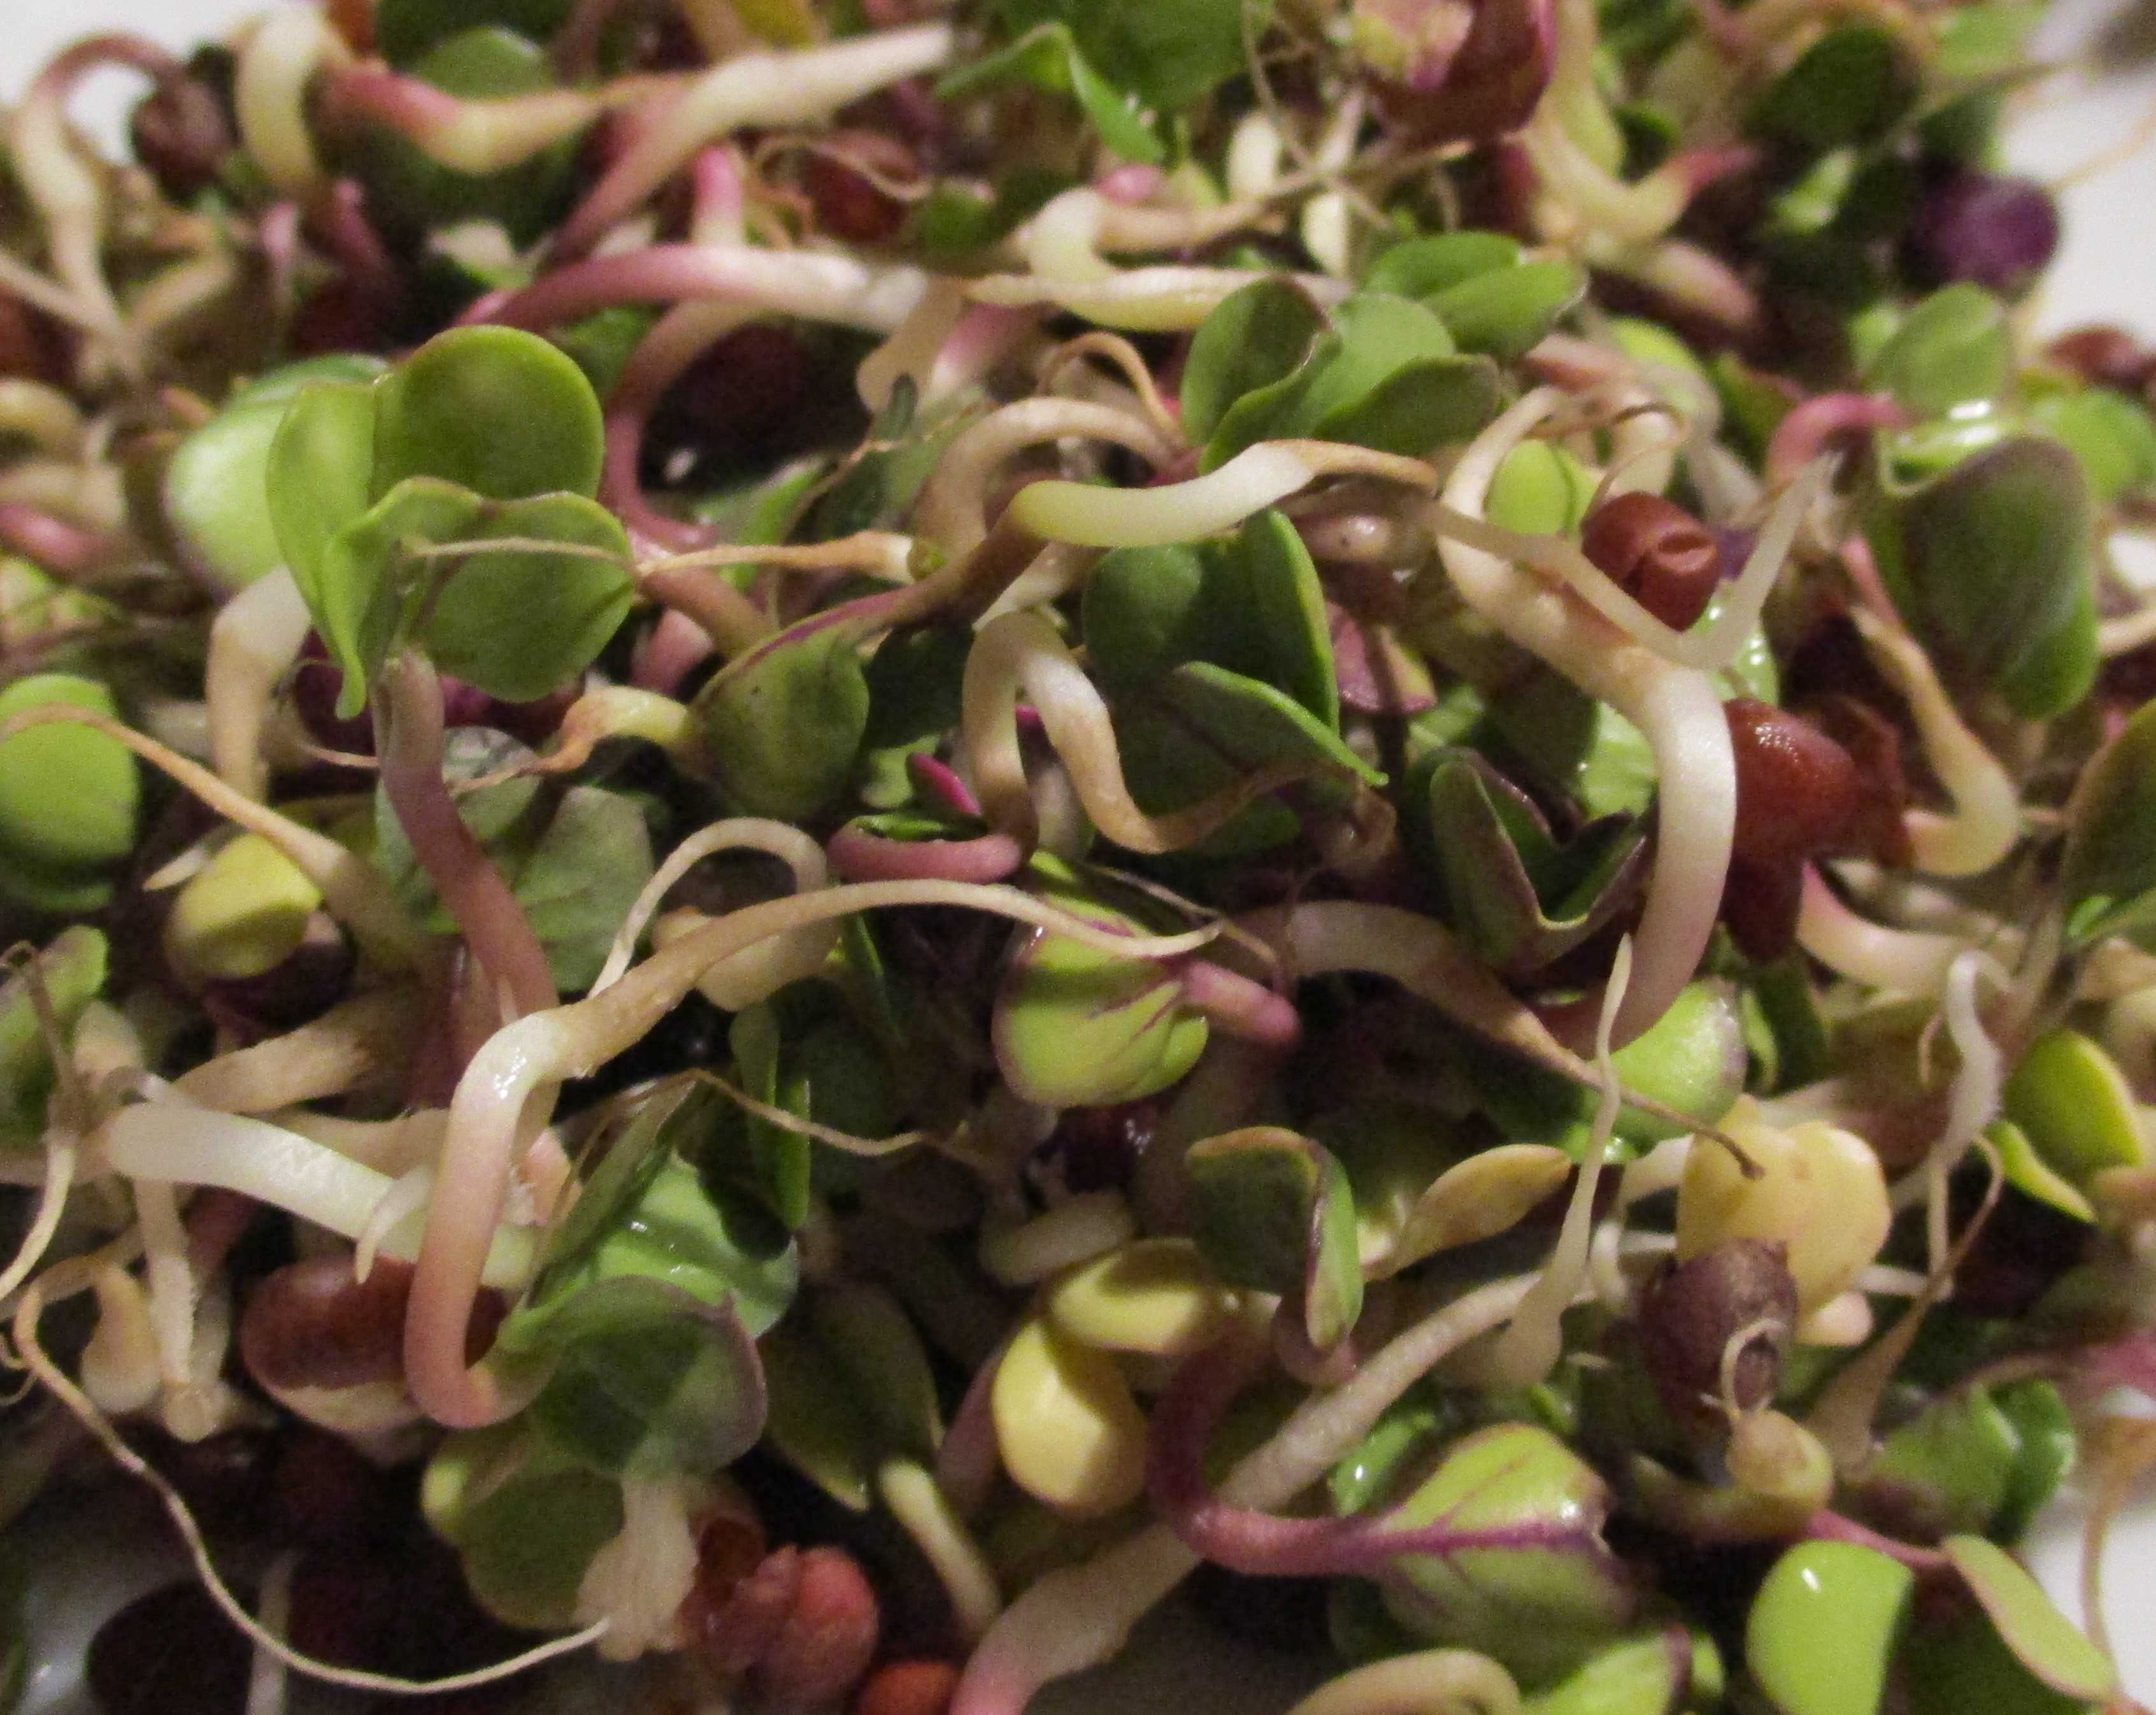
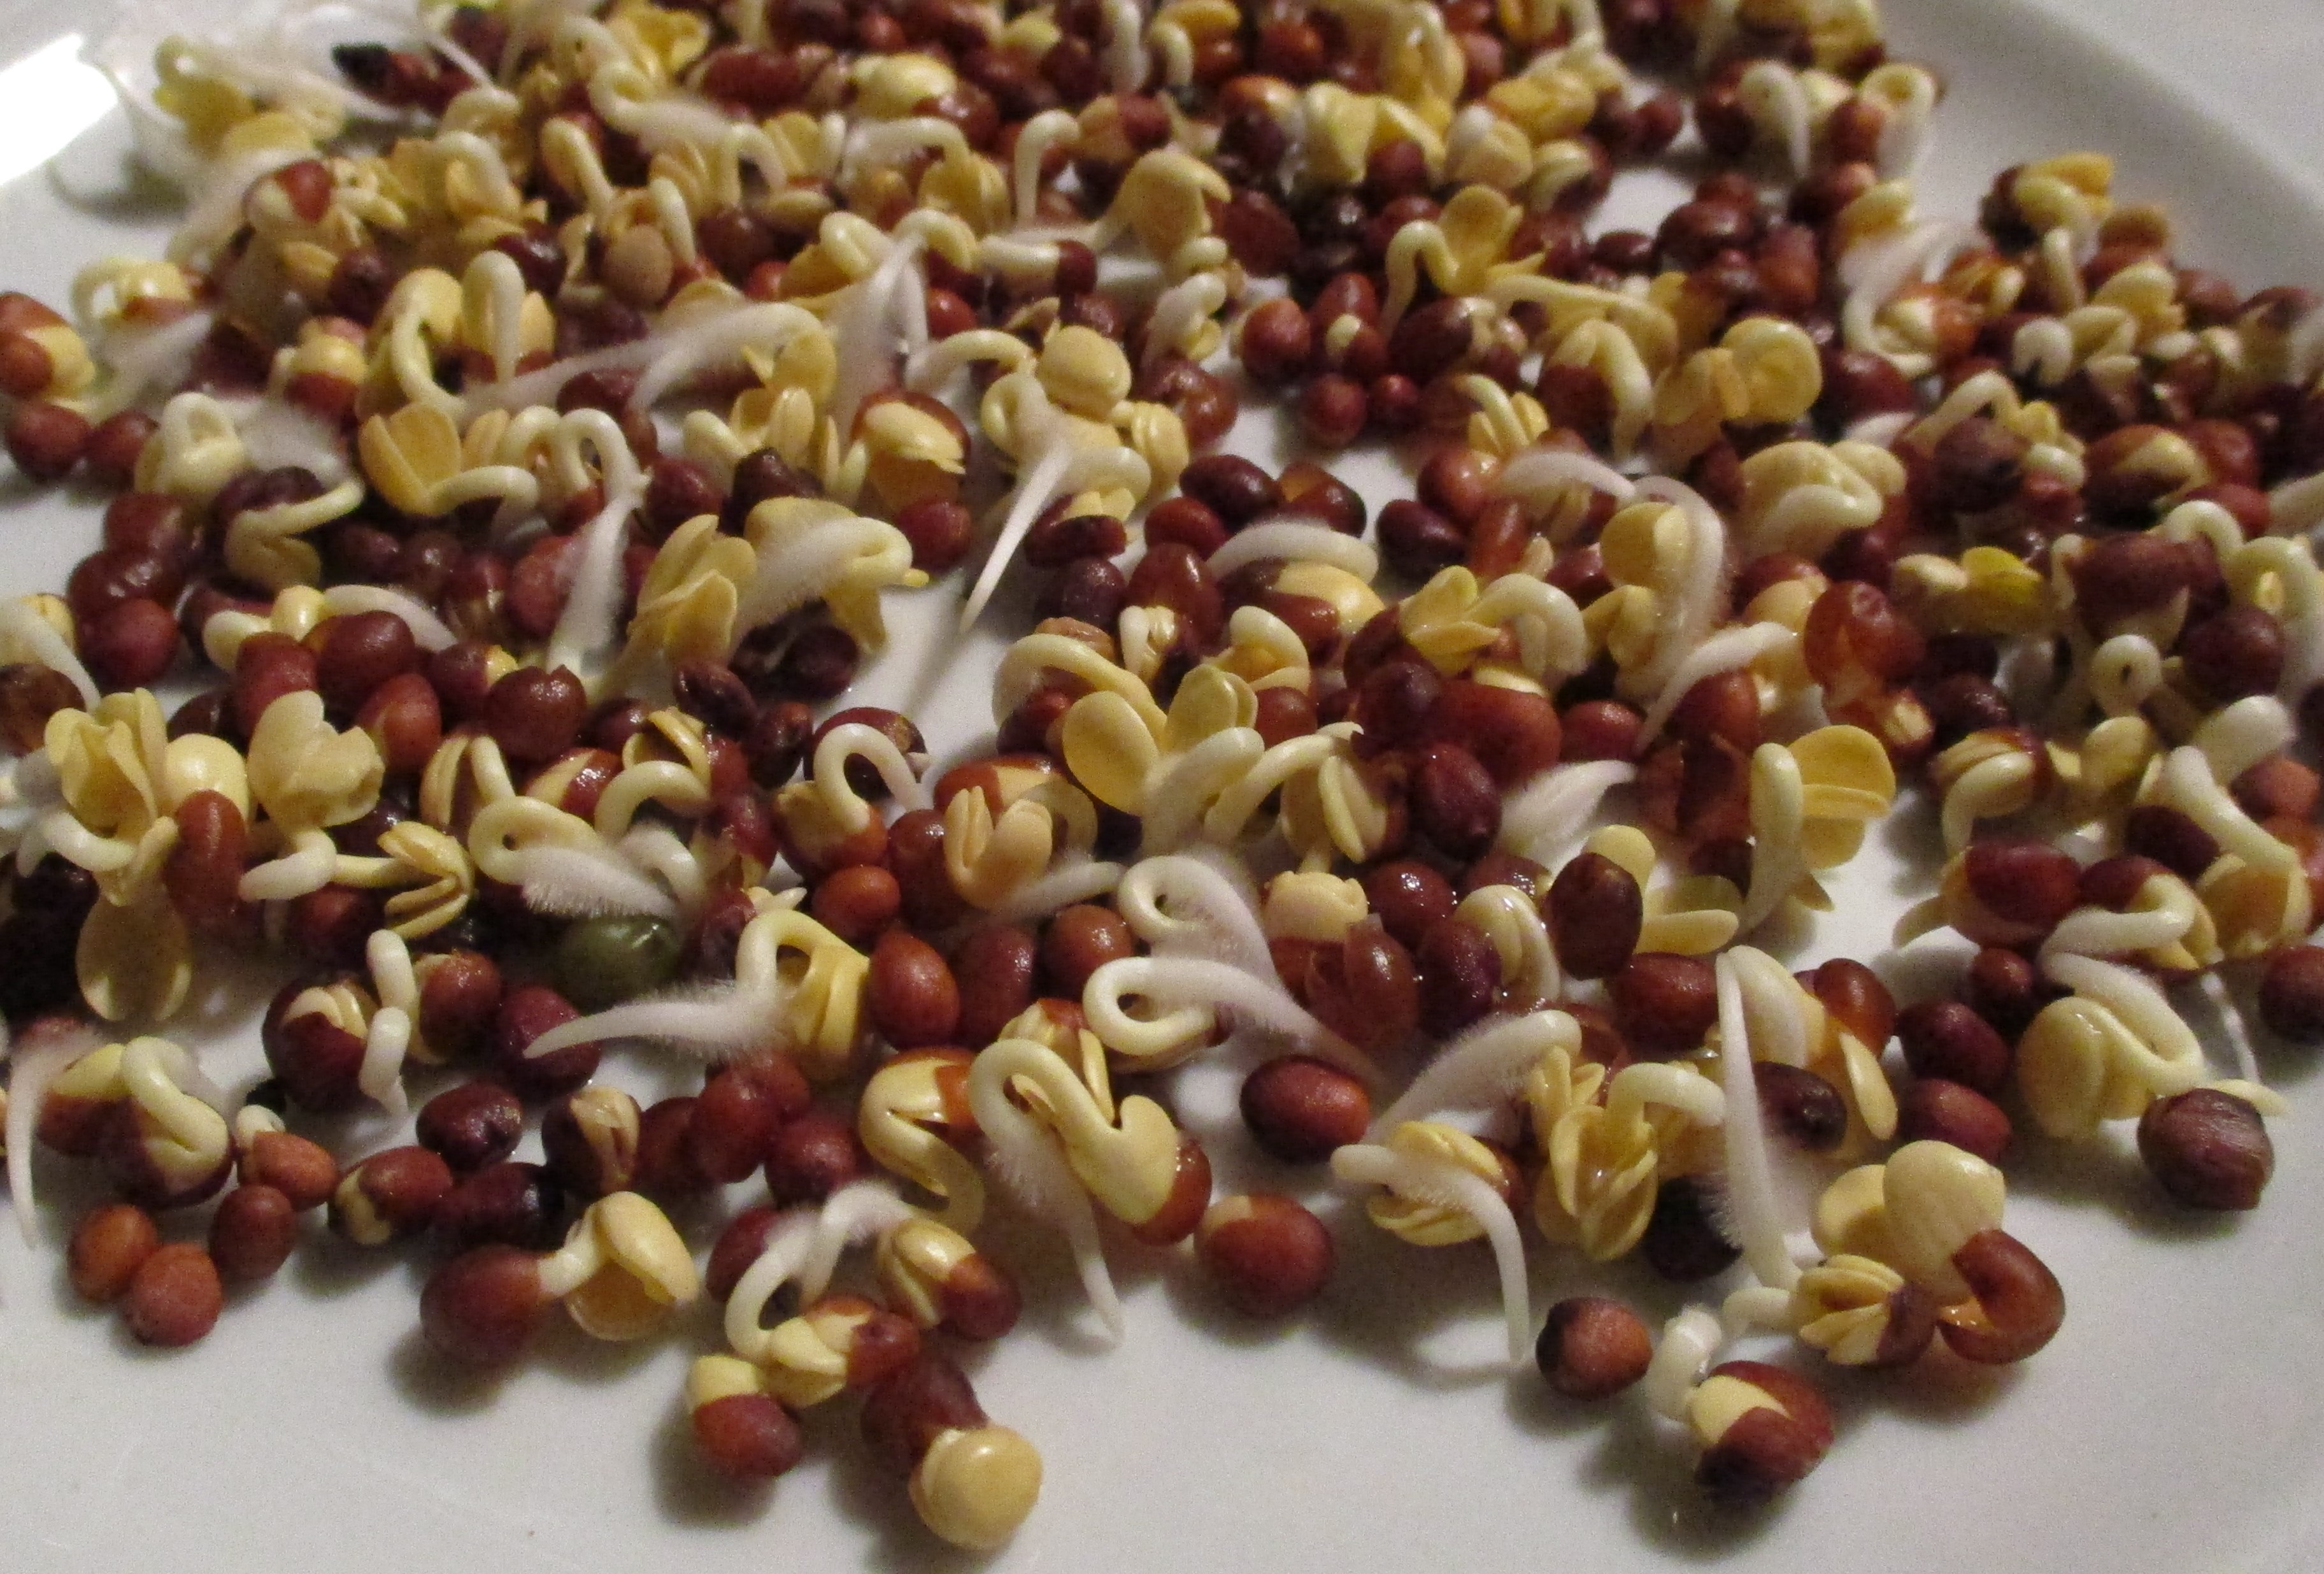
Figure VI.15.- Different germination stages of black radish seeds
The germination process is a unique opportunity for the participants of the project to reason and learn since it teaches them about photosynthesis: nature´s quintessential productive process.
We can teach about the effect that light has on plants by following the germination process: if we keep the sprouted seeds in darkness the stem and leaves will stay white, but if we let the light reach the seeds, without being directly exposed to the sunlight, we will notice how the stem and leaves turn green due to the process of photosynthesis (Figure VI.16).
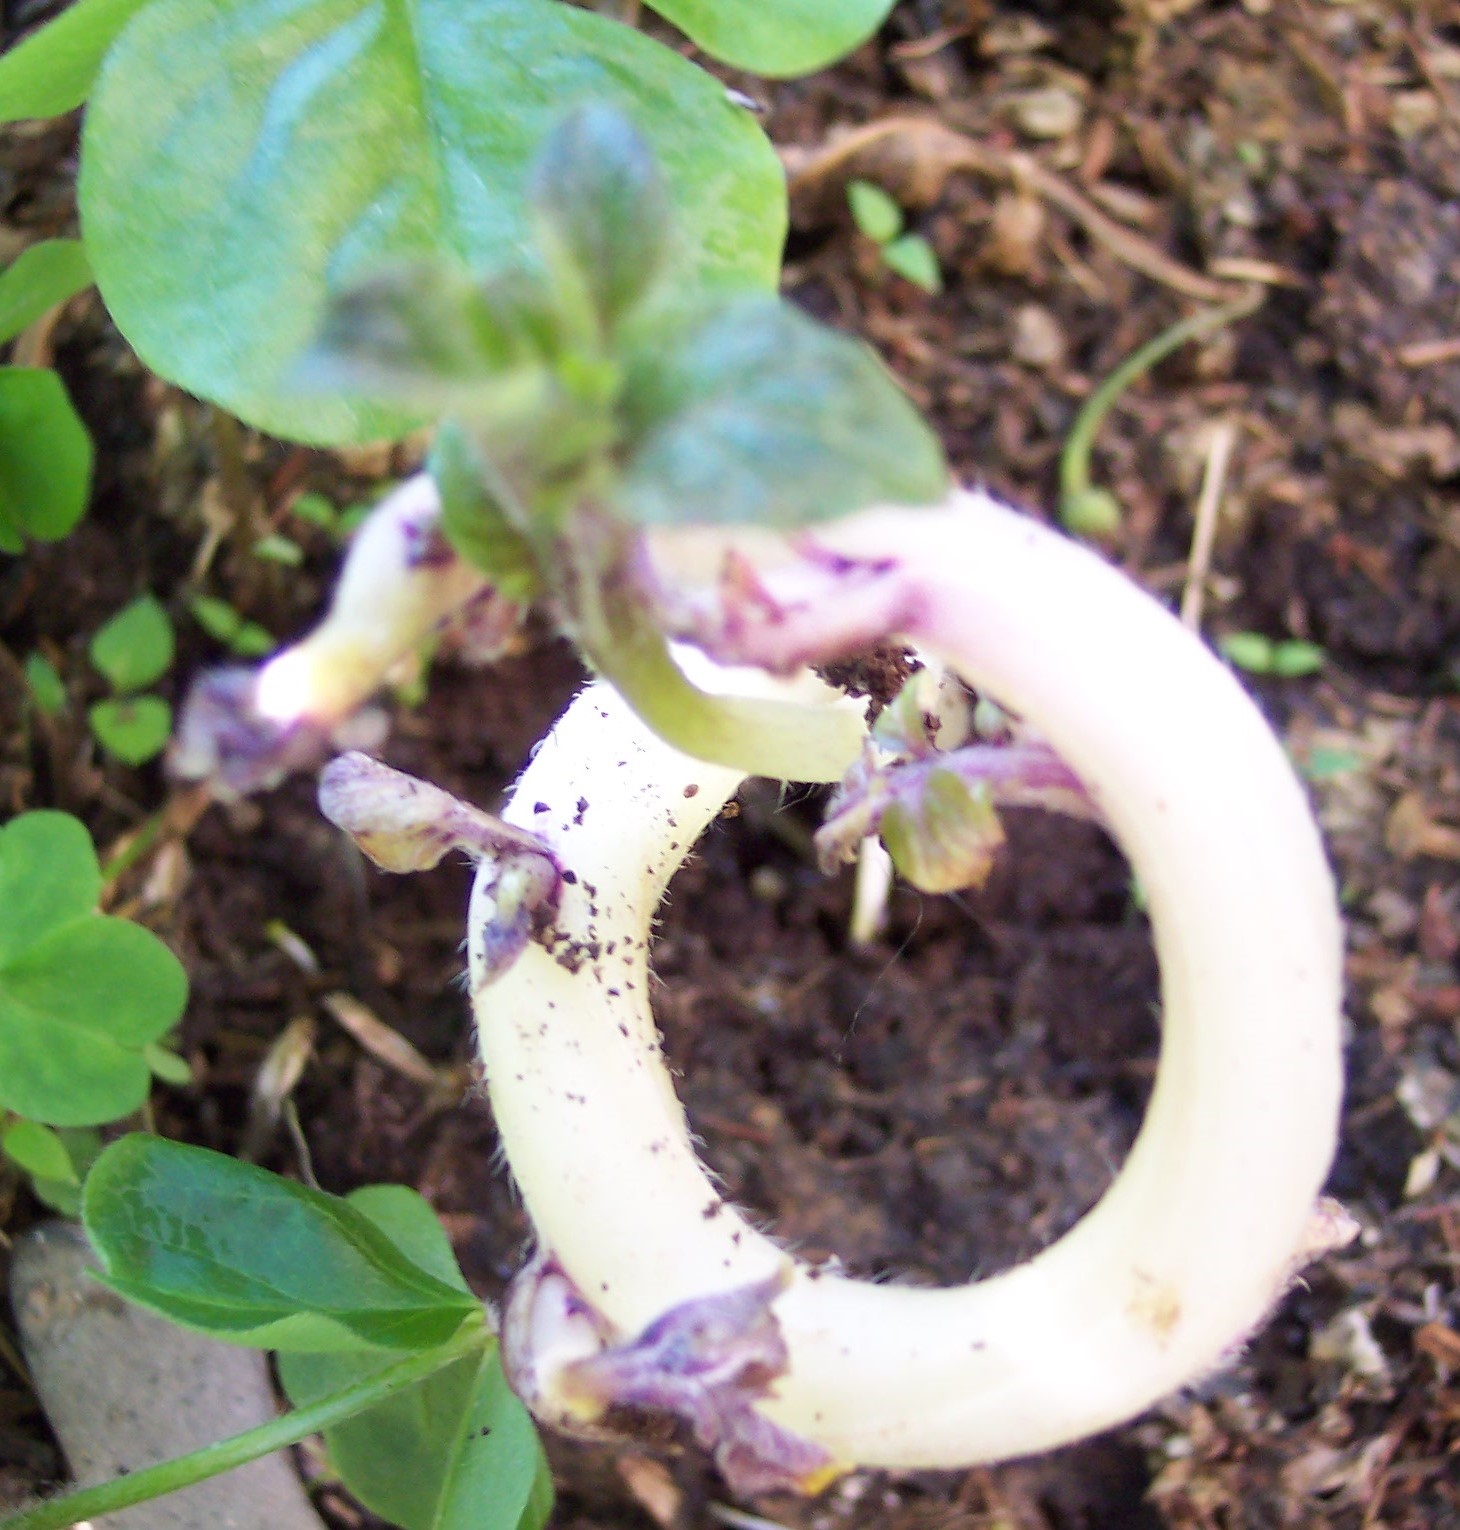
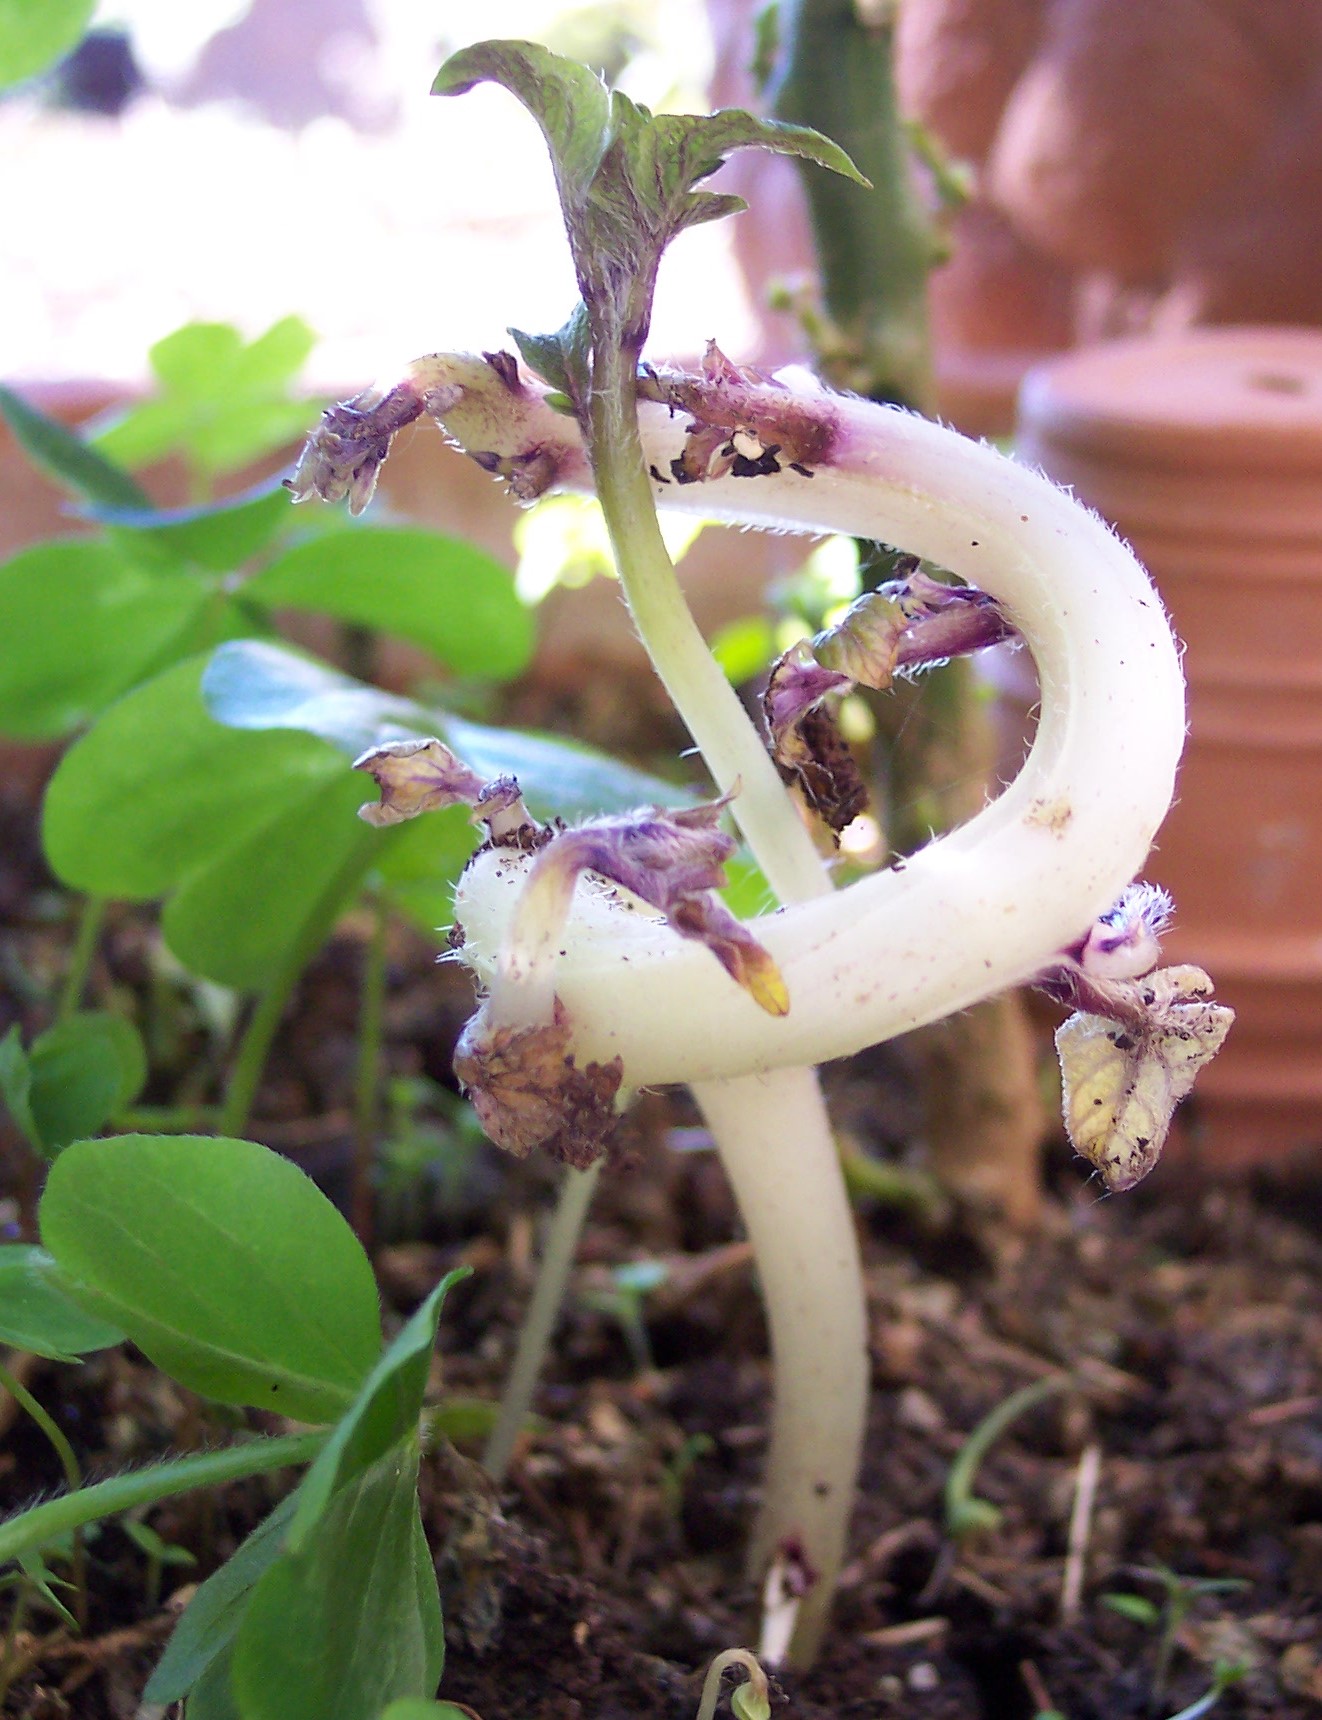
Figure VI.16.- Images of the effect that lack of photosynthesis has on a potato after sprouting in darkness (an upside down pot)
VI.3 Sowing in our greenhouse
We recommend having some type of greenhouse in the property in order to sow a variety of seeds that ensures the replenishment of vegetables. This allows us to manage the succession of the cultivations that will later be transferred to the soil.
Sowing in a greenhouse requires a high quality substrate so that the seedlings are nourished enough in order to grow until being transplanted. In the previous didactic unit we explained how and where to obtain substrate for our seed trays: from the compost of the paths of life.
We need to sieve the substrate before using it on the seed trays. Two people will take part in this activity that requires a sieve, a shovel and two wheelbarrows, one filled with coarse substrate and an empty one for the smooth and spongy substrate.
We place the sieve on top of the empty wheelbarrow. We scoop up some substrate with the shovel and we pour it onto the sieve. Then, the two persons sieve the substrate over the empty wheelbarrow so that it is filled with the smooth and spongy substrate (Figure VI.17).
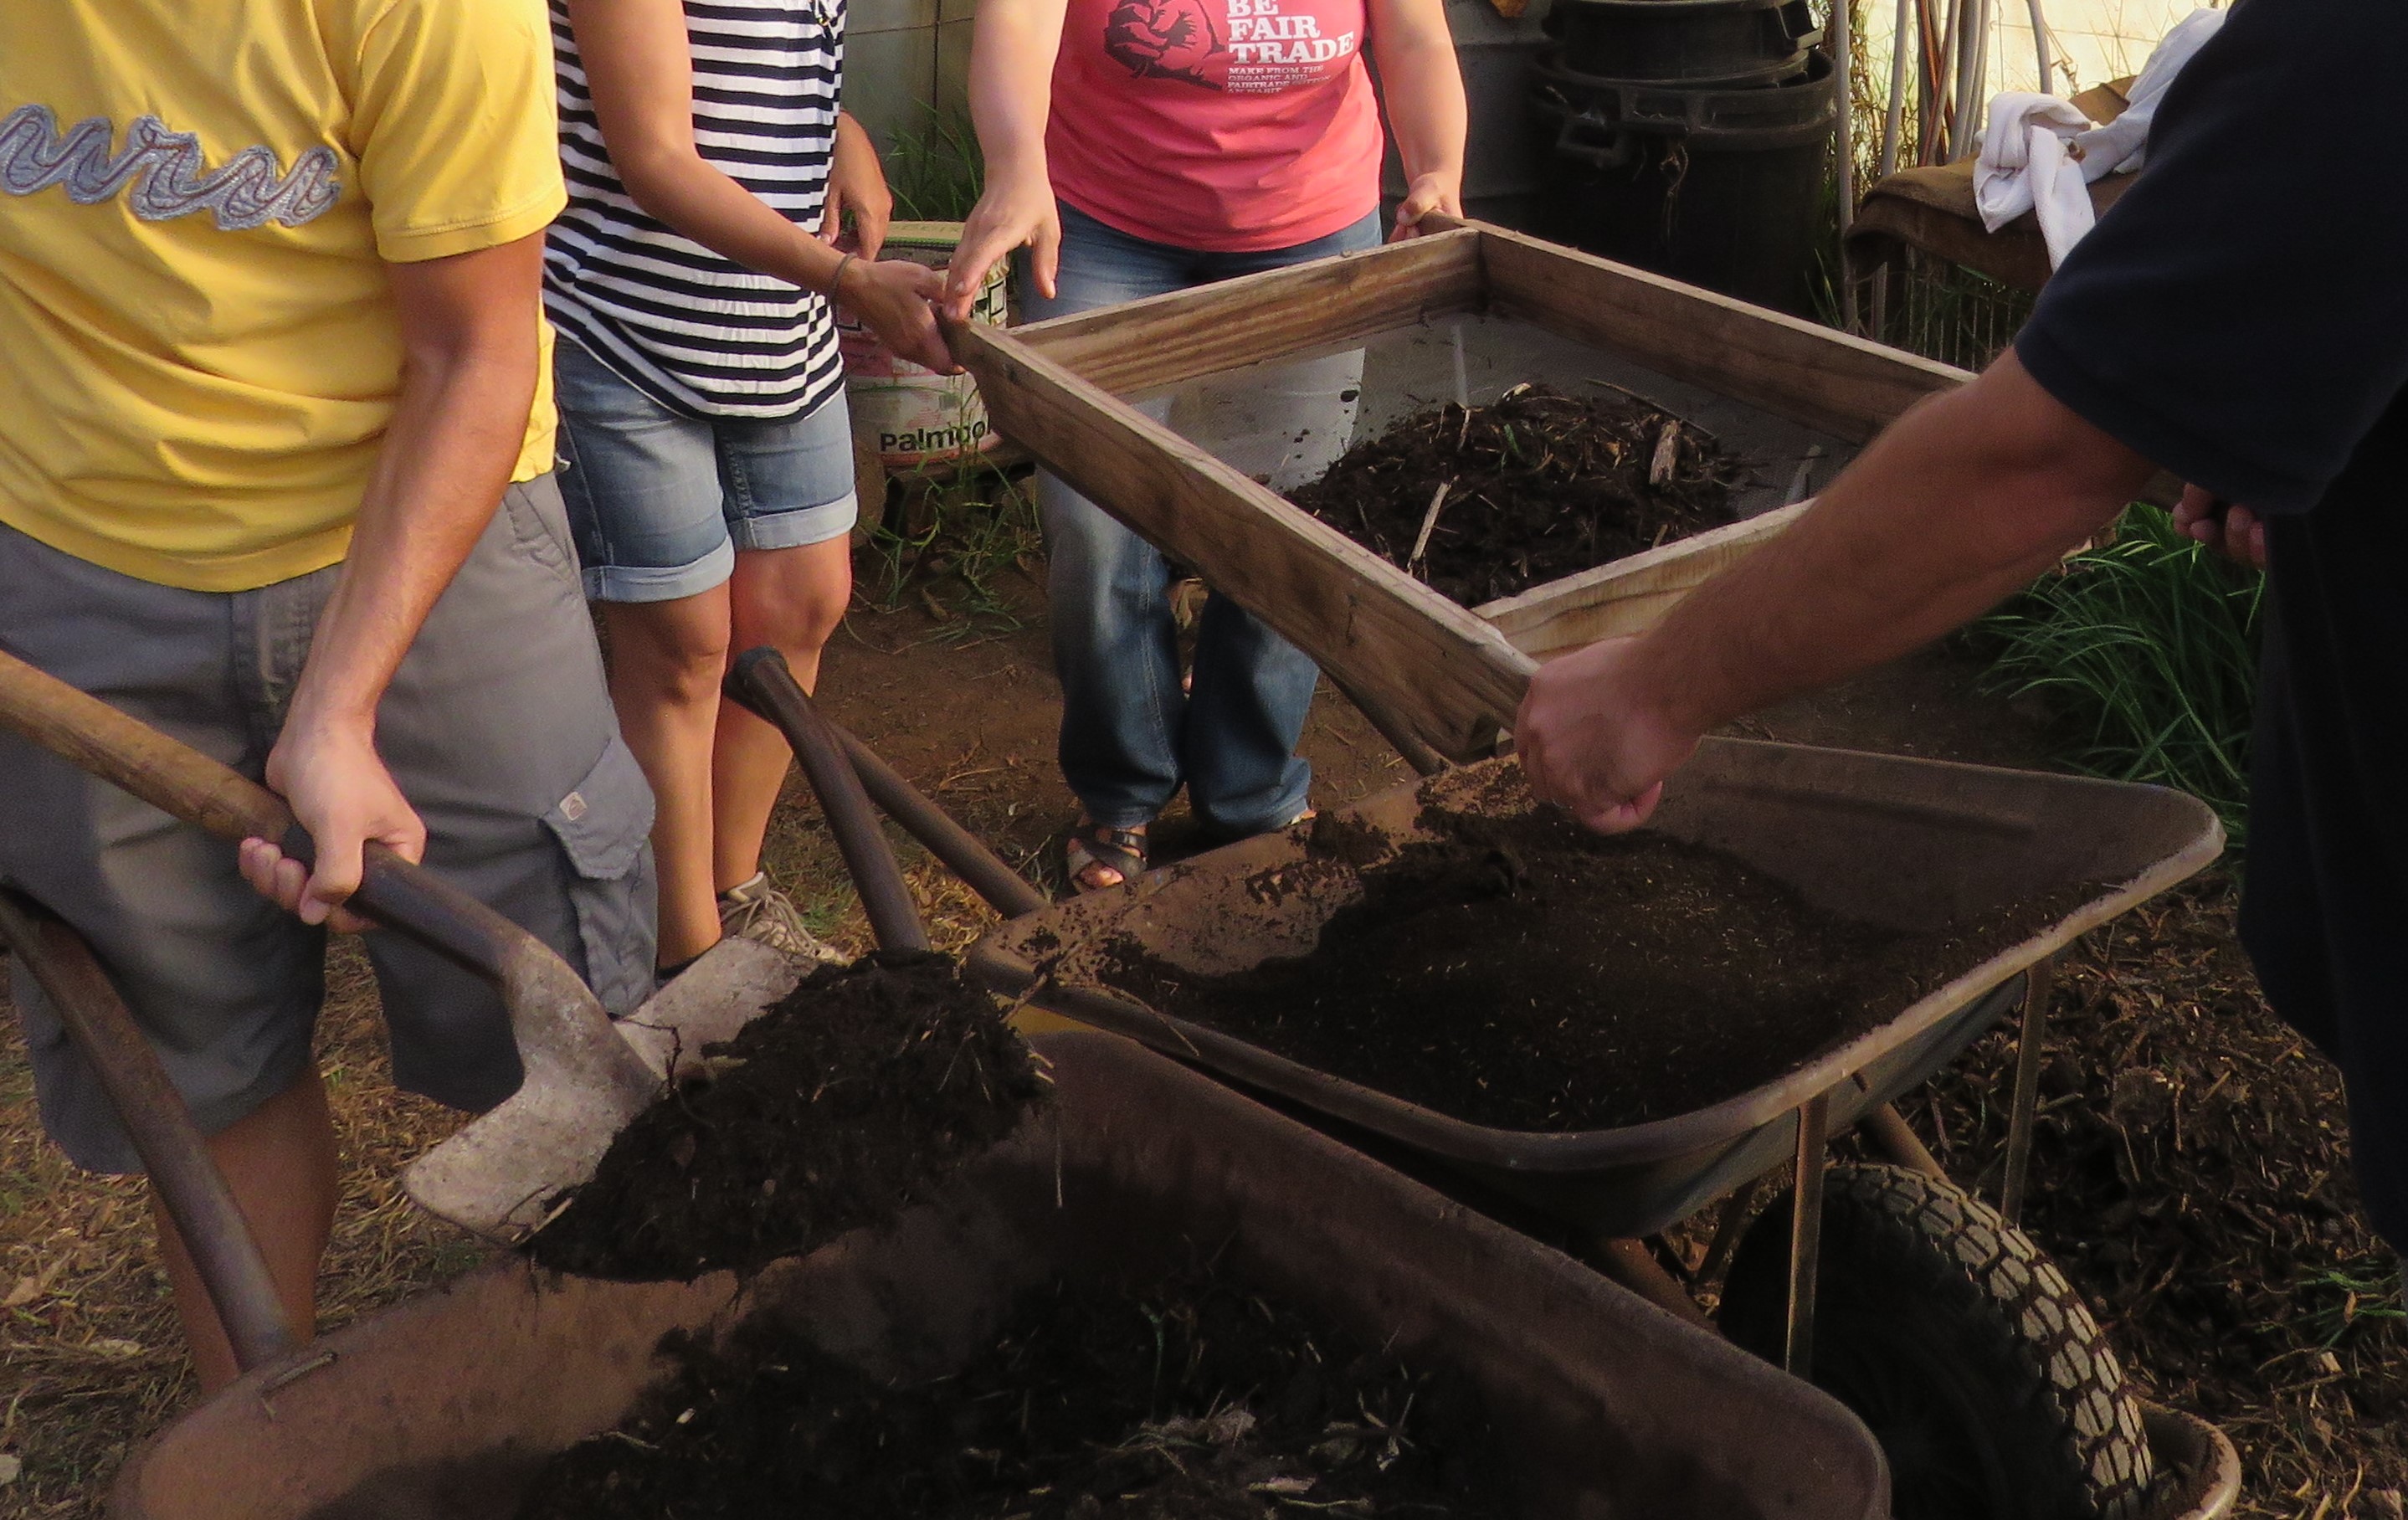
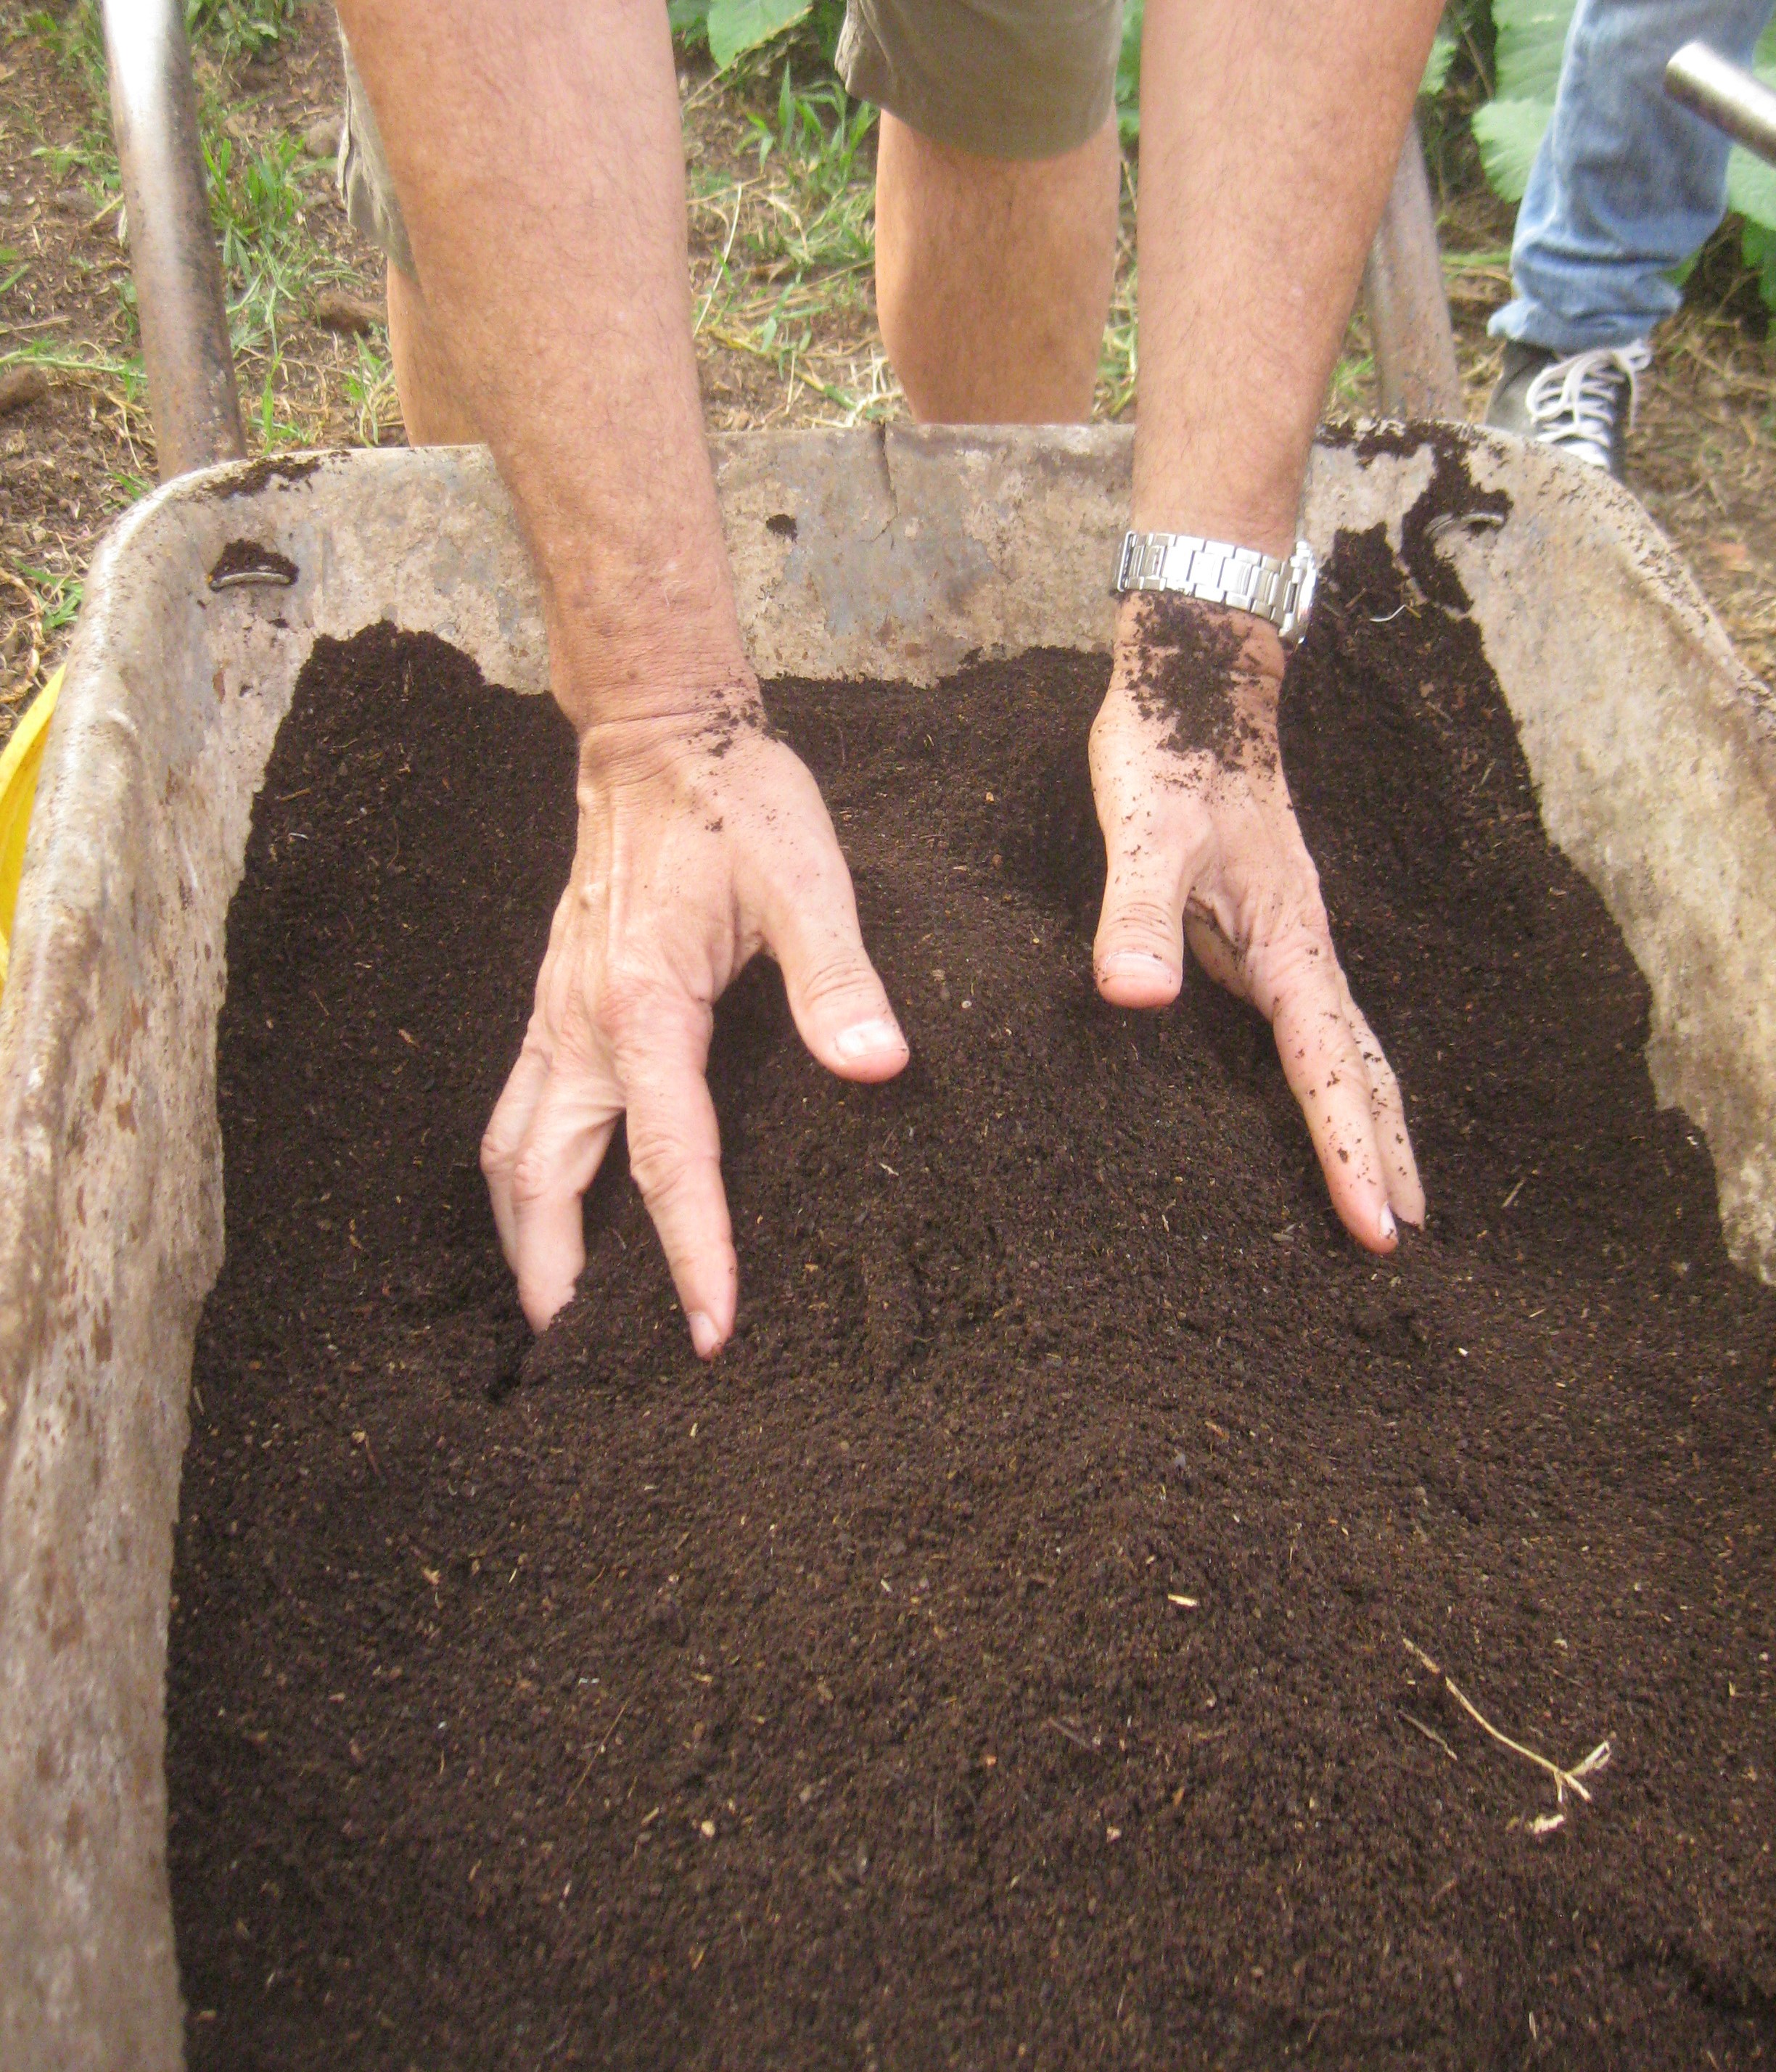
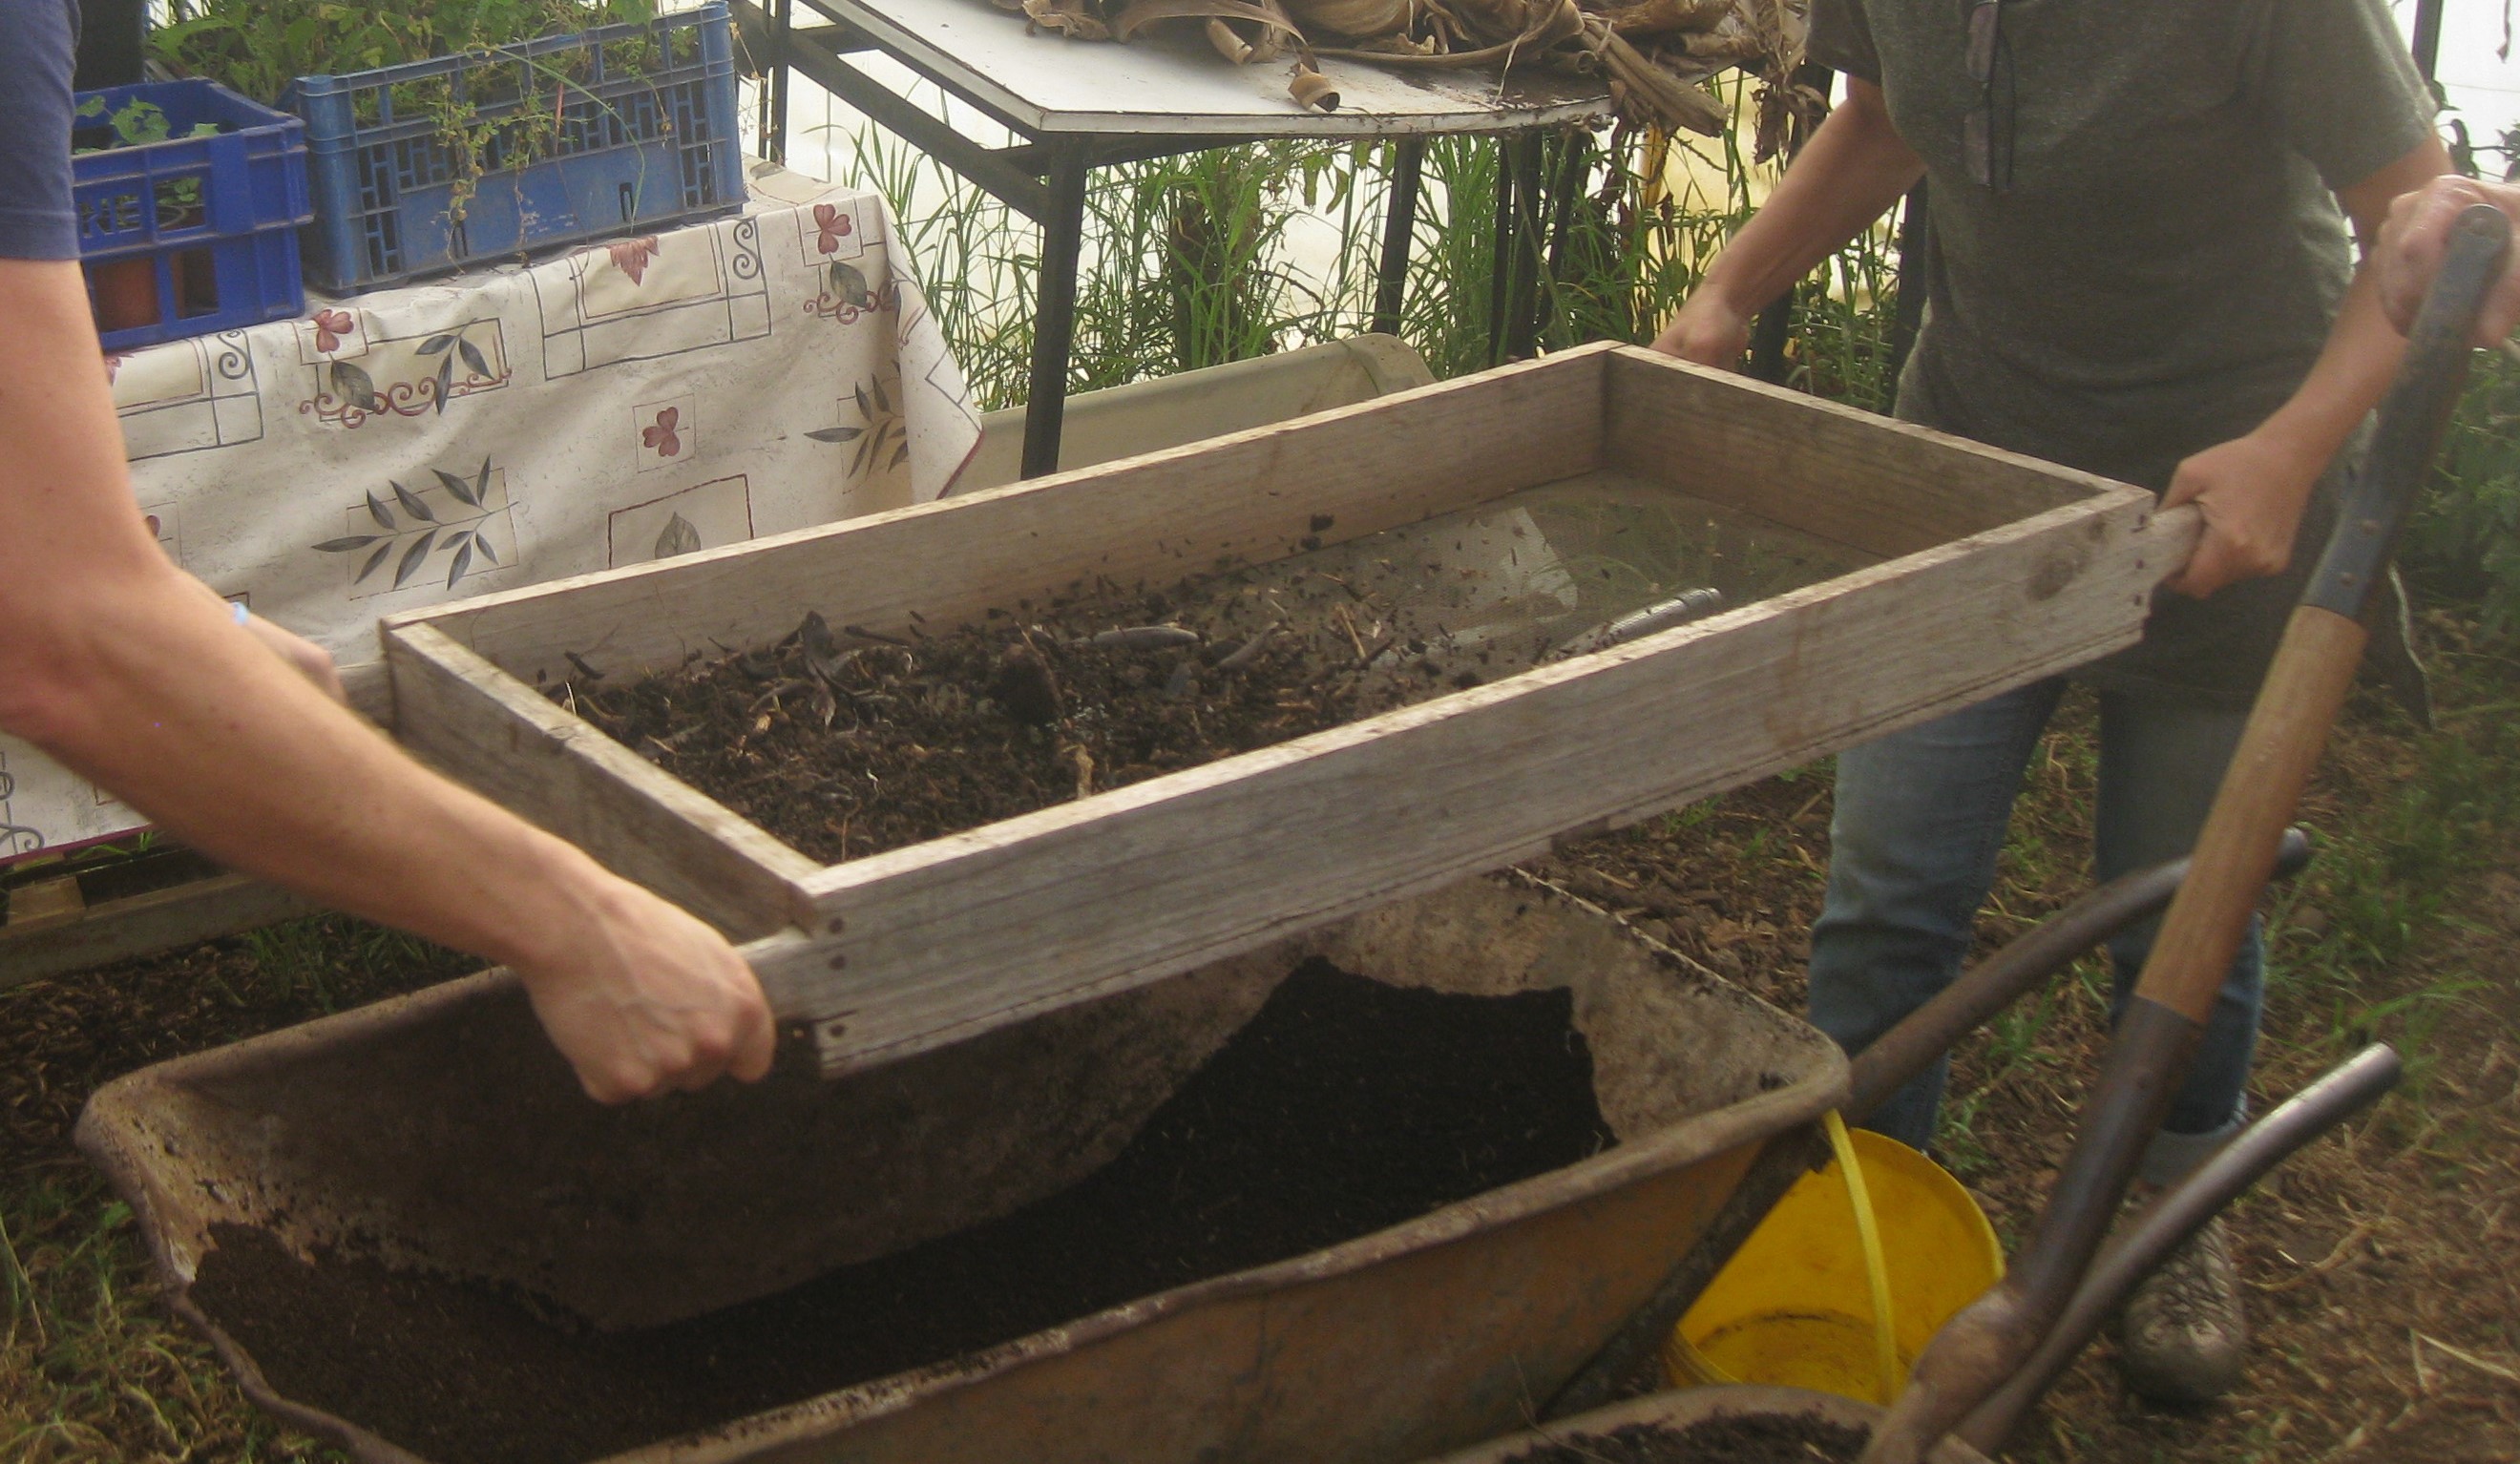
Figure VI.17.- Images of the process of sieving and obtaining smooth and spongy substrate for seeds
Every time we sieve, the substrate that has not finished decomposing yet stays on the sieve, this coarse material is put aside so it can be used again on the paths or beds and decompose completely. If we have some remaining compost, we can store it until we need to use it again.
This activity offers a great therapeutic opportunity for the people we work with because it helps them to acquire motor skills such as the coordination when sieving with another person, a correct breathing and posture.
We fill a bucket with sieved and spongy substrate. We pour its contents onto the seed trays without pressing them down. A way to avoid pressing the substrate into the slots is pouring it onto the center of the seed tray to create a pile. With a board or a similar object or even gently with the palm of the hand we can spread the substrate into the empty slots and remove the excess to even out the surface (Figure VI.18). By using this technique we create small air pockets inside the slots that contribute to a better rooting of the seedlings.
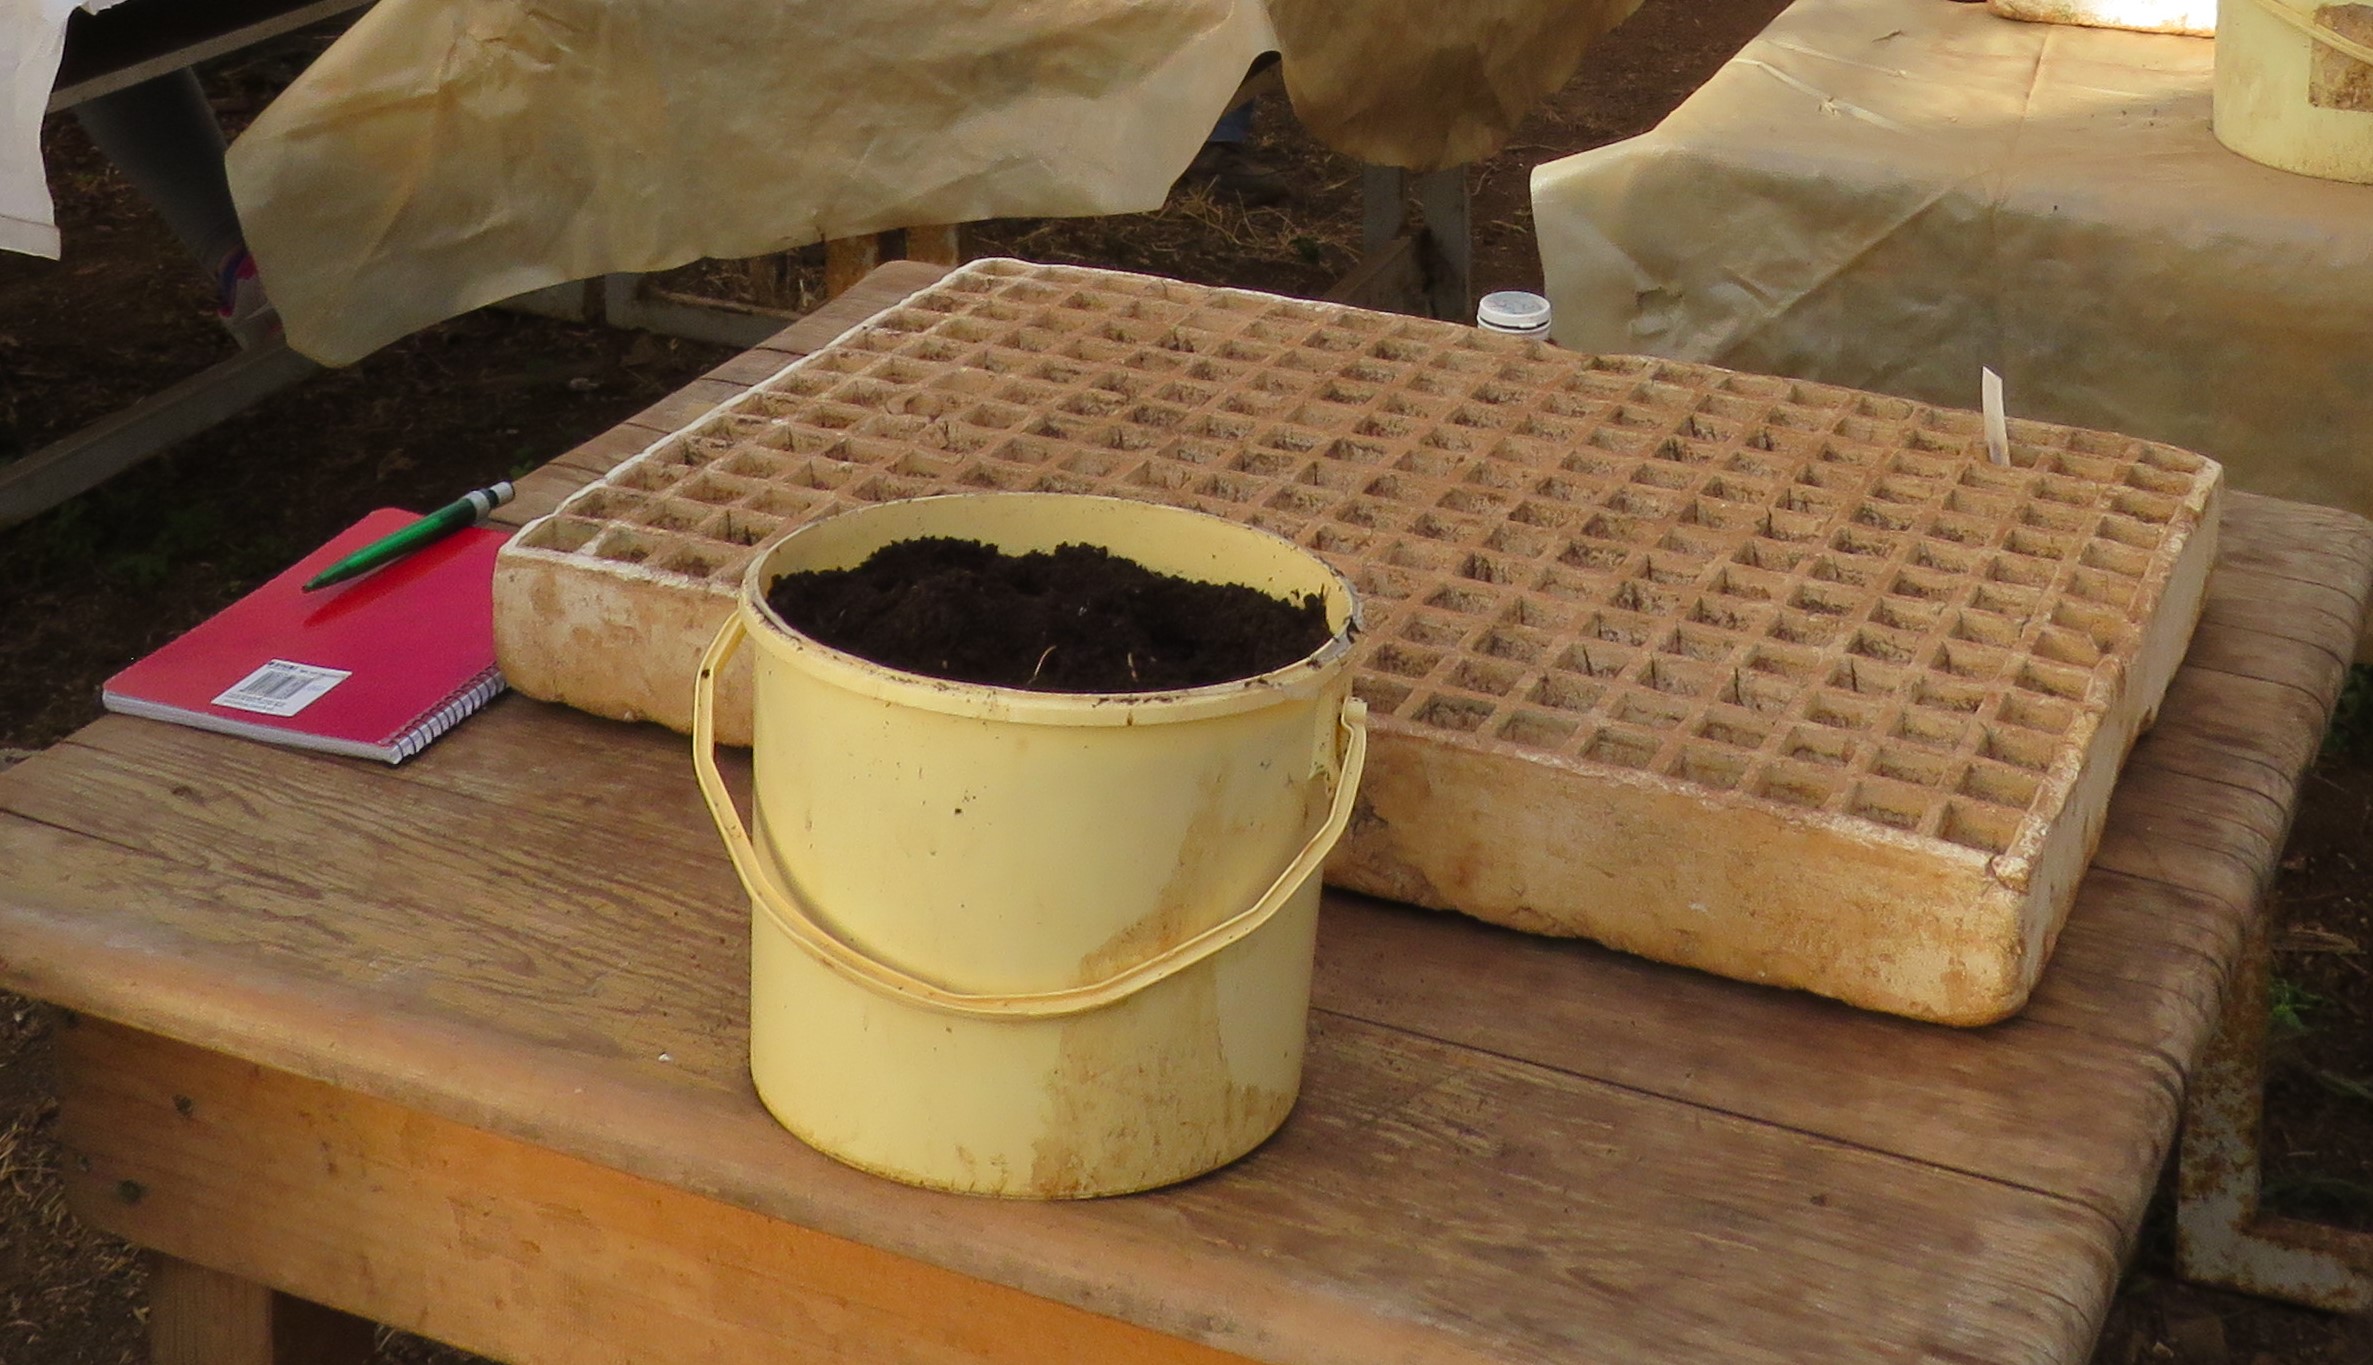
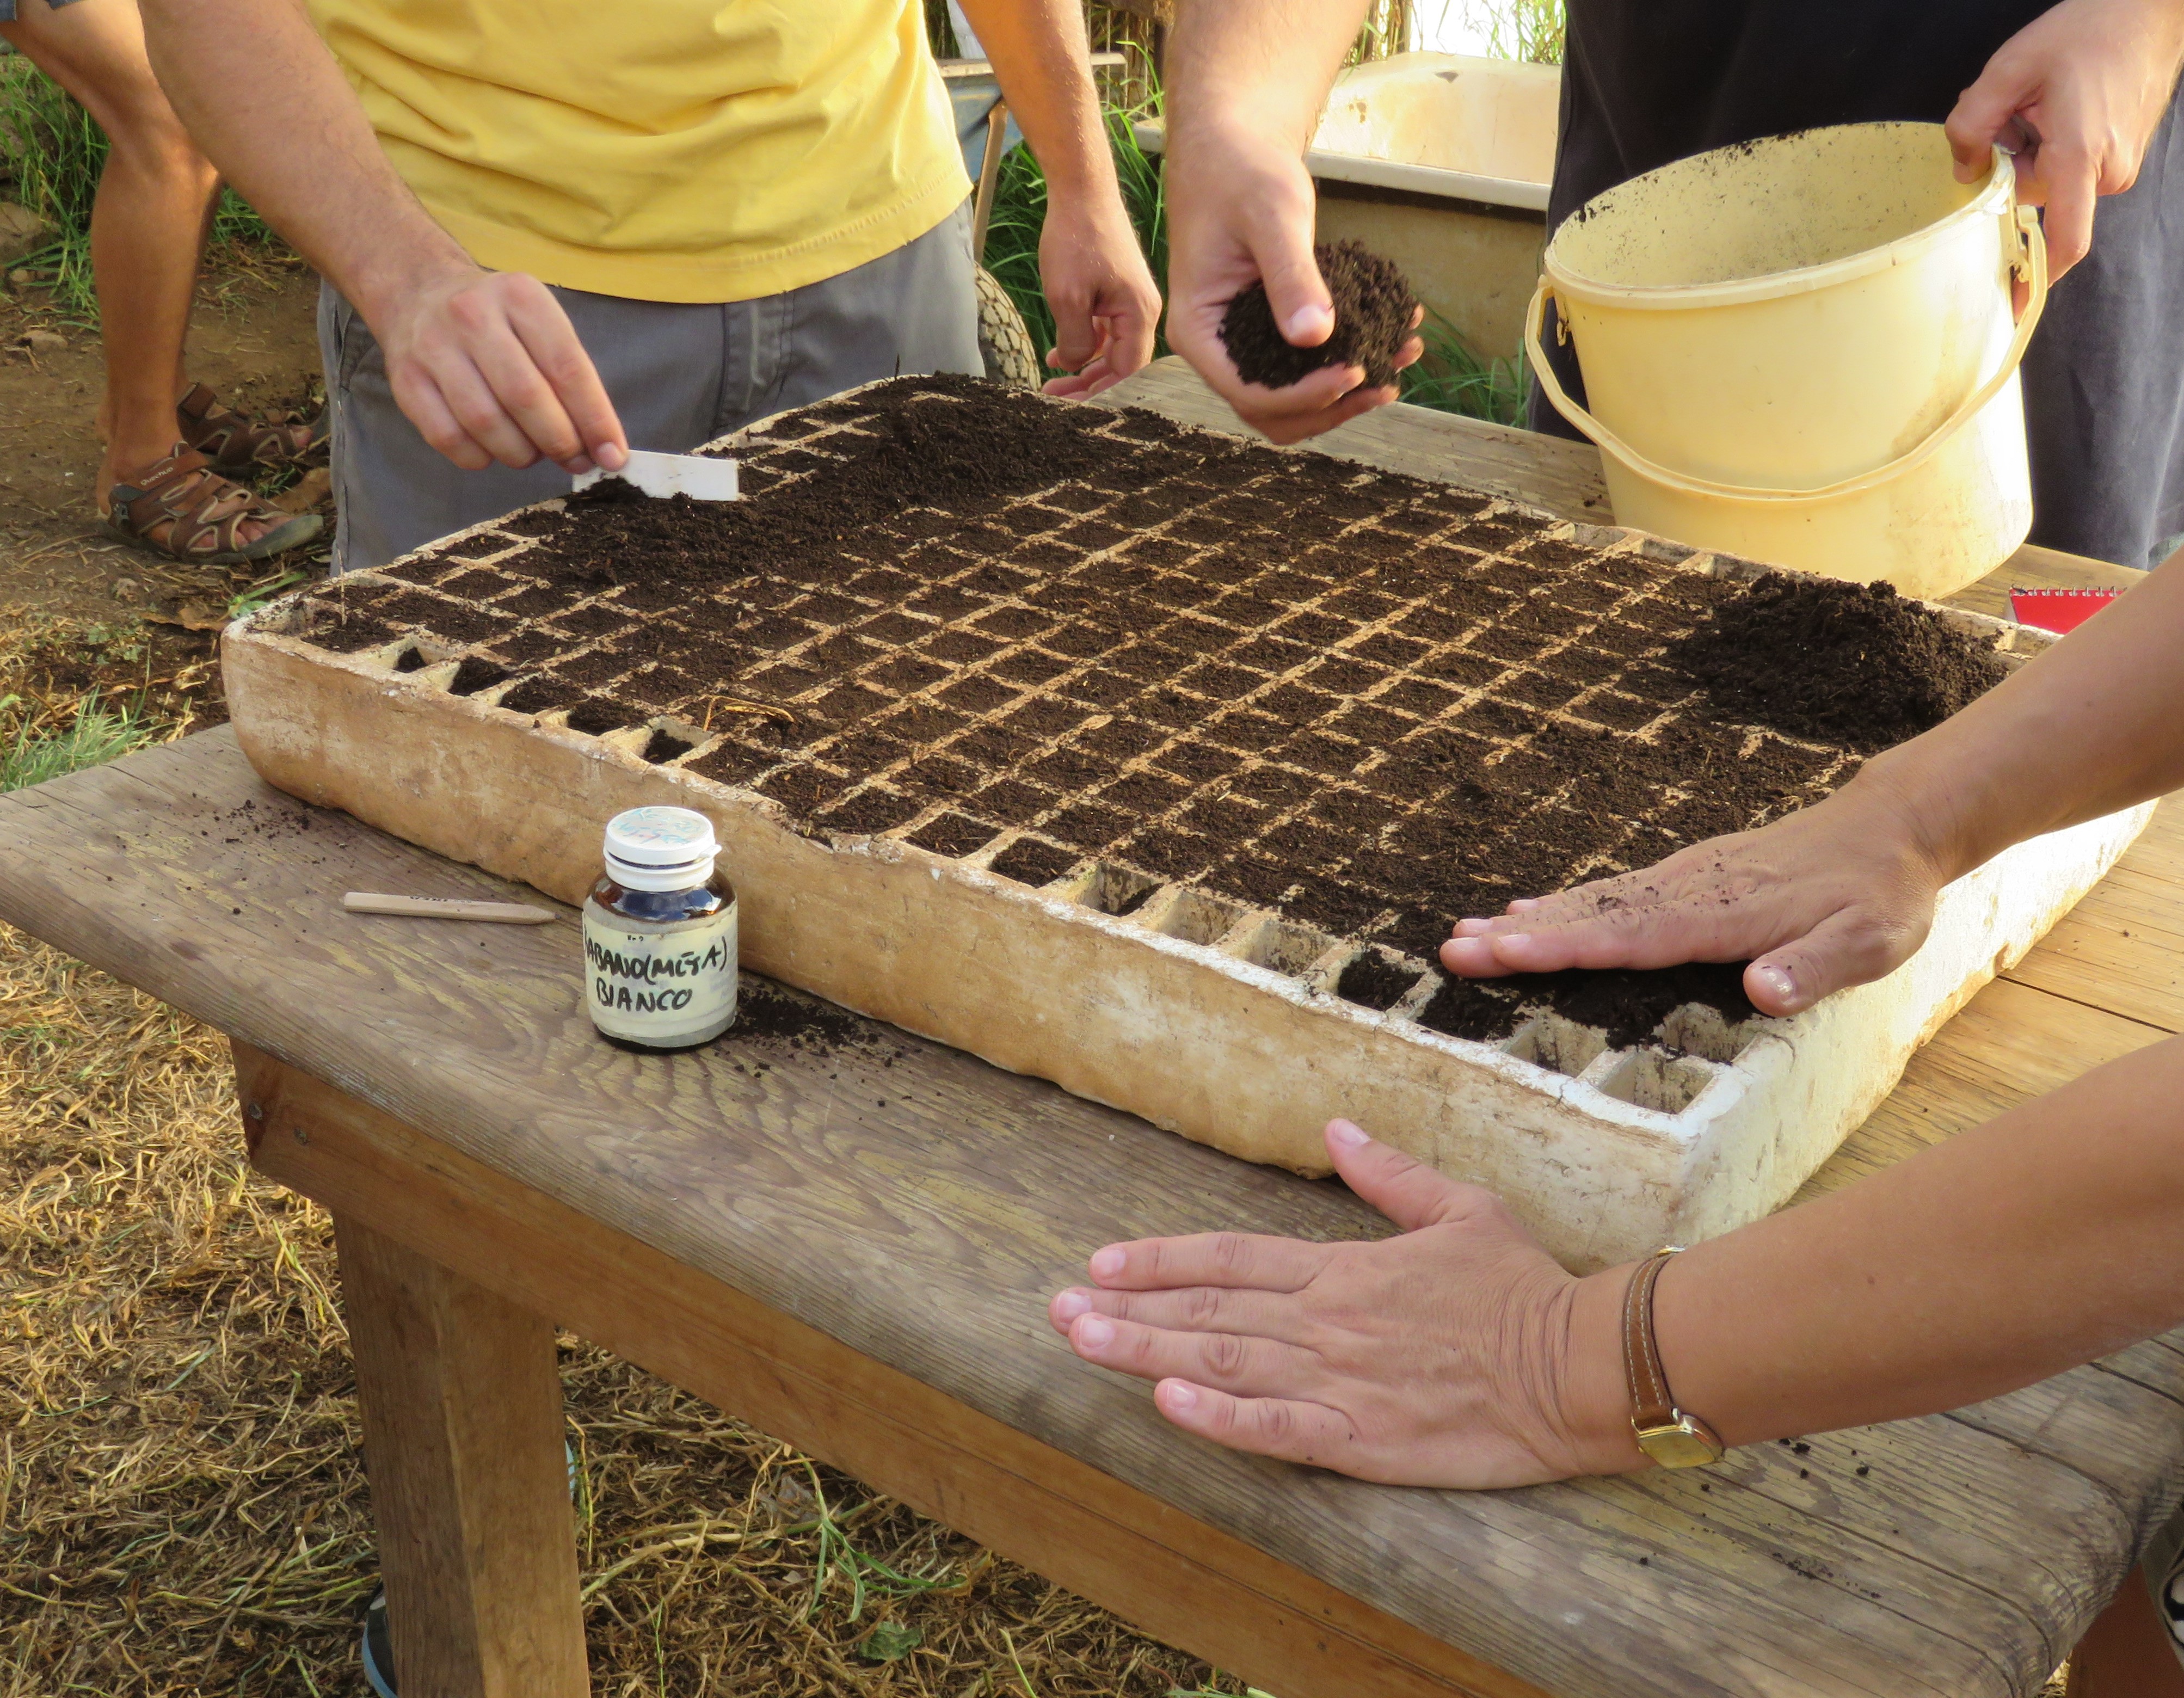
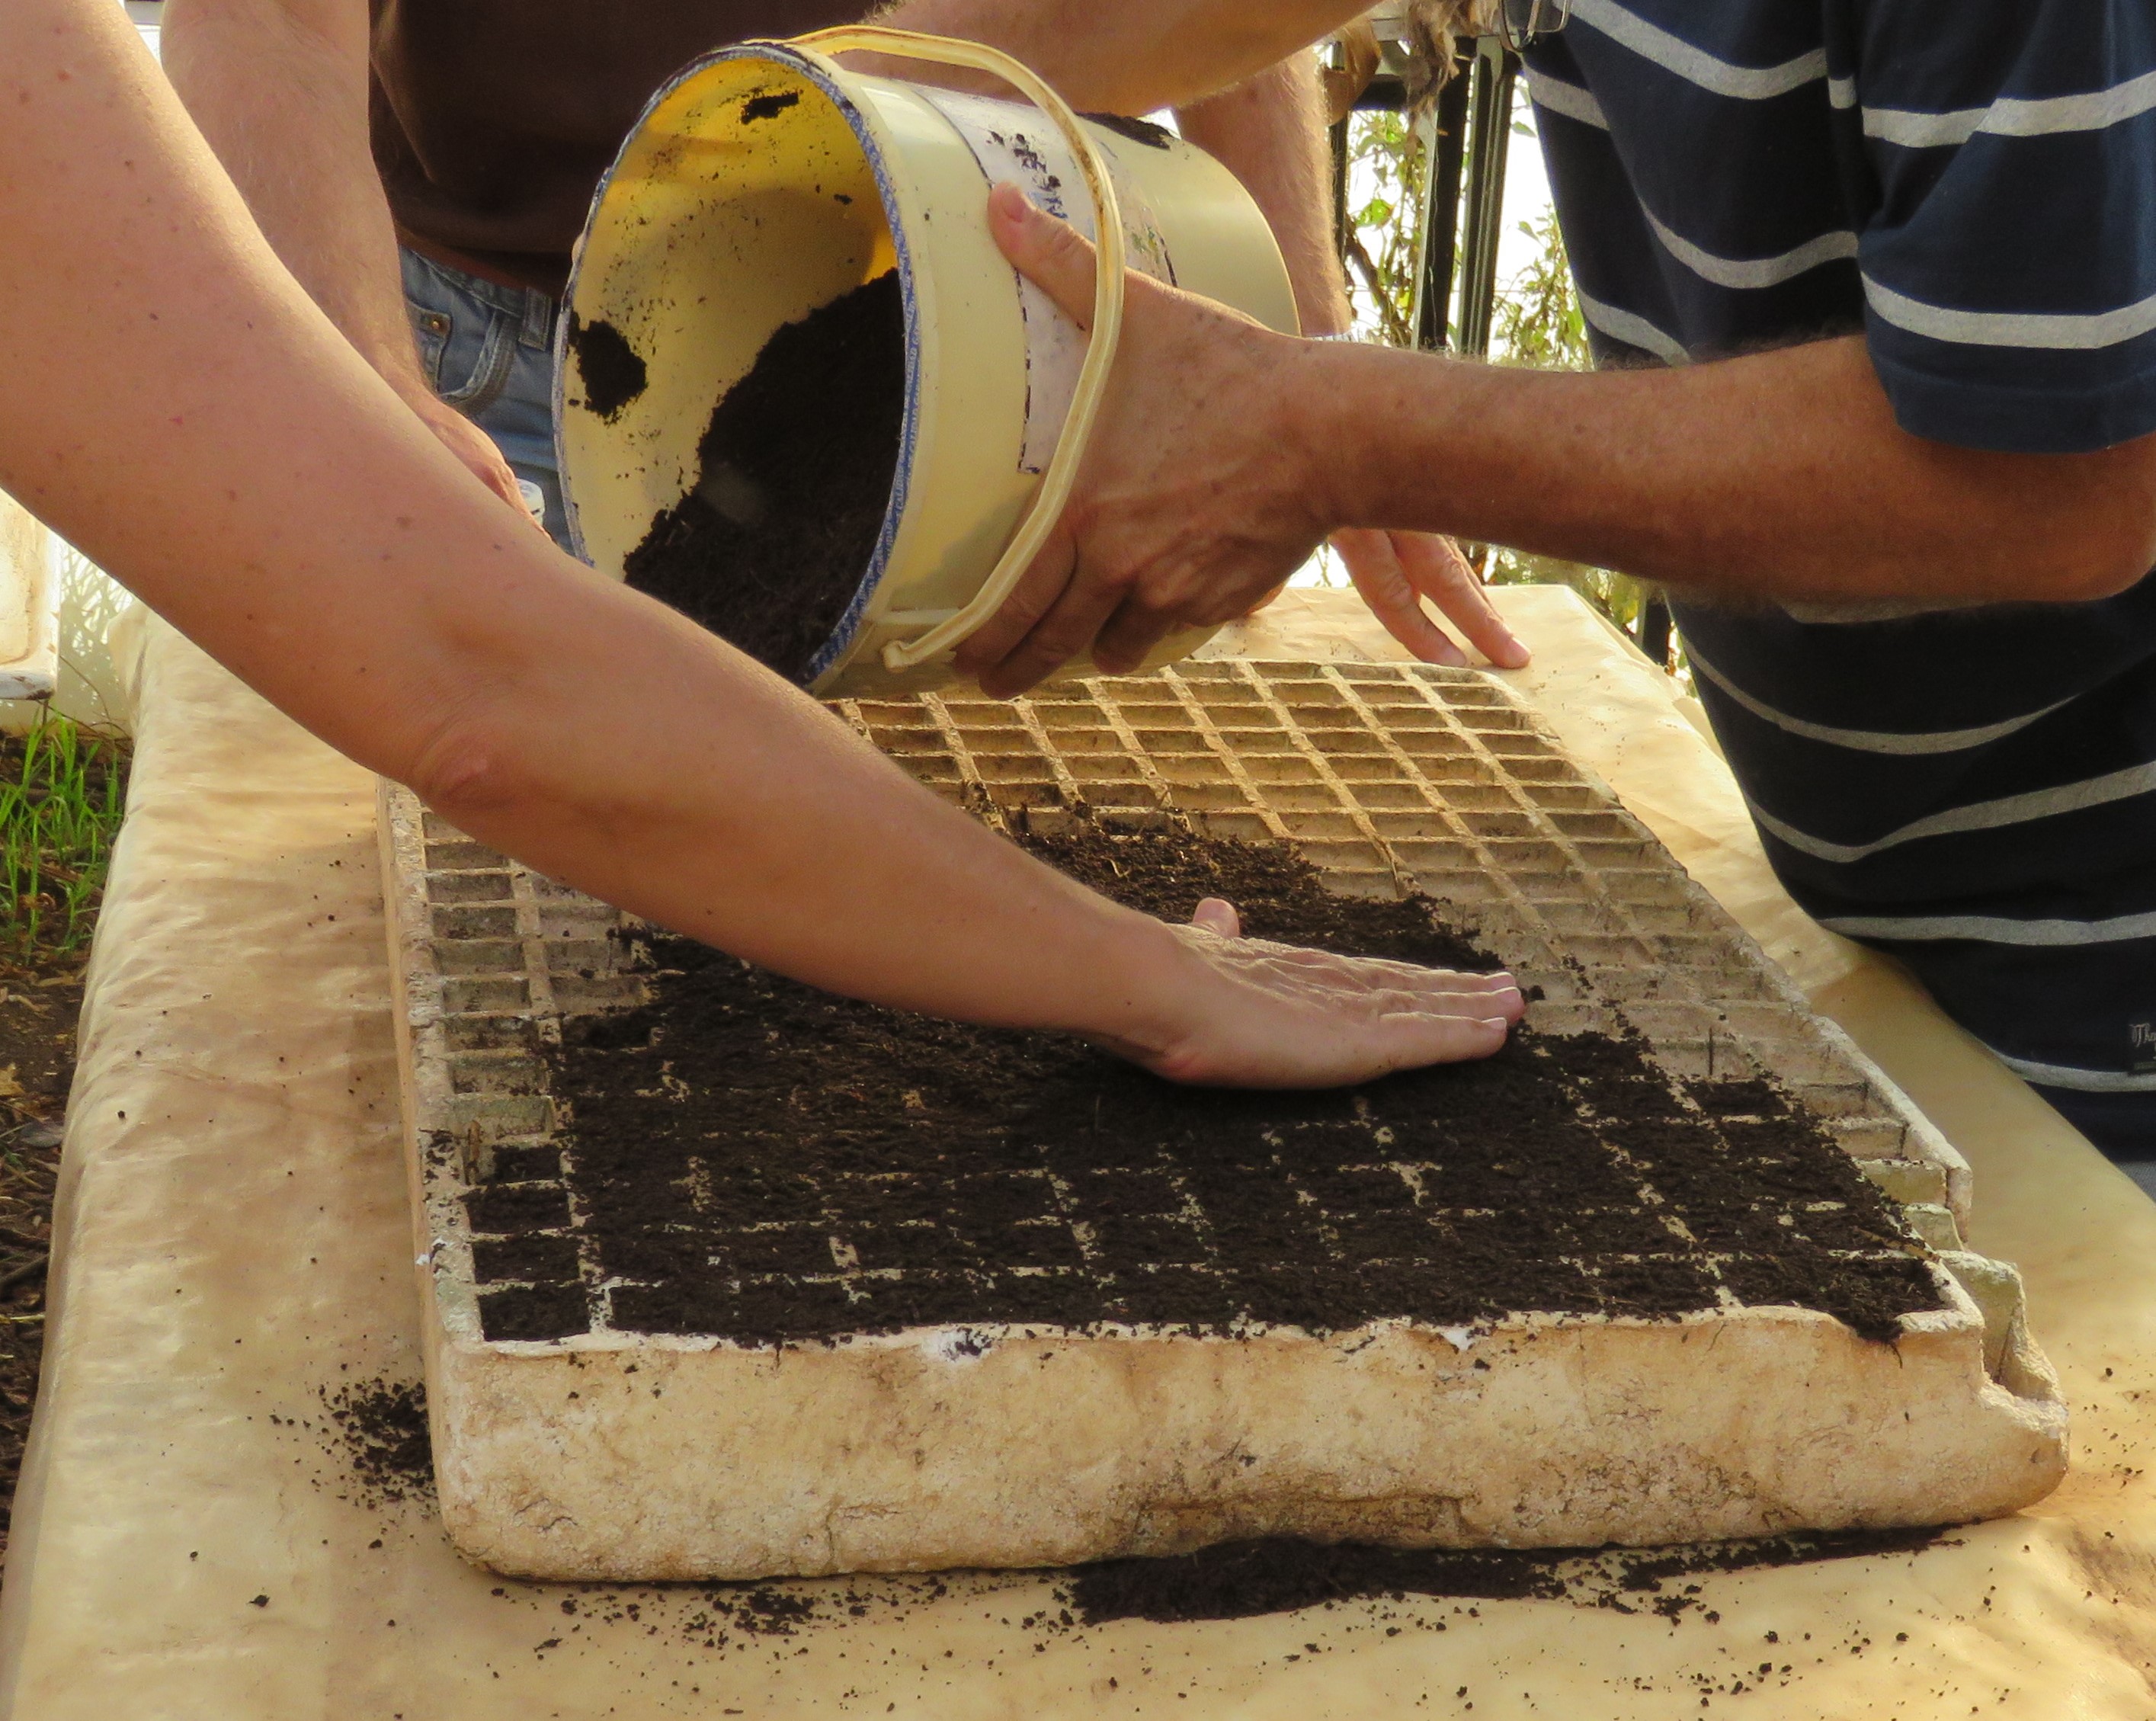
Figure VI.18.- Filling the seed trays with substrate
We need to take into account that we are not working with peat so its conditions are not the same as the ones of substrate. For example, if we let our substrate dry completely, it will harden and then it will be more difficult to make it humid again. We can recover the substrate if we water it more frequently with less water. With our substrate, we only need to bear in mind that we should not press it down and that before filling the seedlings have some moisture without soaking it.
In the case of commercialized peat, since it is more porous than our substrate, it functions as a sponge because it has more air pockets in its interior making it easier to recover the humidity of the seed tray.
The trays sown with our substrate might grow some weeds that are easy to remove with the help of the students. This task encourages users to learn to distinguish between seedlings from weeds and seedlings from vegetables.
Depending on the plants that we sow, the first leaves of the seedling have a specific shape that we will recognize better each time. For example, the first two leaves from the cabbage have the shape of a heart, whereas the first two leaves of the lettuce have a round shape.
After filling the tray we will make holes by gently pressing the substrate with our fingertips (Figure VI.19).
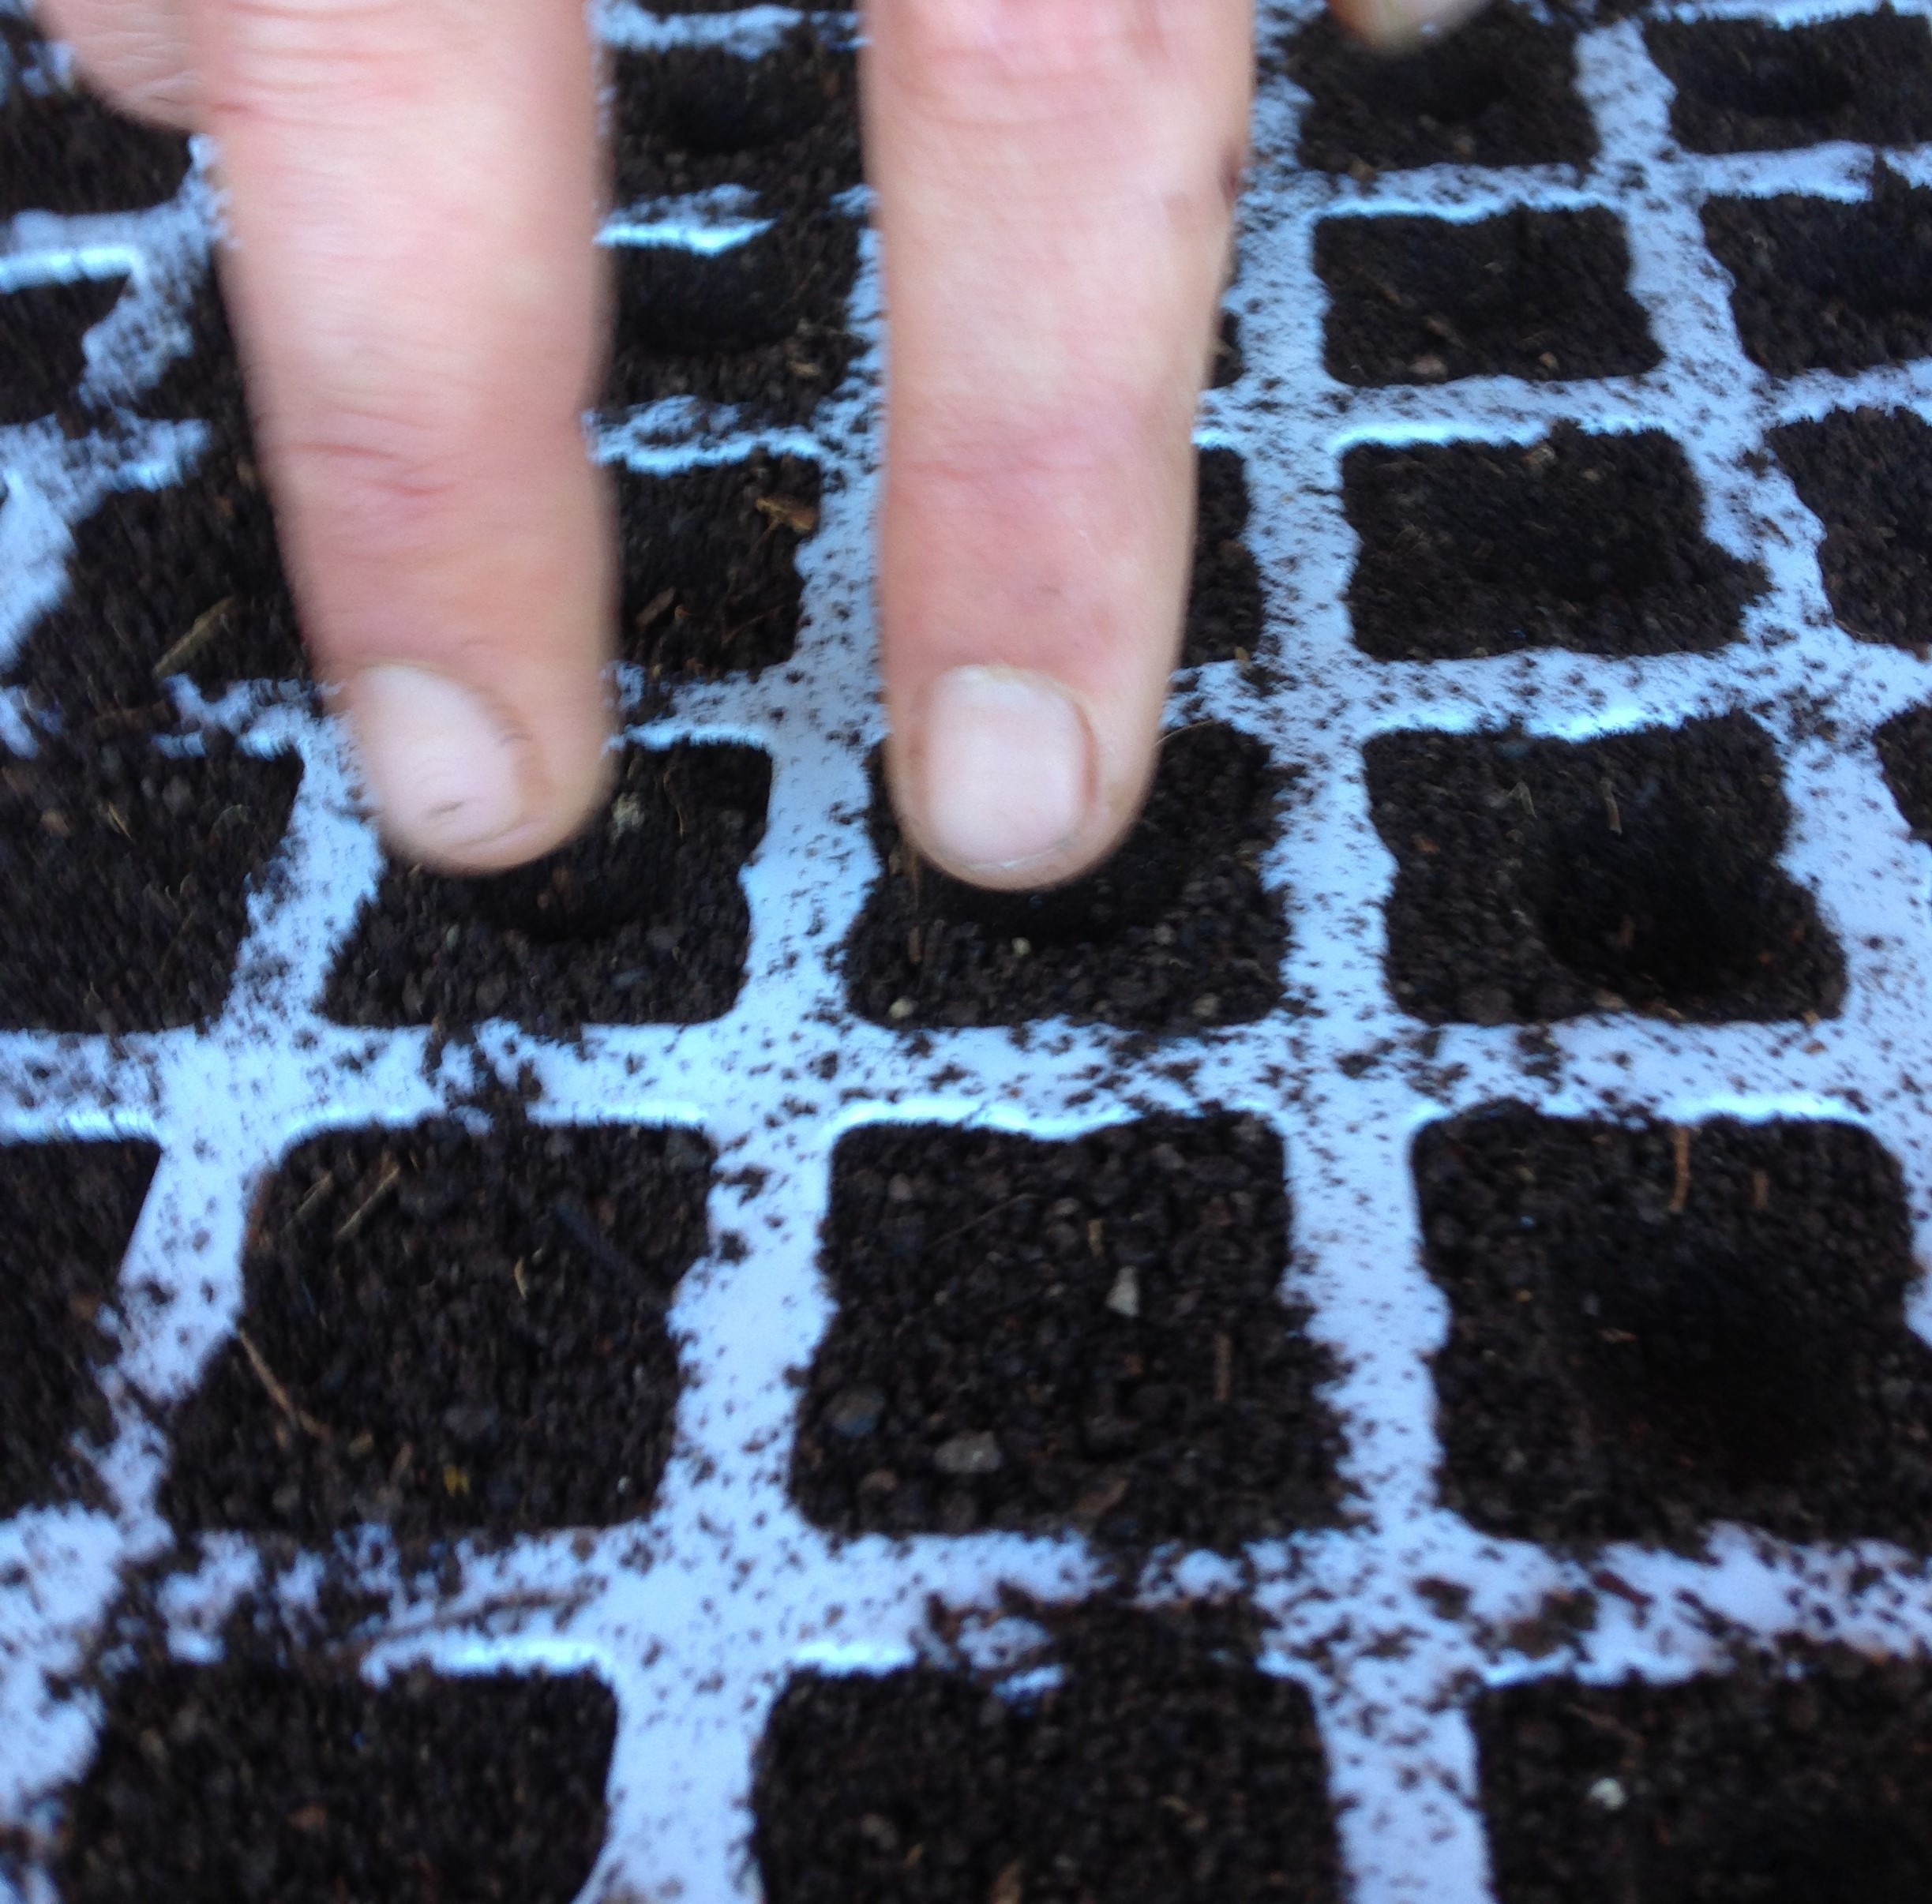
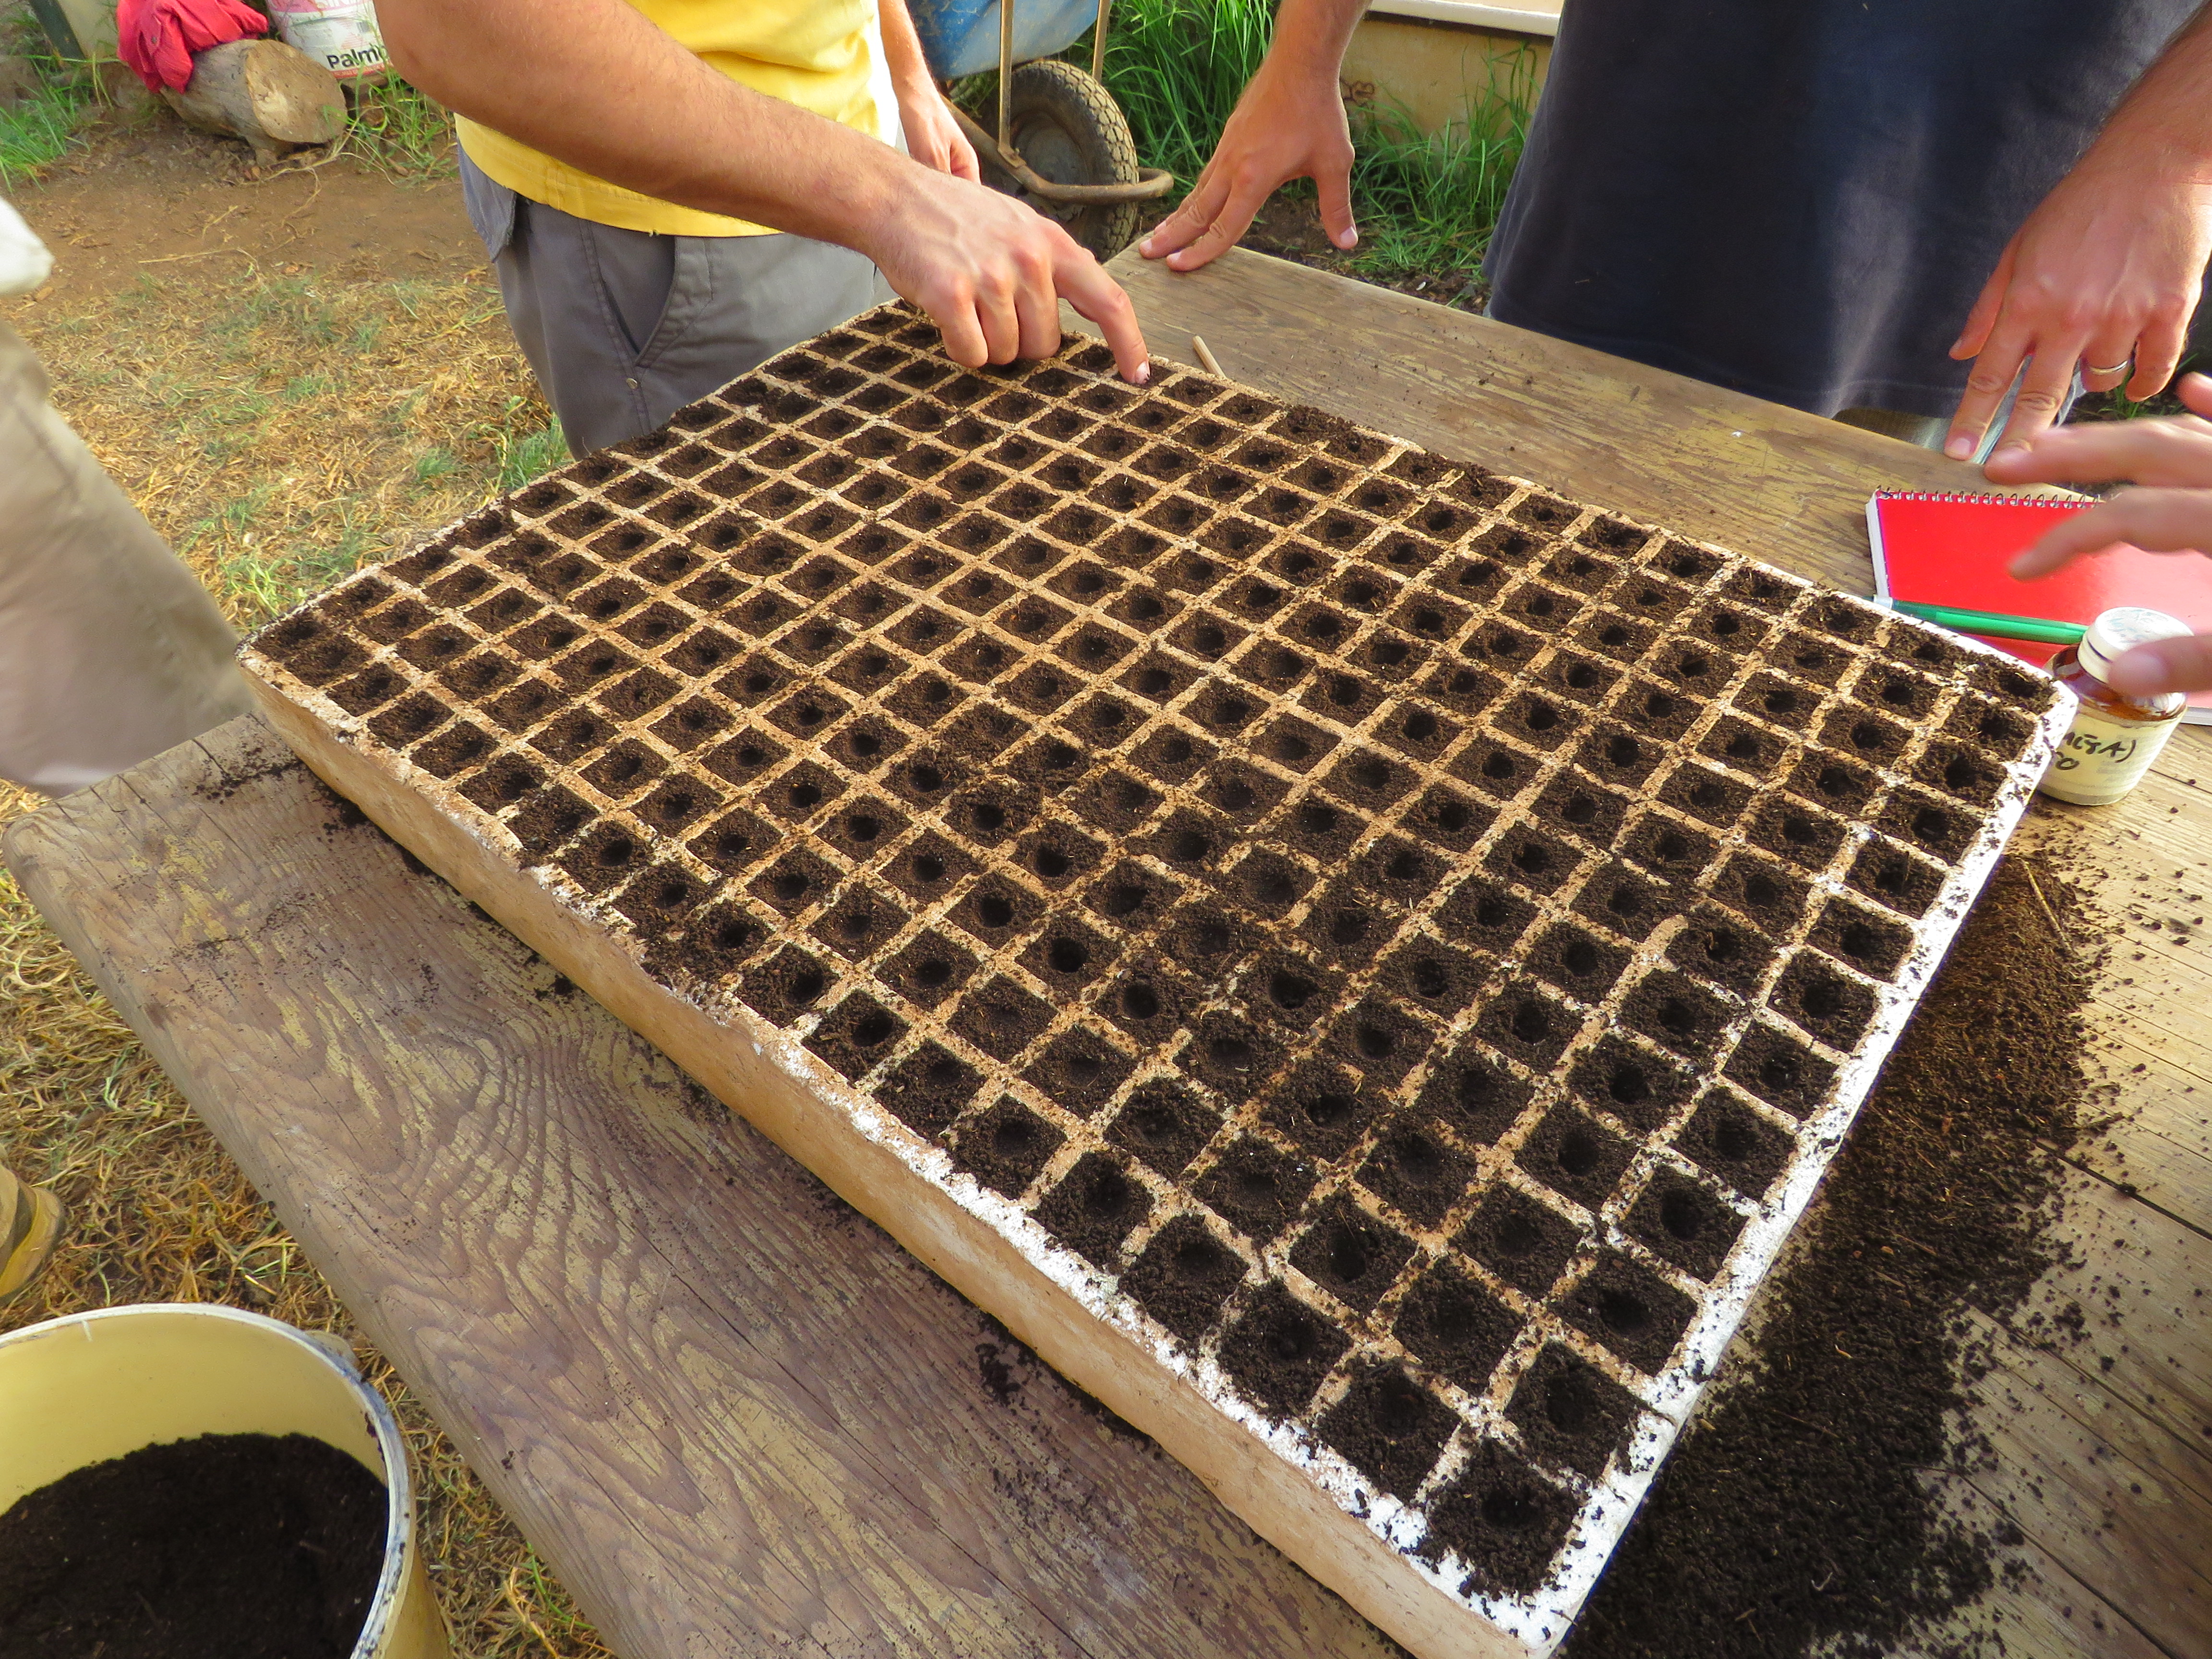
Figure VI.19.- Making holes in the tray to sow seeds
We gently drop one see into each hole. We recommend making all the holes before starting to put the seeds into them to avoid possible mistakes. By doing so, we can visually keep track of the sowing (Figure VI.20). If more than one seed falls into a hole, it is preferable to let the seeds sprout since trying to take them out could cause worse consequences.
We then cover the seeds with the help of a finger in order to control the amount of substrate we add. The layer of substrate we cover the seeds with should be as thick as the size of the seeds.

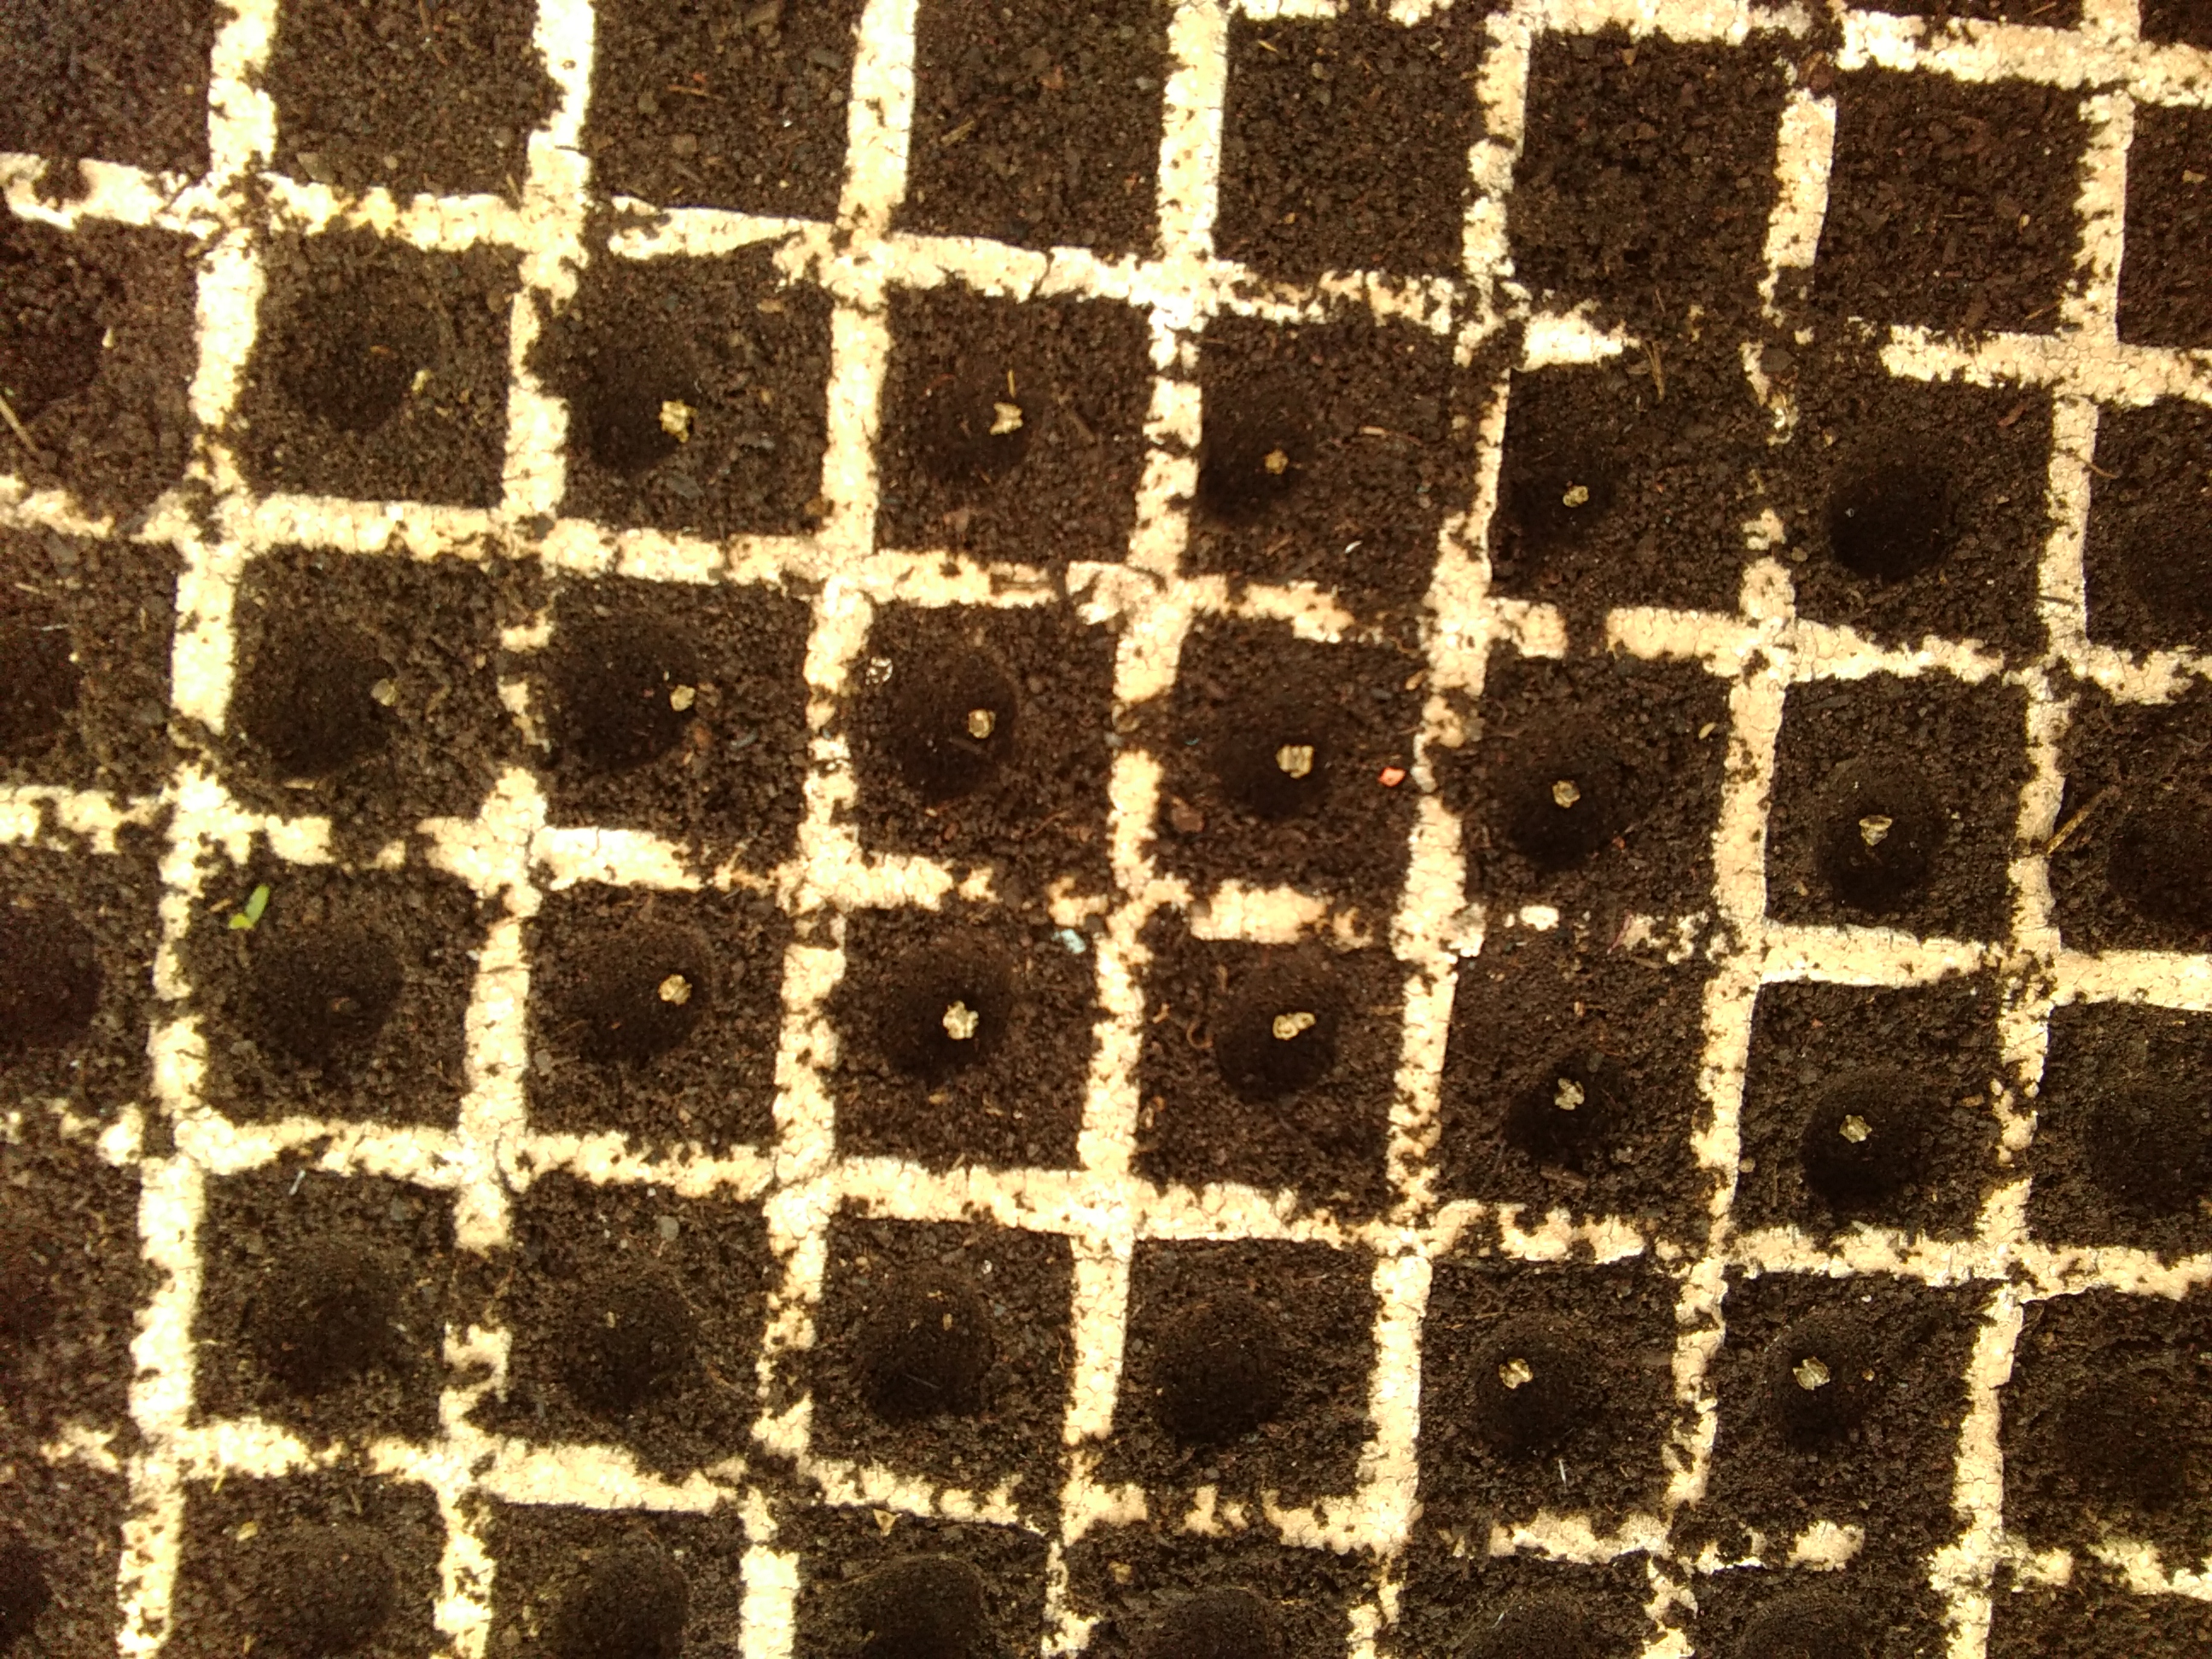
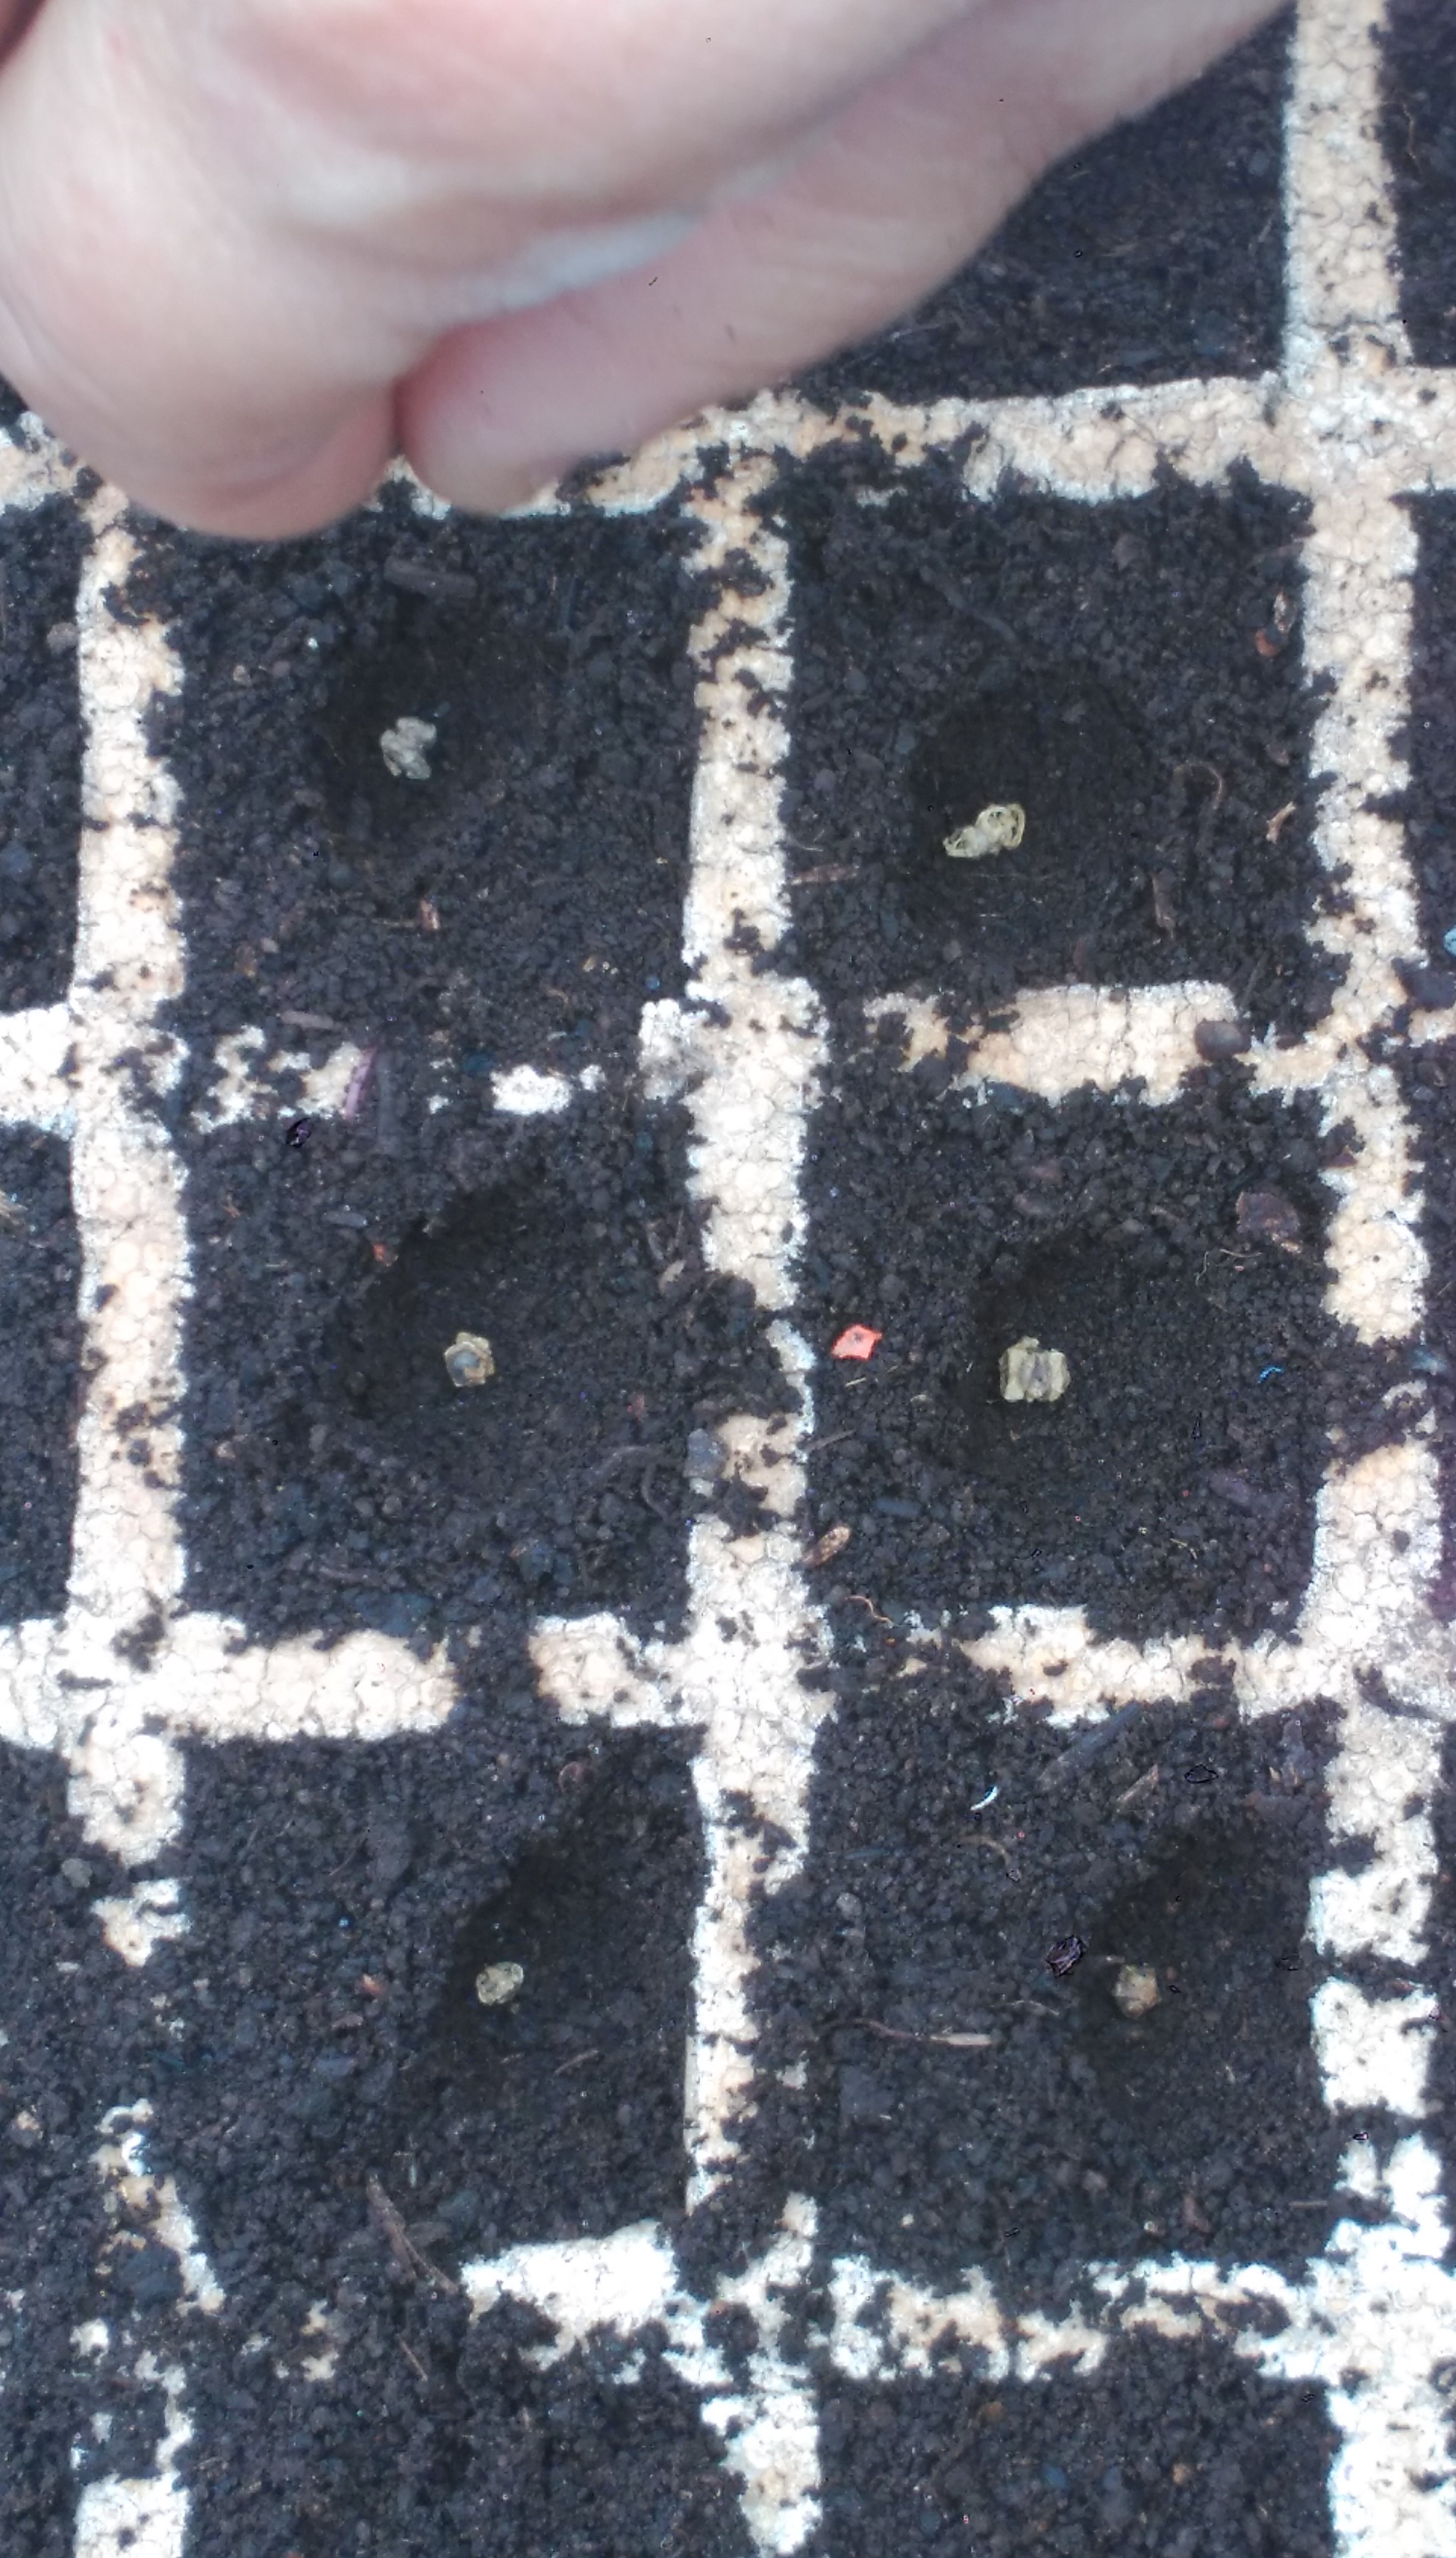
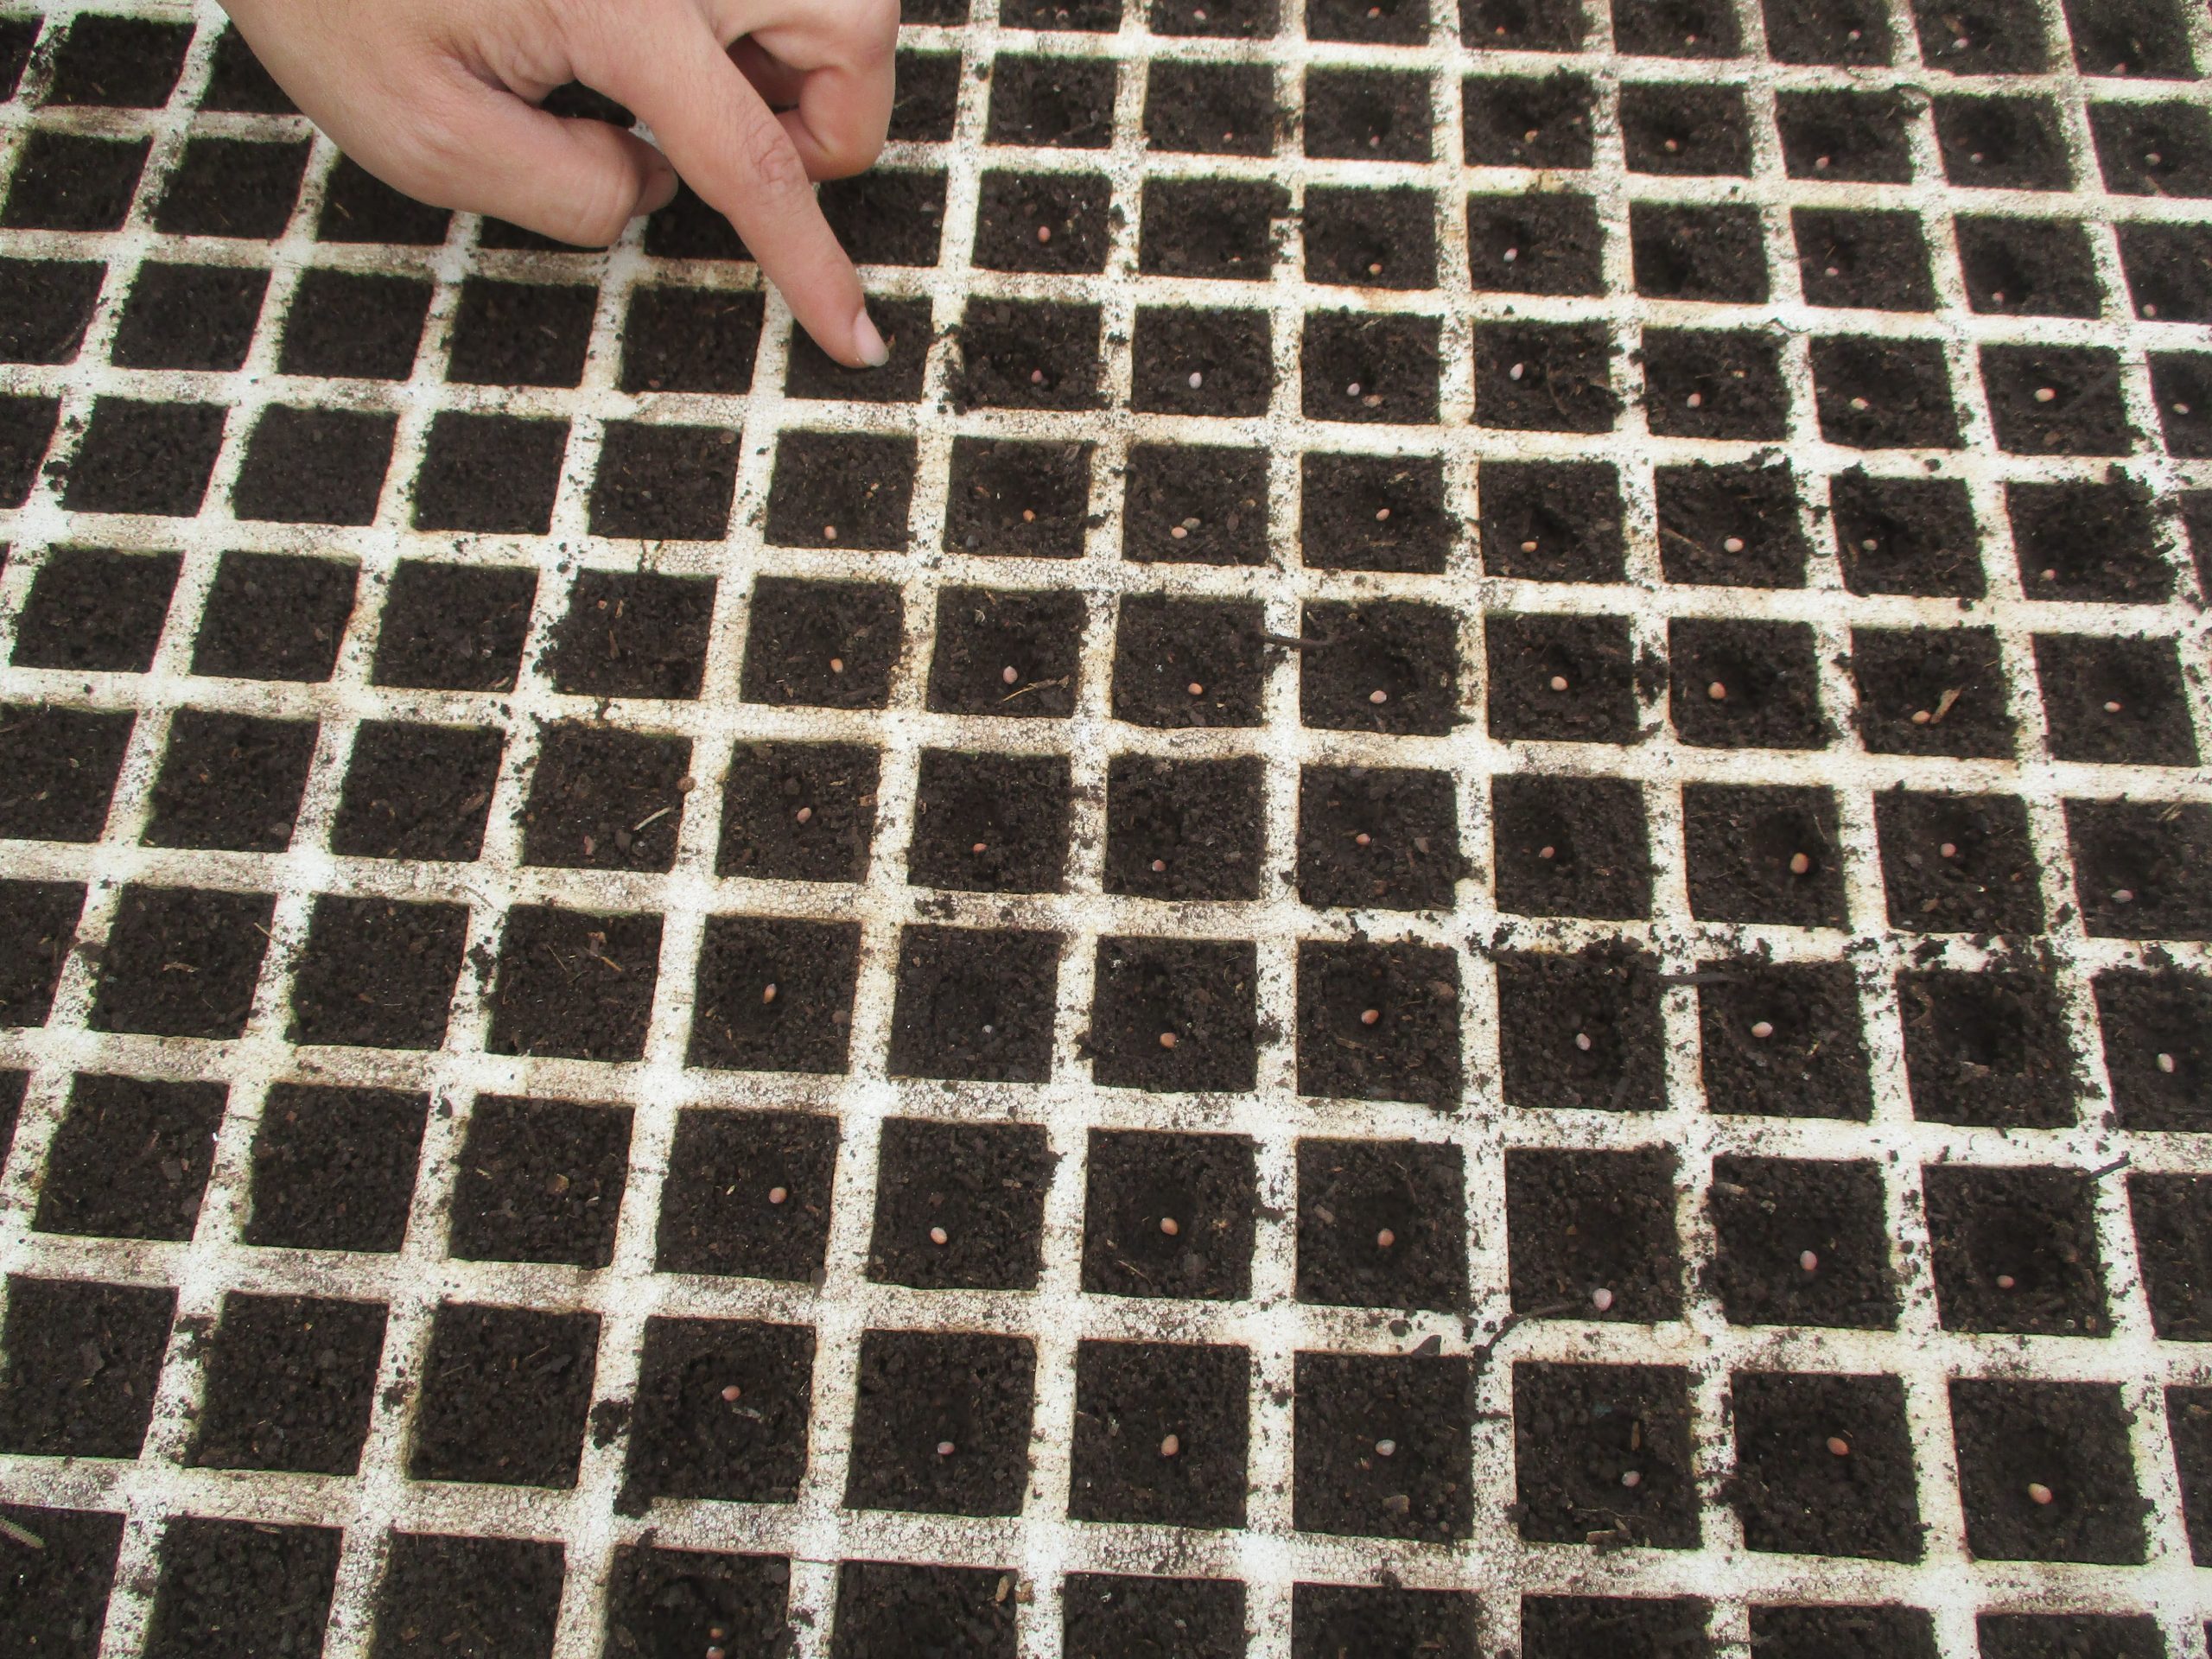
Figure VI.20.- Dropping seeds into the holes and trays with covered seeds
This sowing task is very therapeutic for the people who we work with because they need to concentrate in the said task; they keep their mind in the present moment, they improve their patience, they develop skills for accurate and specific tasks and we can see the relationship that each person has with certain seeds.
We also provoke a sense of intrigue about the future sprouting of the seeds they have sown which increases their interest and desire to closely follow the evolution of the seeds.
In order to be able to identify the seeds and to follow their growth we attach a little sign to the tray, indicating the name of the plant and the date the seeds were sown.
Once the seeds have been covered we will gently humidify the tray with a watering can or a sprayer, making sure not to uncover the seeds. We can check if the tray has been watered enough when we pick it up and notice its weight has increased. We will not water it again until the seeds start sprouting.
If we plant several trays simultaneously, once we have watered them we will place them on top of each other since seeds germinate quicker in darkness. We pile them up with caution, without dragging them in order to prevent seeds that might be near the surface from moving. We cover the last tray with a humid sack or something similar so the tray stays humid and to ensure that it remains in darkness (Figure VI.21)
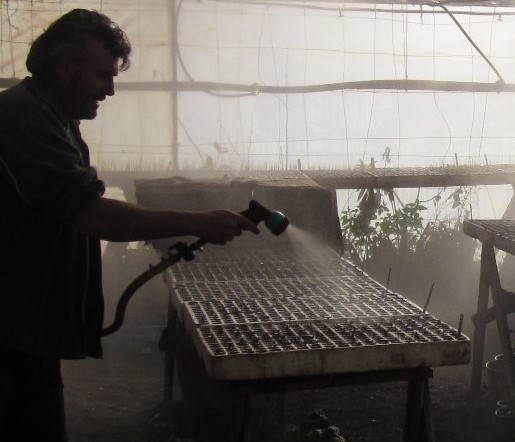
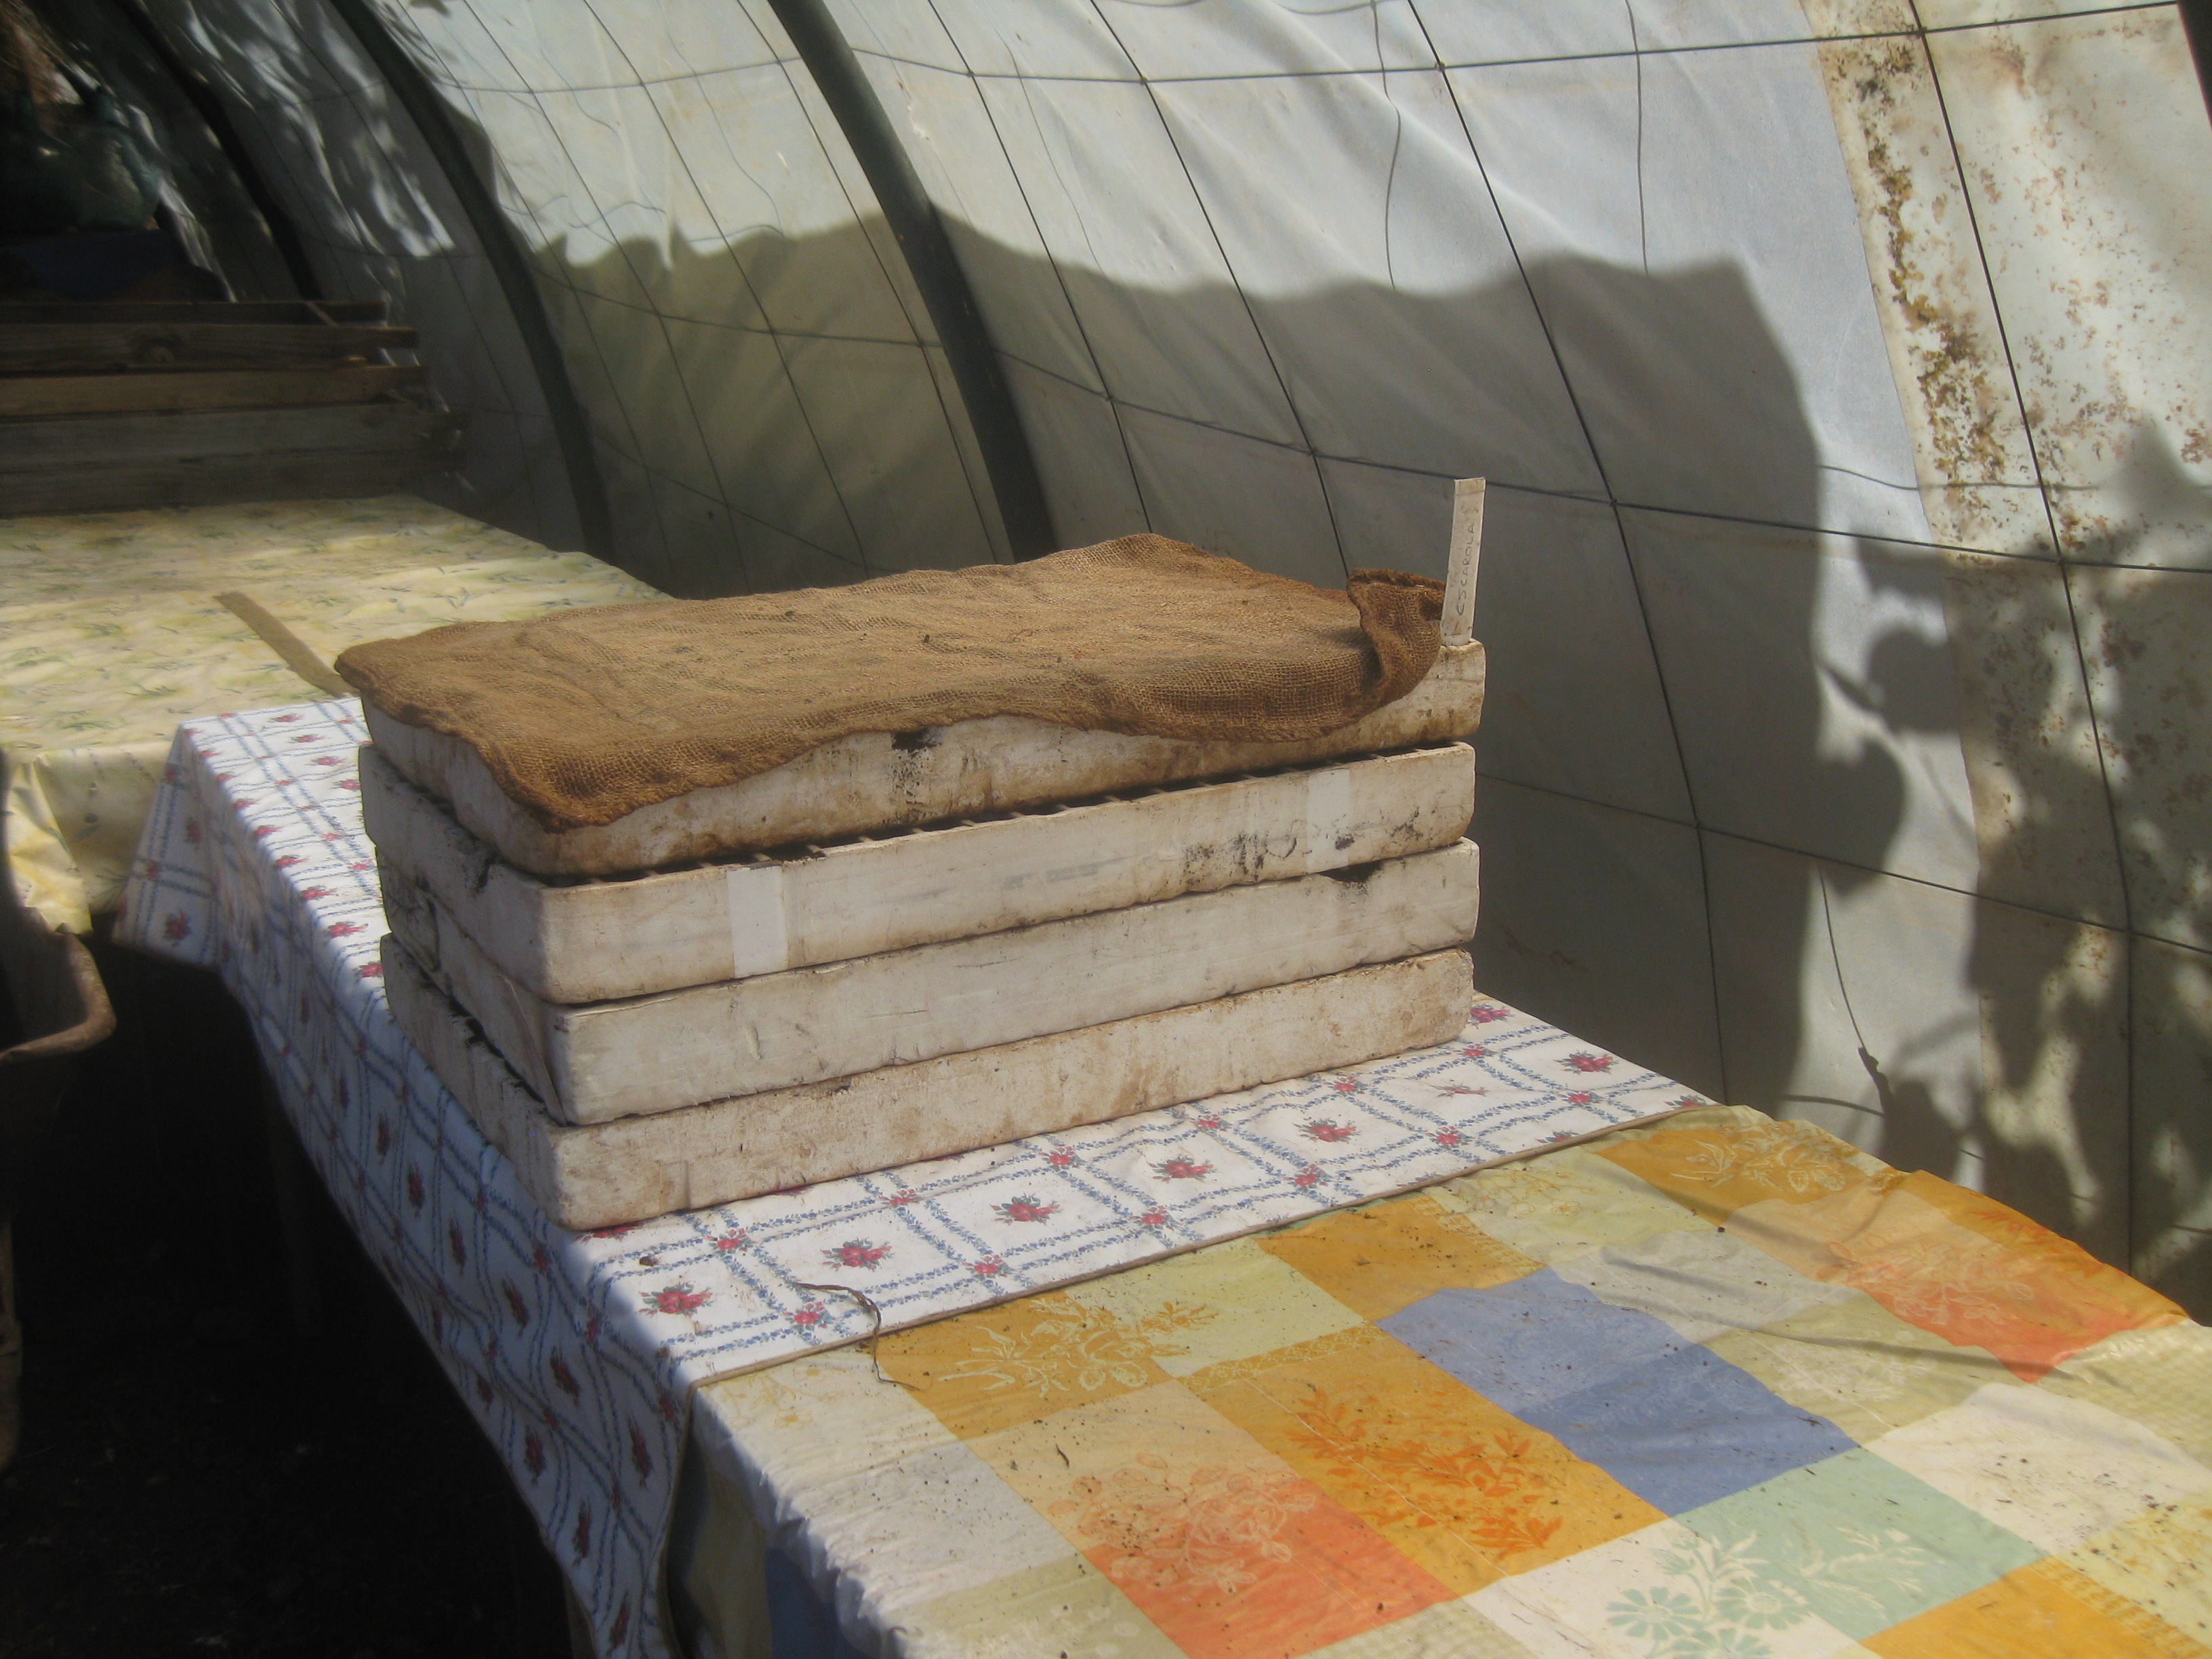
Figure VI.21.- Spraying and piling up the newly sown trays
It is crucial to monitor the germination of the seeds on a daily basis by carefully lifting up one side of each tray in order to identify the moment when they have to be removed from the pile, because if the sprouted seeds spend too much time in darkness they will grow quickly in search of light. In this case, the seedlings put all their energy in growth, which weakens them and sometimes causes them to die.
The time it takes seeds to sprout depends on the variety of vegetable we are sowing: two days, four days, one week or even more (Figure VI.22).
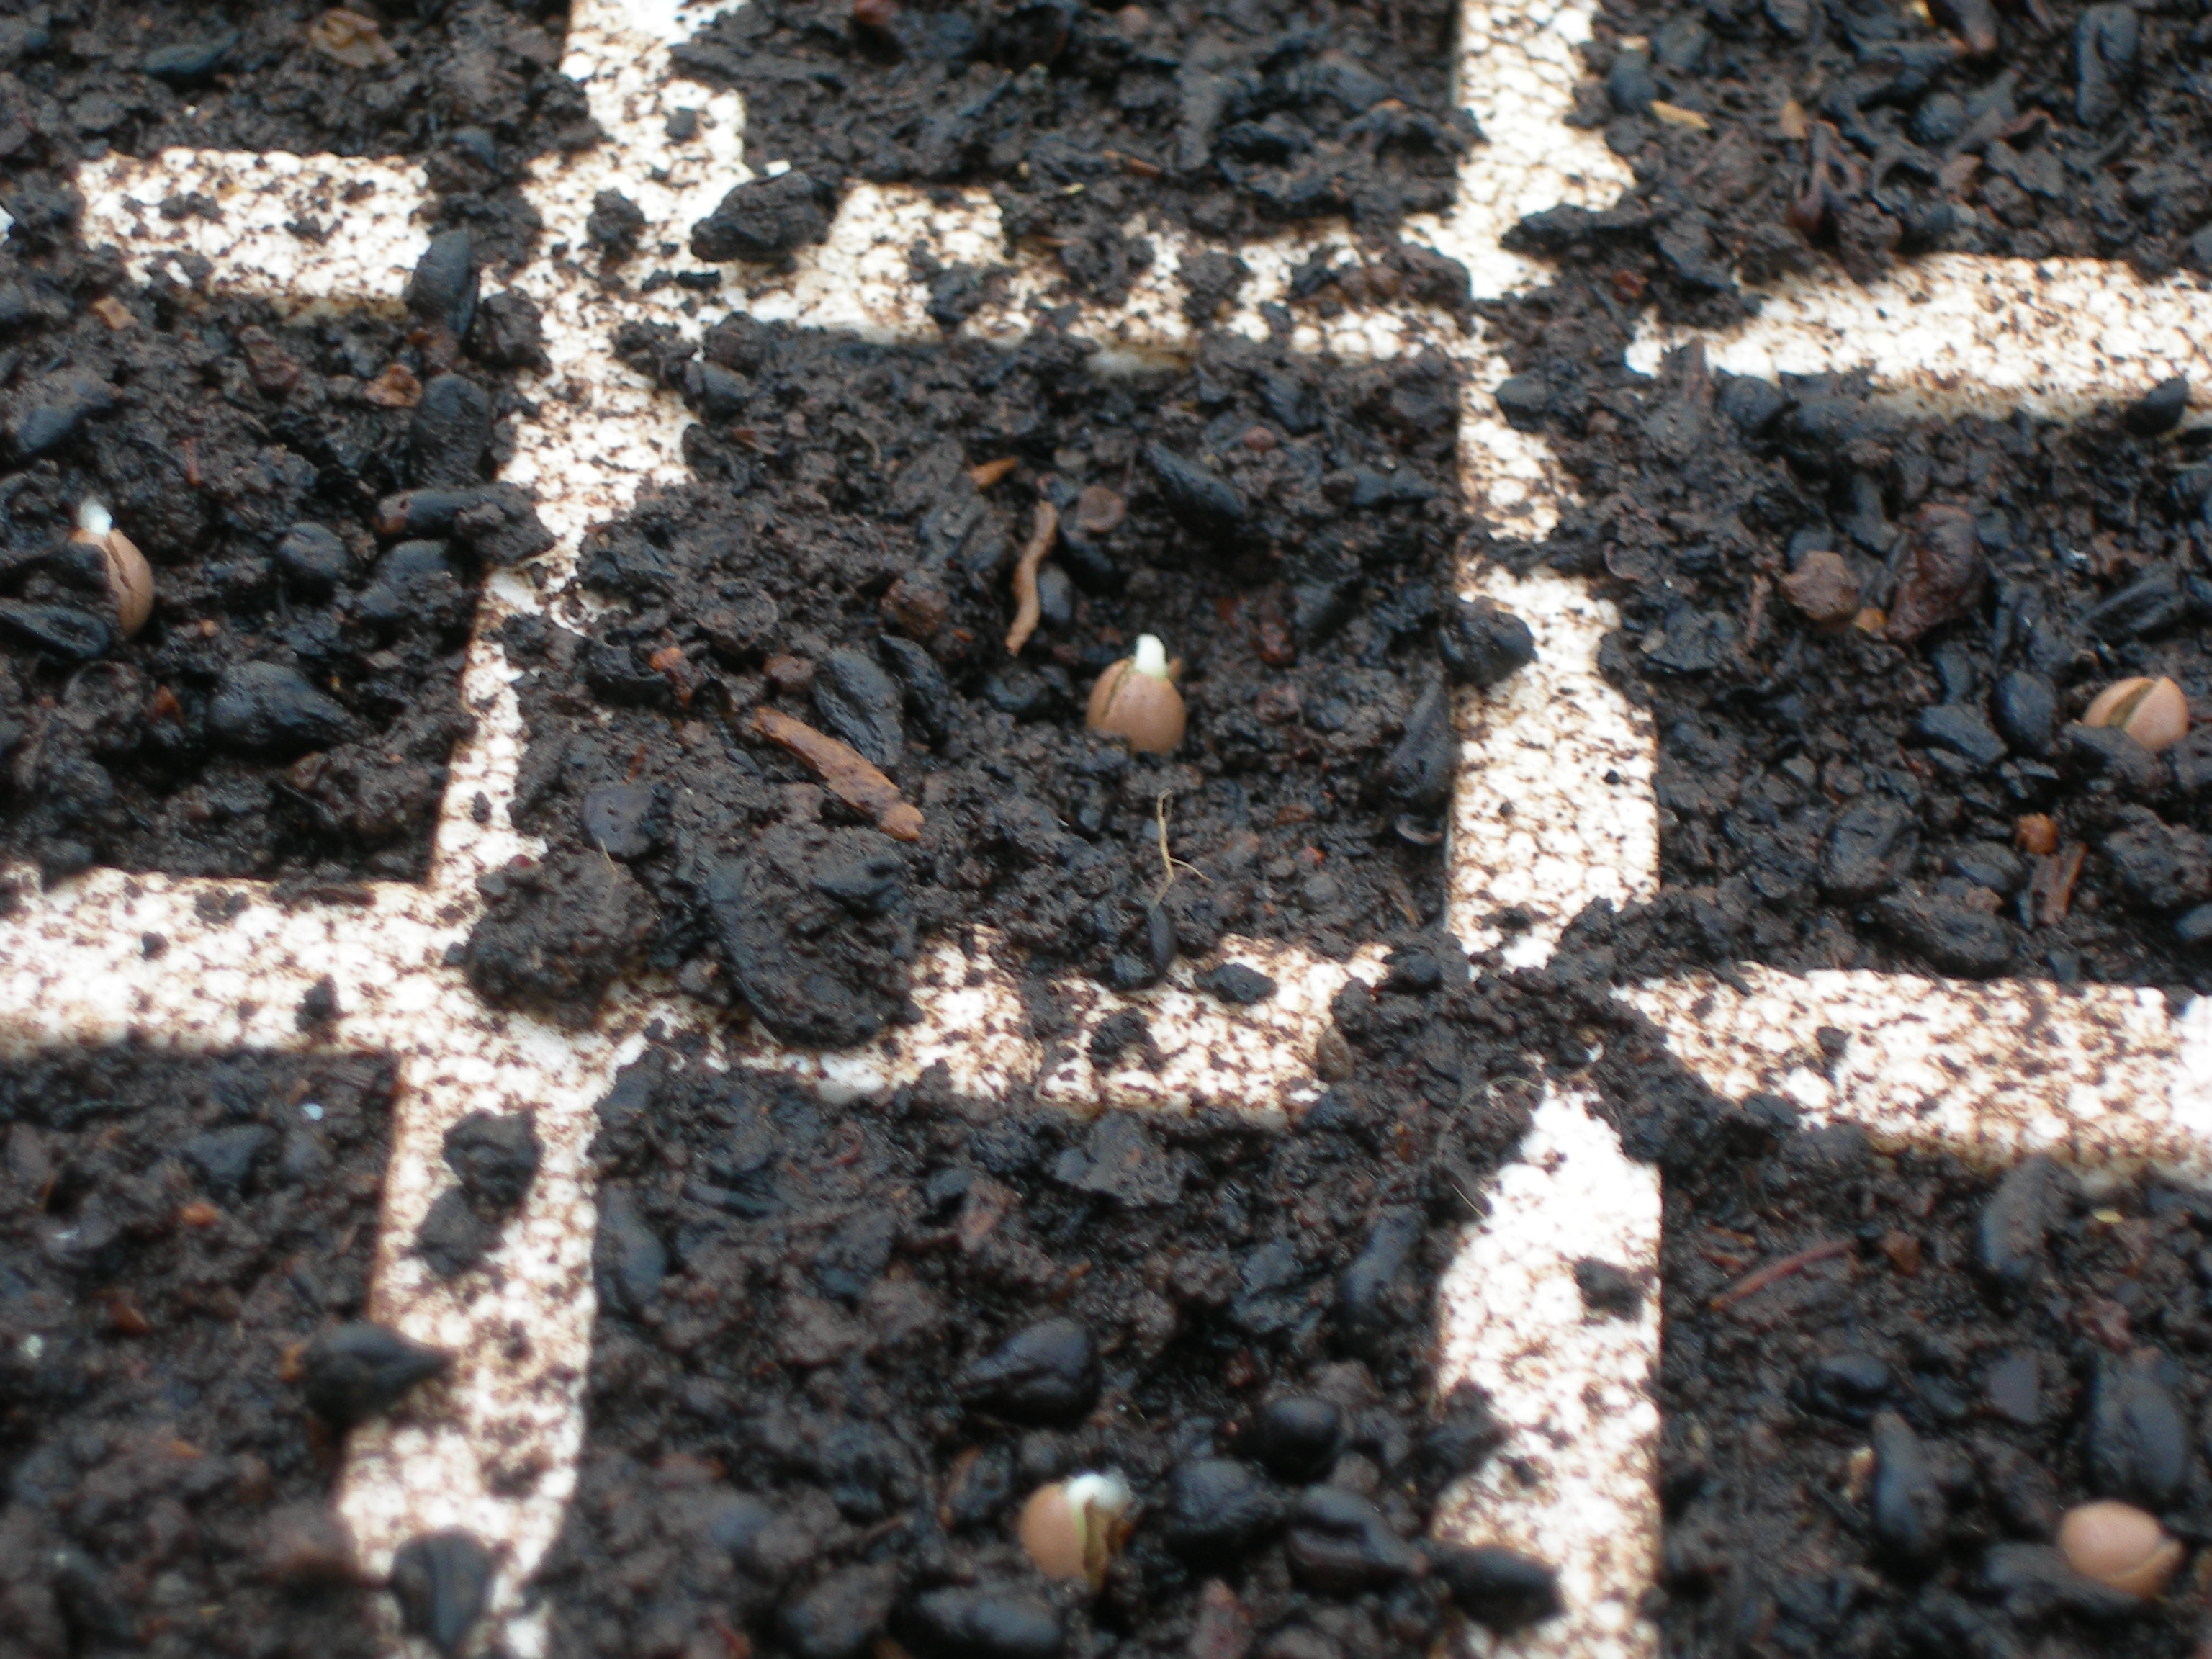
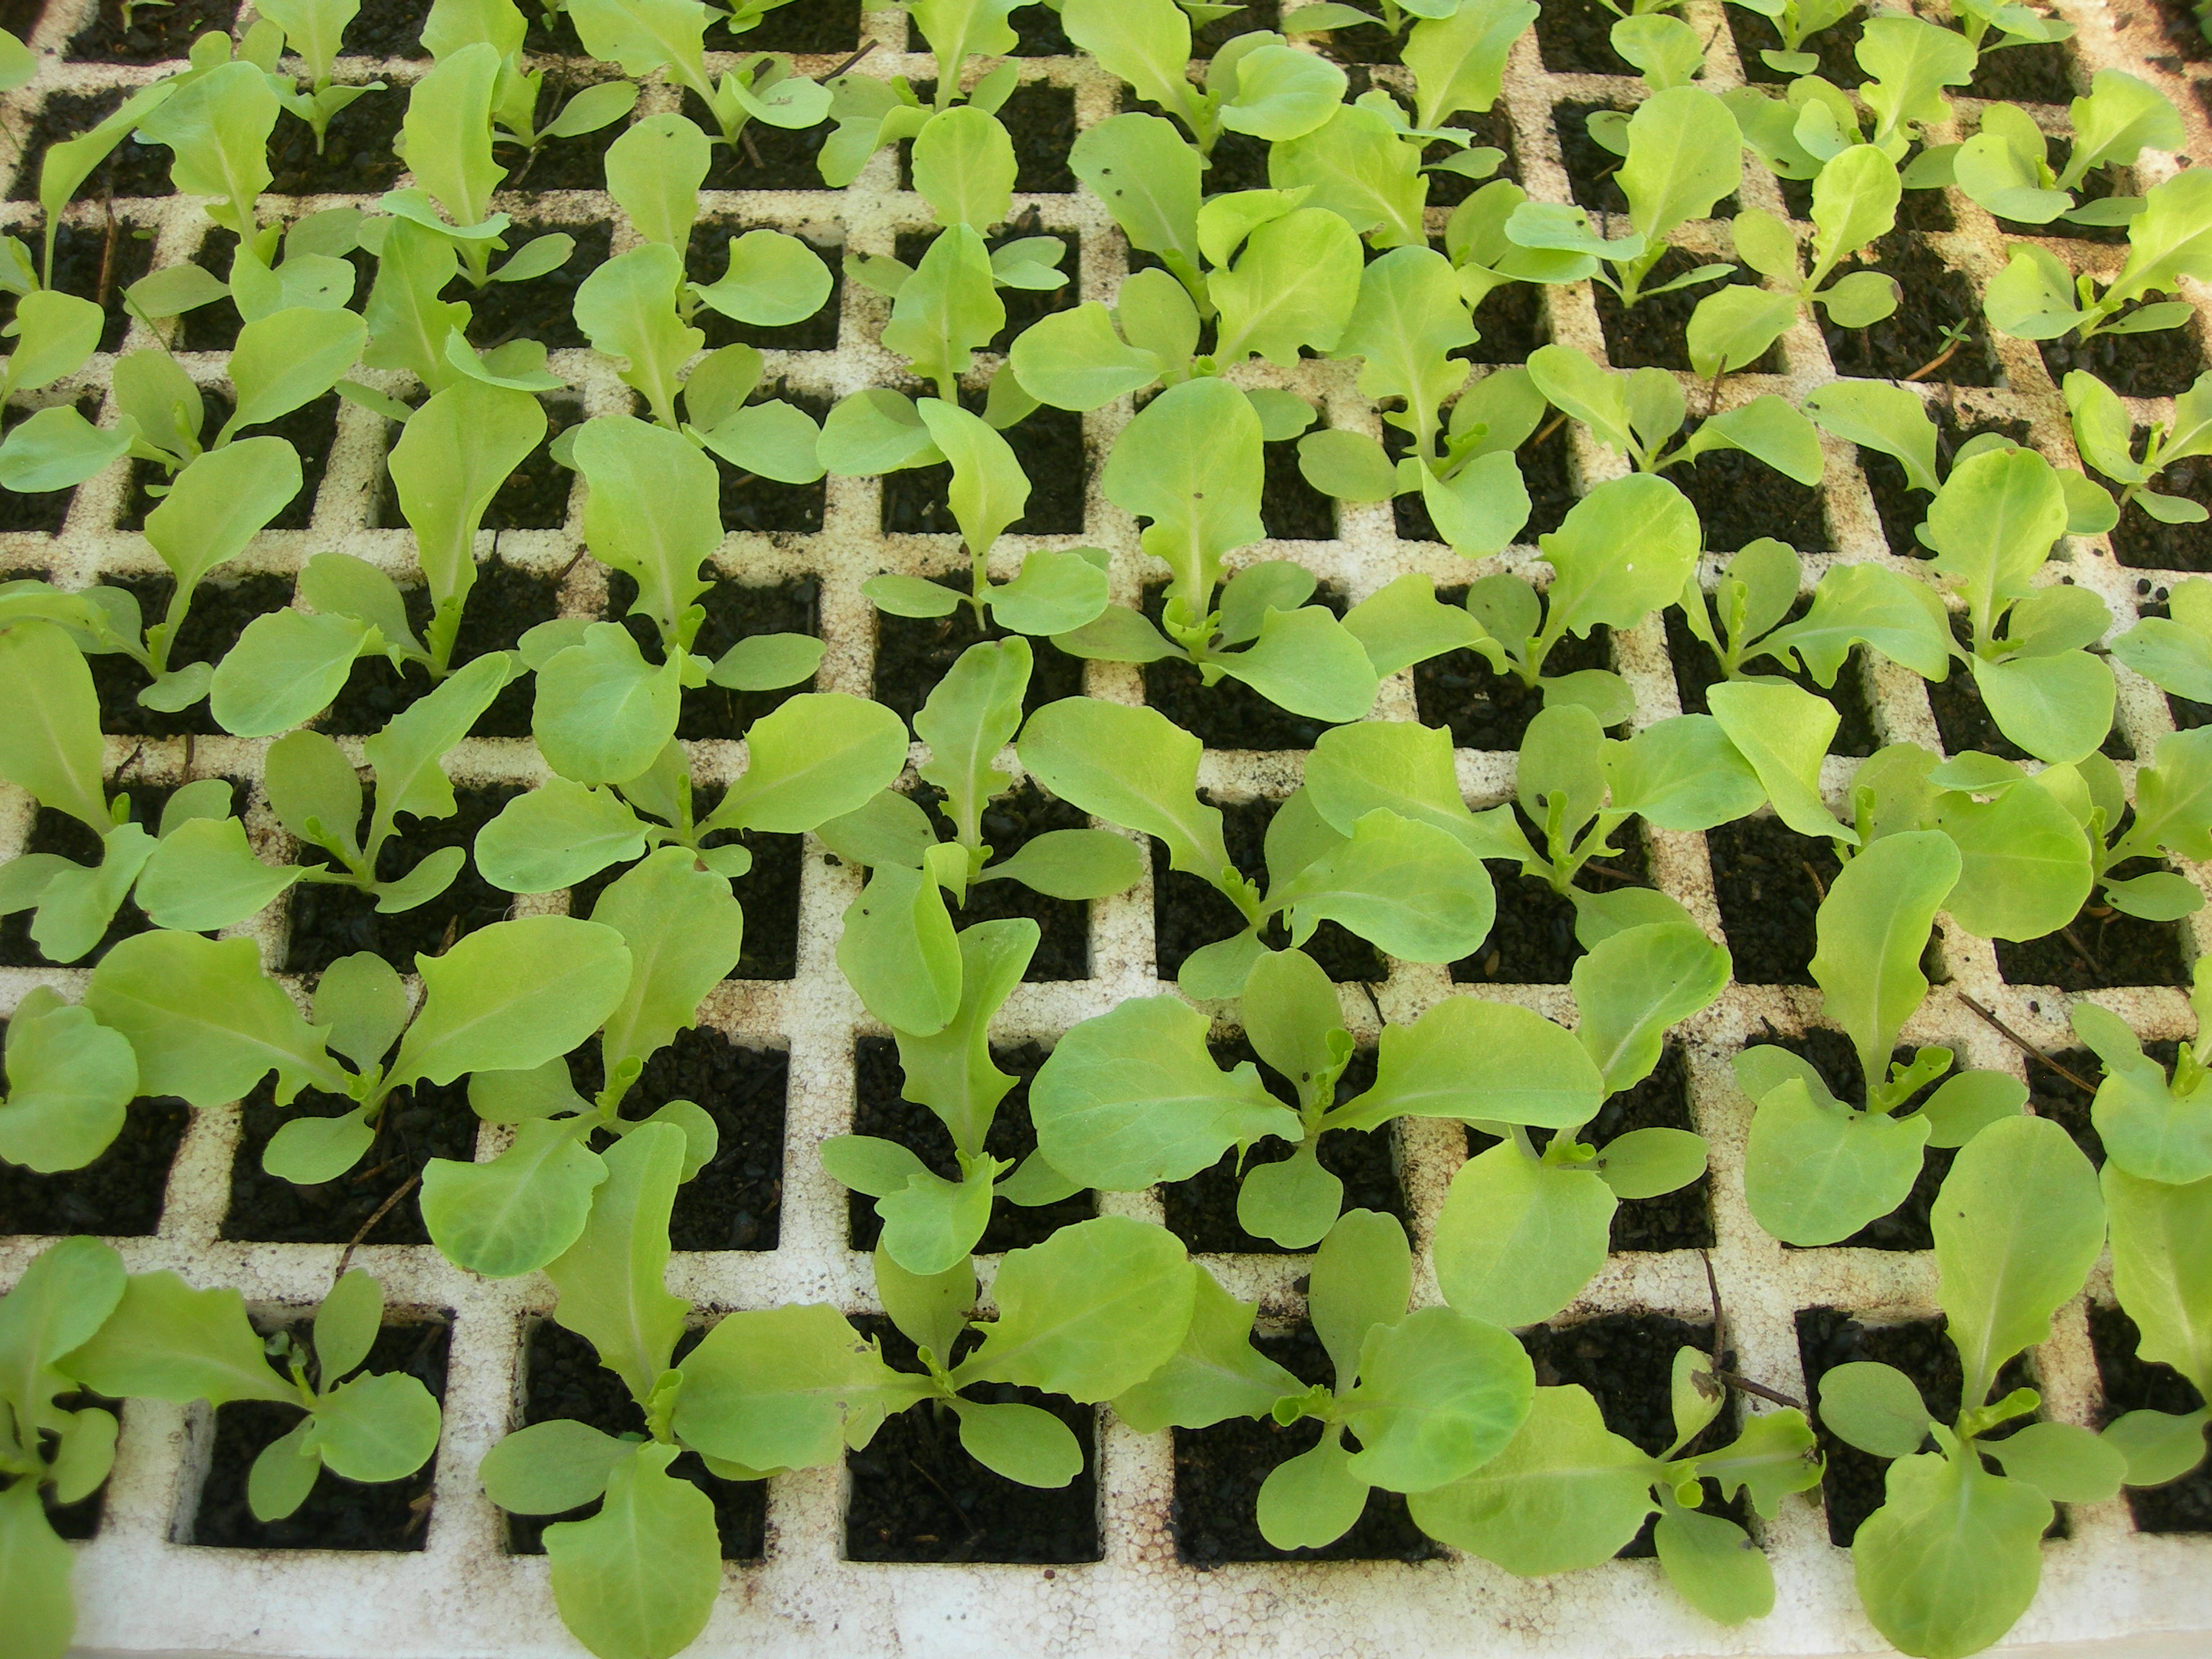
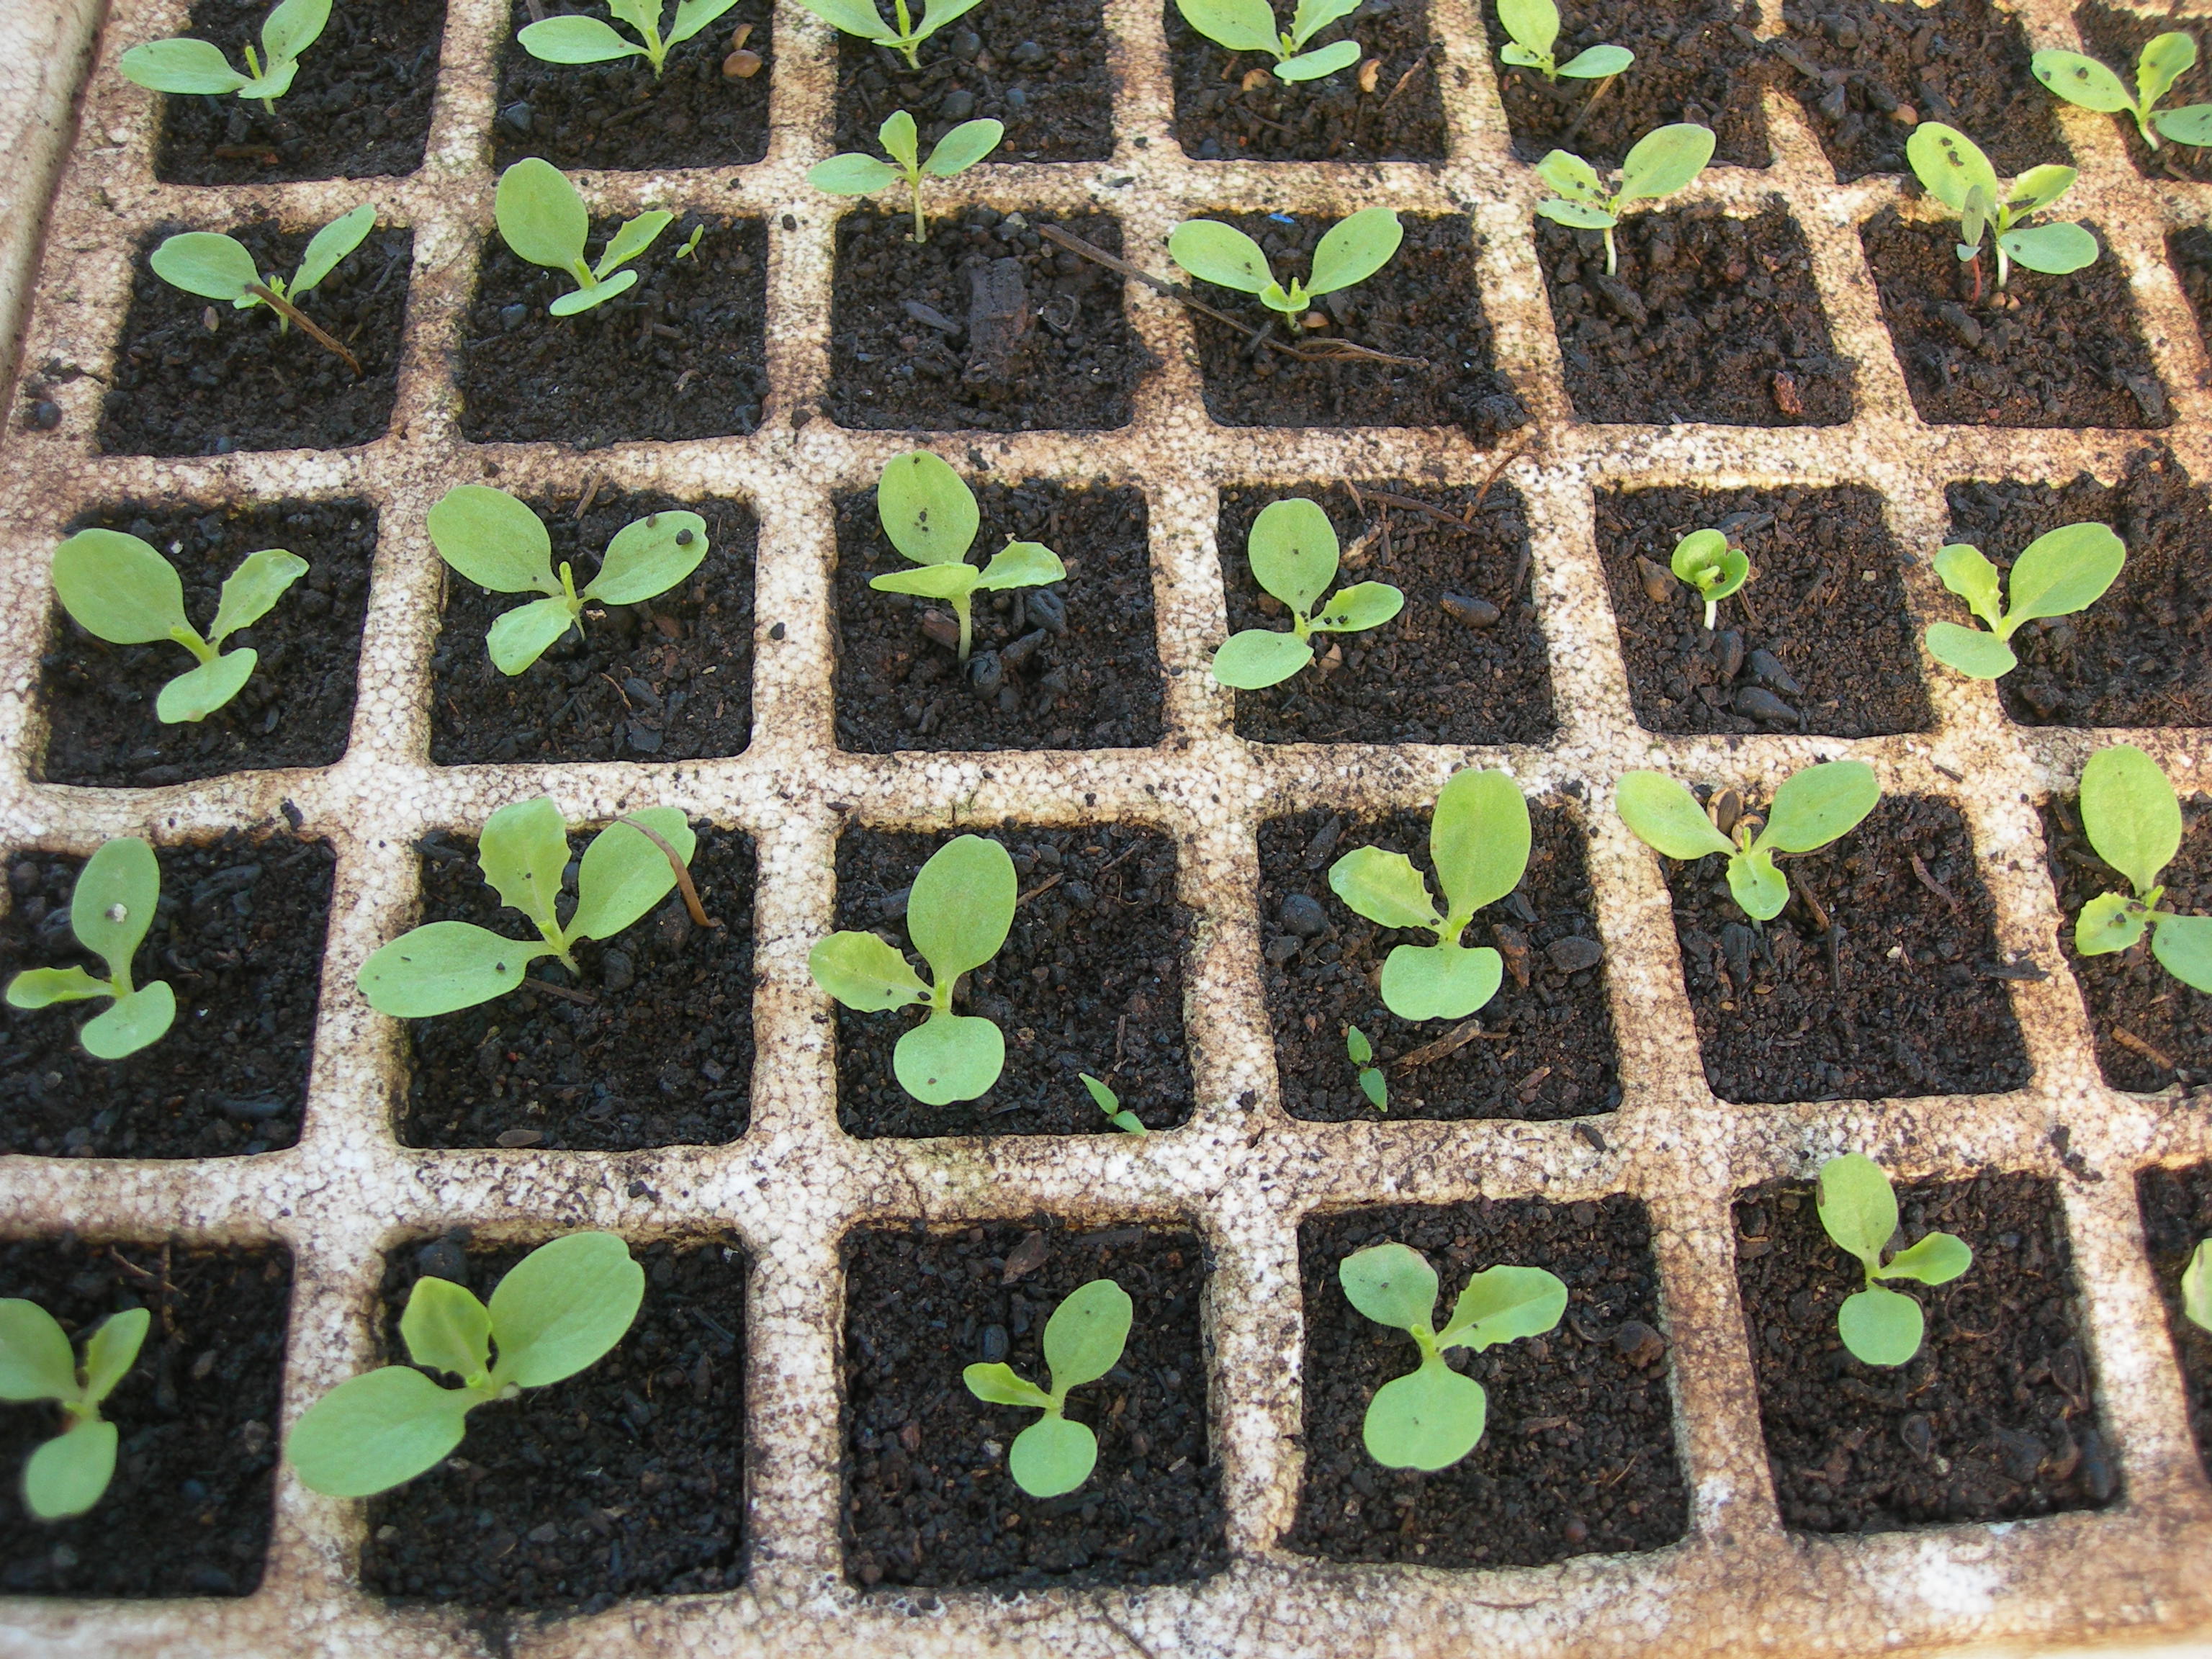
Figure VI.22.- Evolution of the sprouting of lettuce seeds
The time needed before transplanting also depends on the type of seed we sow: it can range between fifteen days and two months approximately (Figure VI.23). It also depends on the climatology of the area, the nutrition of the seedling, the humidity and its season. We will learn all of this by trial and error, using the information we find in specialized manuals about seeds and sowing and with the lunar calendar of the current year.
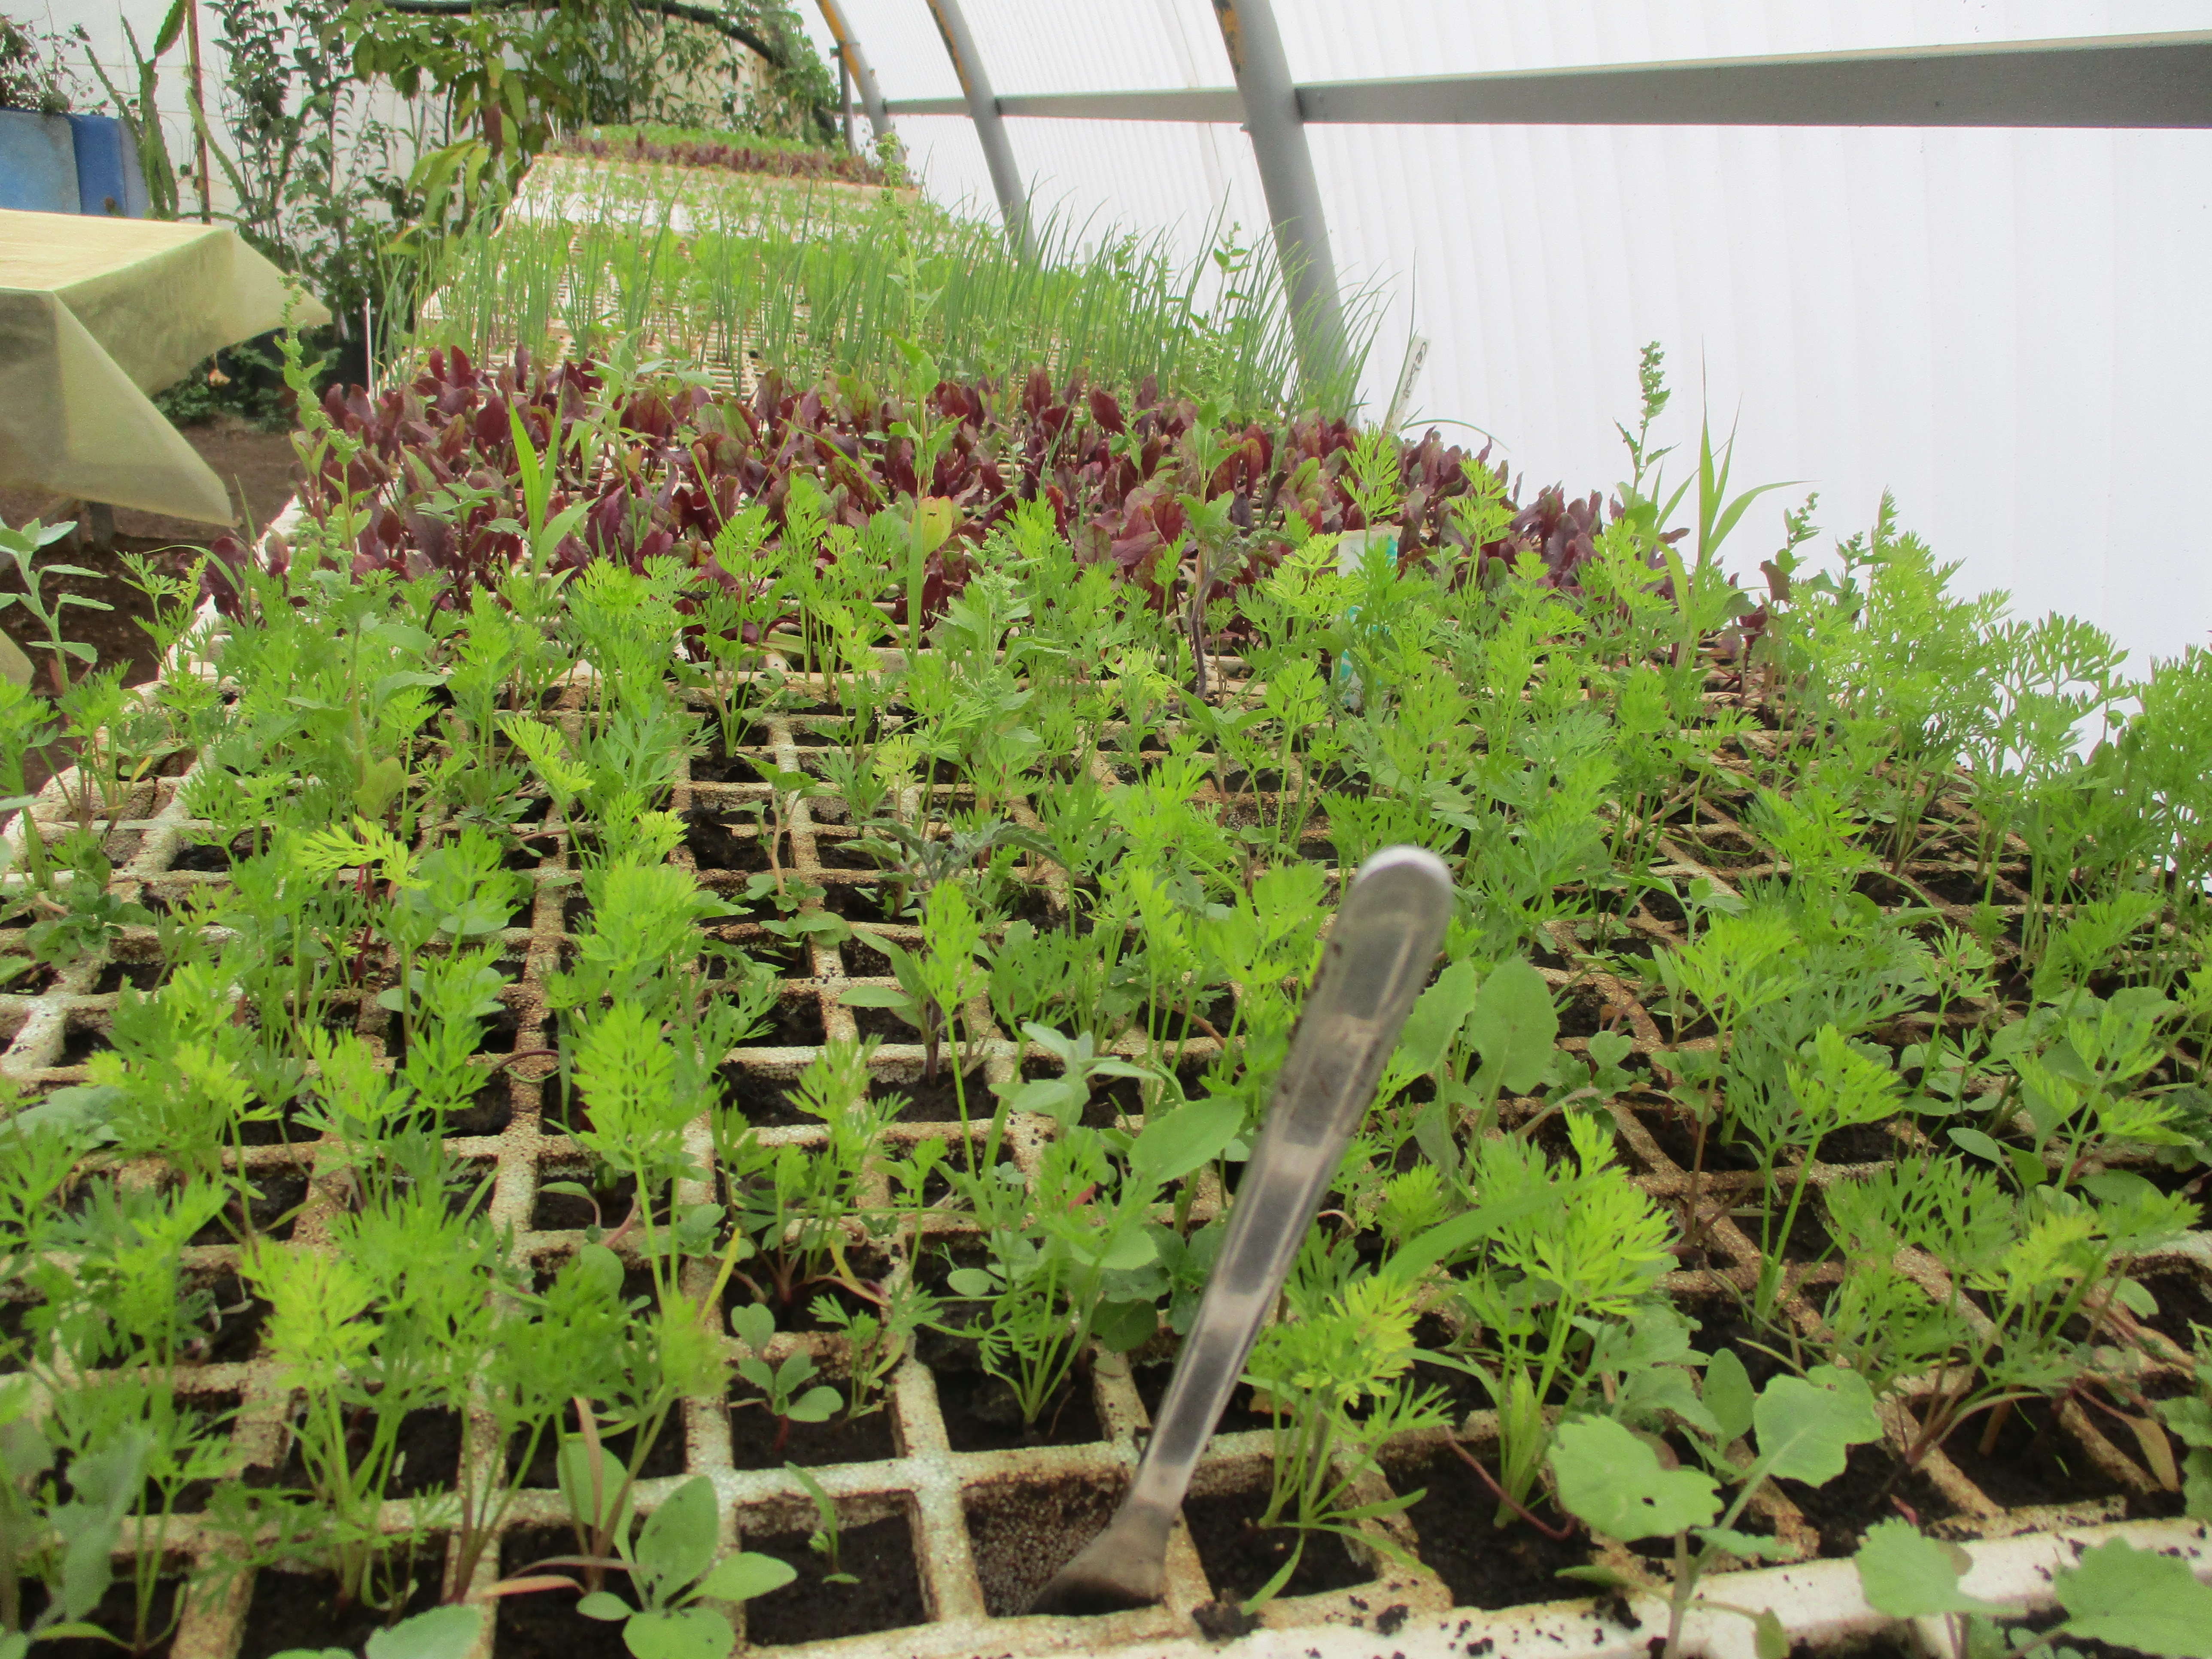

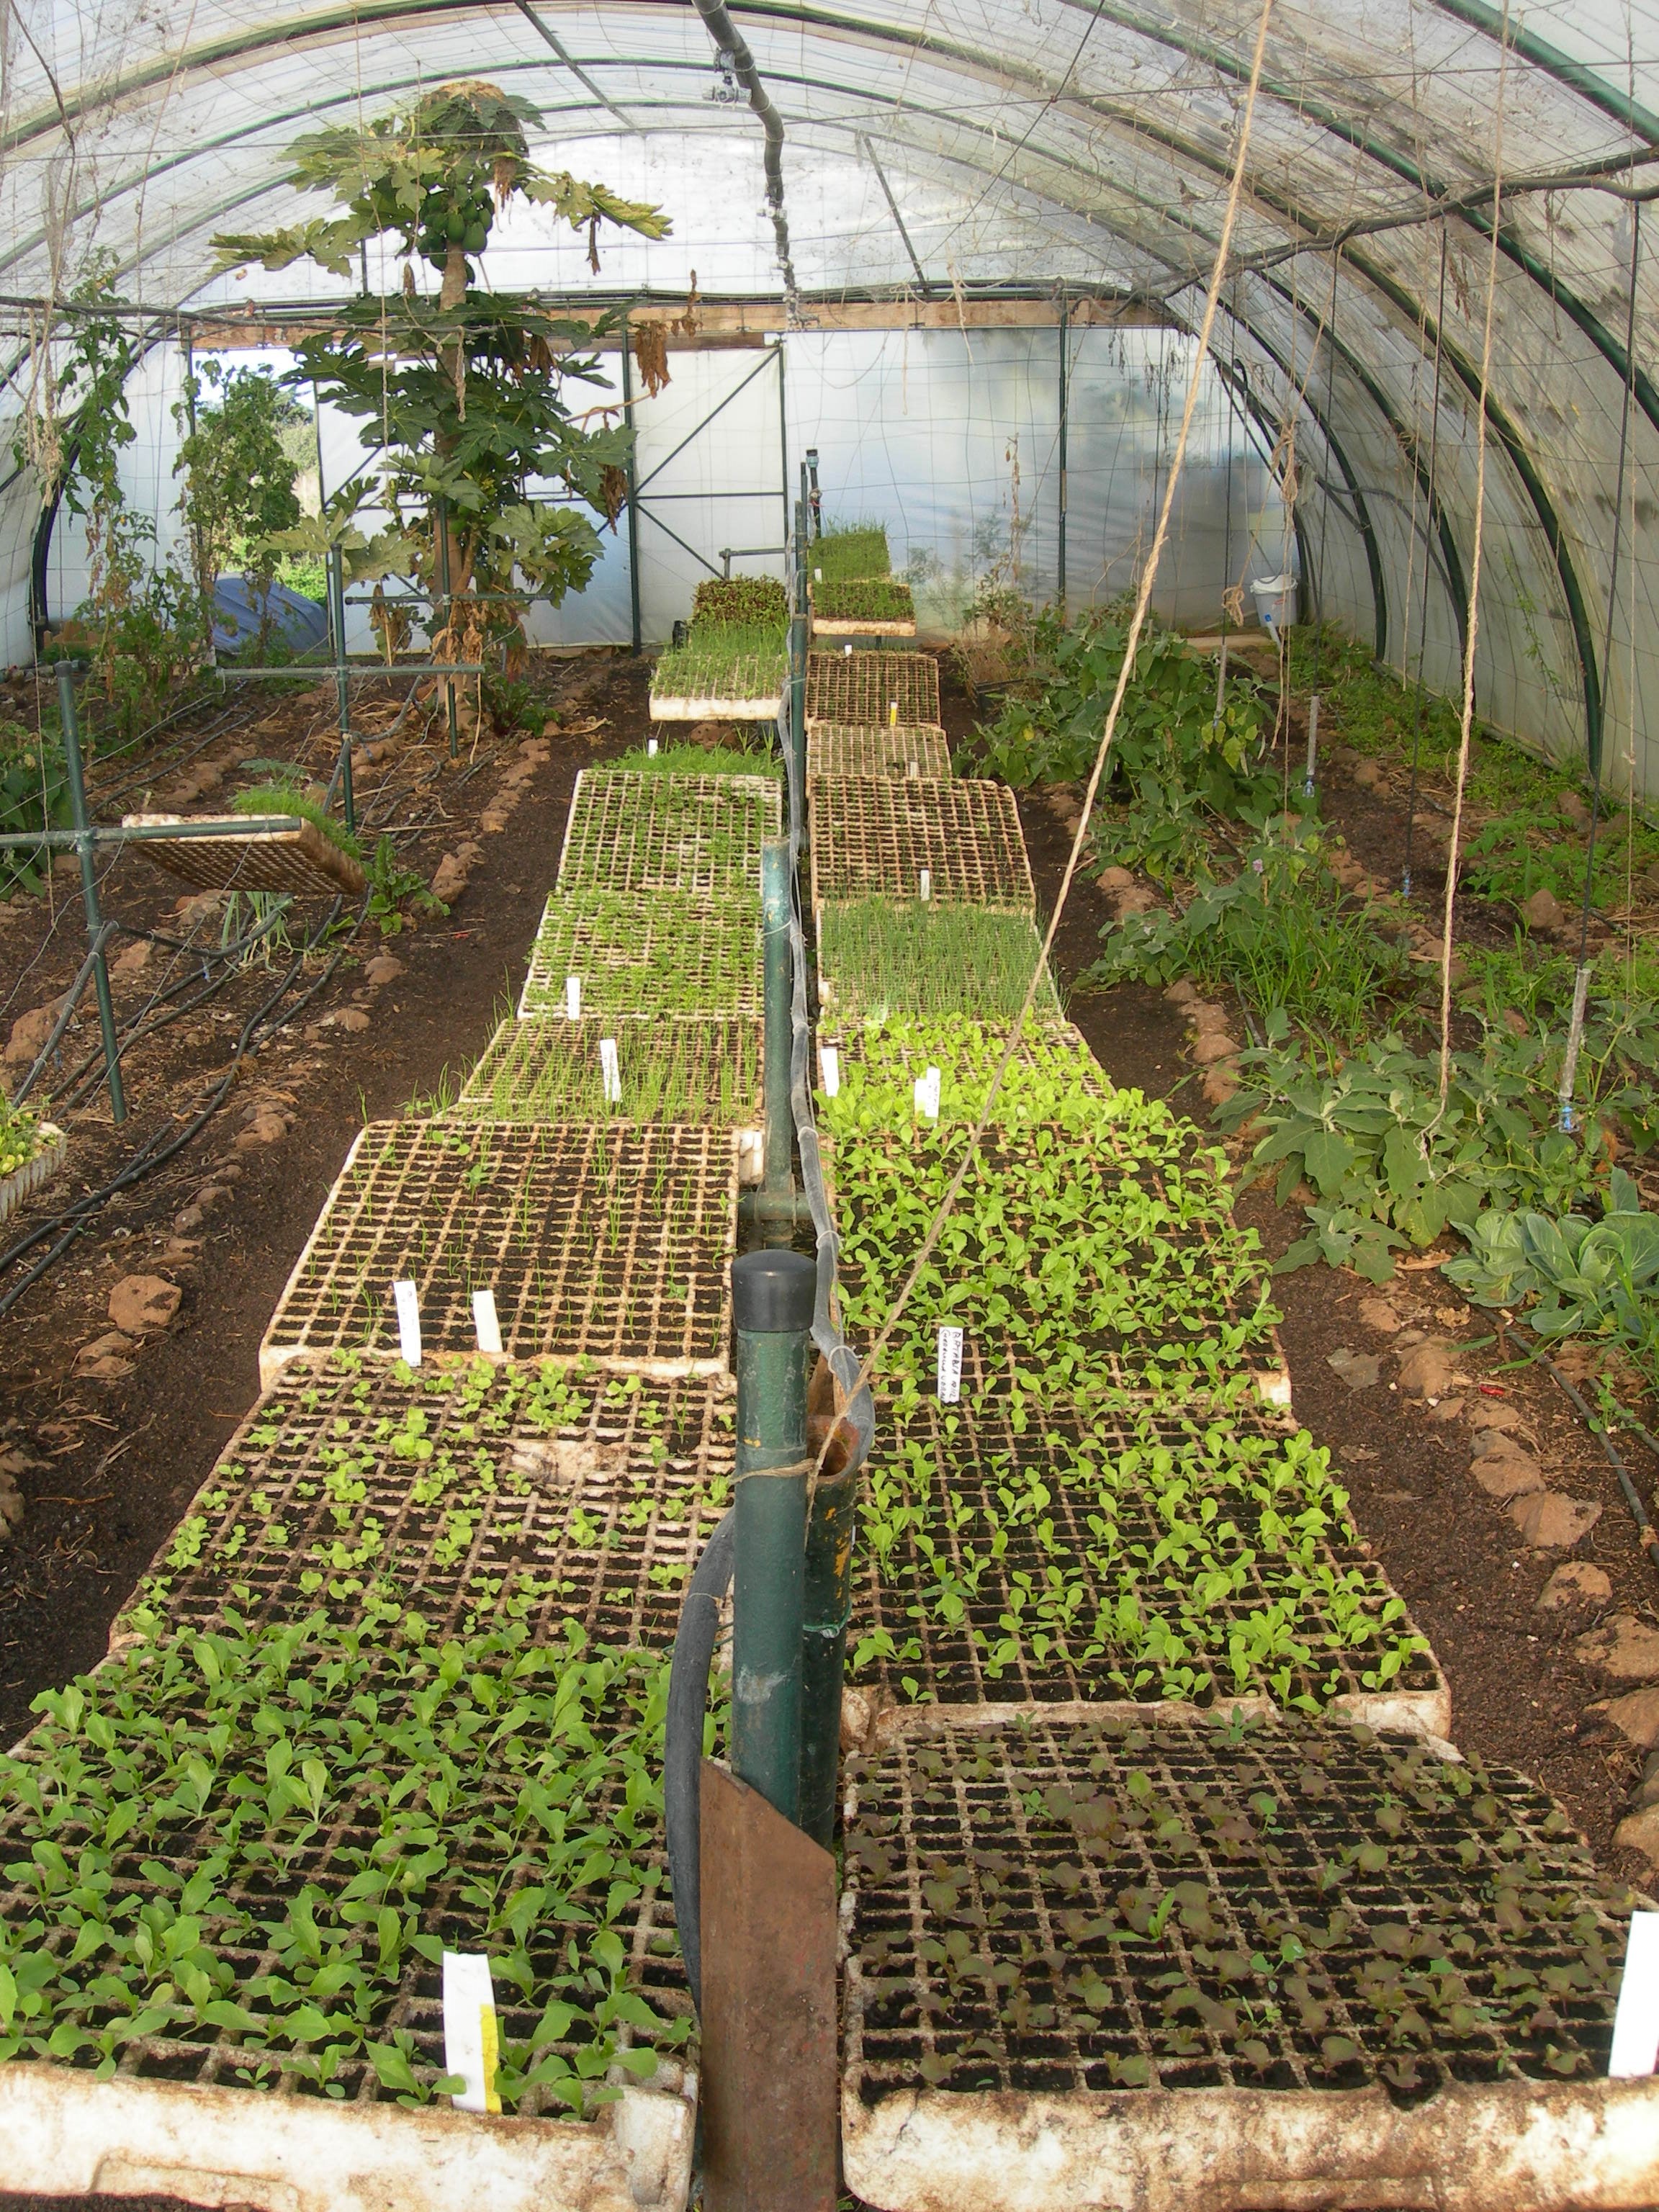
Figure VI.23.- Trays with different seedlings ready to transplant
The small inconveniences that our substrate has in relation to peat are offset by the advantages of its self-sufficiency by closing virtuous cycles, by reusing a waste in a quality resource in a local and responsible way, facing the problems of depletion, pollution, global warming… The peat bogs are the maximum carbon sinks and potential wildlife refuges that are destroyed by their drainage and extraction, when we support their consumption.
VI.4 Time to transplant to the ground
When it’s time to transplant the seedlings to the beds we first have to water the trays. We make sure that, when we pull them out, the seedlings come out easily and with their entire rootball (Figure VI.24).
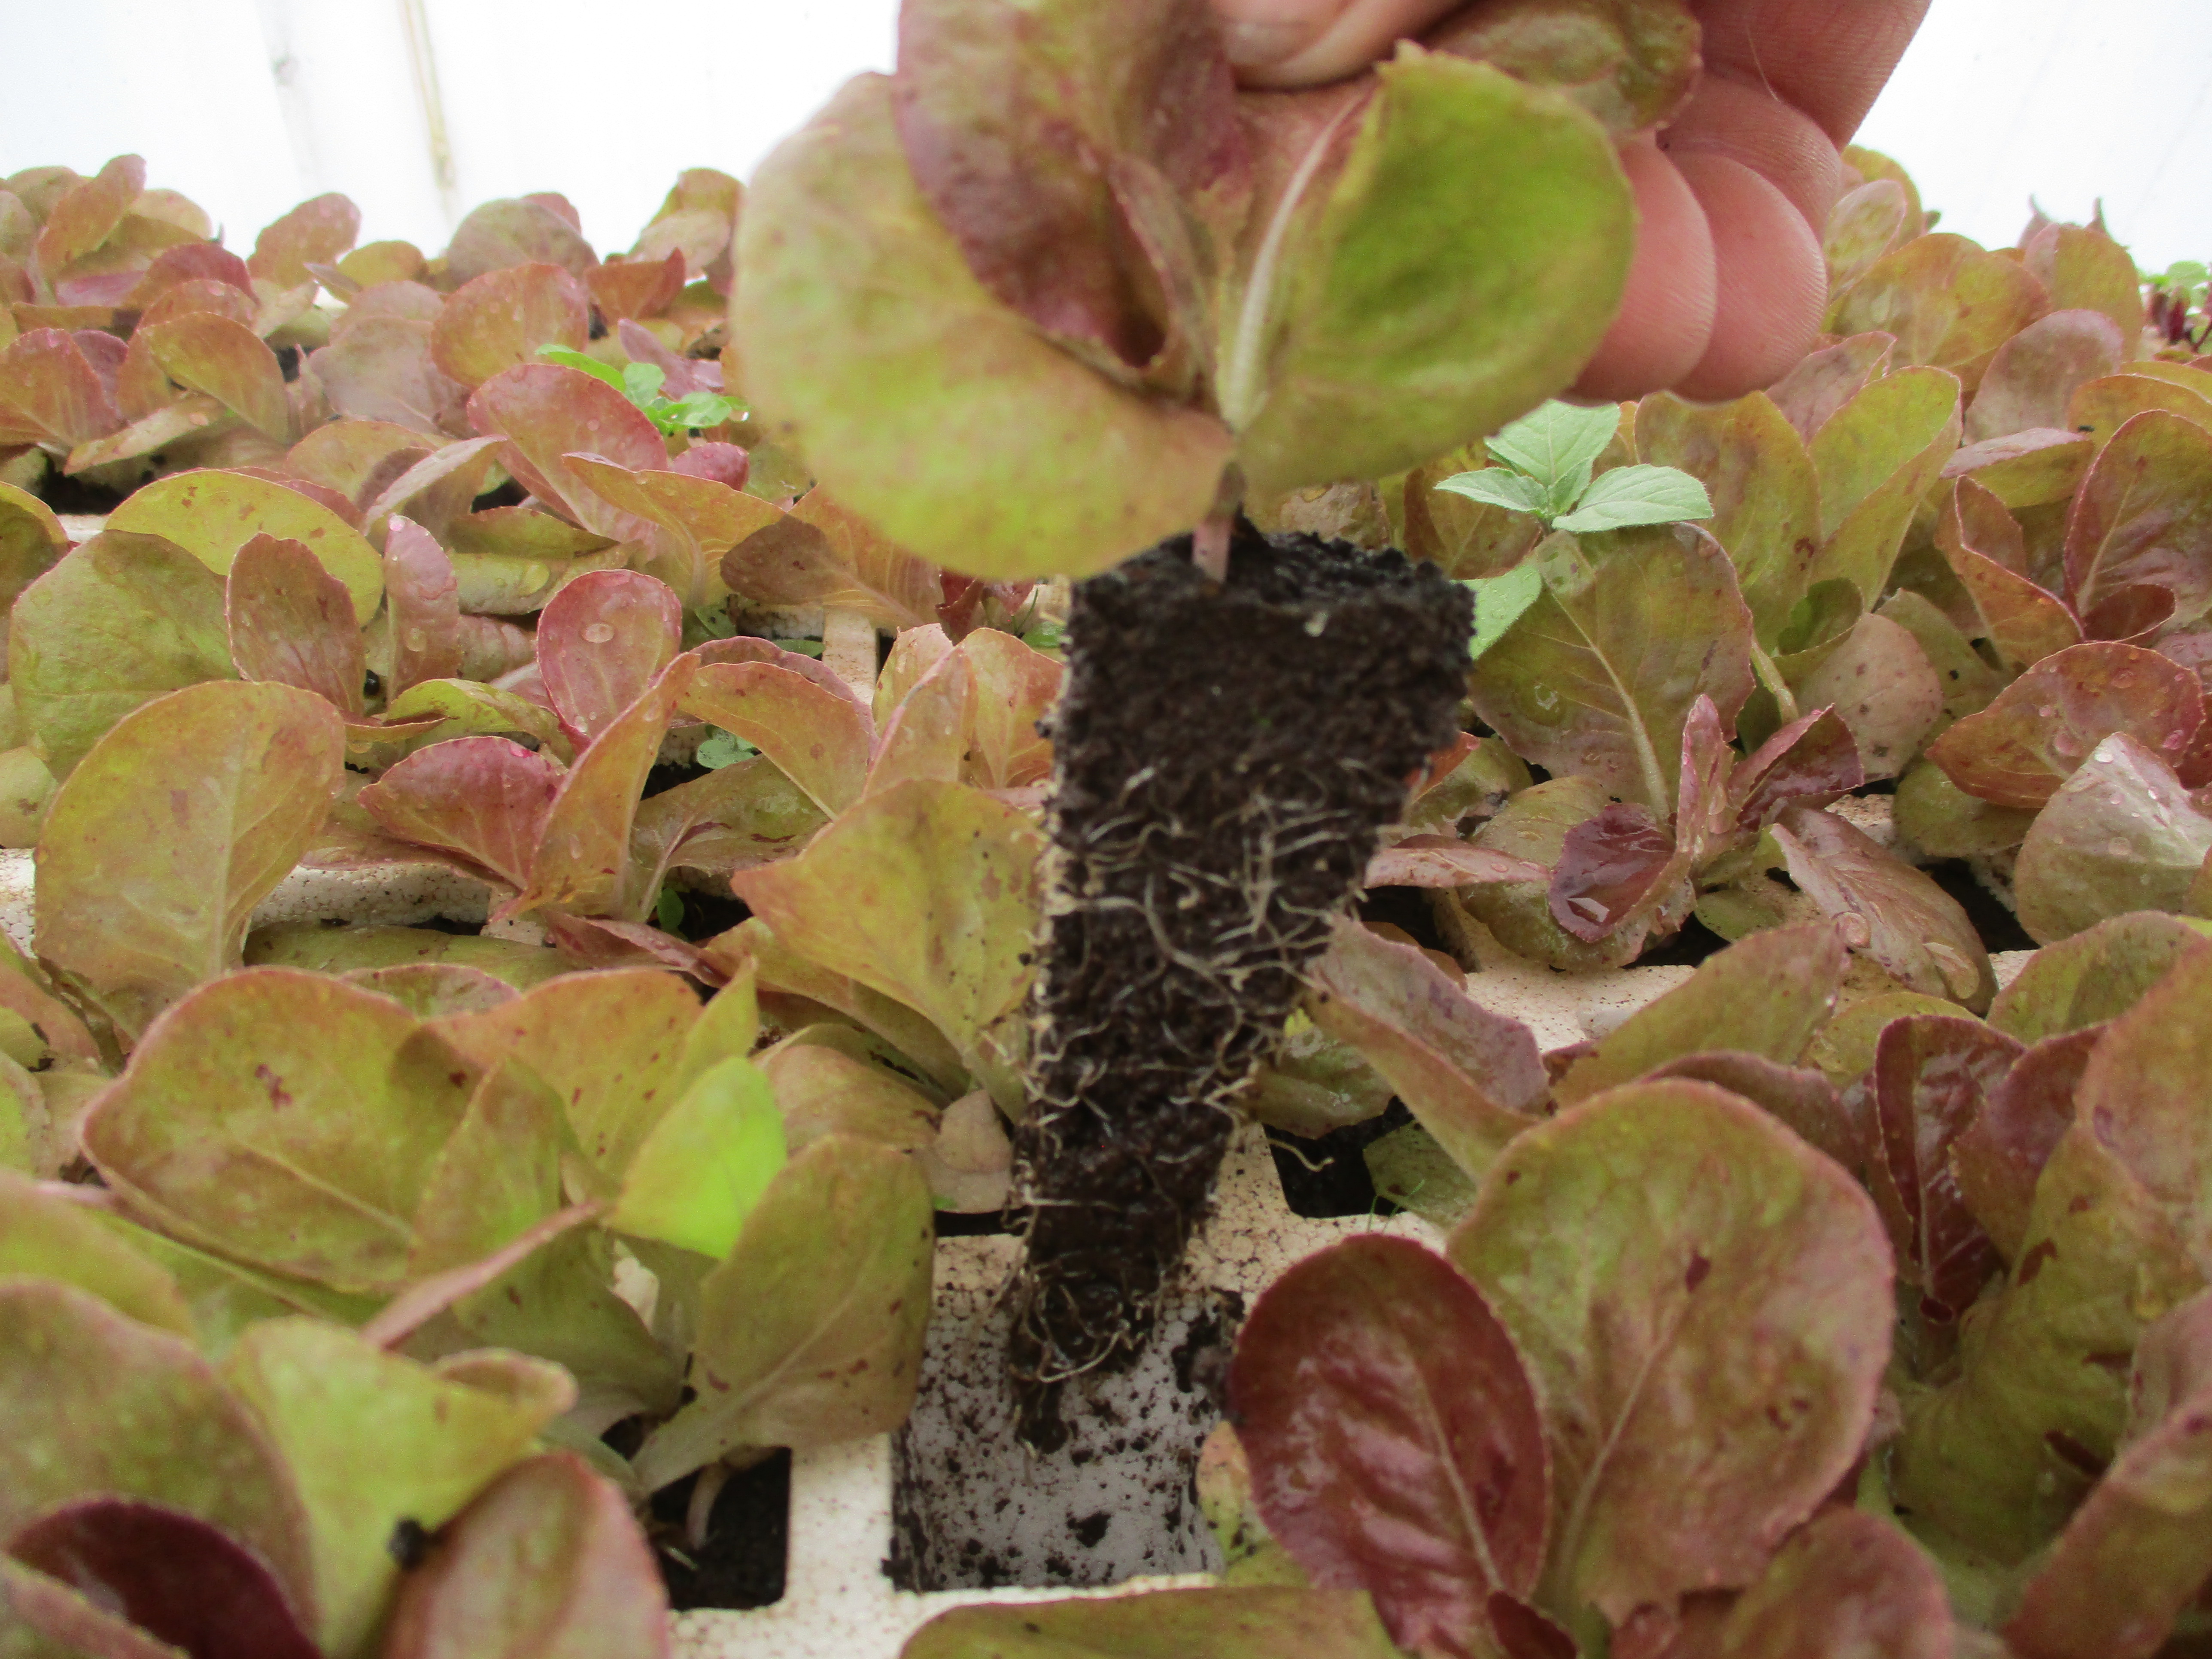
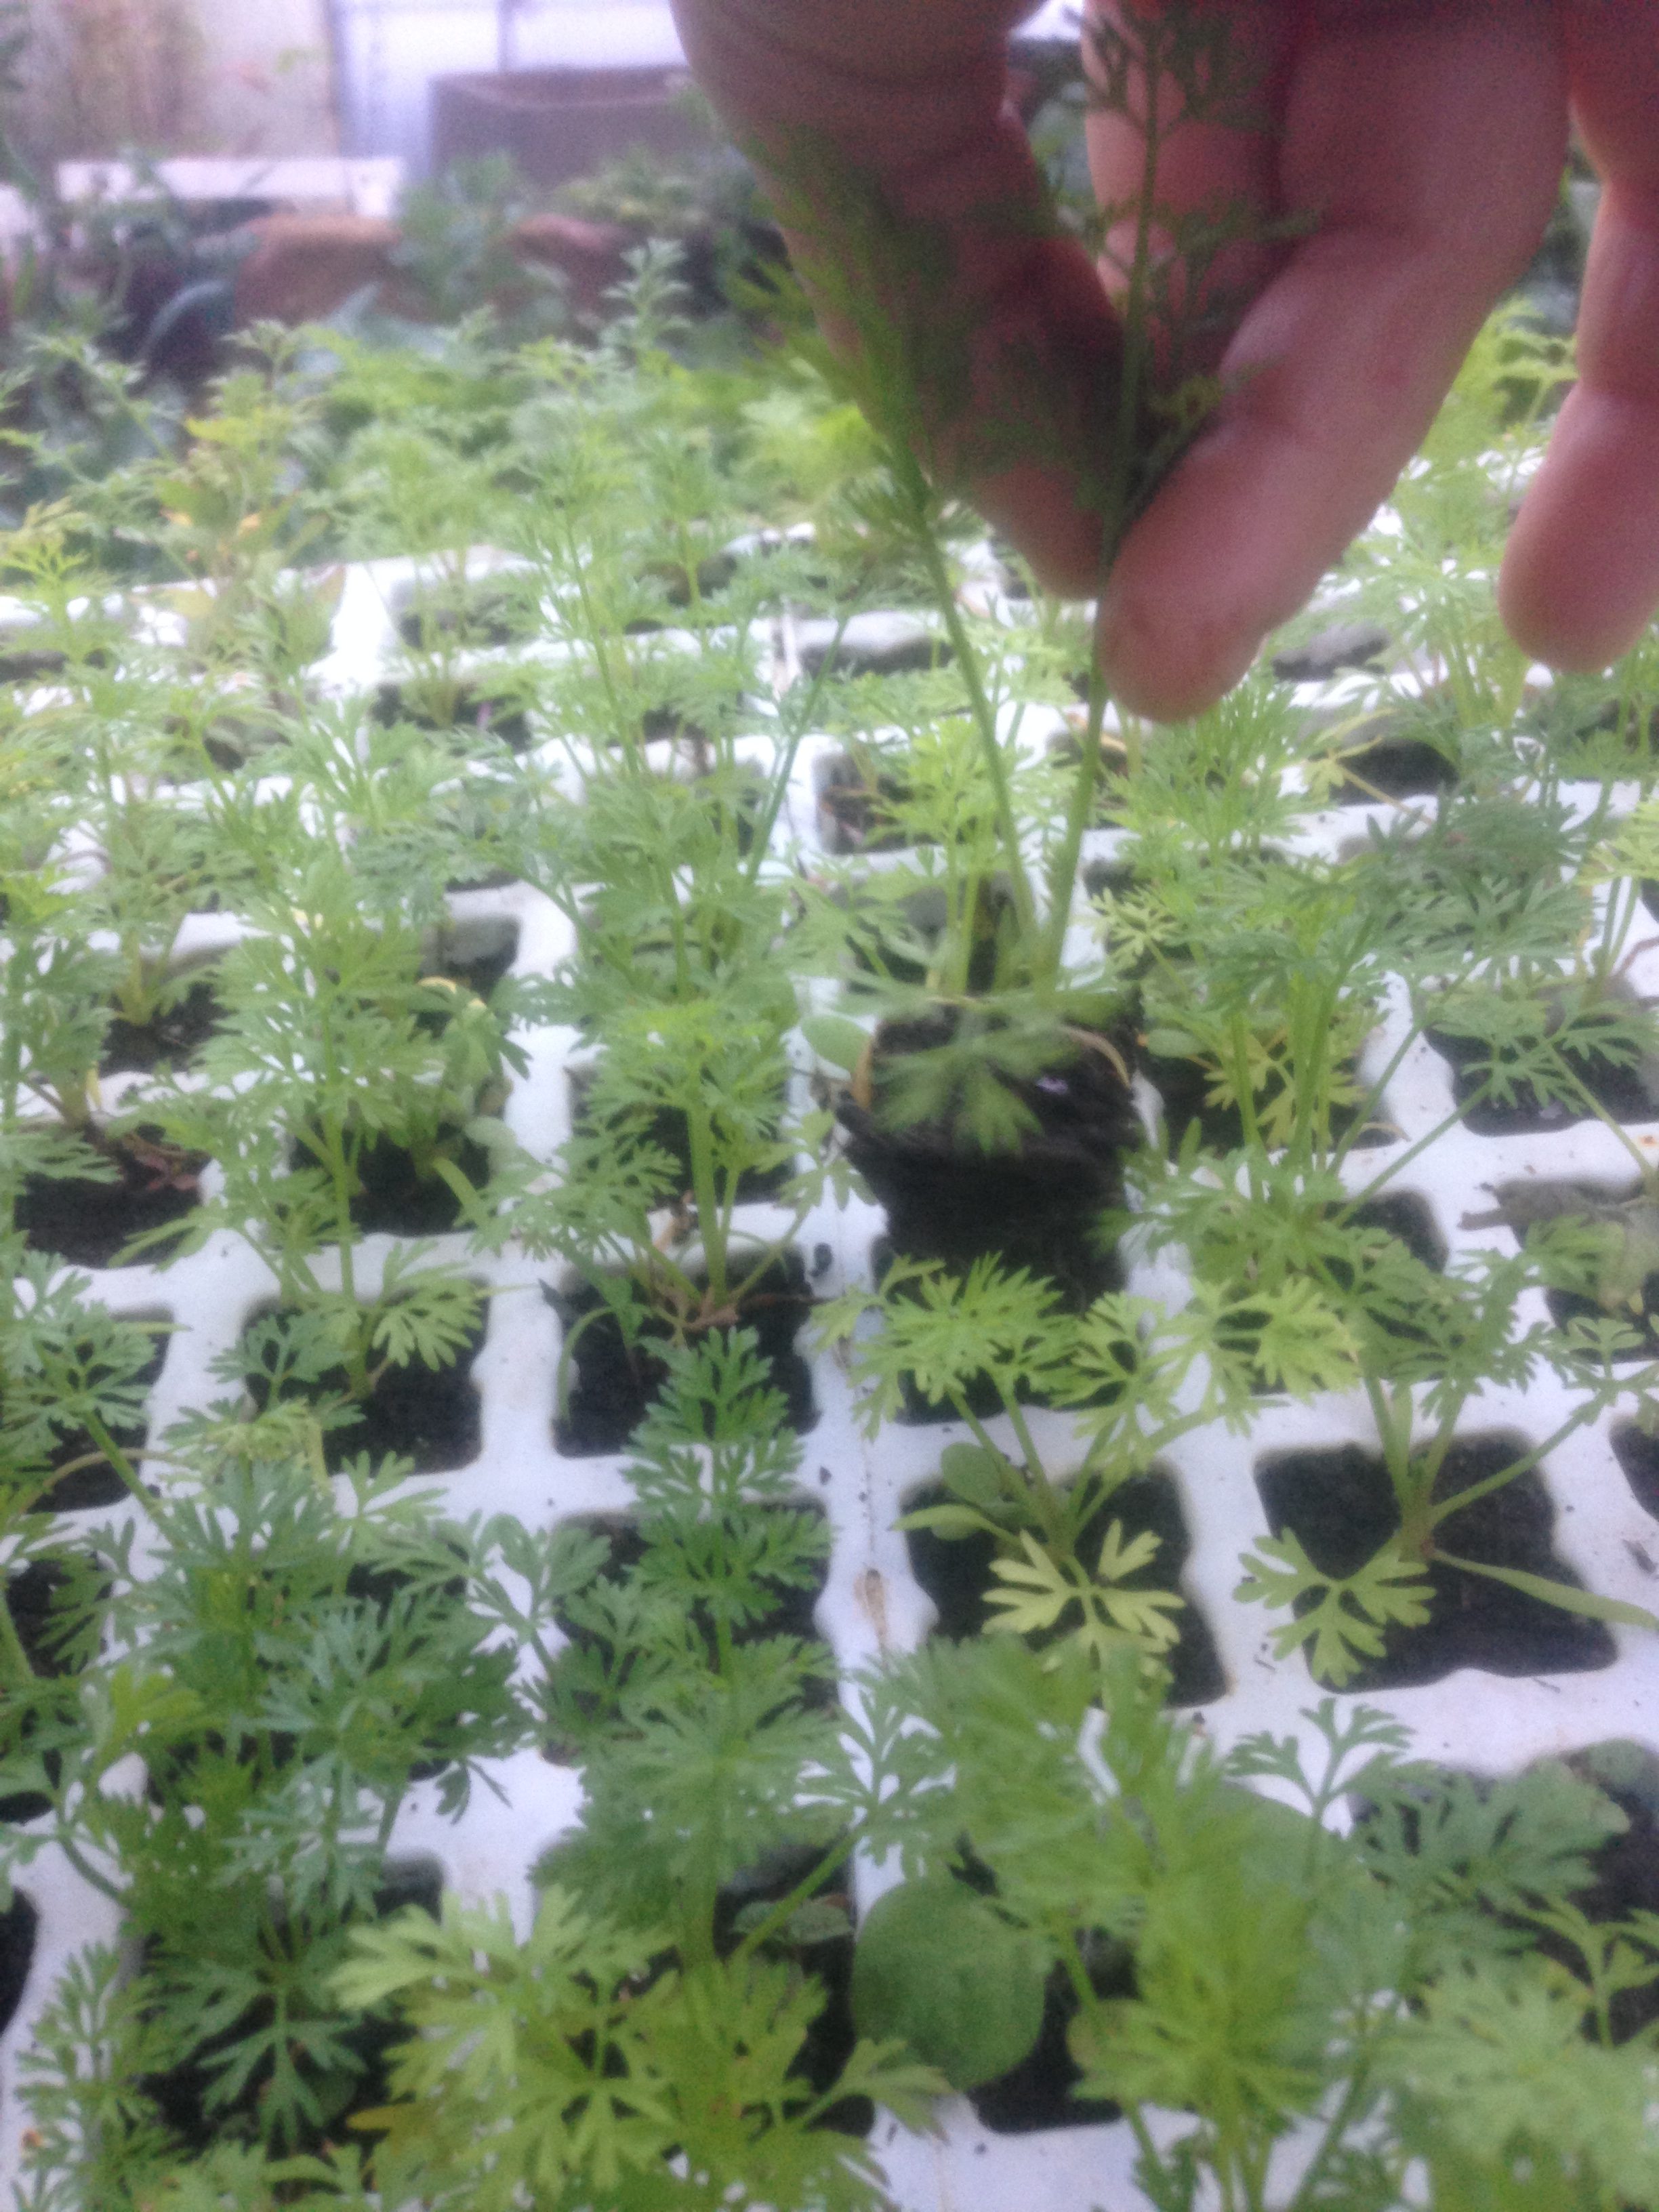
Figure VI.24.- Extracting lettuce and carrot seedlings with the fingers
It could happen that some of them have turned out to be somewhat small even though they stayed long enough in the greenhouse to grow. In this case it is better to transplant them into the ground with the rest of the seedlings so they do not get weak.
In order to take out the seedlings from one side of the slots we can use a tool such as a dull knife, being extremely careful with plants such as carrots not to cut the taproot (Figure VI.25).
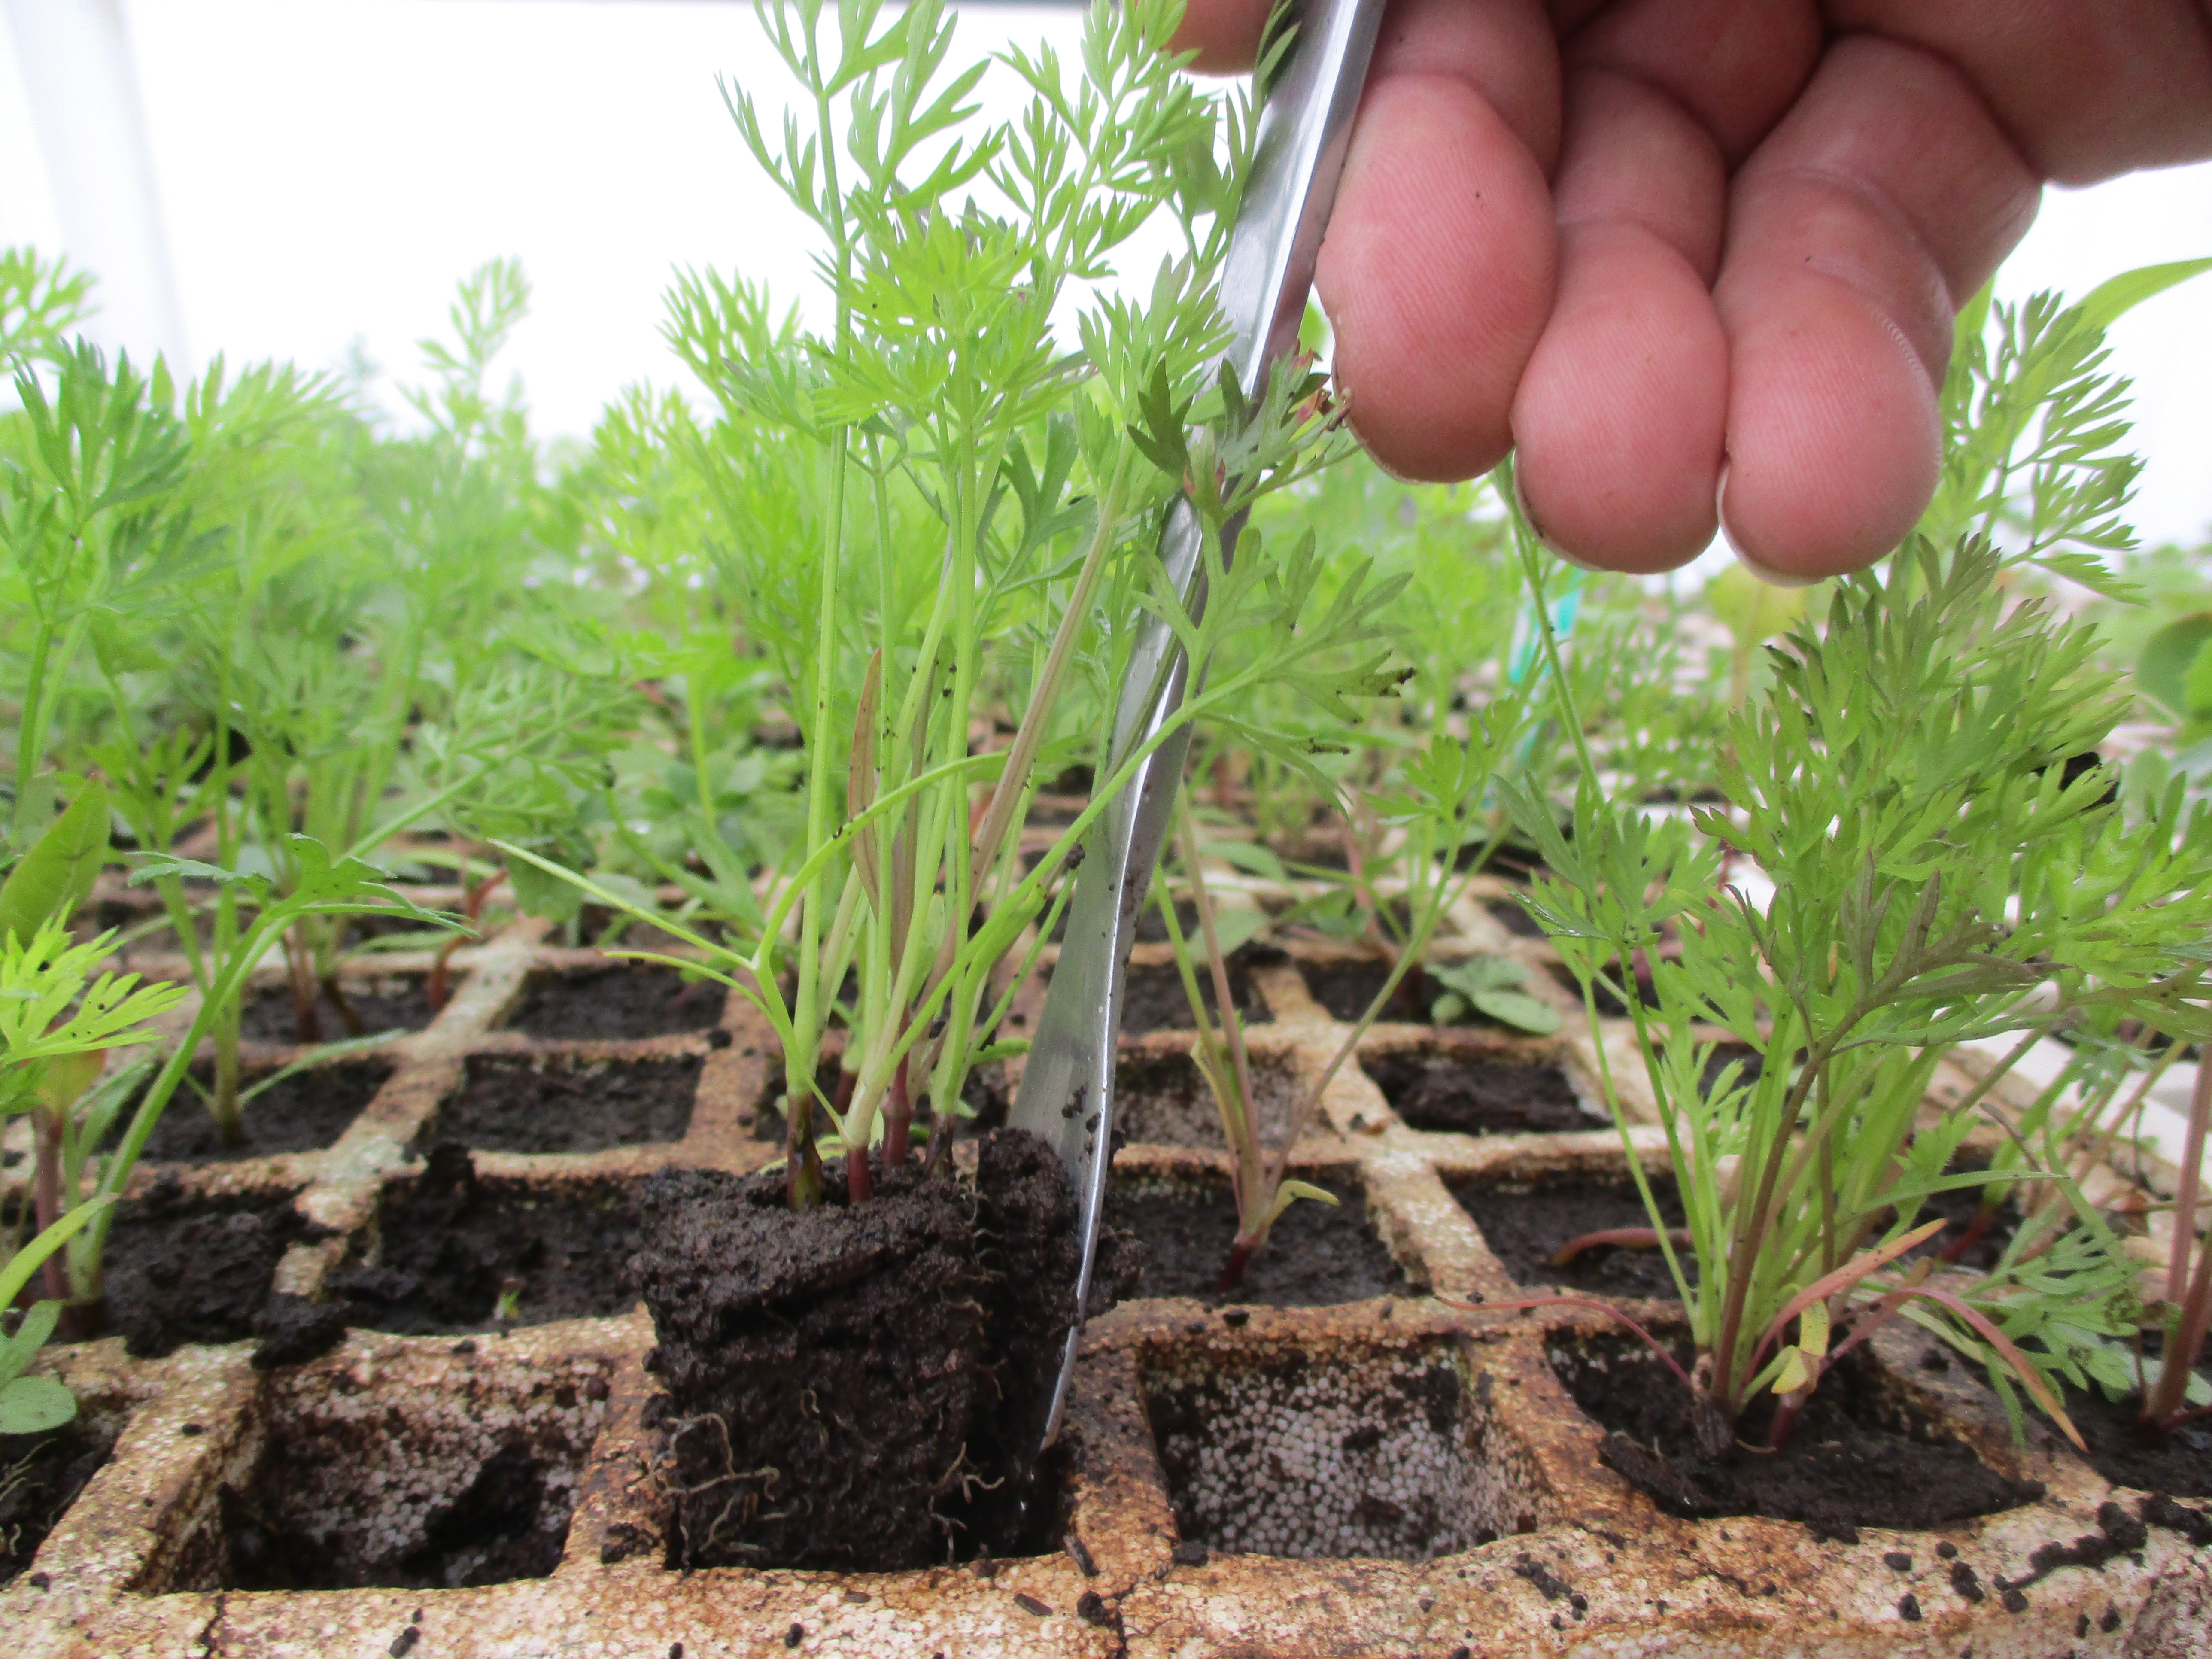

Figure VI.25.- Extracting the seedlings with a dull knife
We distribute the seedlings in the beds as it was described in the previous didactic unit (Figure VI.26).
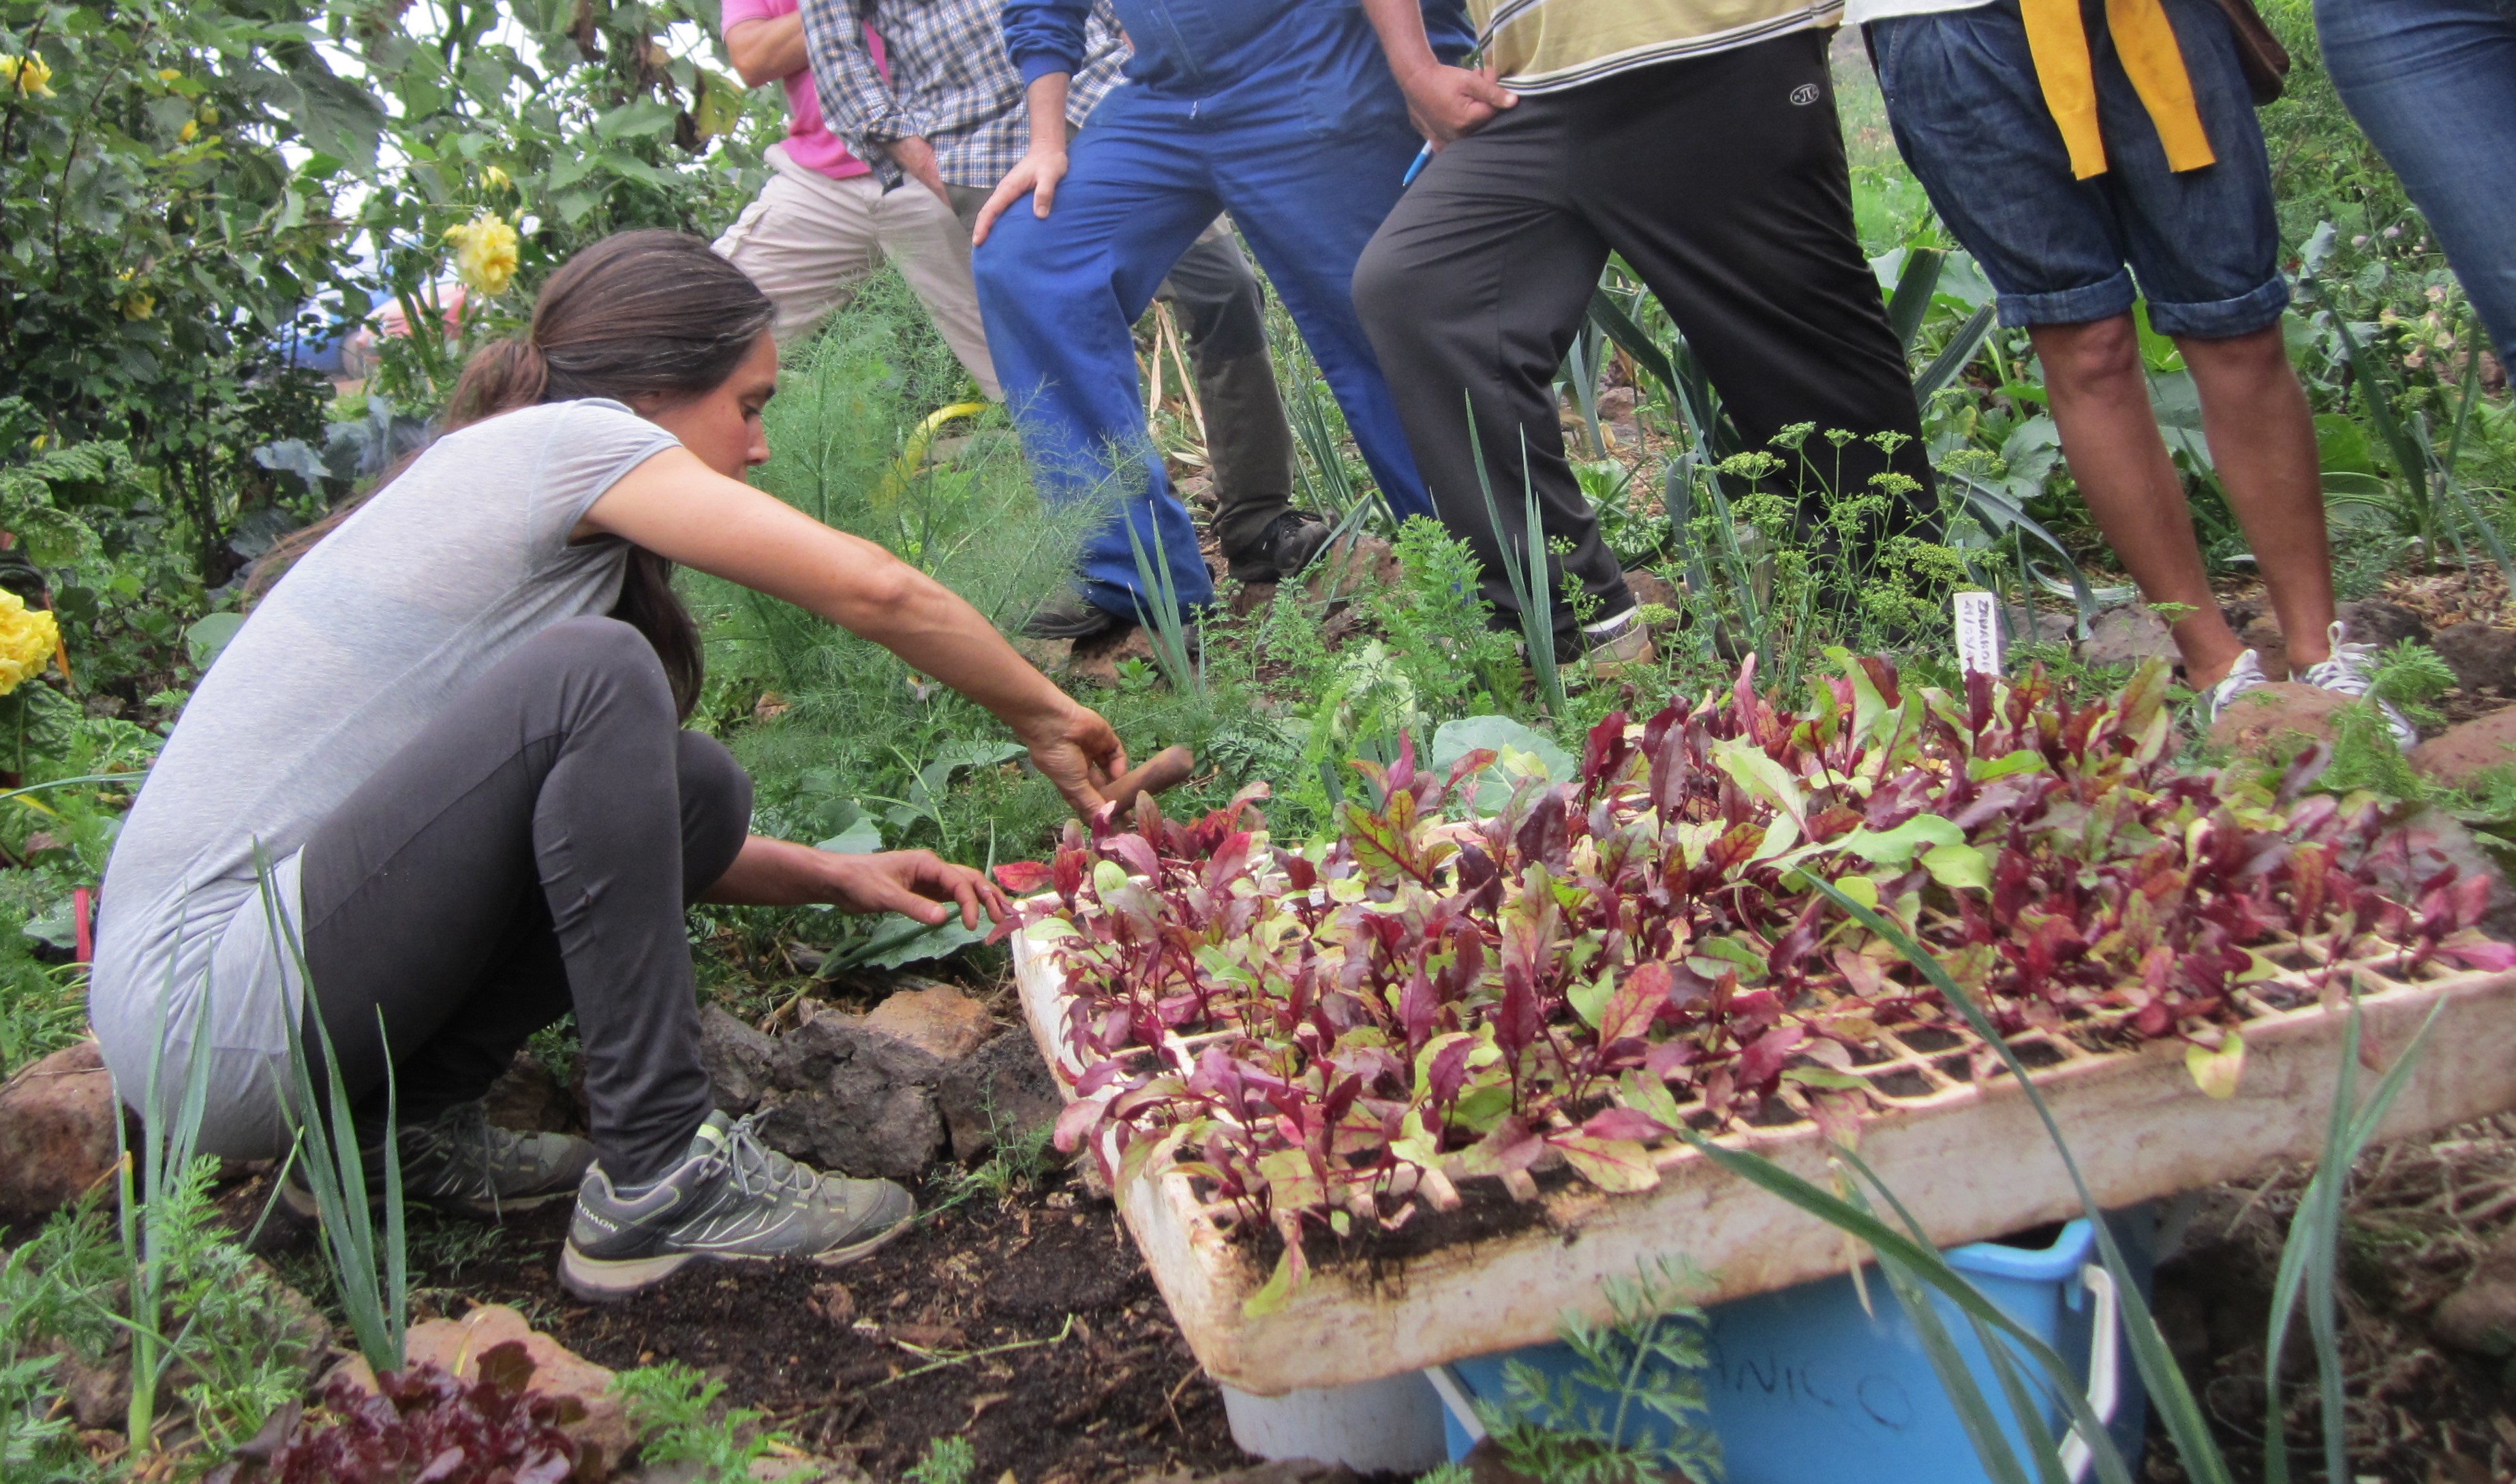
Figure VI.26.- Seedlings in trays ready to be transplanted and planting them in the bed
We can also combine the transplant activity with a direct sowing technique different from broadcast sowing. While some people are transplanting the seedlings from the greenhouse, others can sow seeds in the beds placing them under the mulch at the same depth as if we were sowing them in trays (Figure VI.27).
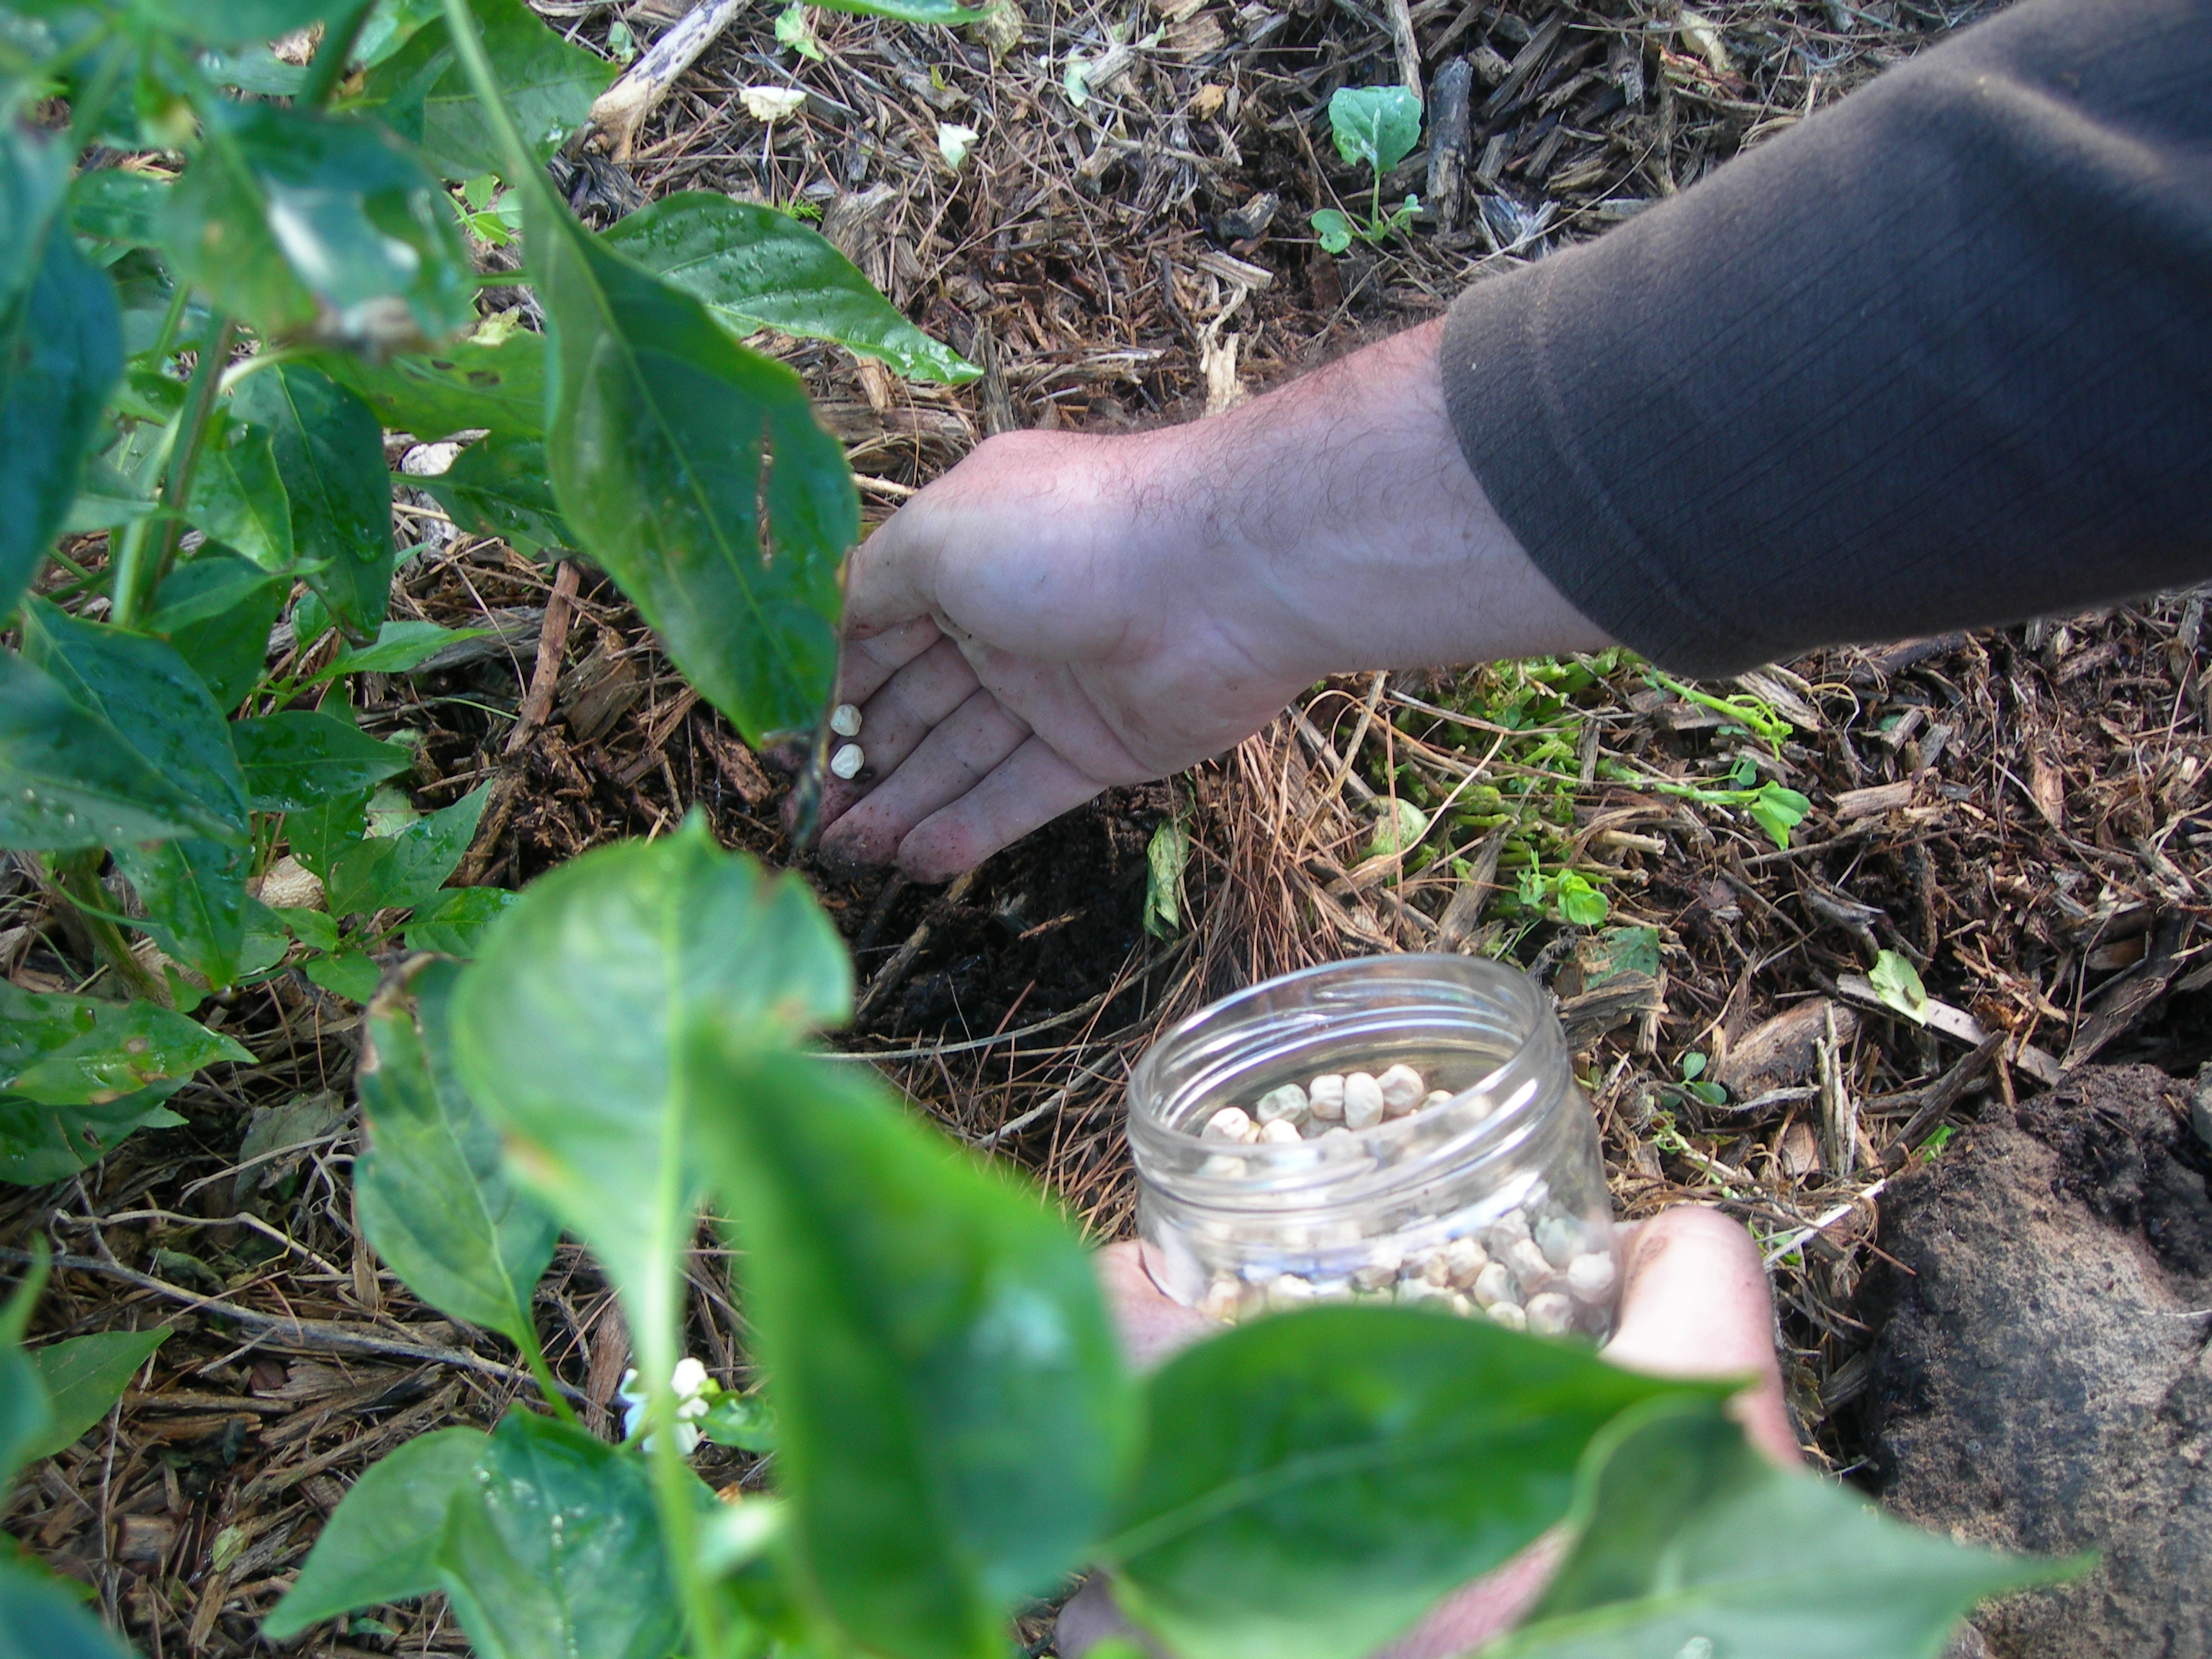
Figure VI.27.- Direct sowing in the bed
With our fingertips, we first make a small hole where we drop the seed. We then cover it with our fingers so we can control the amount of matter we add on the seed. On the contrary to broadcast sowing, we drop the seeds deliberately at the desired distances so that afterwards we do not have to remove any plants.
A different way of sowing is making seedbeds directly in a section of a bed so we can later transplant the seedlings to other parts of our edible gardens or garden forests.
We also allow some vegetables to flower so that they produce seeds that self-seed in the beds, letting them drop their seeds onto the mulch just the way it occurs in a natural ecosystem (Figure VI.28).

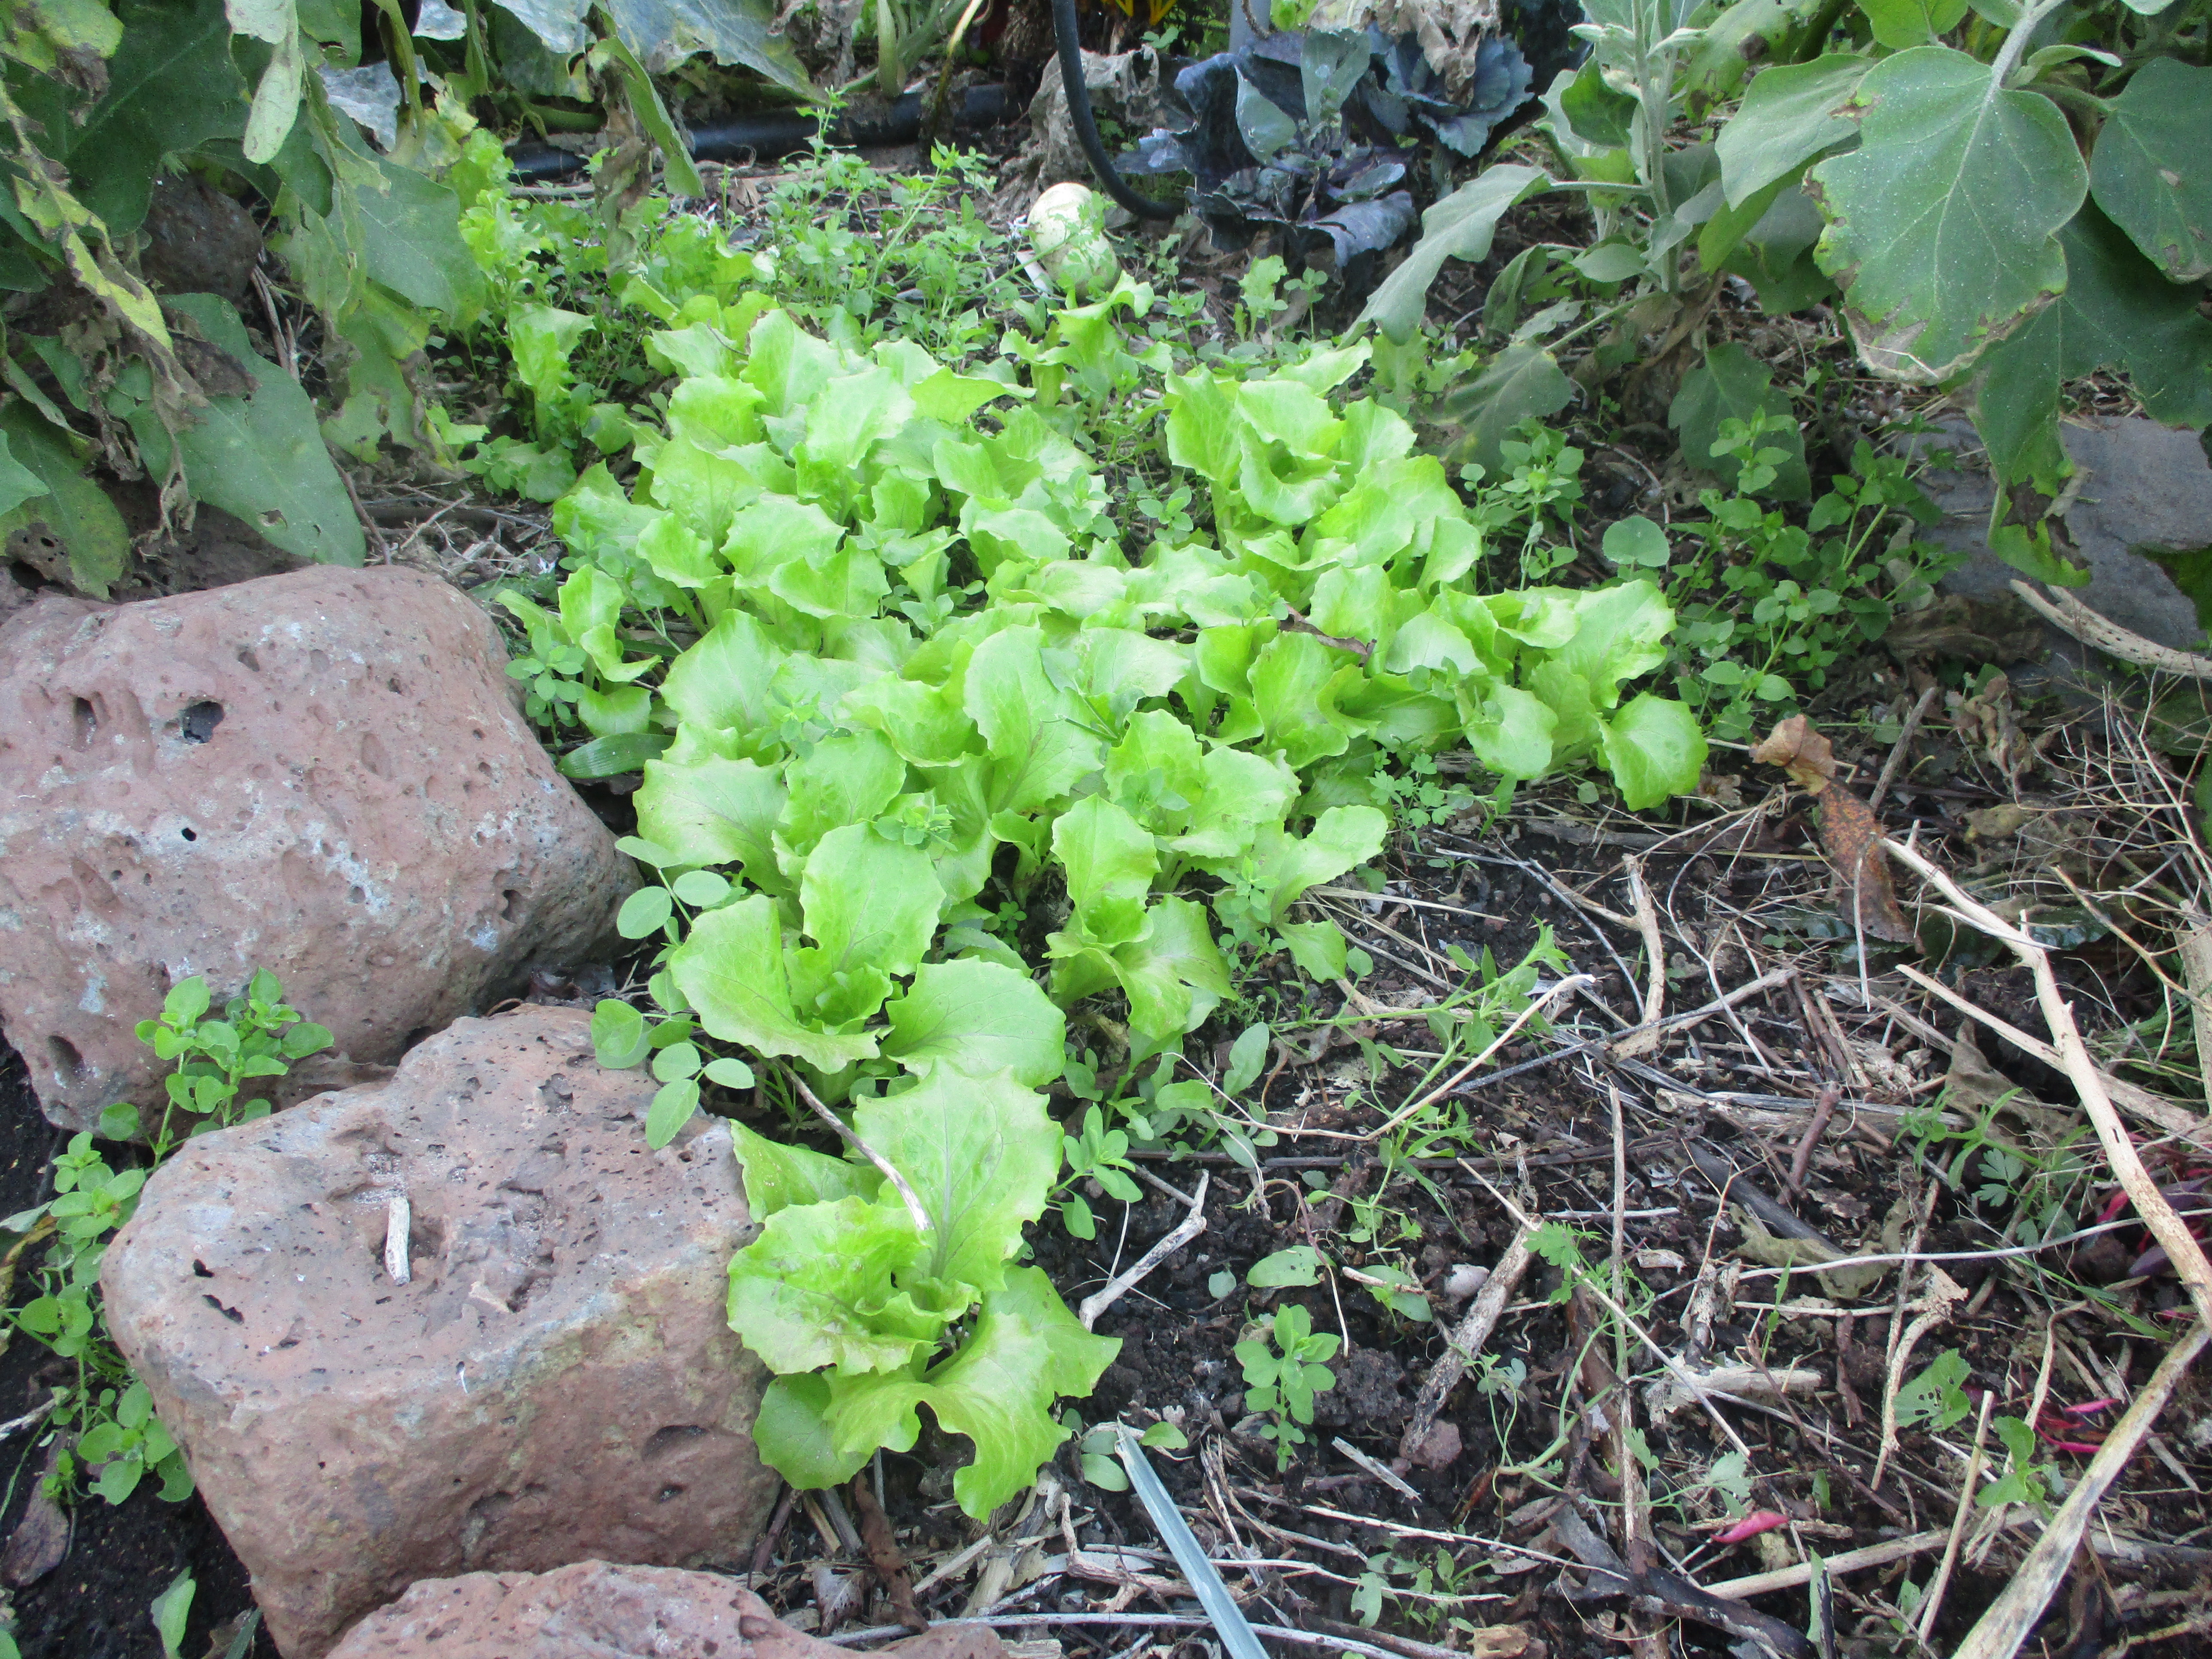
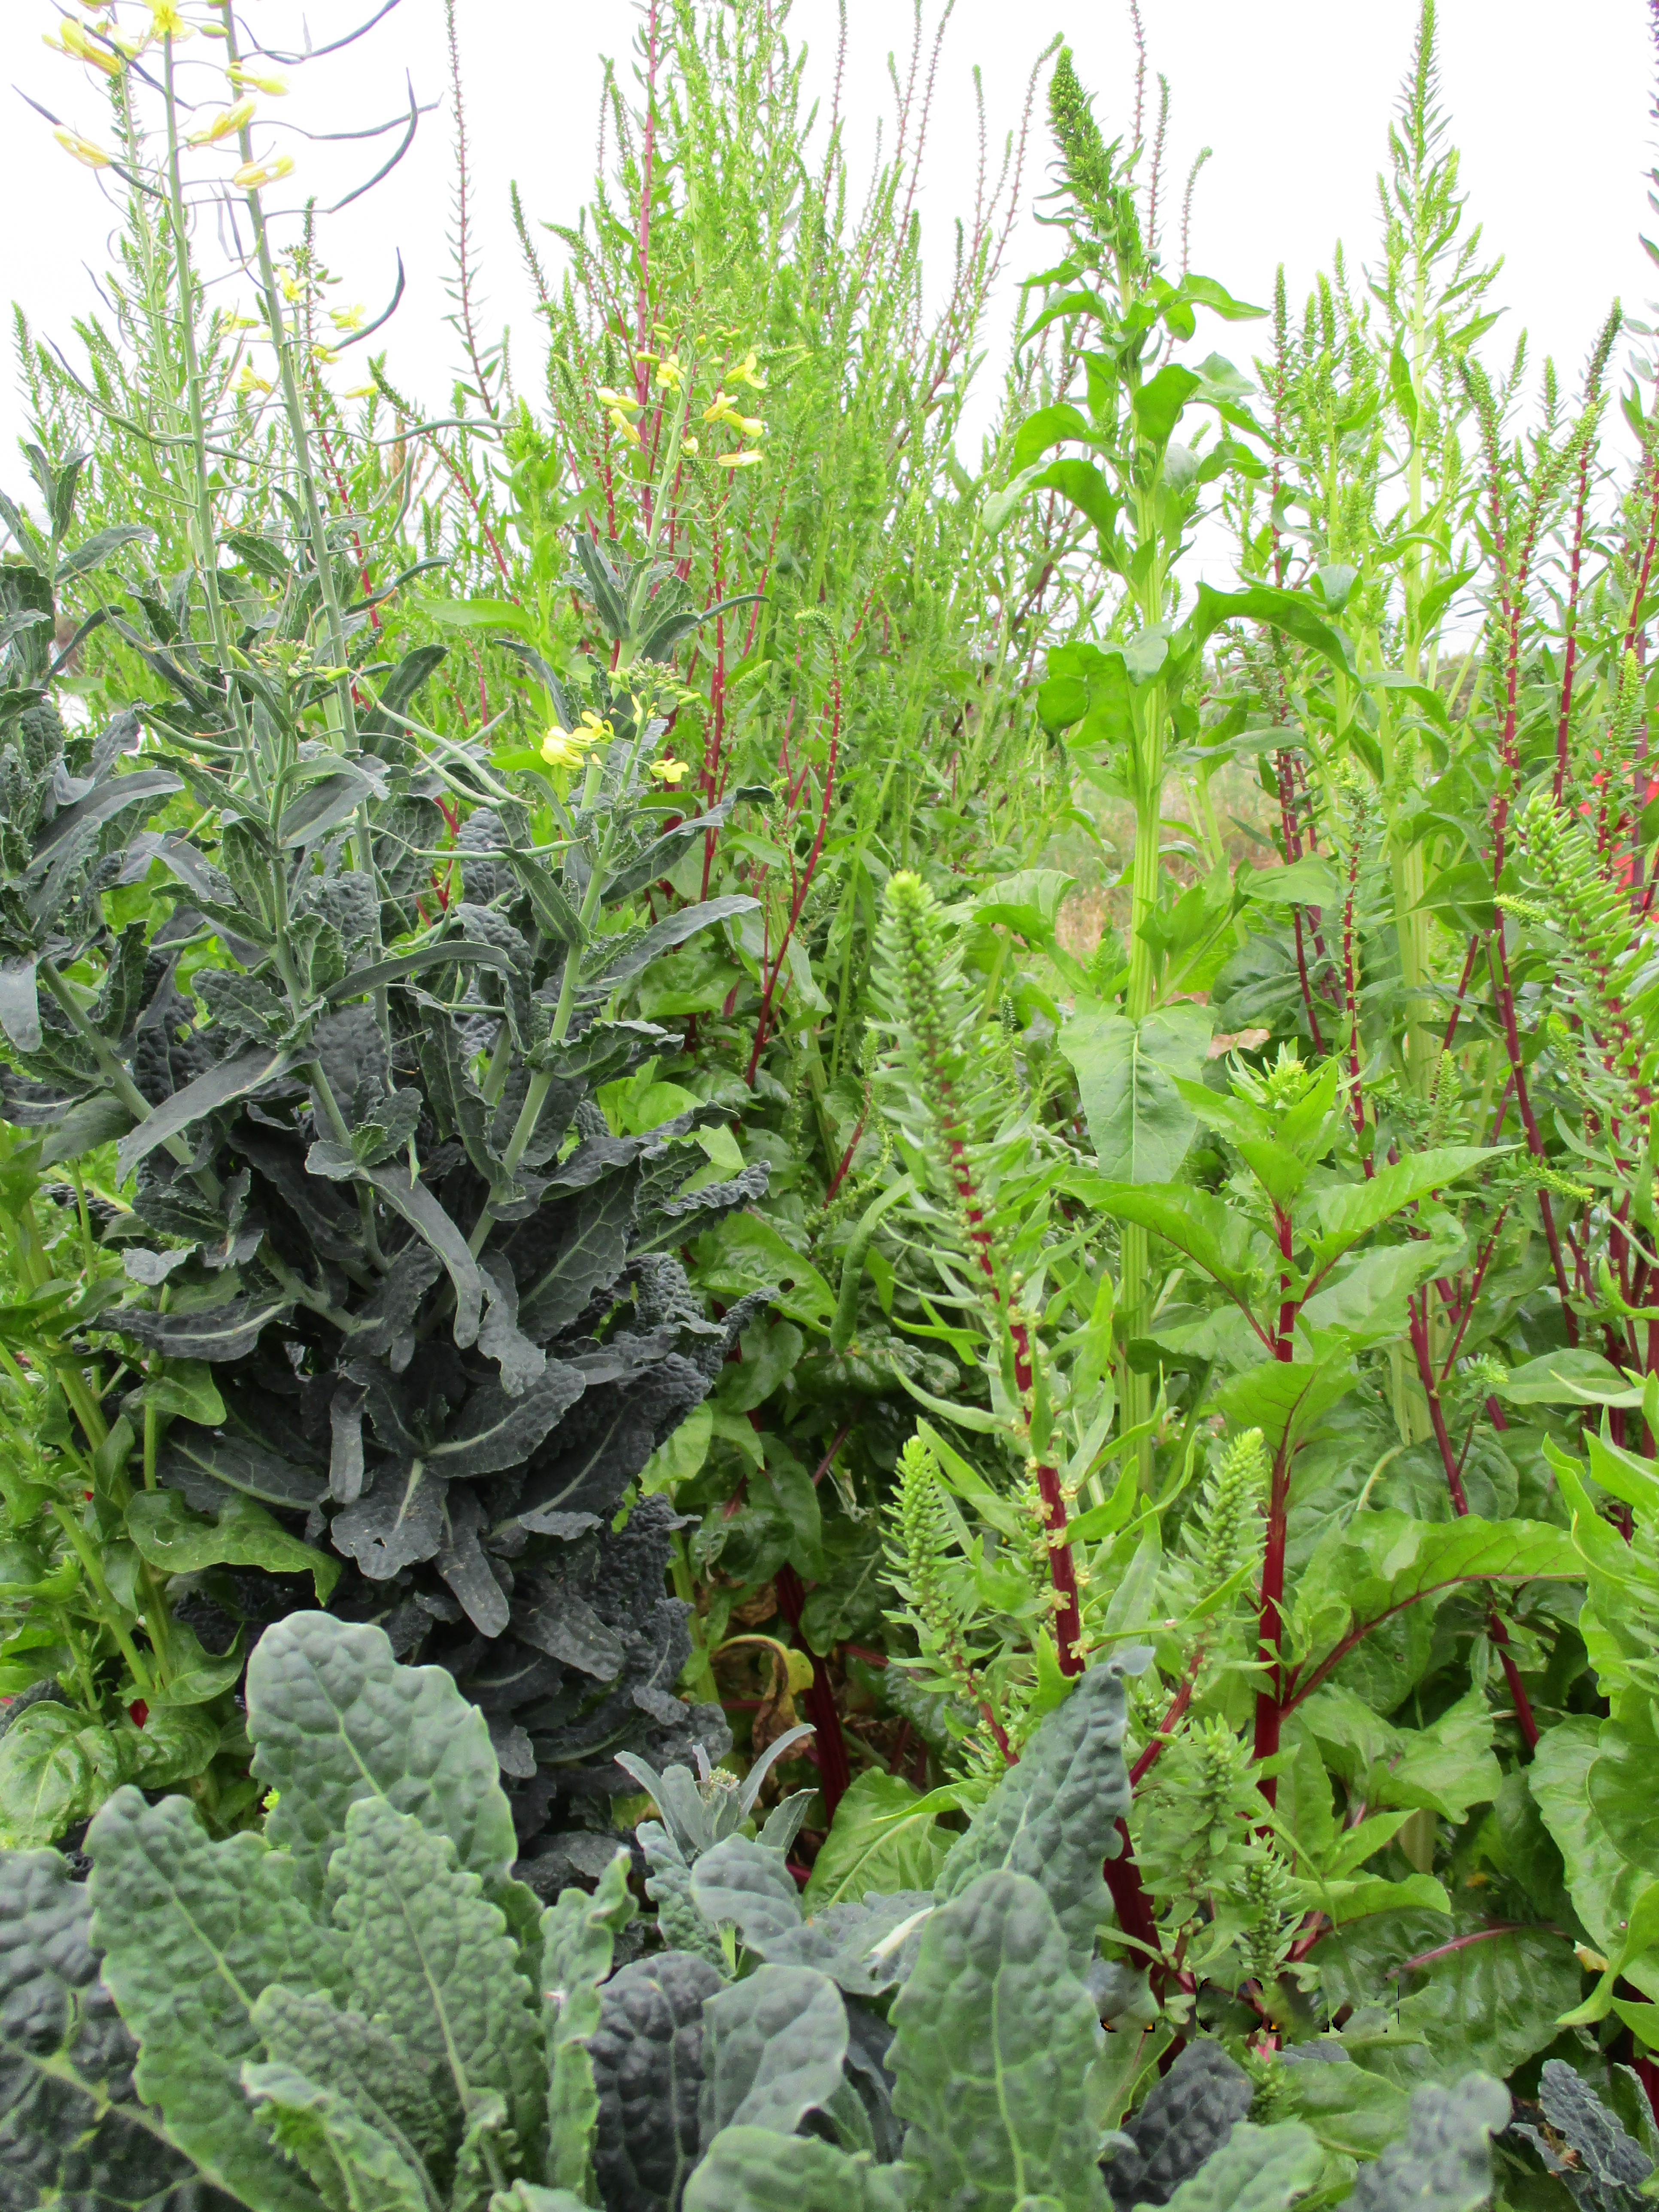

Figure VI.28.- Images of vegetables flowering and self-seeding area
The time seedlings need to grow after they have been transplanted until we can harvest them also depends on the type of vegetable we have planted, the climatology, the area, etc.
In order to study and monitor the time a seed needs to develop into a fully-grown plant that’s ready to harvest, we use a field notebook in the garden and the greenhouse. We can either buy or make a personalized one with the students. With this we strengthen skills of the students, such as the constancy in the annotations in the field notebook every day, where grammar, mathematical calculations, creativity in drawing…, are also worked. (Figure VI.29).
In the notebook we describe how we organize ourselves so that we can use it to calculate how much time the seeds take to develop into seedlings in the greenhouse and the vegetables to be harvested once they have been transplanted in the beds.
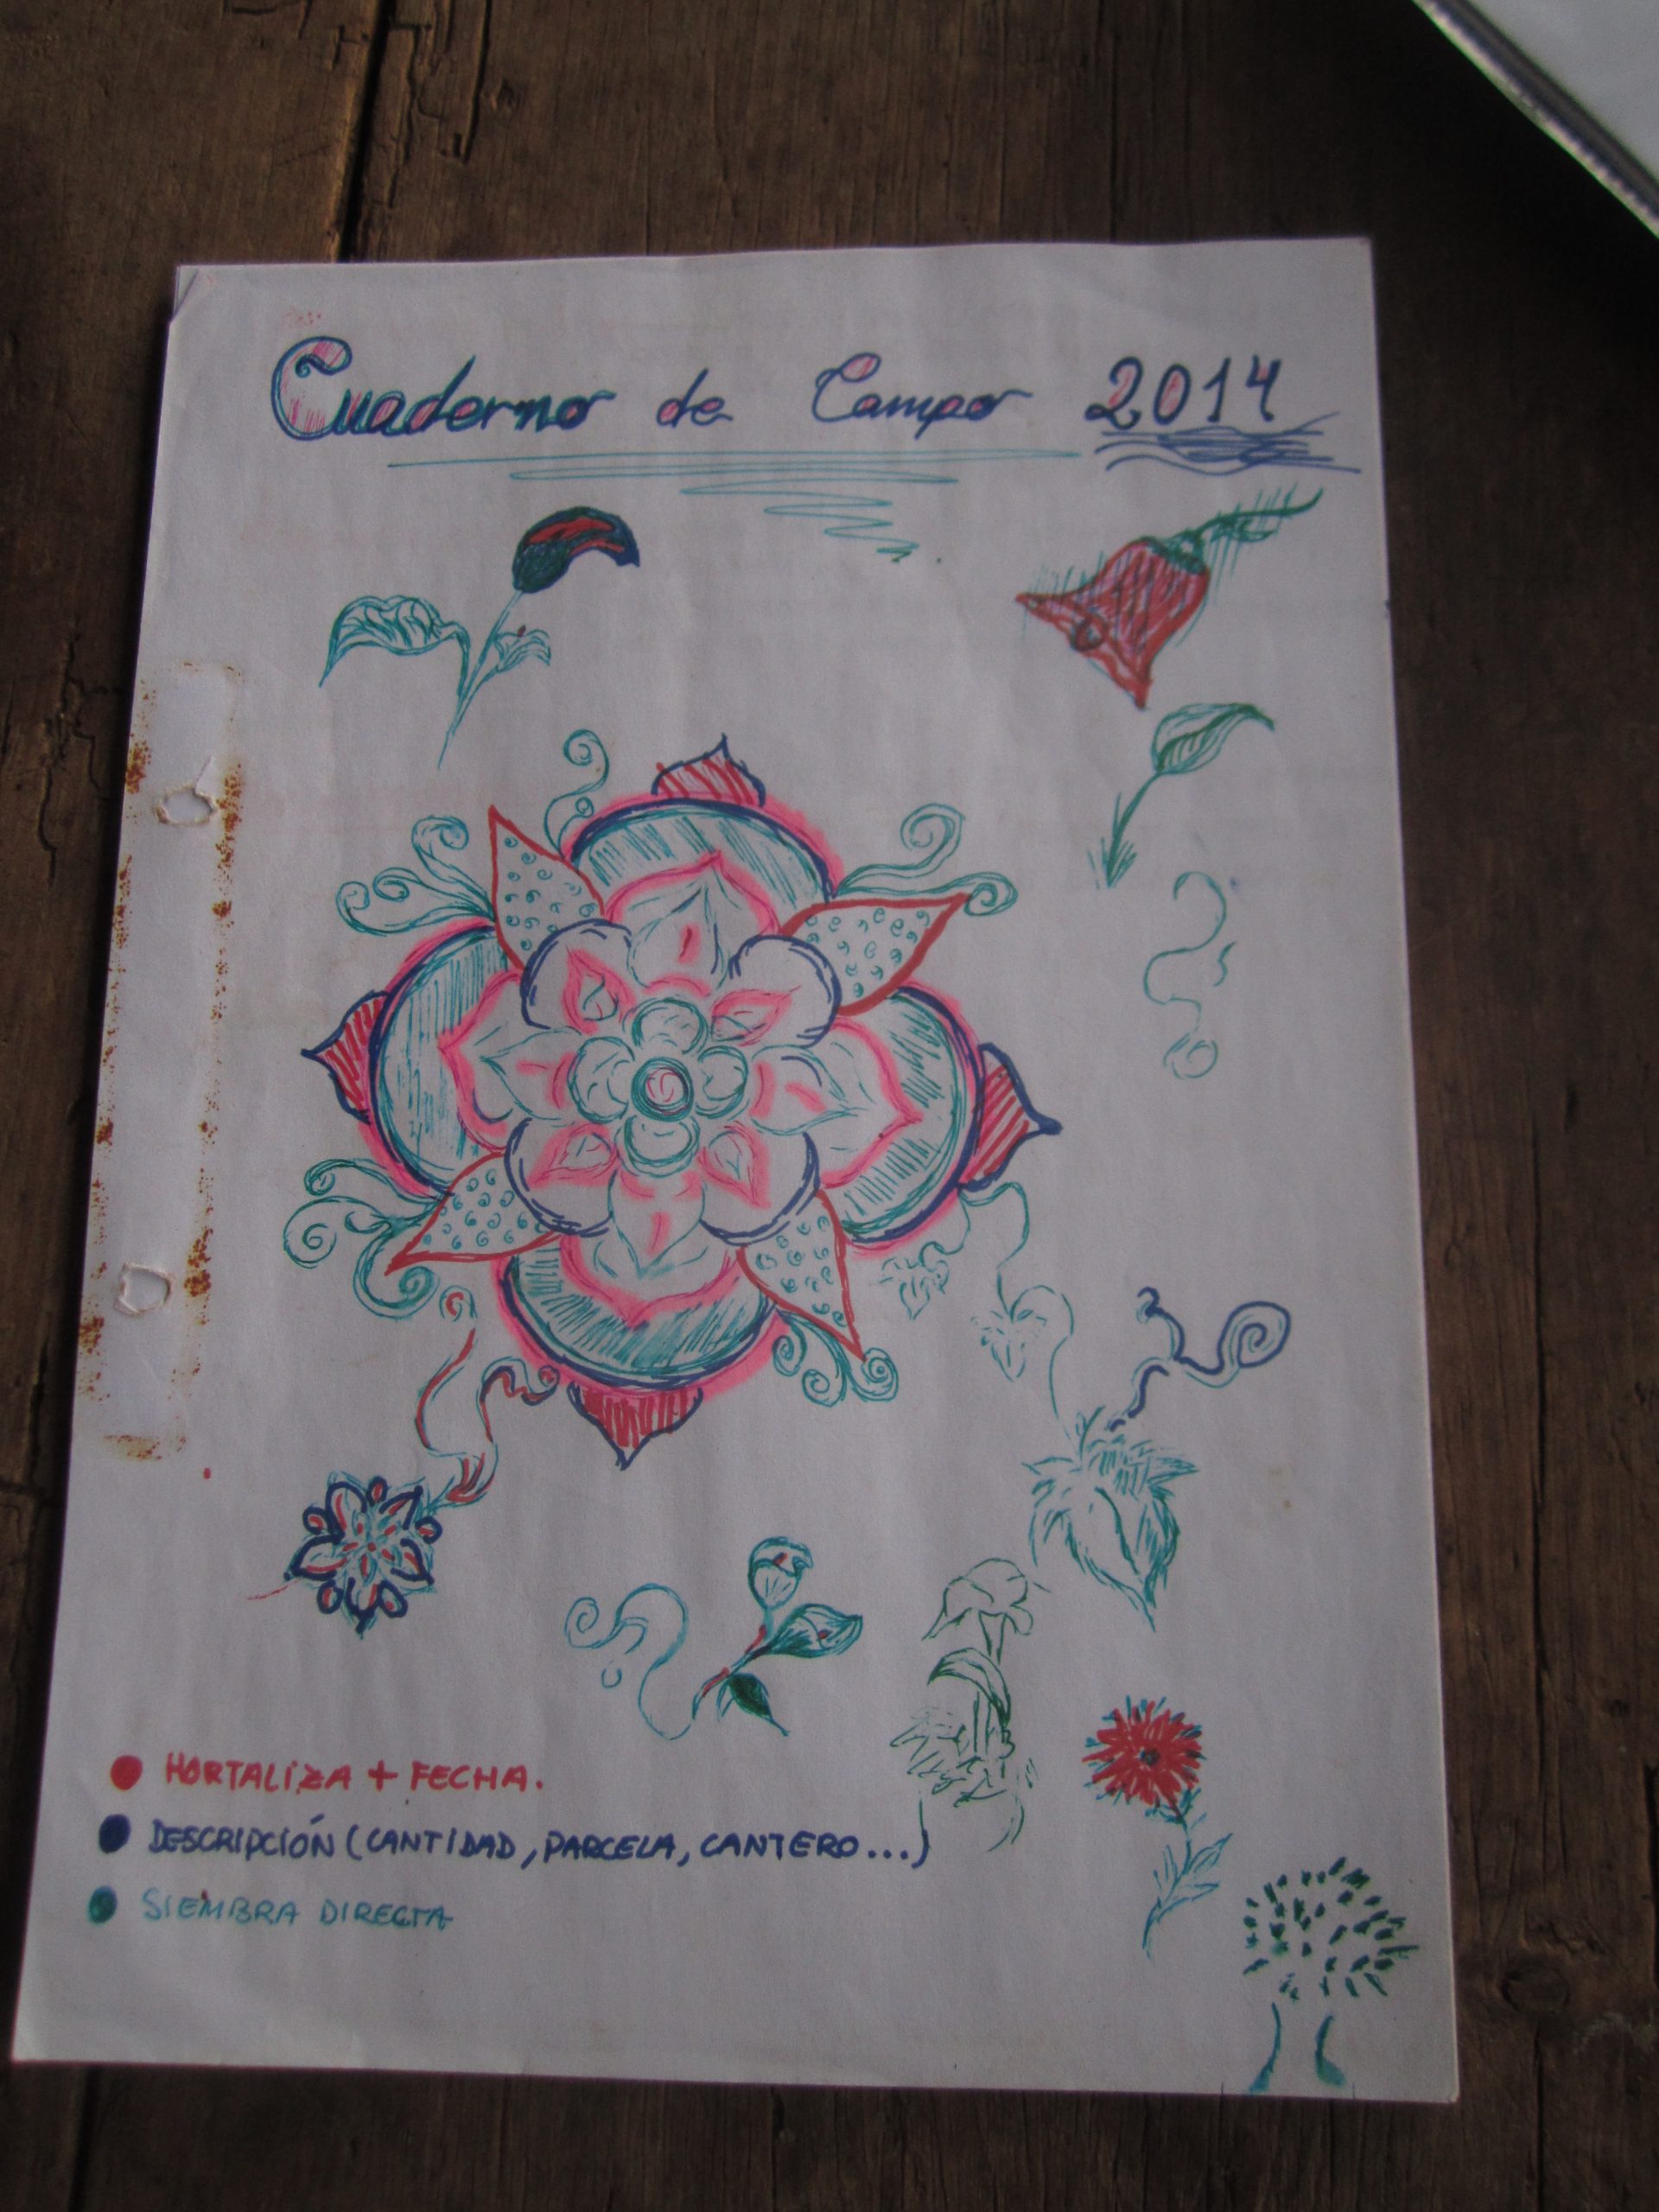
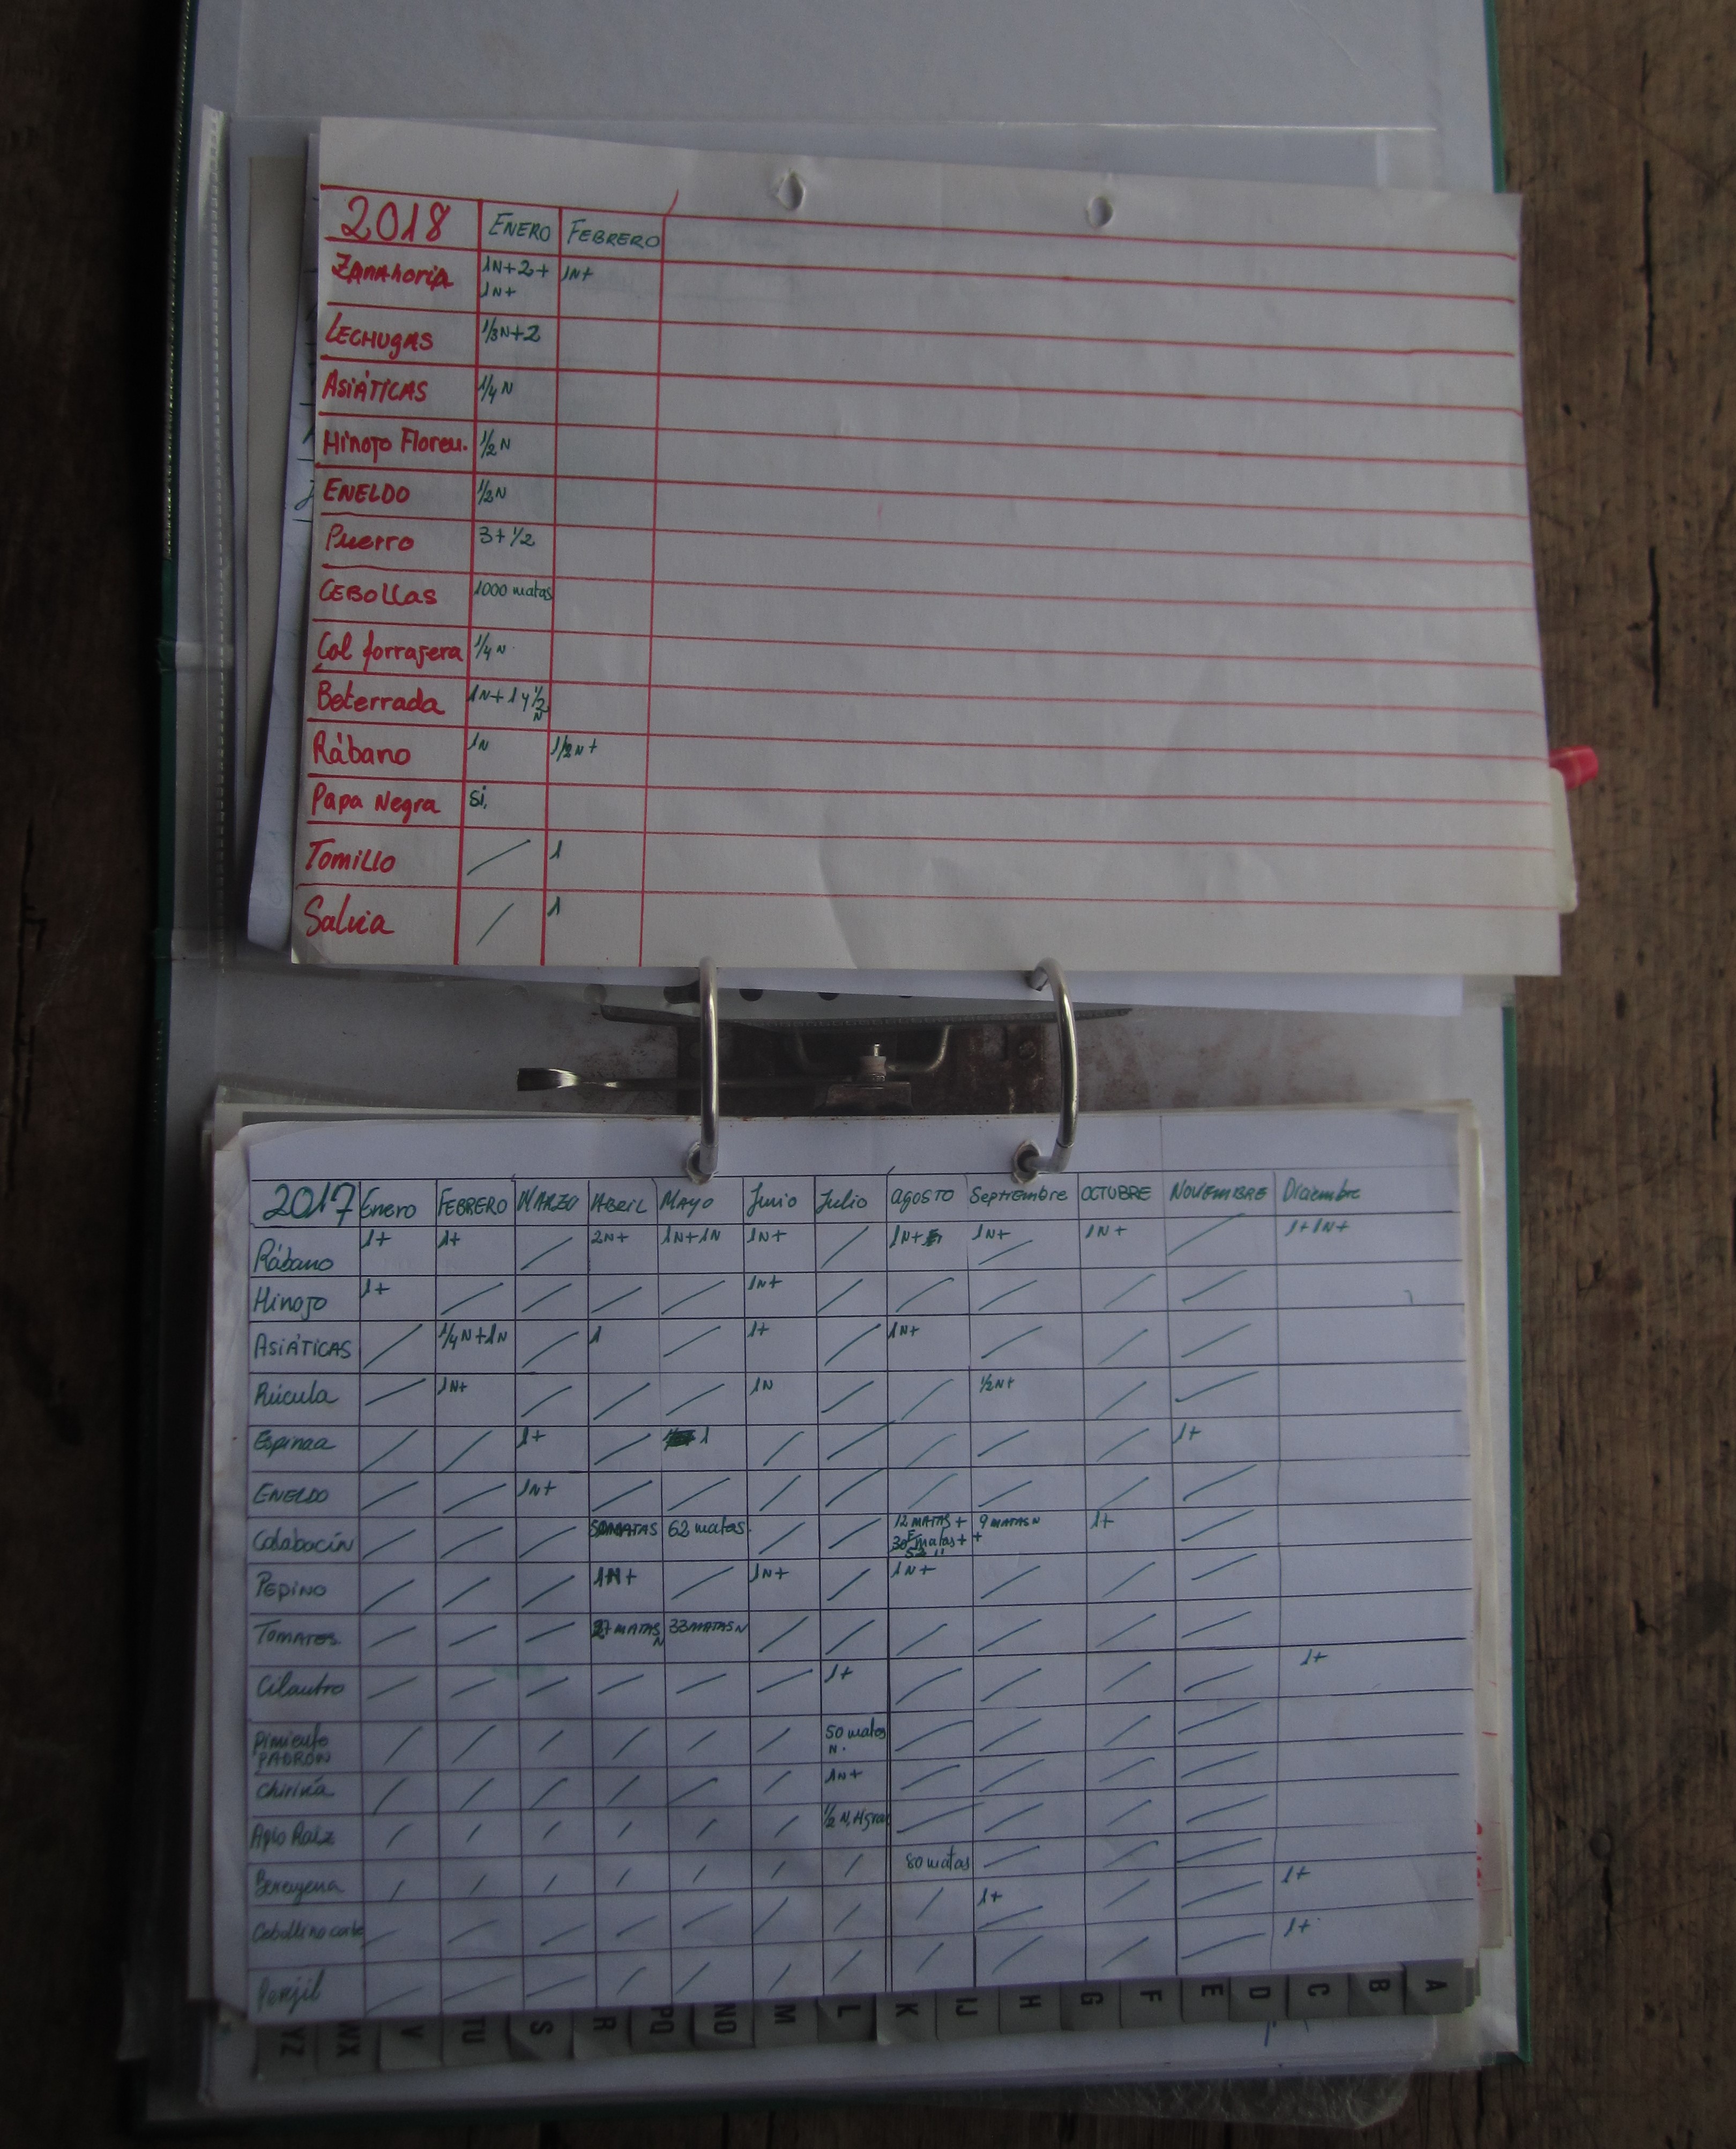
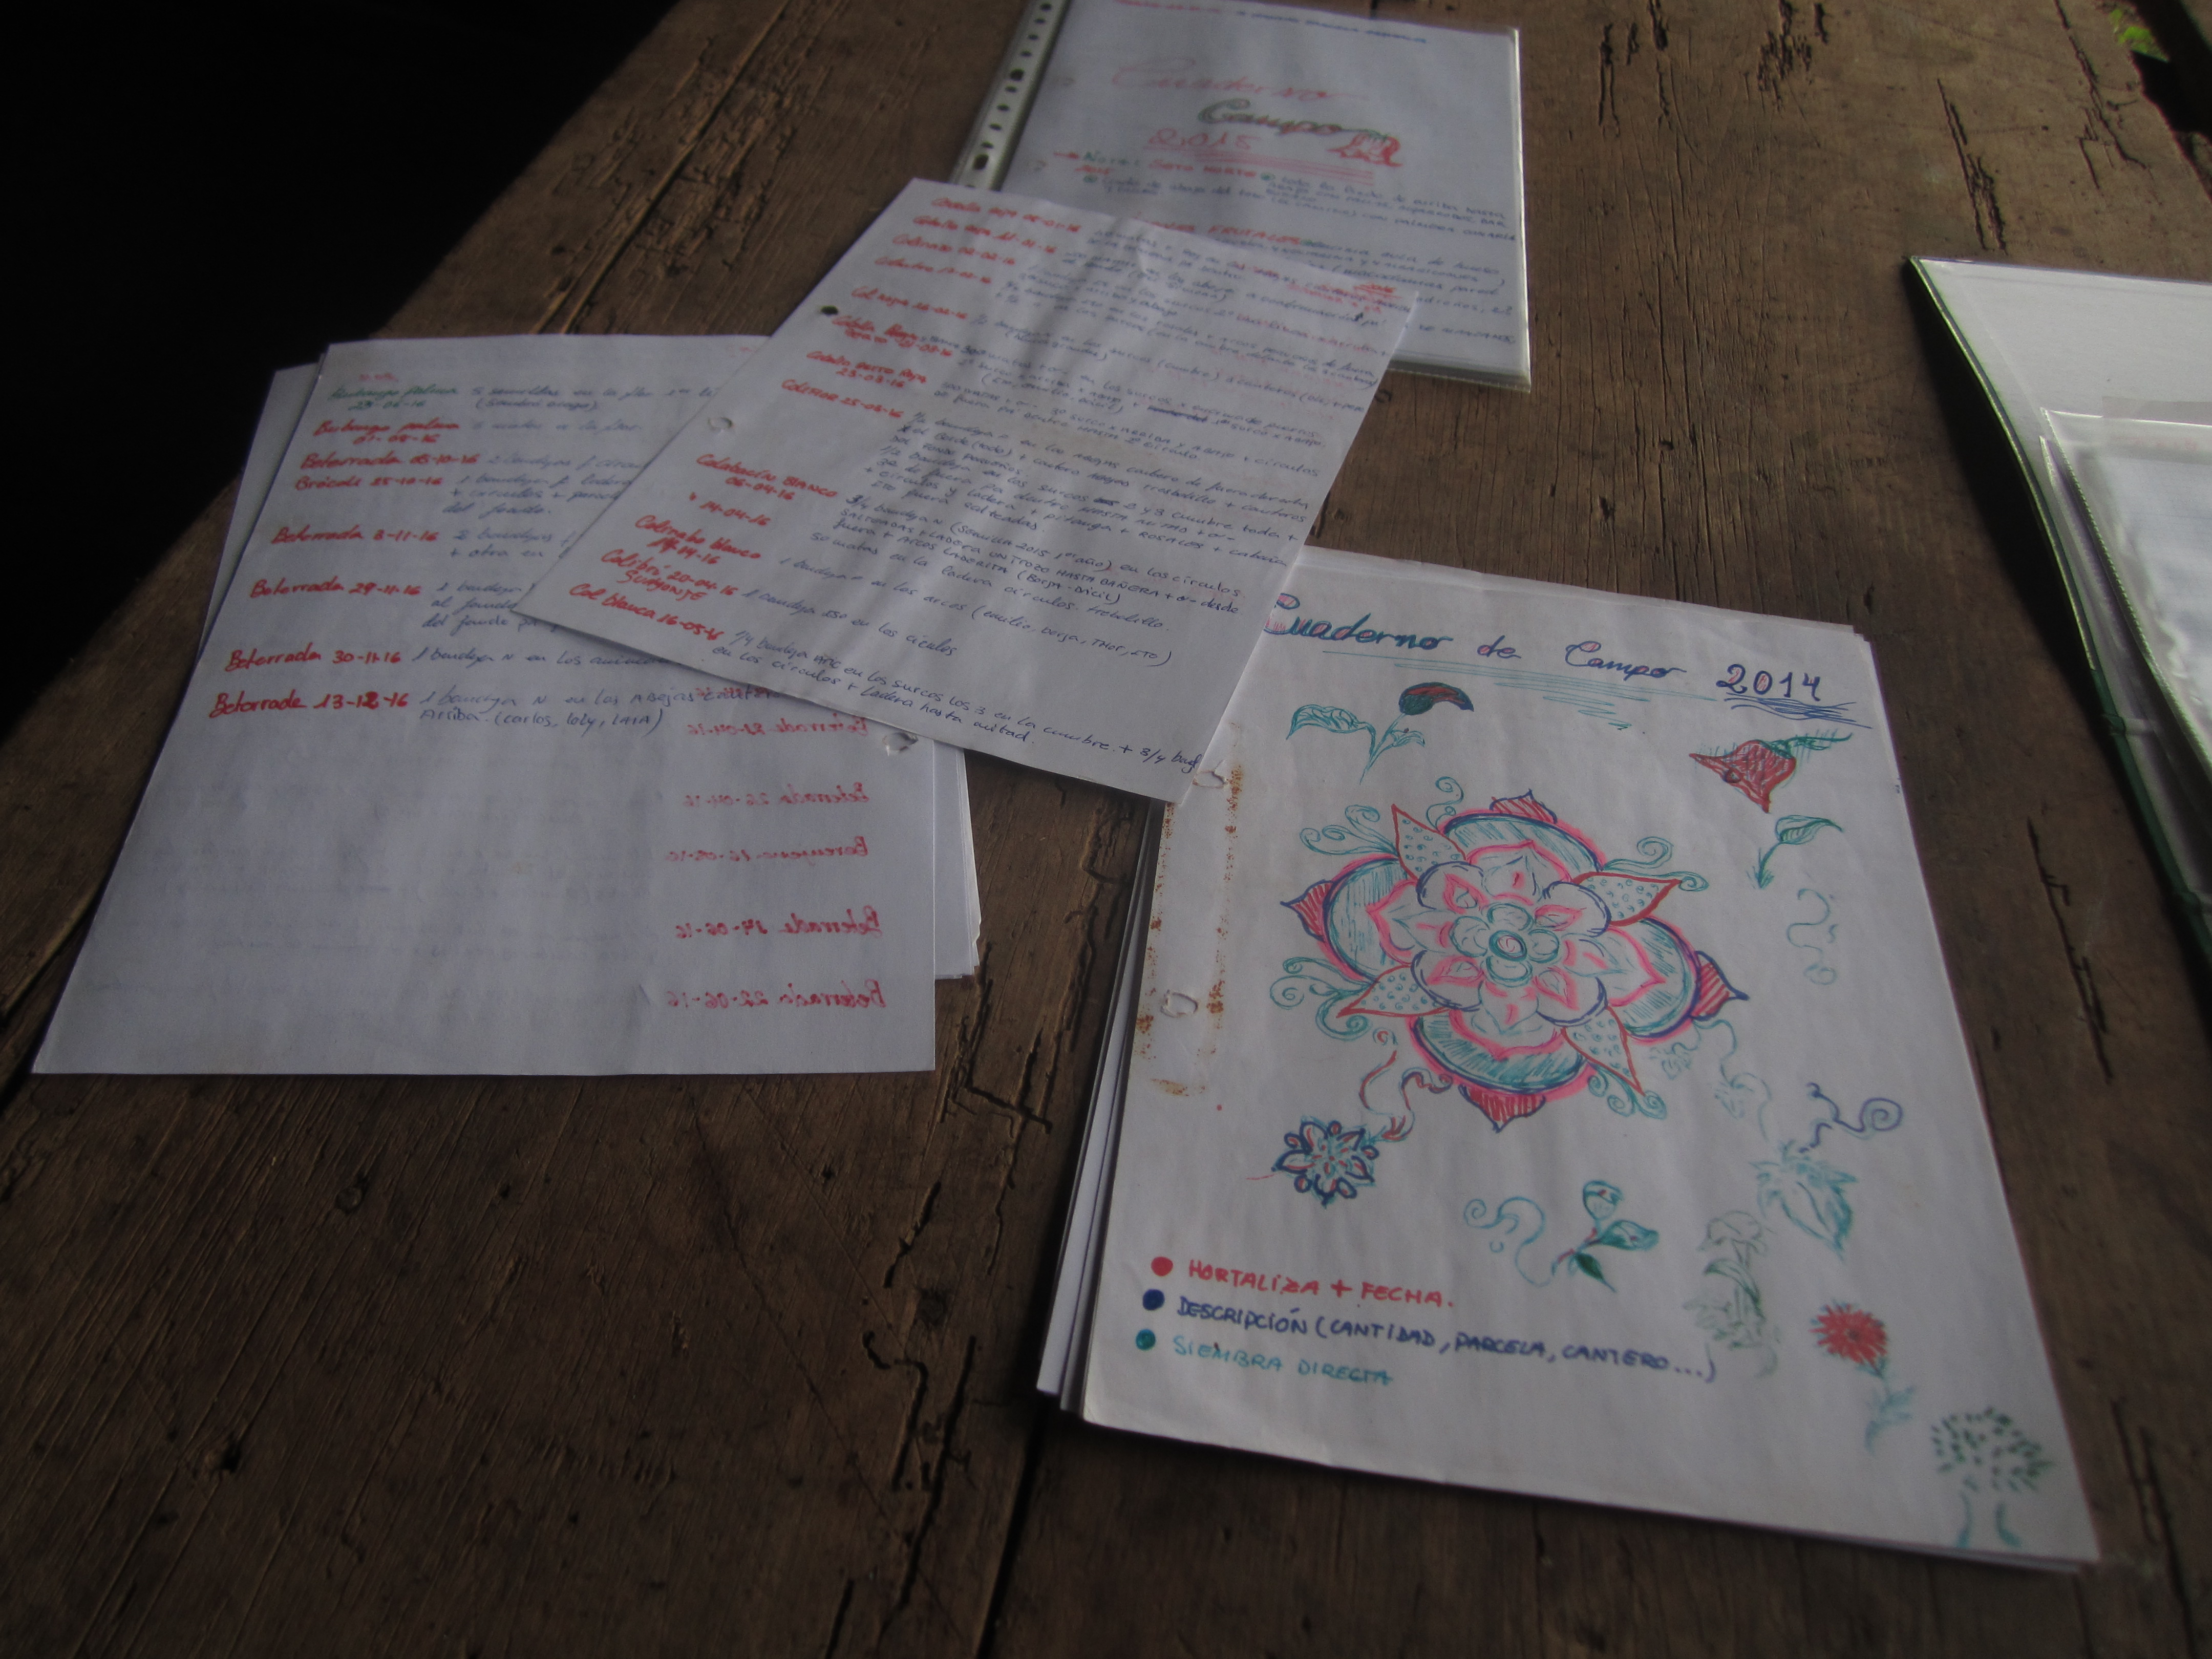
Figure VI.29.- Our personalized field notebooks with notes and drawings
For instance, if a lettuce seed takes about three days to sprout, one month in the seed tray and a month and a half or two months in the soil before being collected, we know how many trays need to be planted every so often and throughout the season to ensure the succession of the lettuces in the greenhouse and in the beds, and therefore establish a continuity in harvesting and commercialization.
Making and personalizing a homemade field notebook offers a perfect opportunity for an artistic and therapeutic workshop for the users of the course with the help of the instructors. The notebook not only functions as a guide for the organization of the activities of the greenhouse and the garden, but we can also show it to the people that visit our edible gardens. We can leave spaces in the notebook to draw, to make diagrams or to insert pictures of events in the garden.
The people that participate in the course enjoy and learn, watching the transformation that plants and their flowers undergo from the moment they are sown and sprout, growing flowers and fruits, until they wither and their seeds grow and ripen: seeds that drop onto the soil and of which many will germinate spontaneously as part of the natural regeneration process. This process creates a harmonic and therapeutic colorful place where we spend some time simply observing the beauty of our flowering plants or how they grow seeds.
The various sowing methods we have described (broadcast sowing, sowing in seedbed, direct sowing…) are very useful if at some point the succession planting in our garden fails. The trial and error method also helps us to improve our know-how.
VI.5 Cultivating biodiversity
When choosing which crops to plant, we recommend a great seedling variety according to a crop planning that takes climatology, the season of the year and the area into account. The articles that different research and agricultural extension centers of each area publish about crop planning are a good source of information to cultivate biodiversity in our edible gardens and garden forests, as well as the information from the farmers of our area and our own experience.
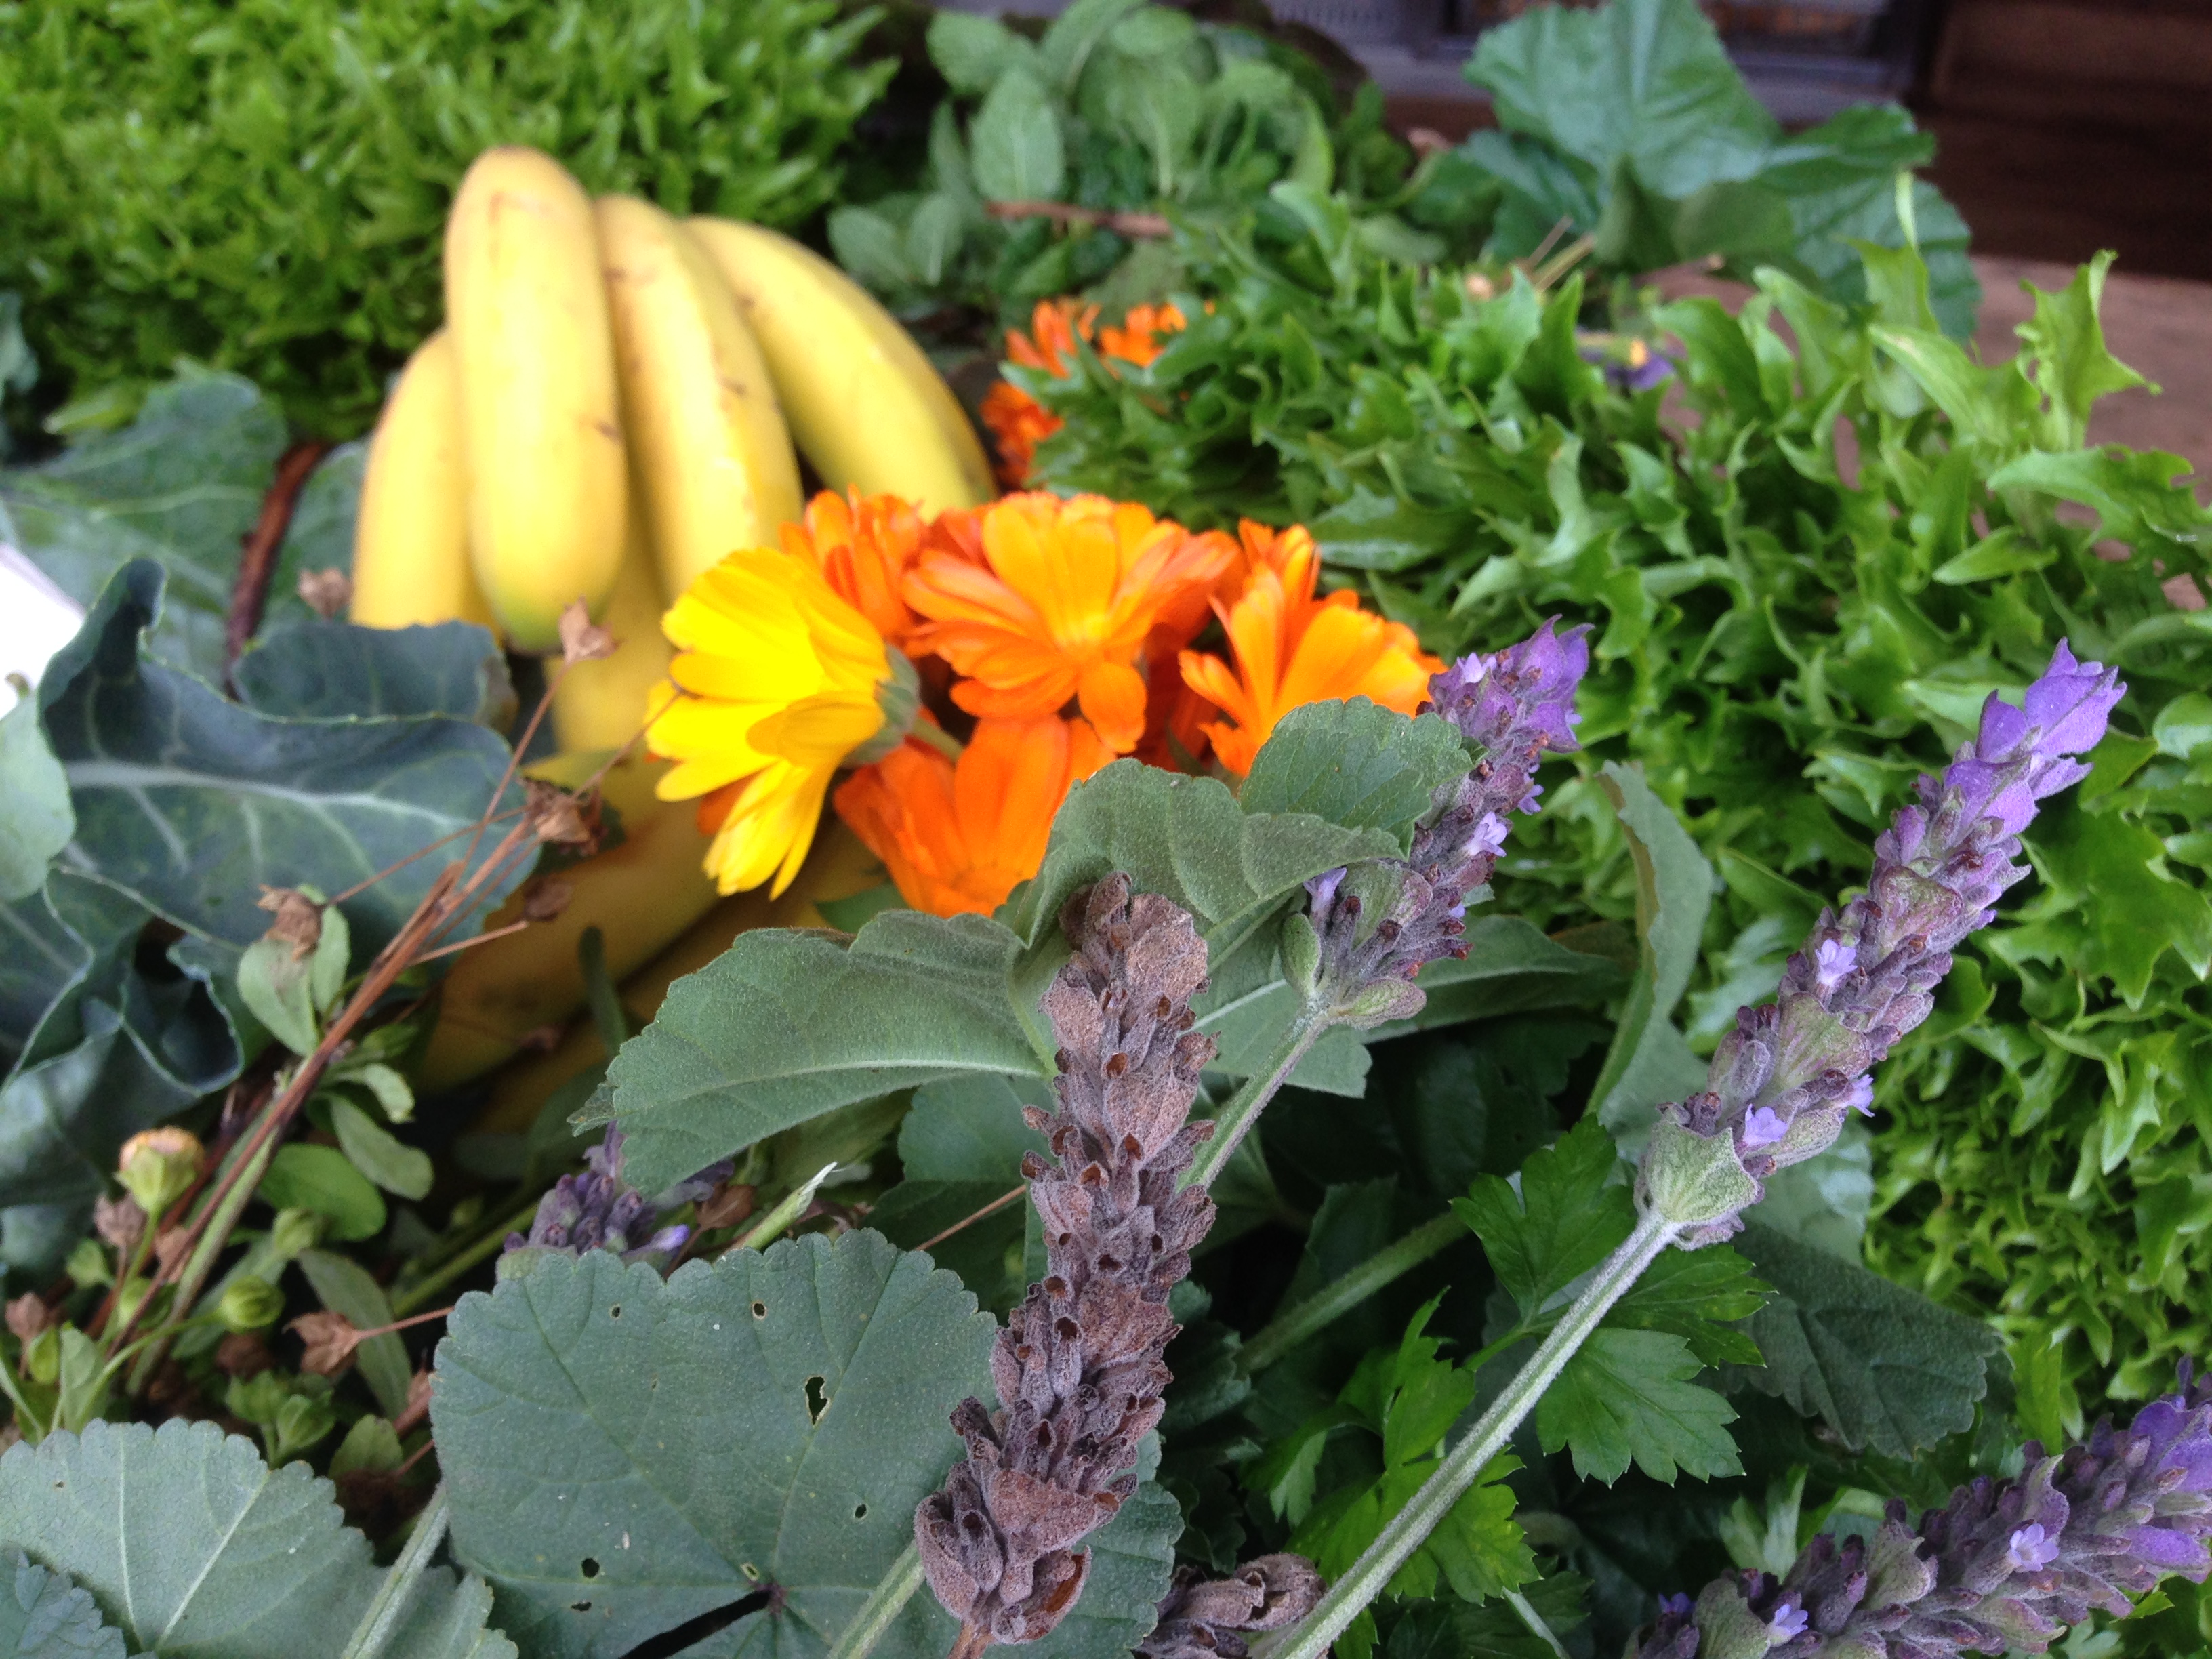
Cultivating biodiversity is the best way to guarantee the resilience of the project by securing our seeds and our harvest and by commercializing our vegetables, fruits, edible flowers and aromatic plants (Figure VI.30).
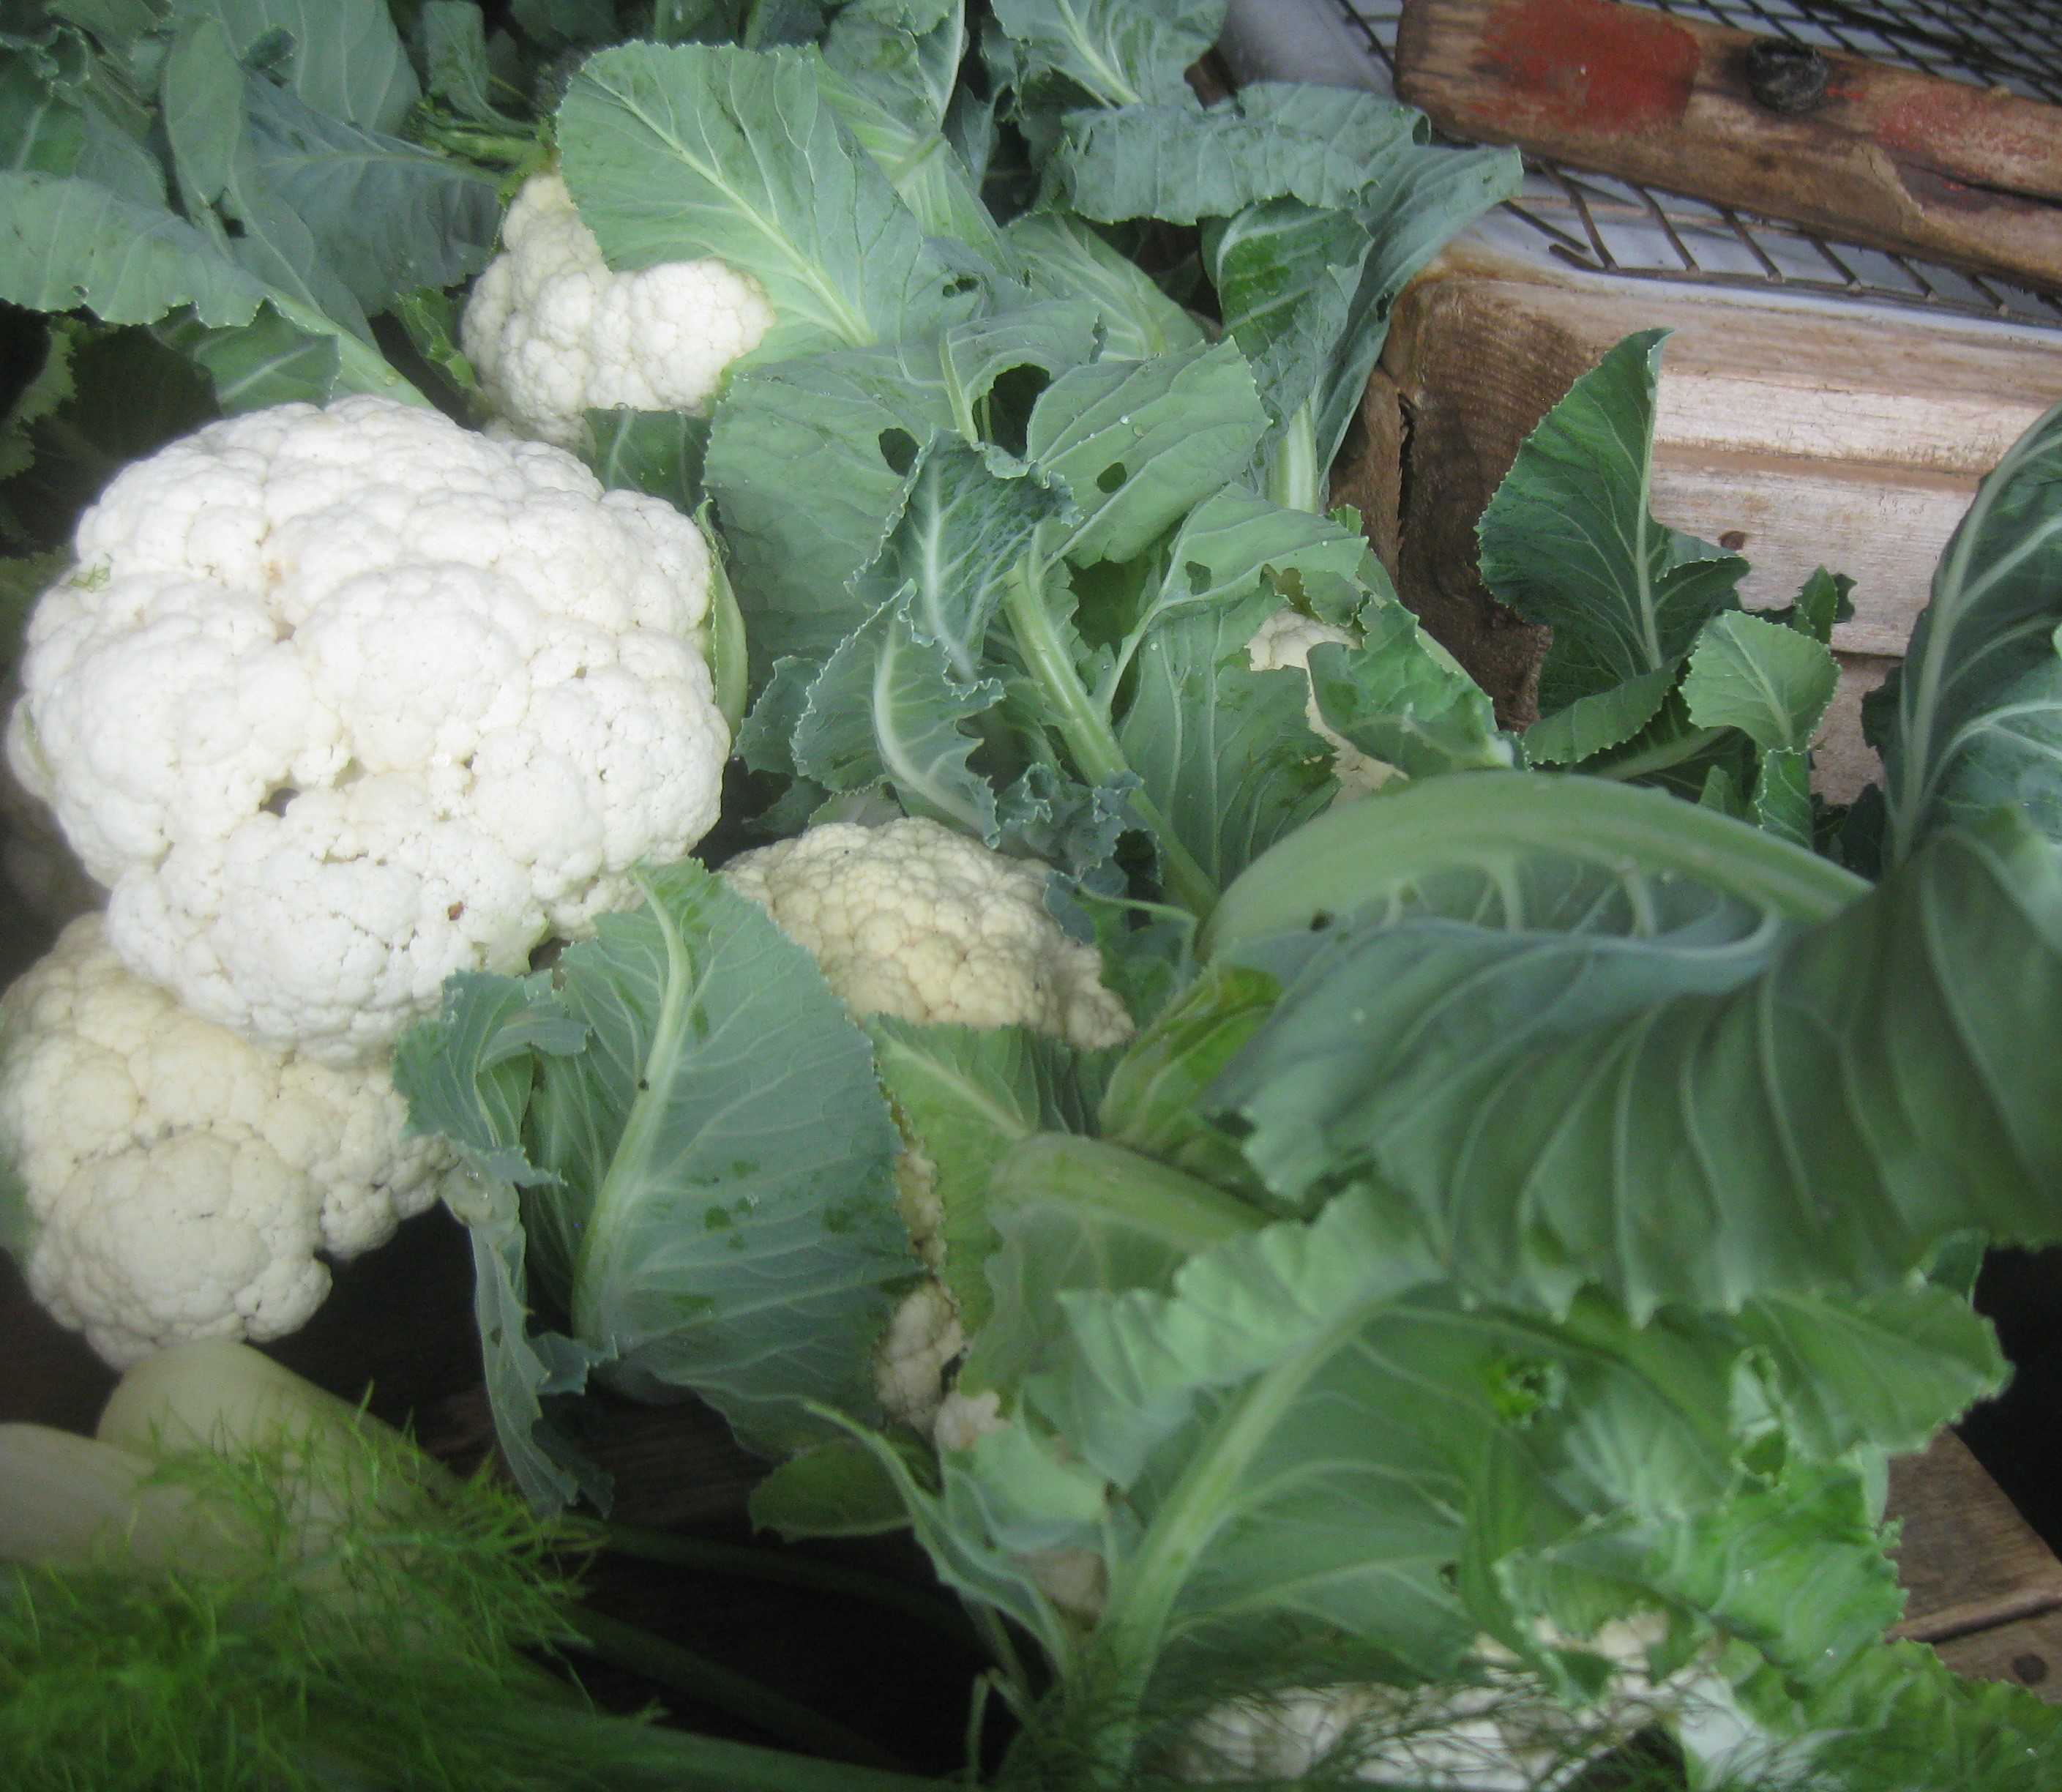
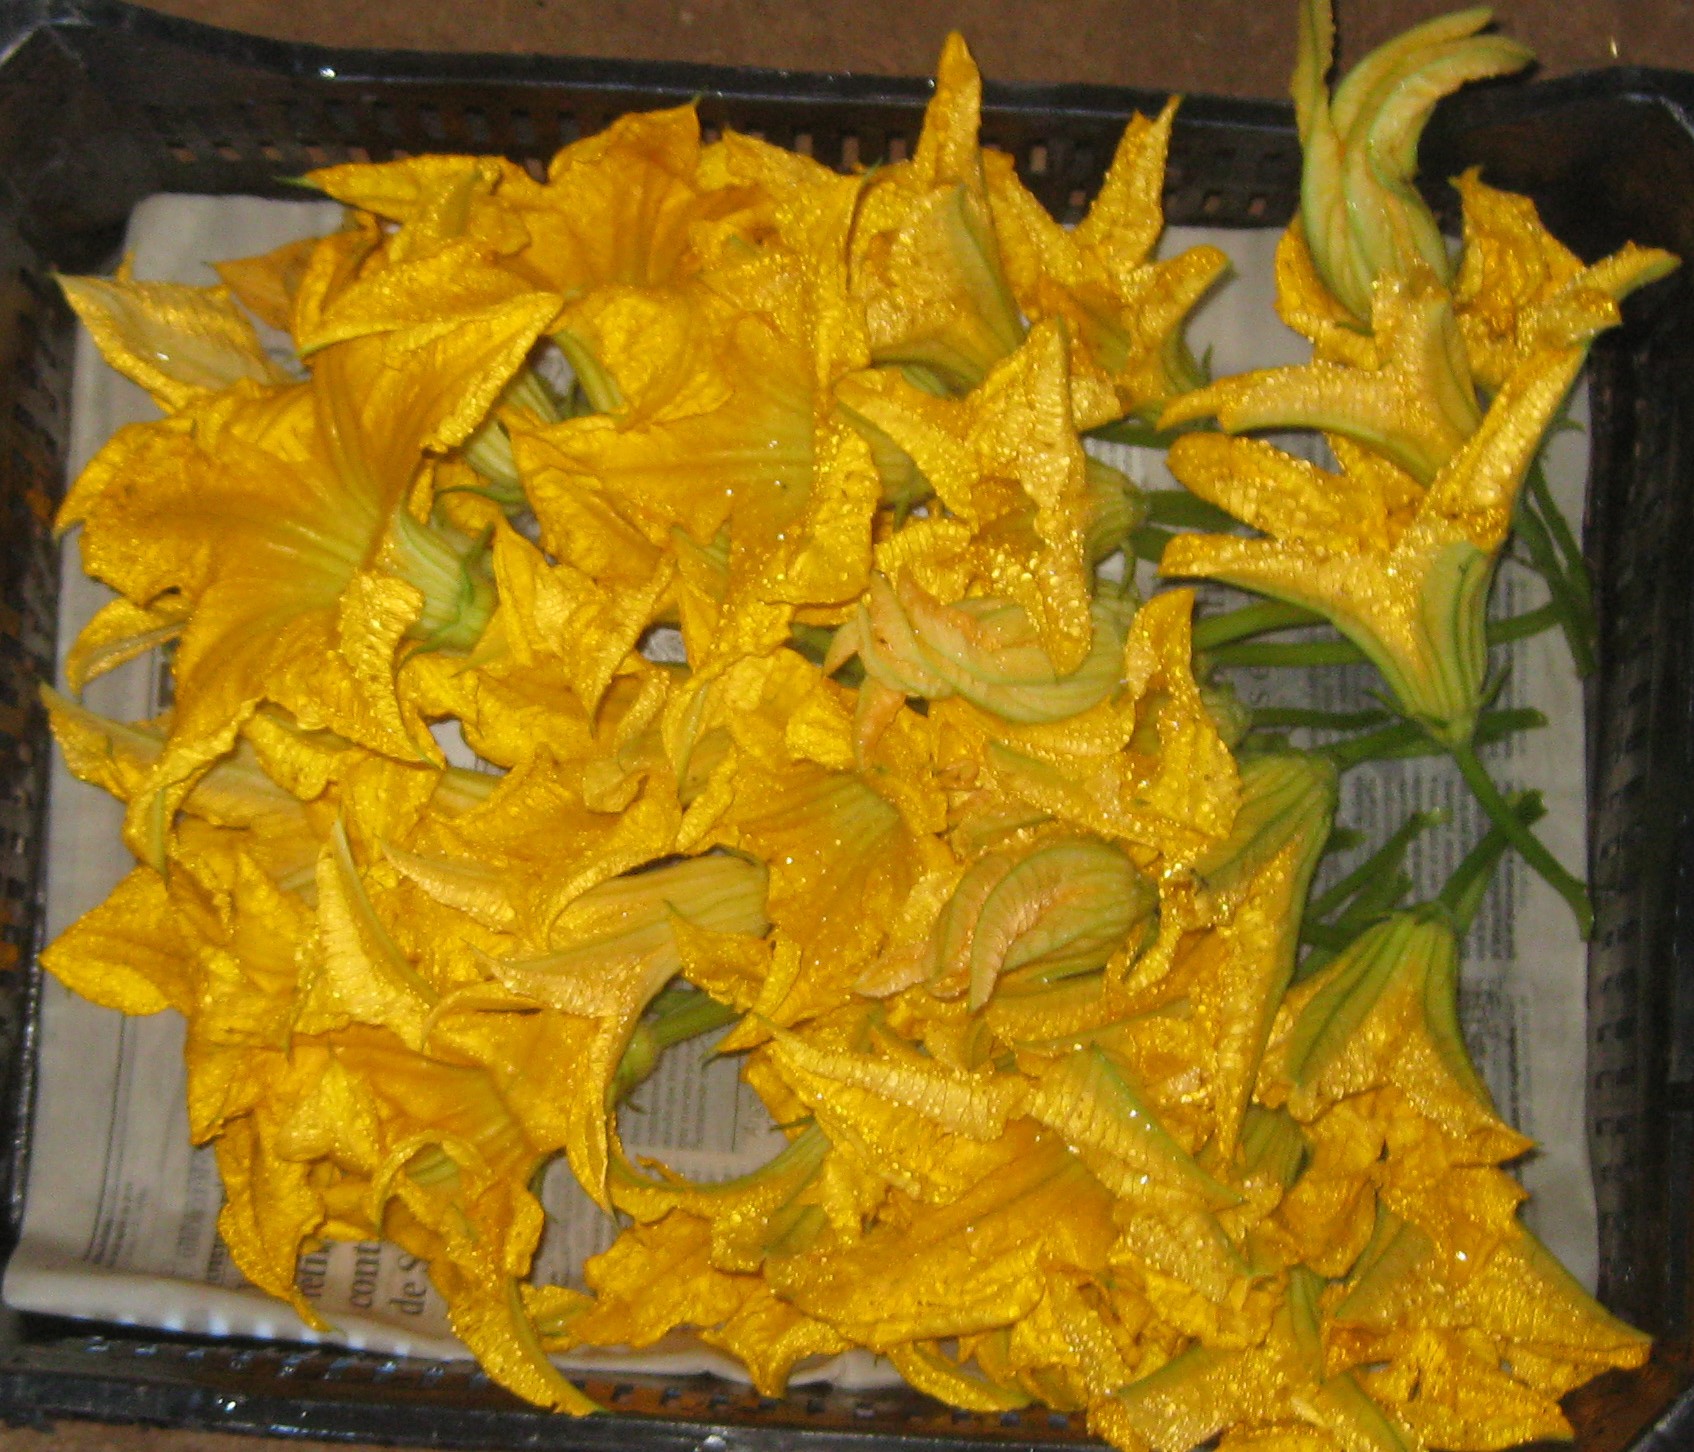
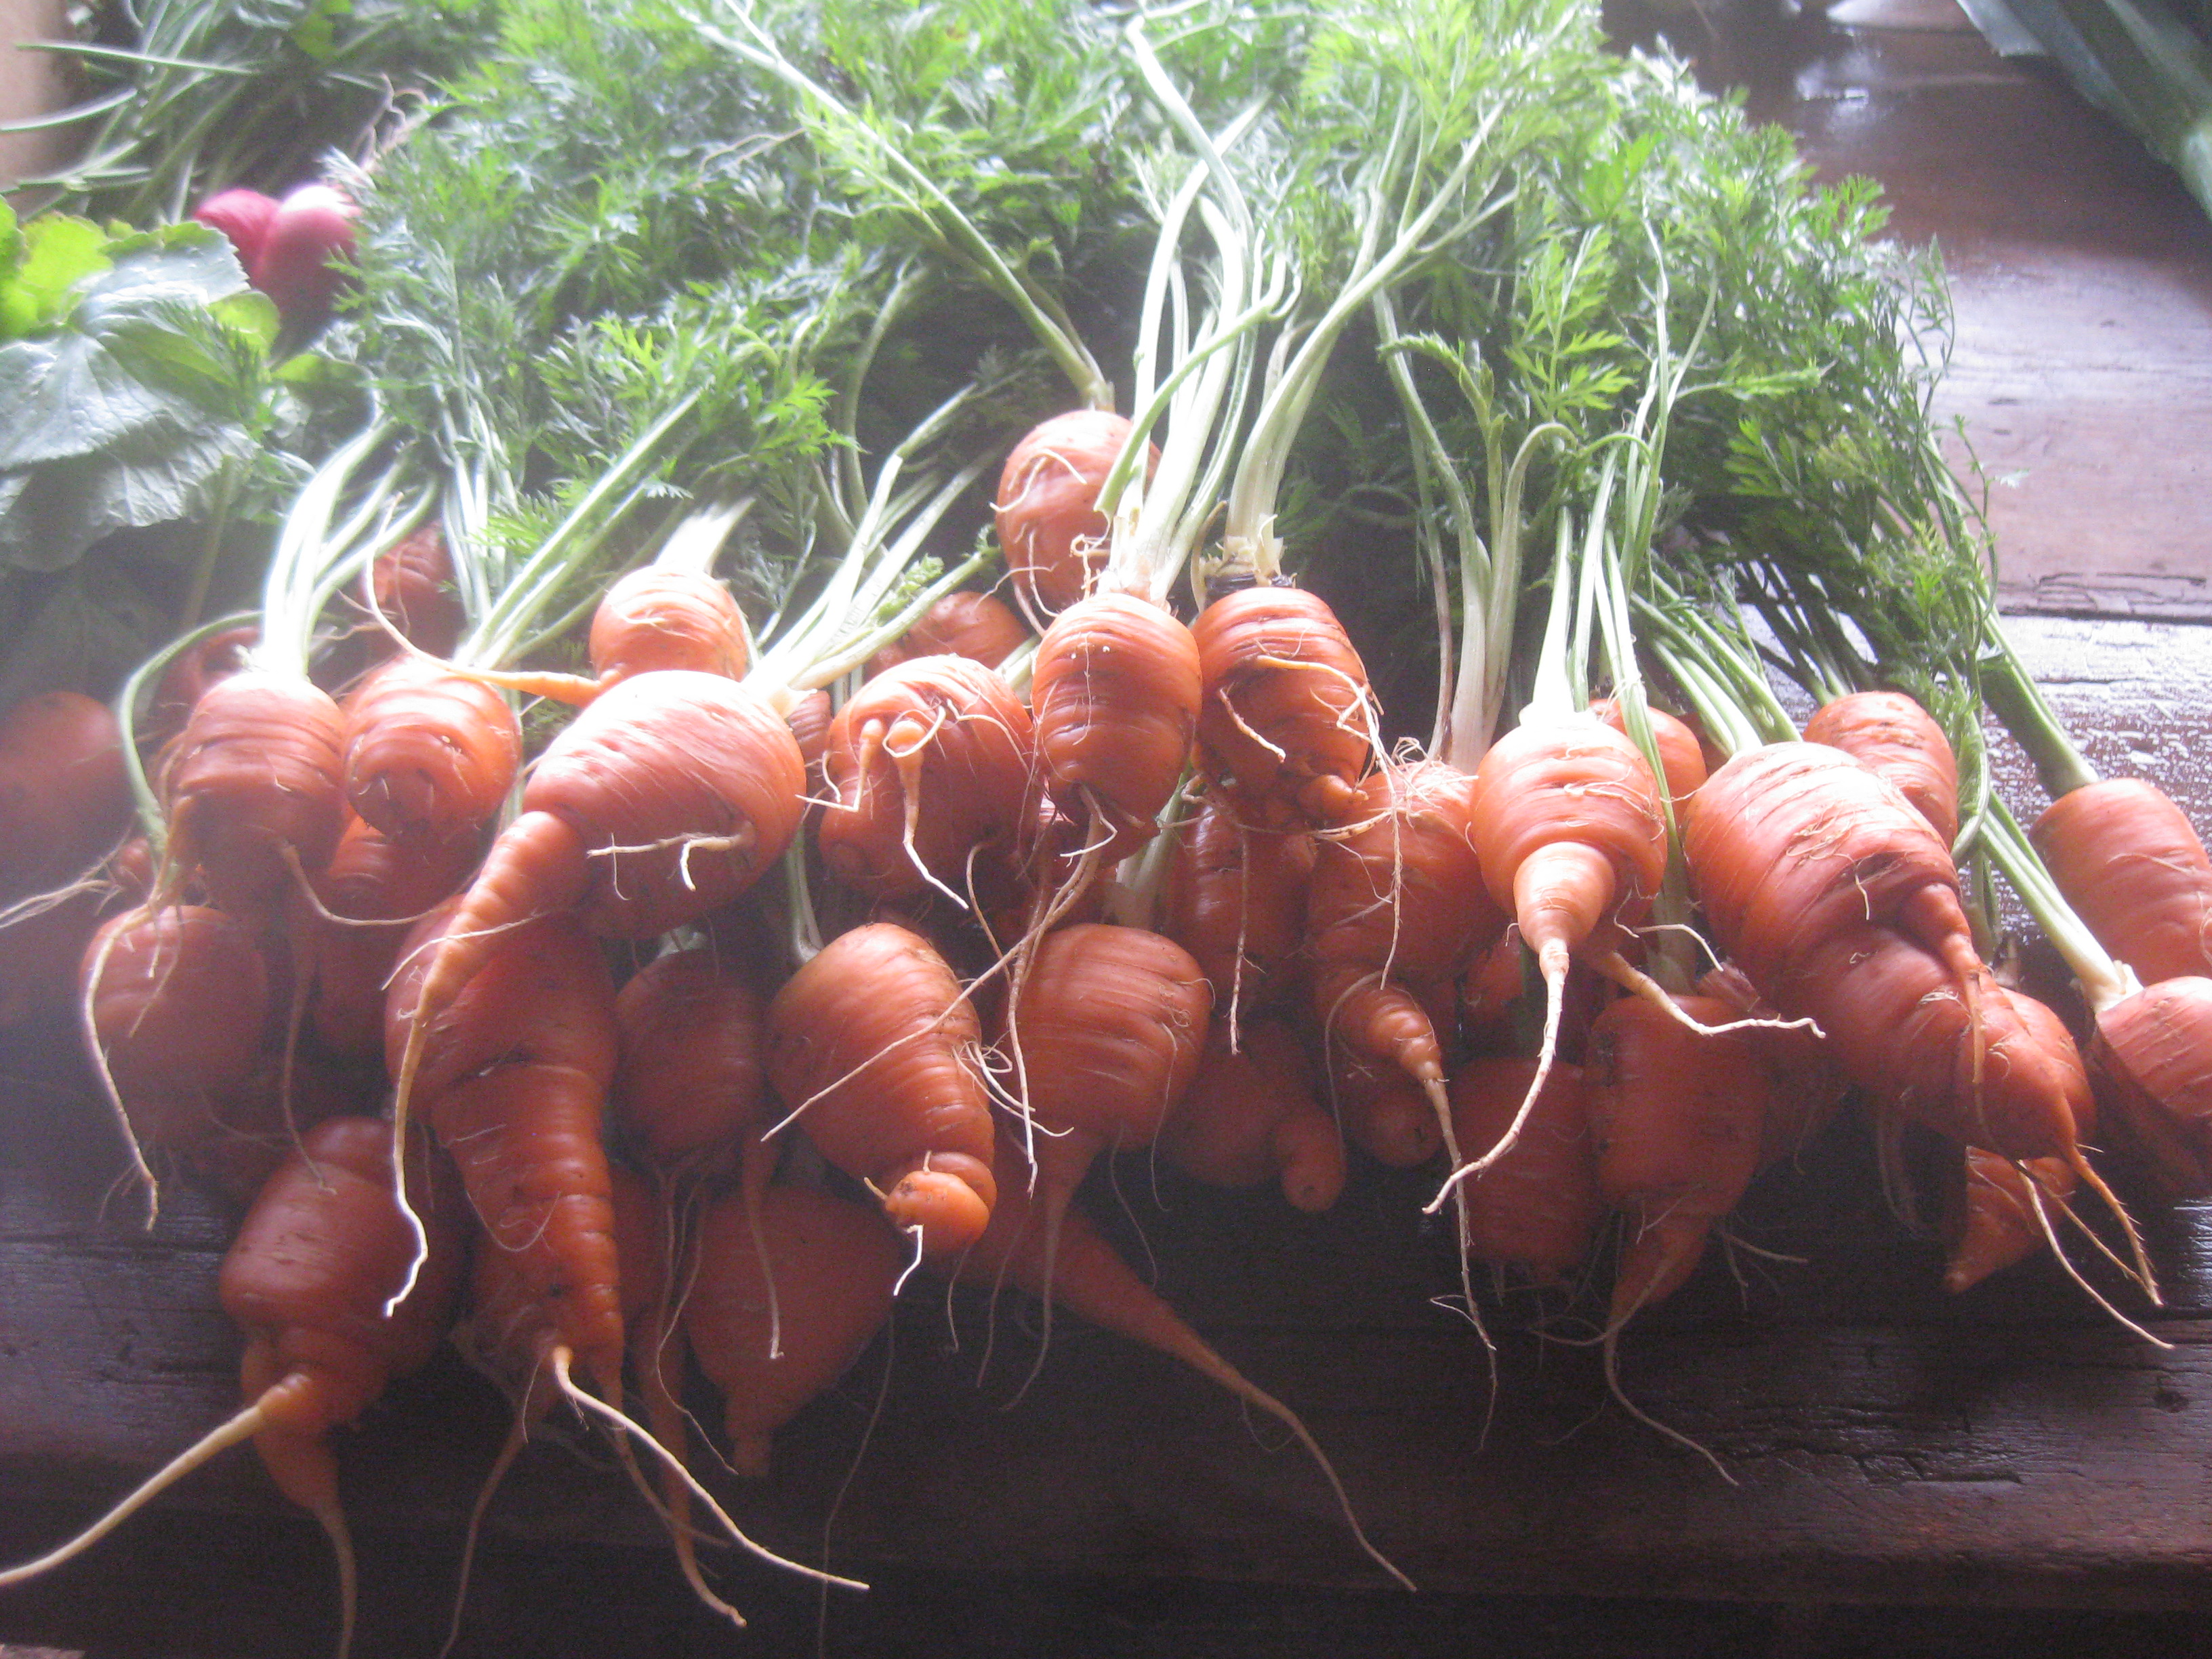
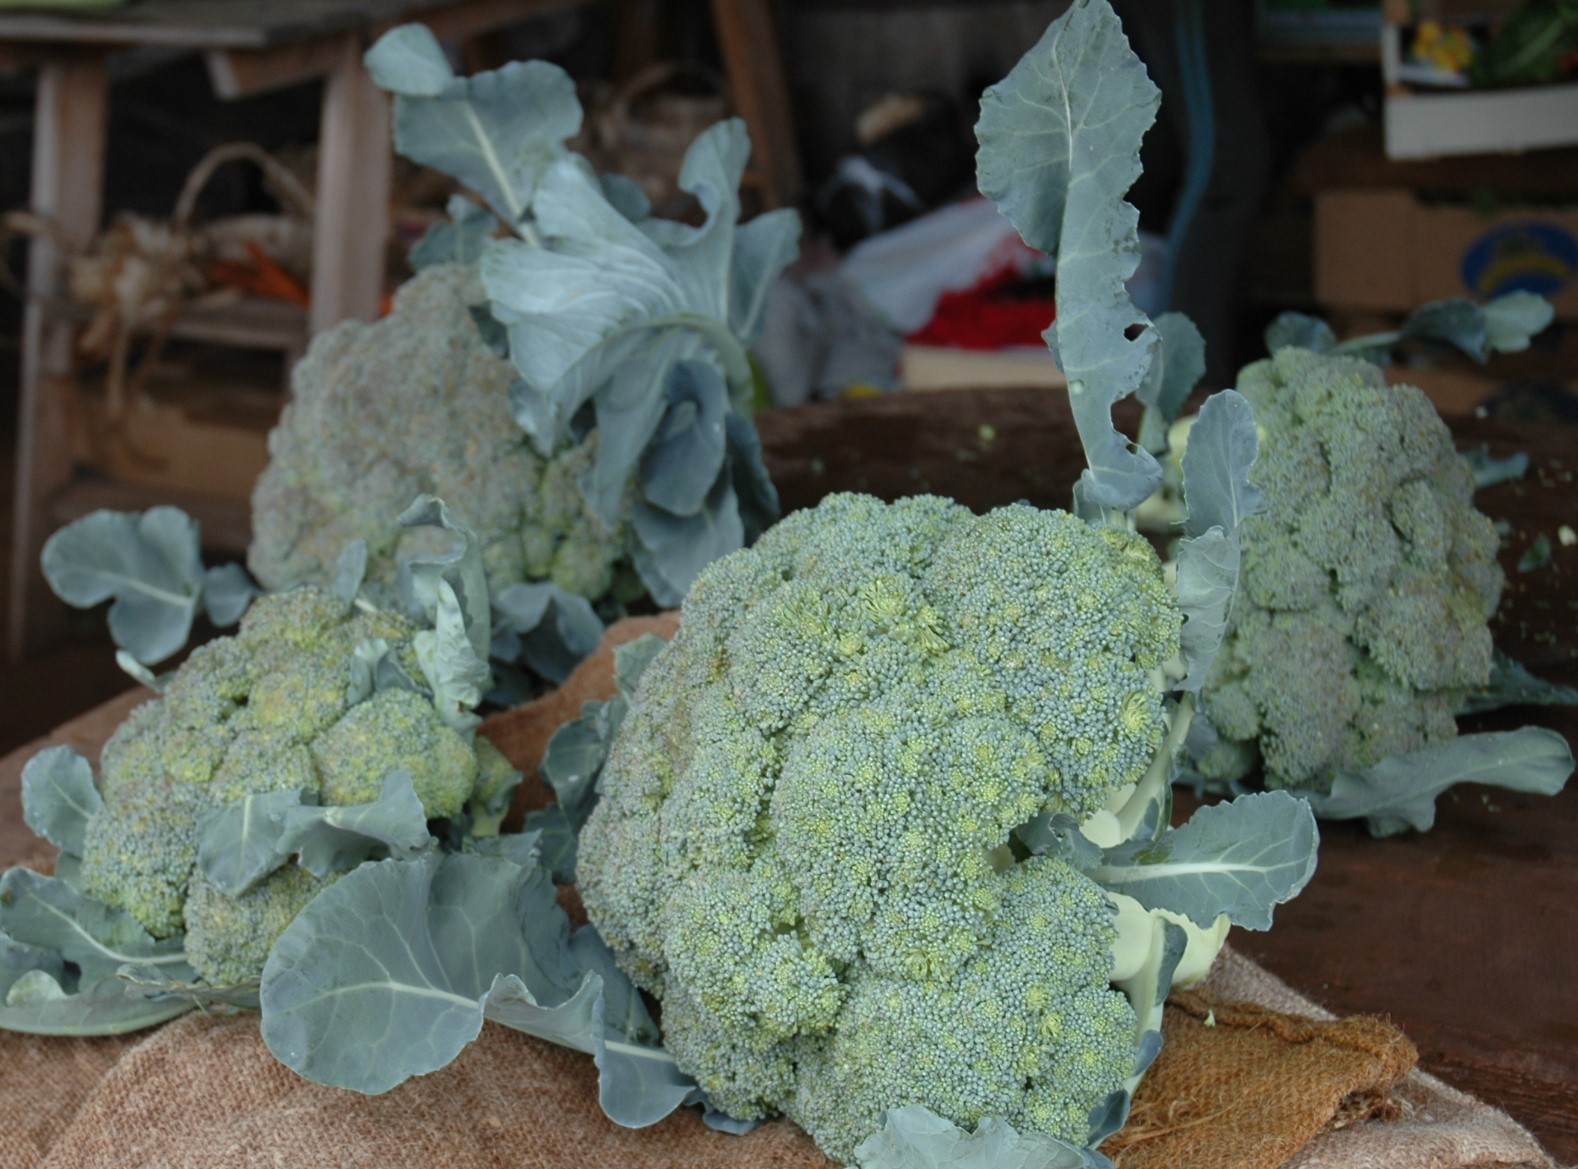
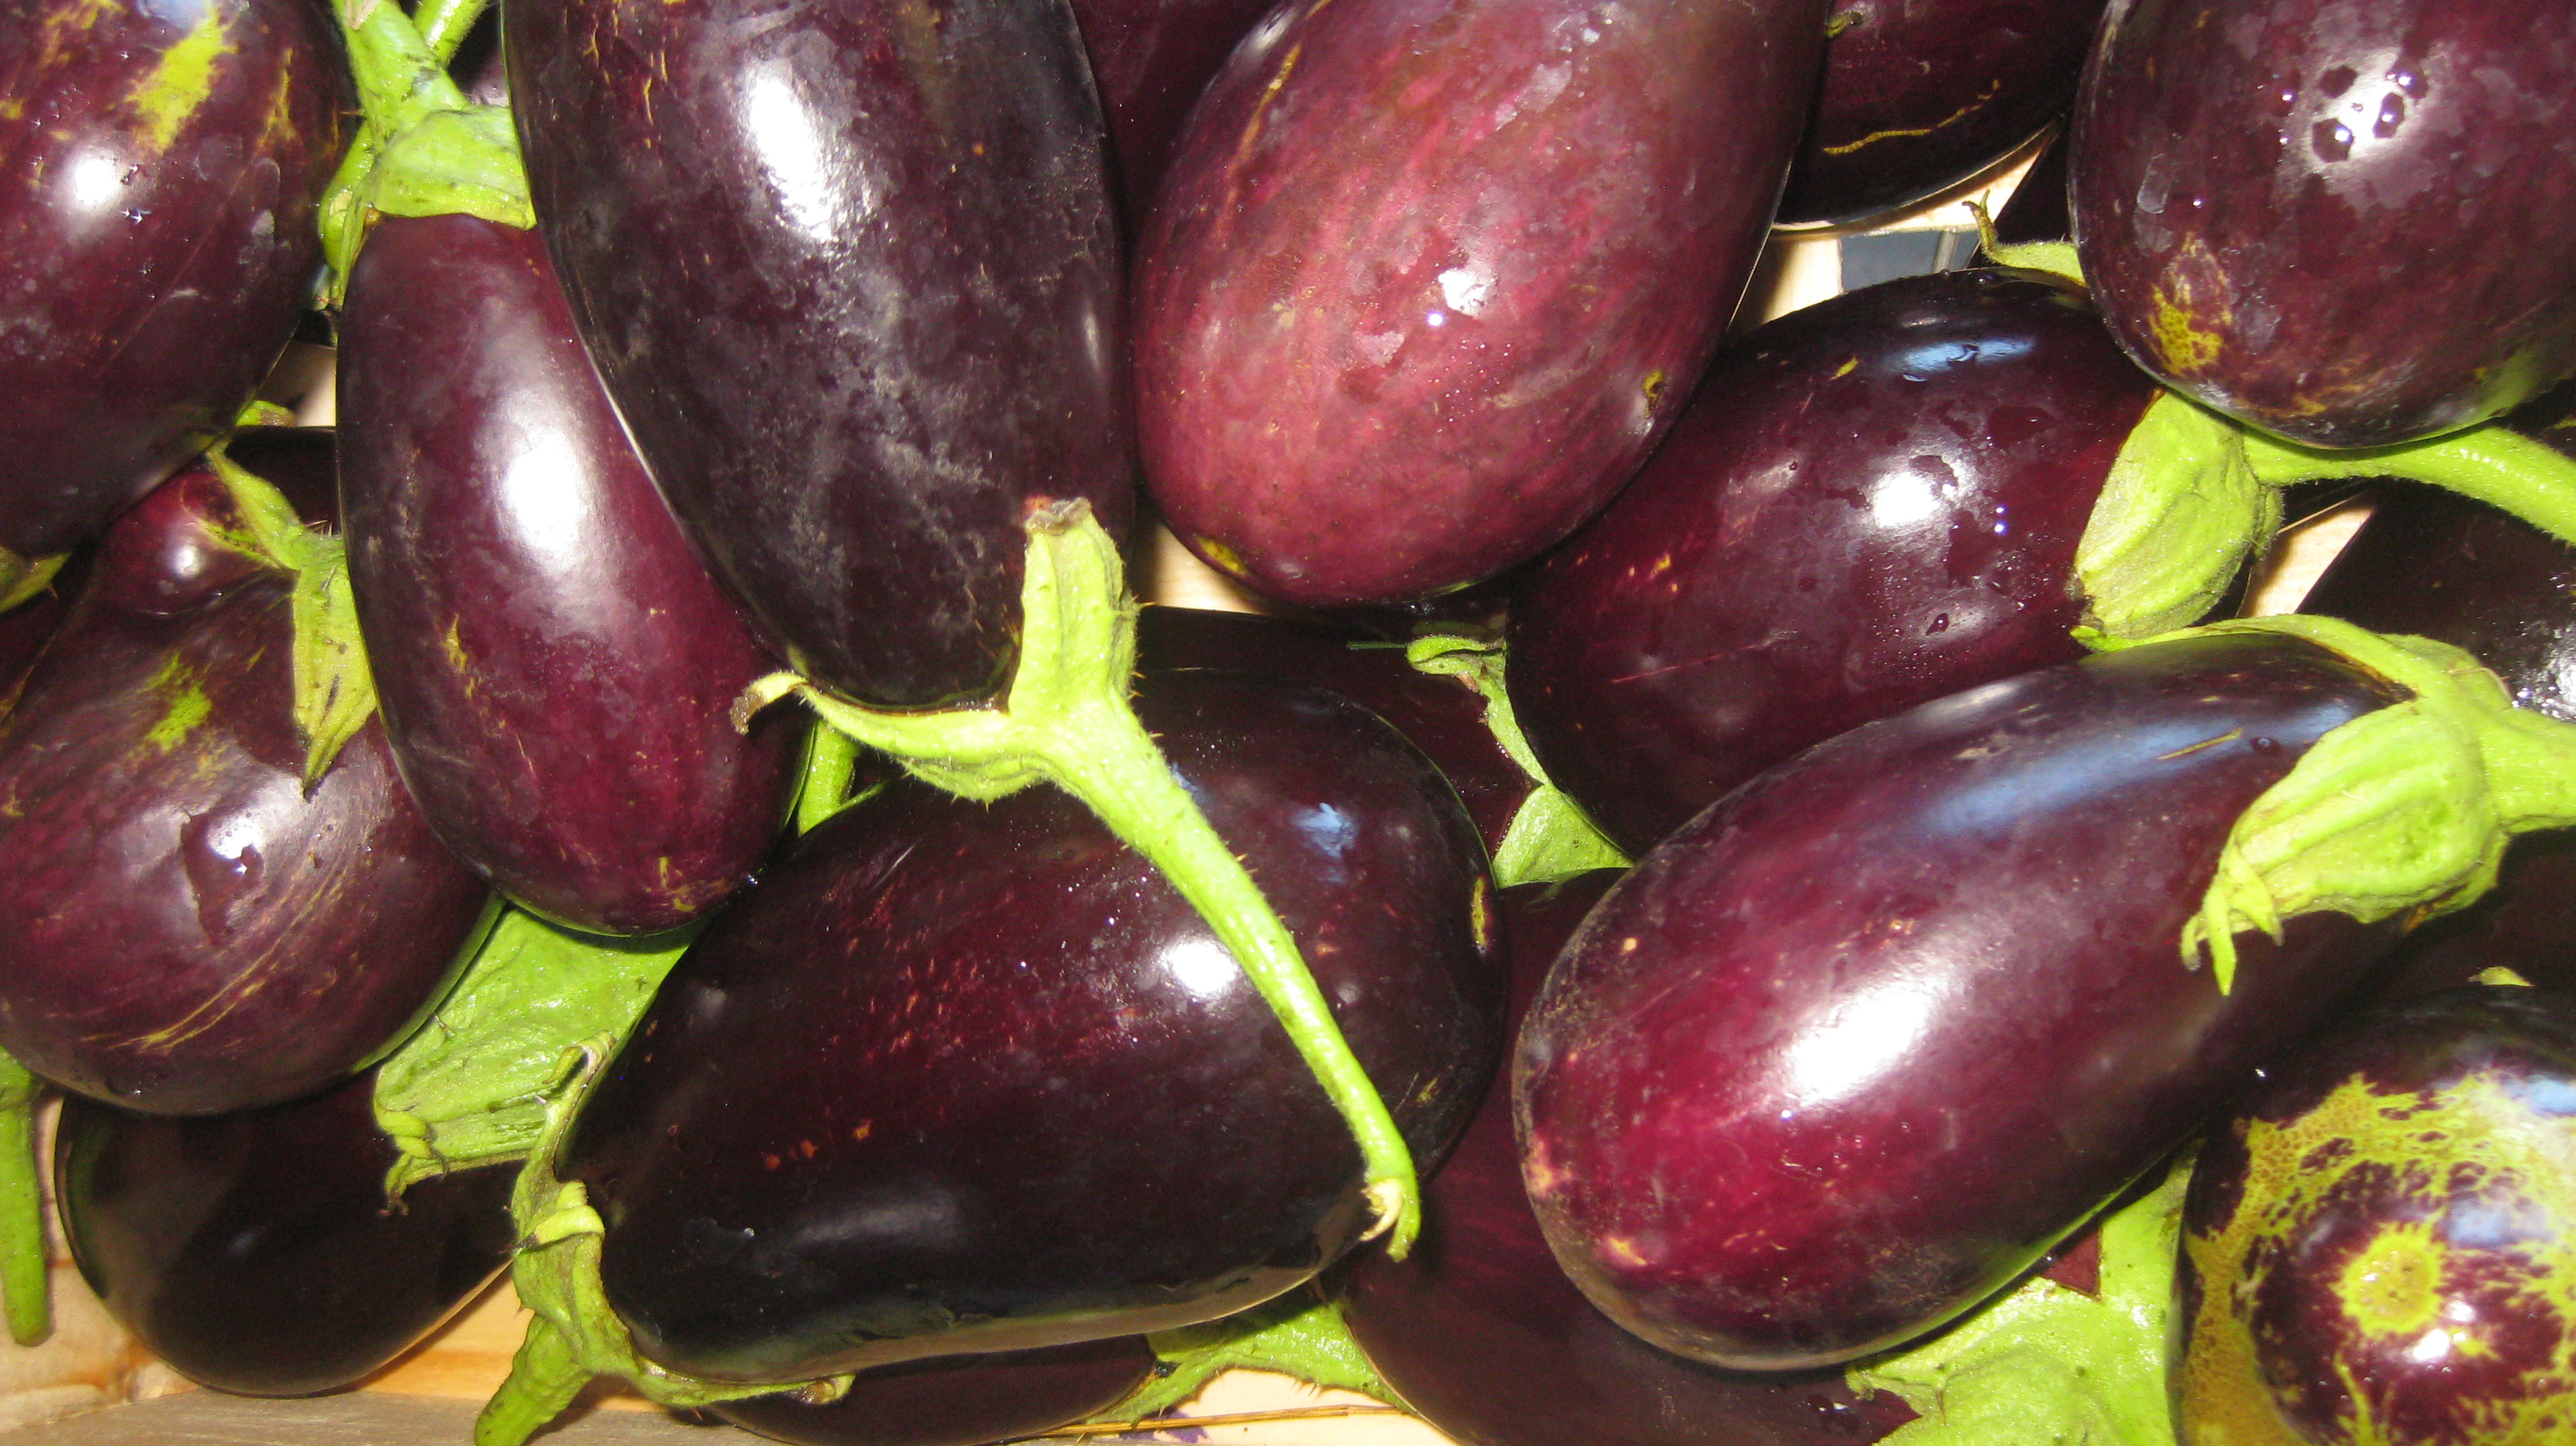
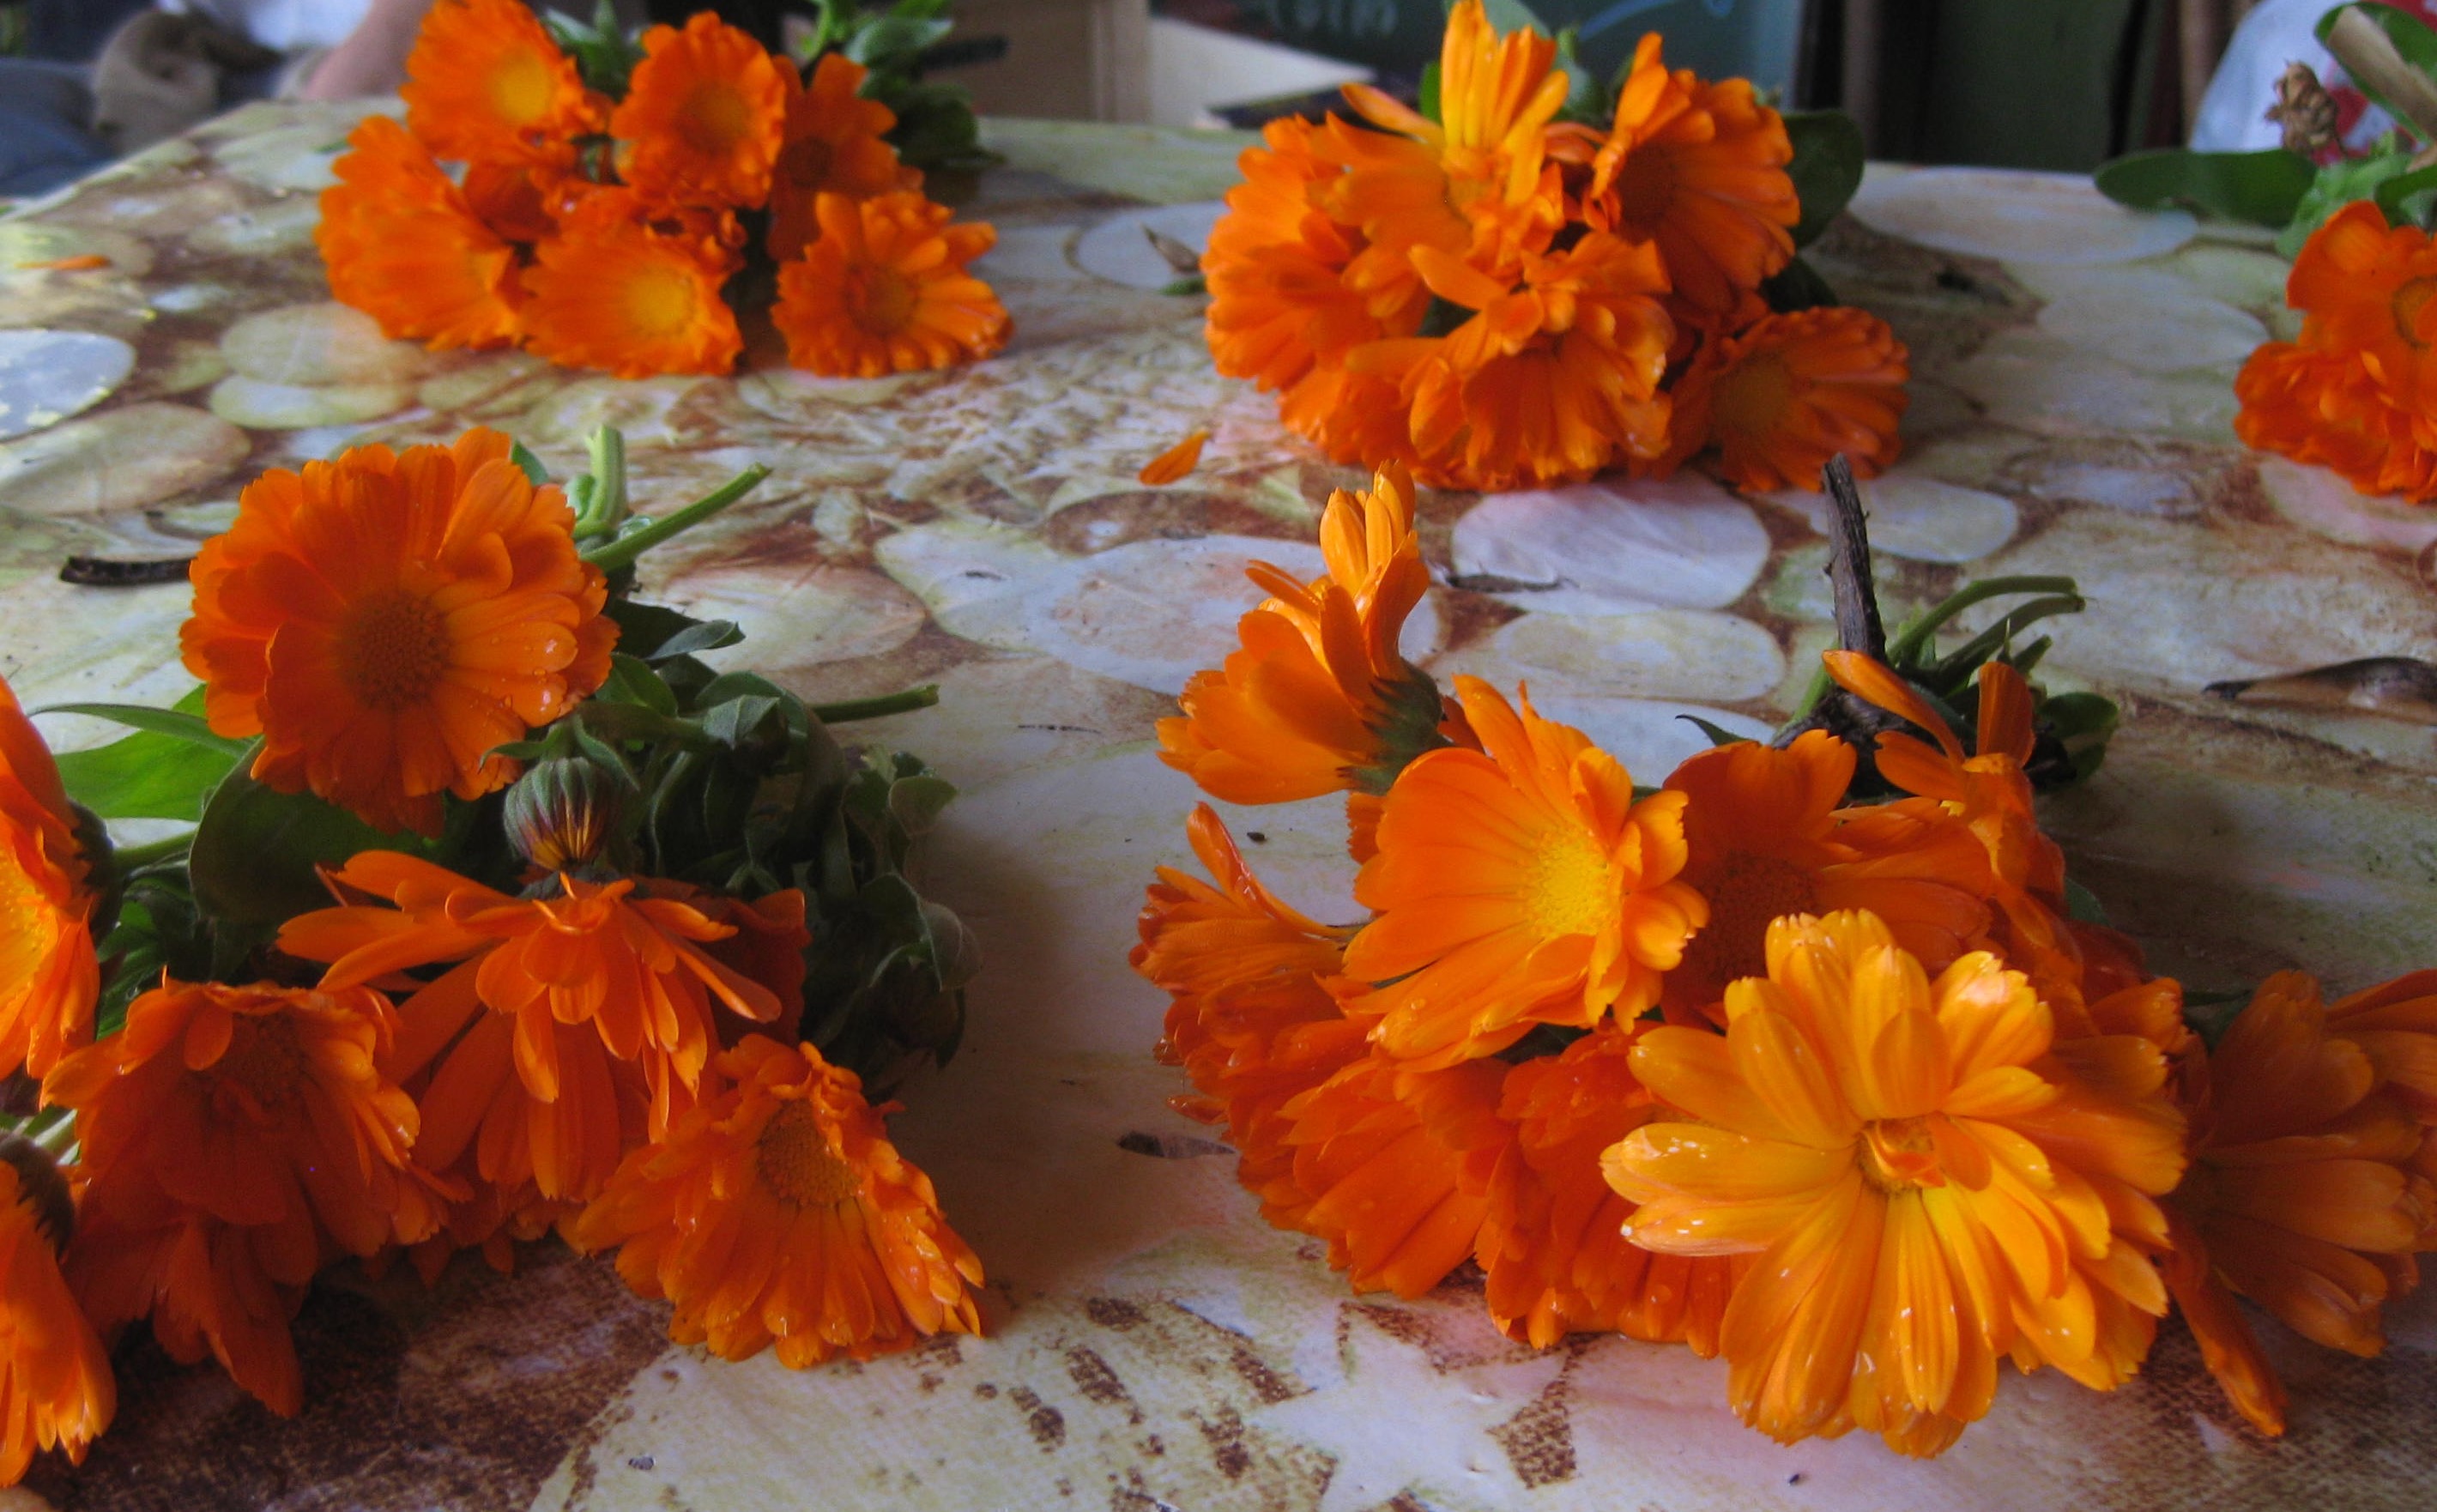
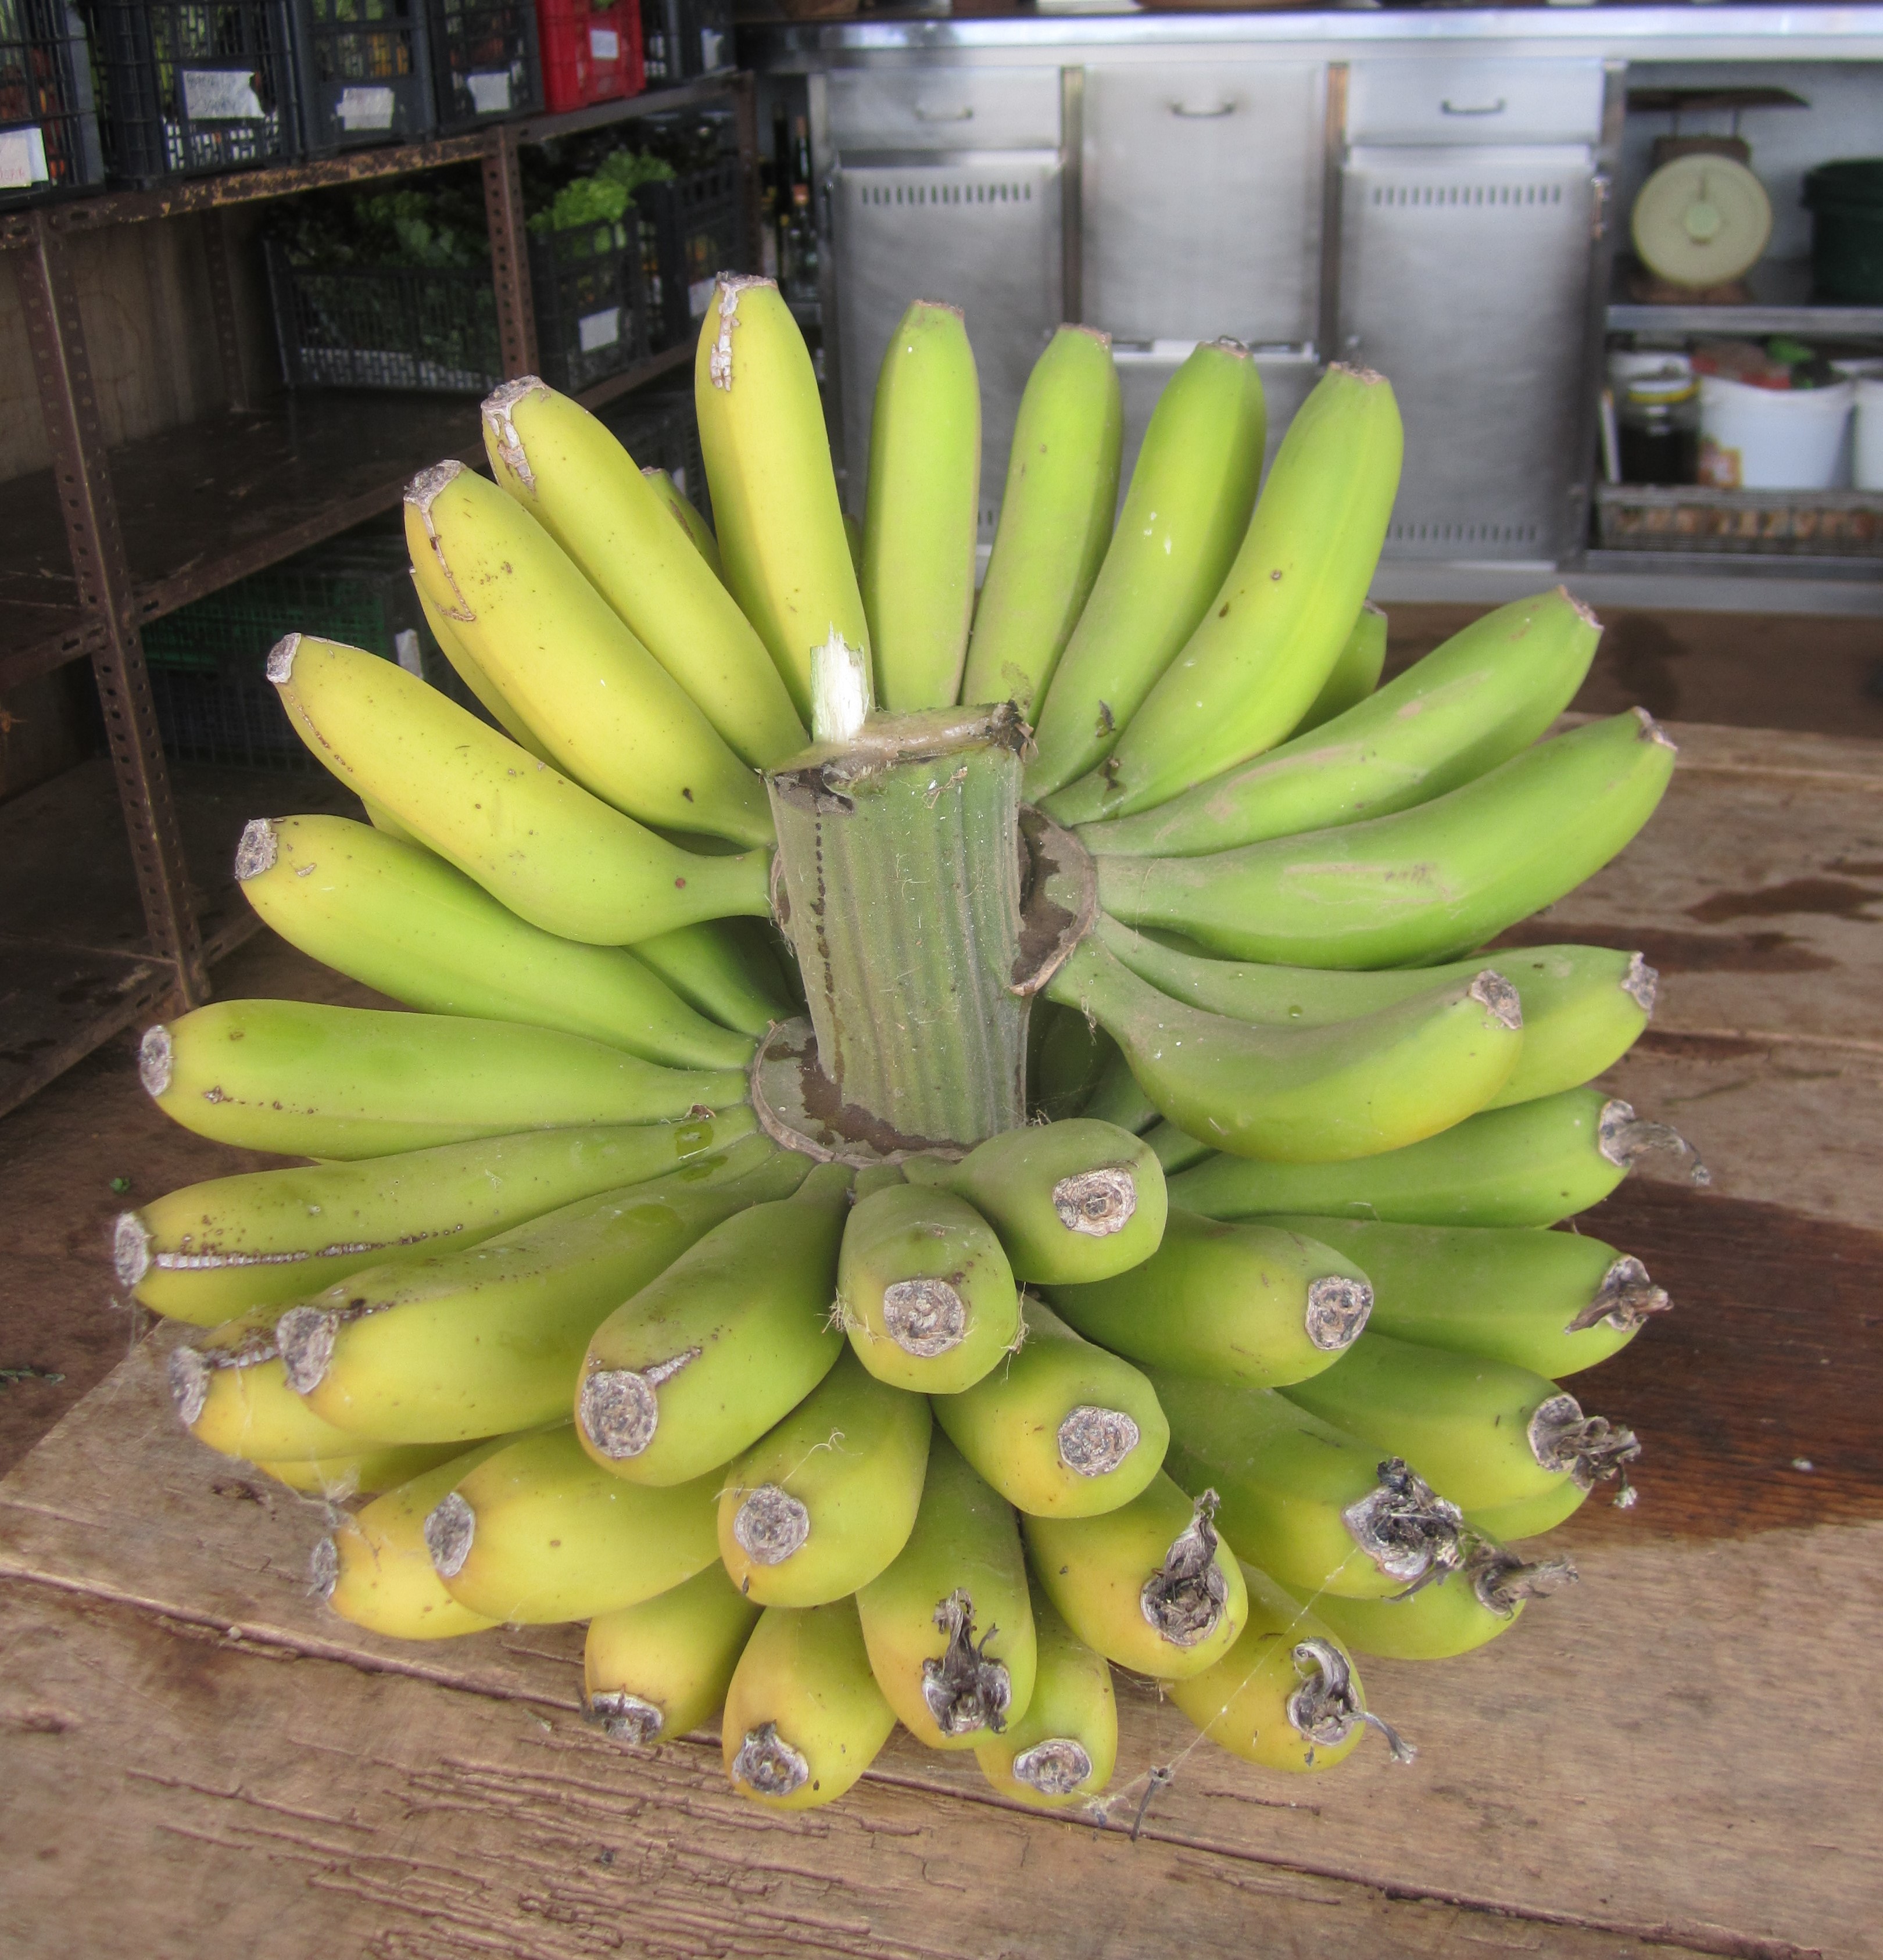

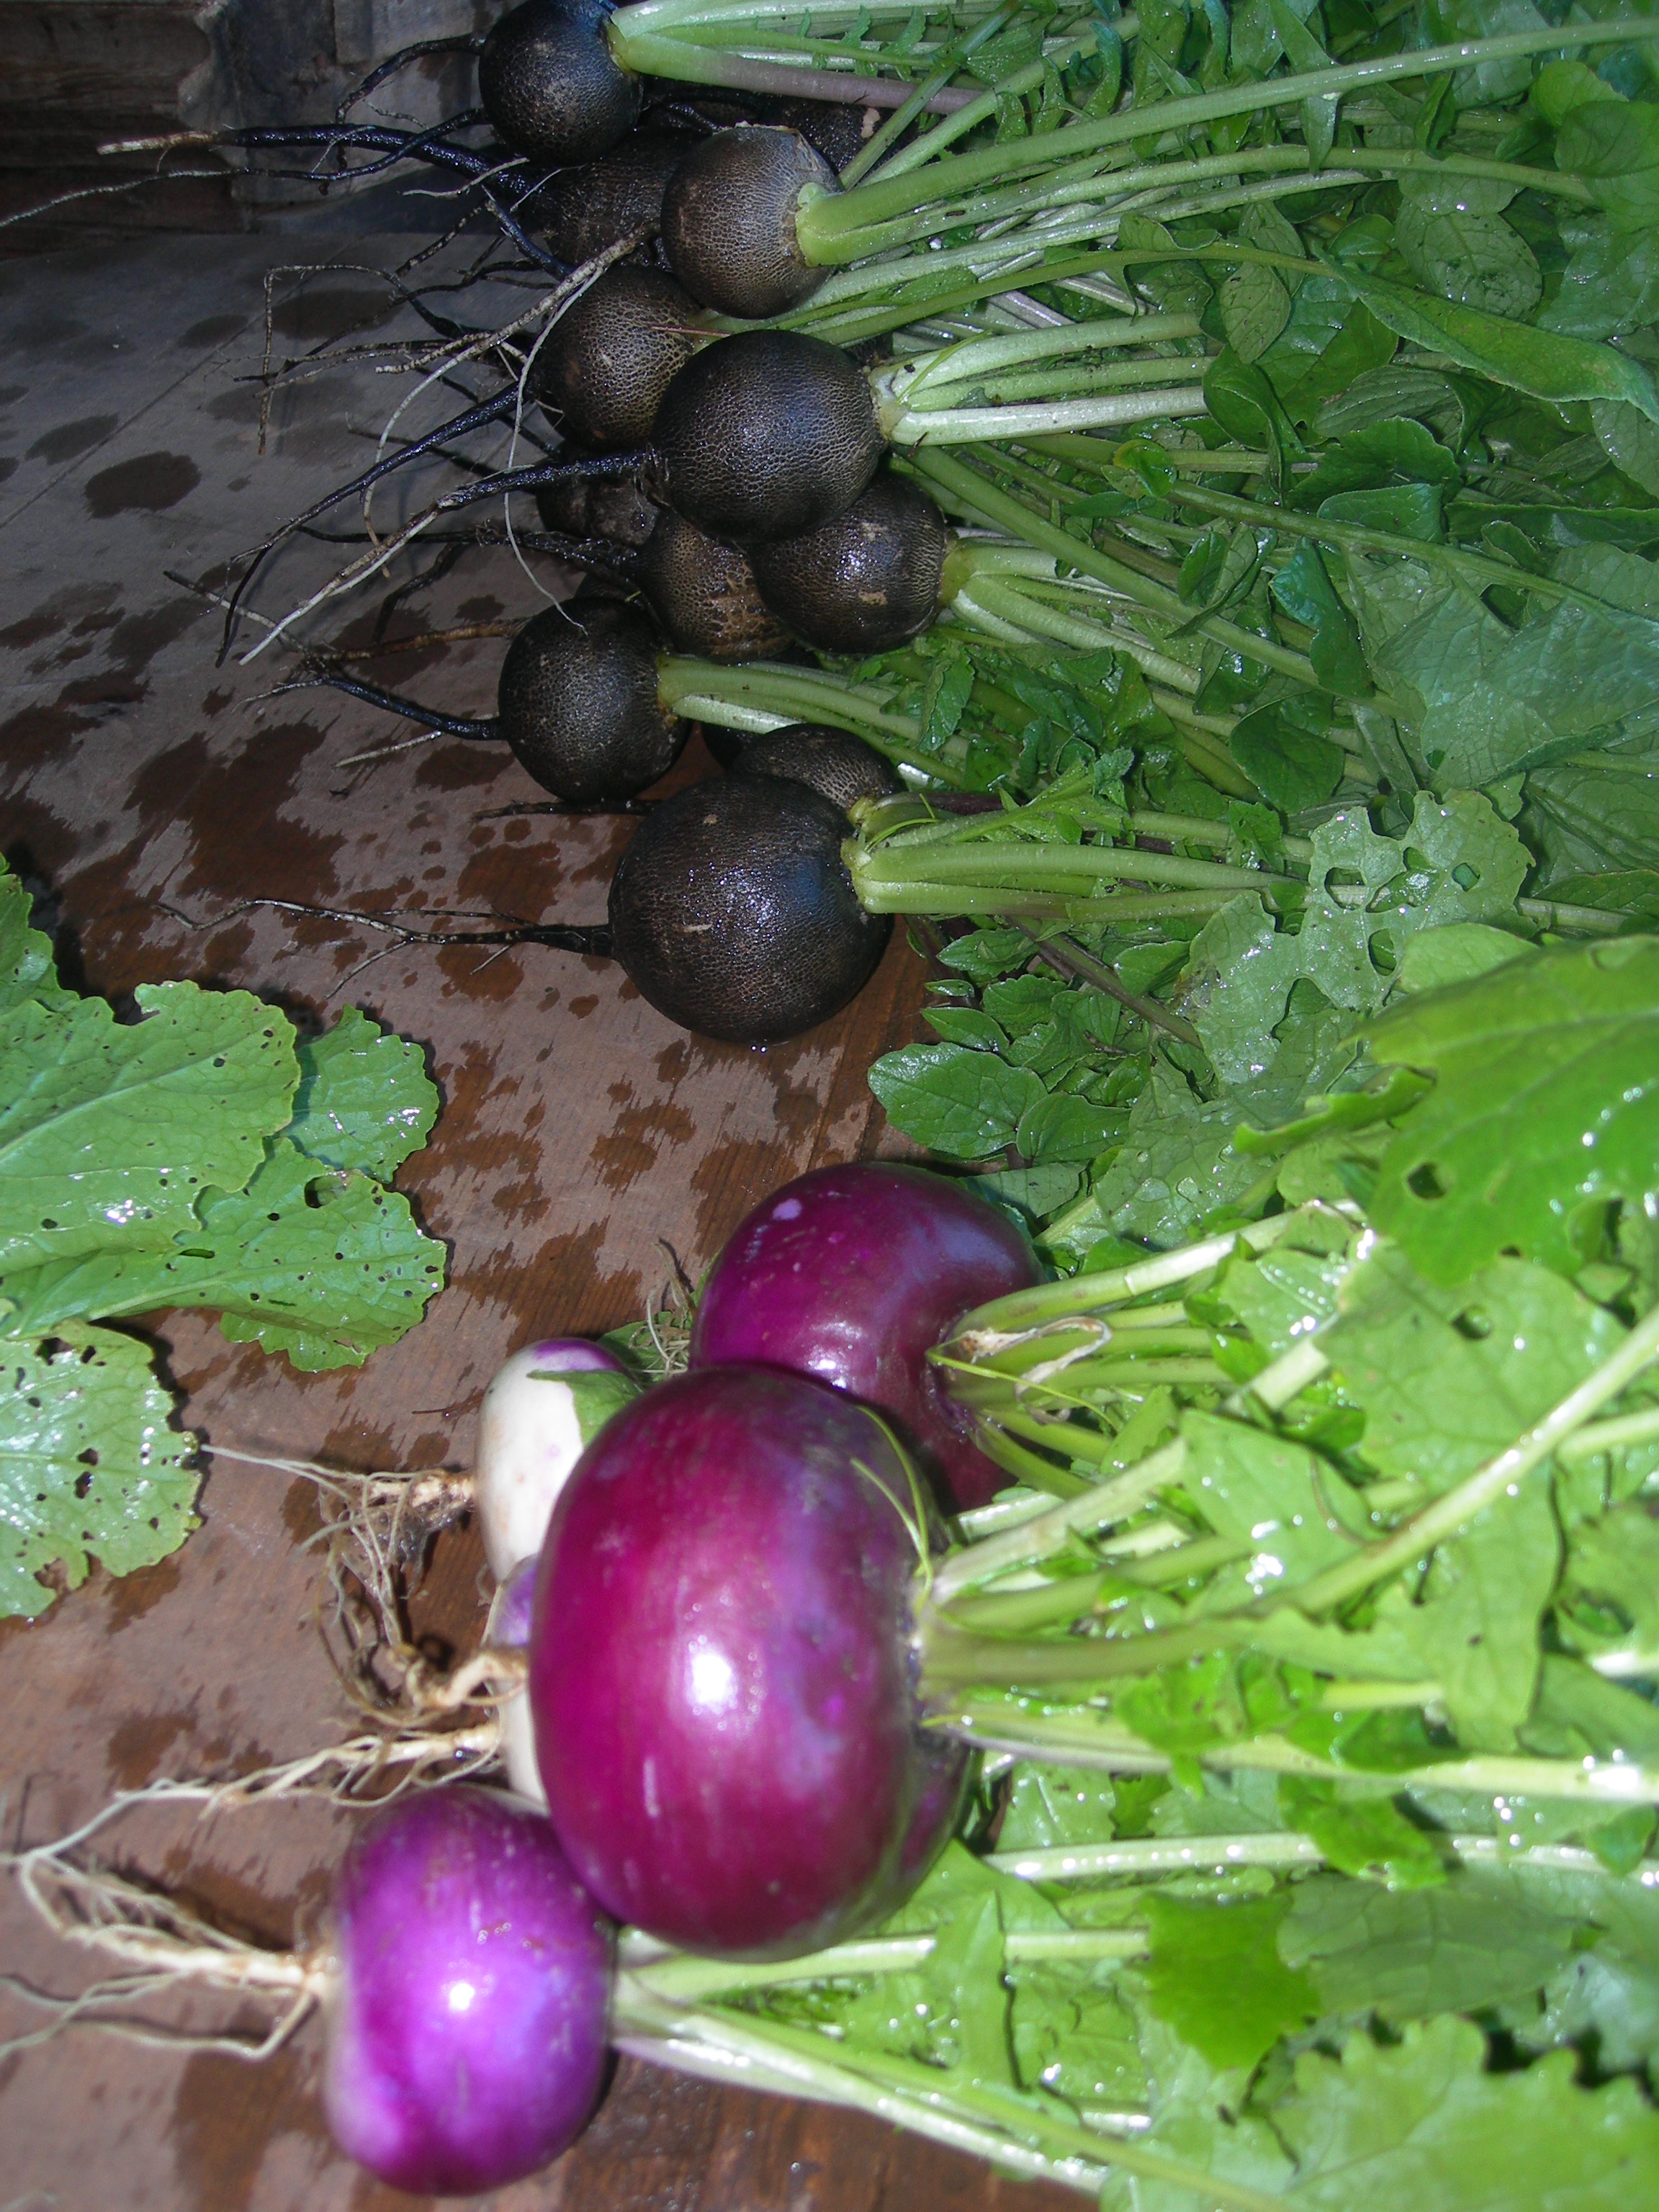
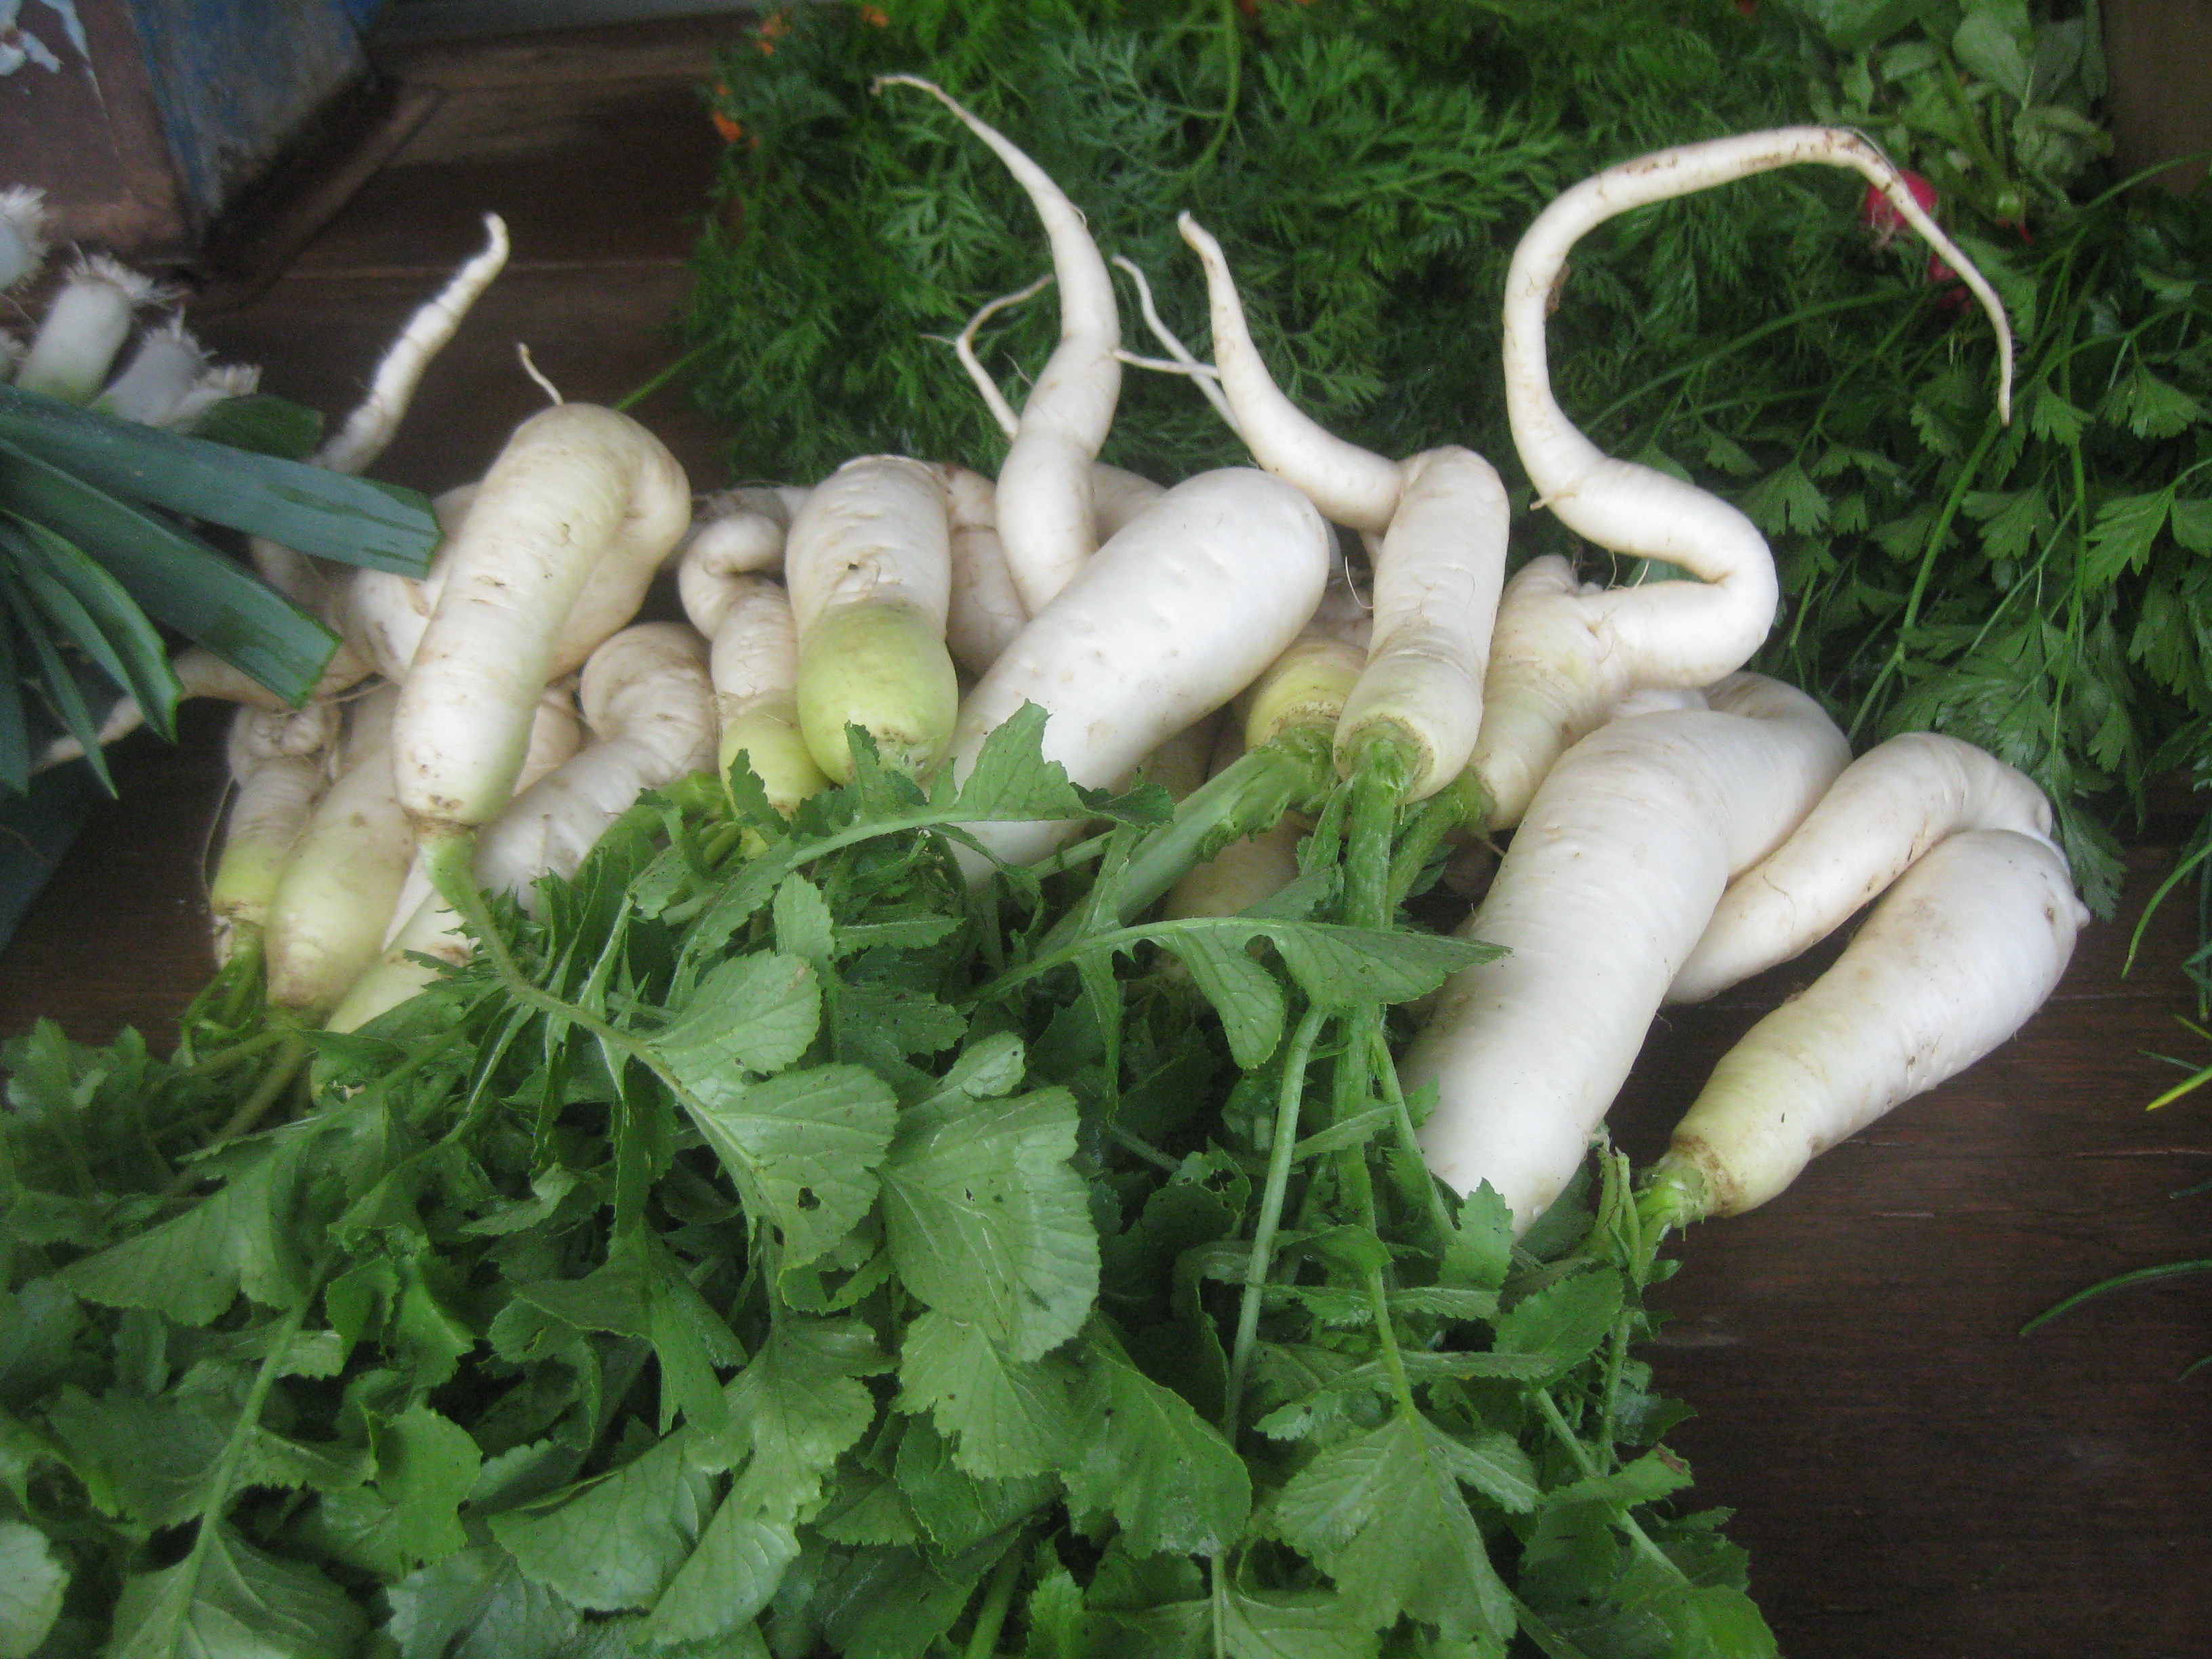
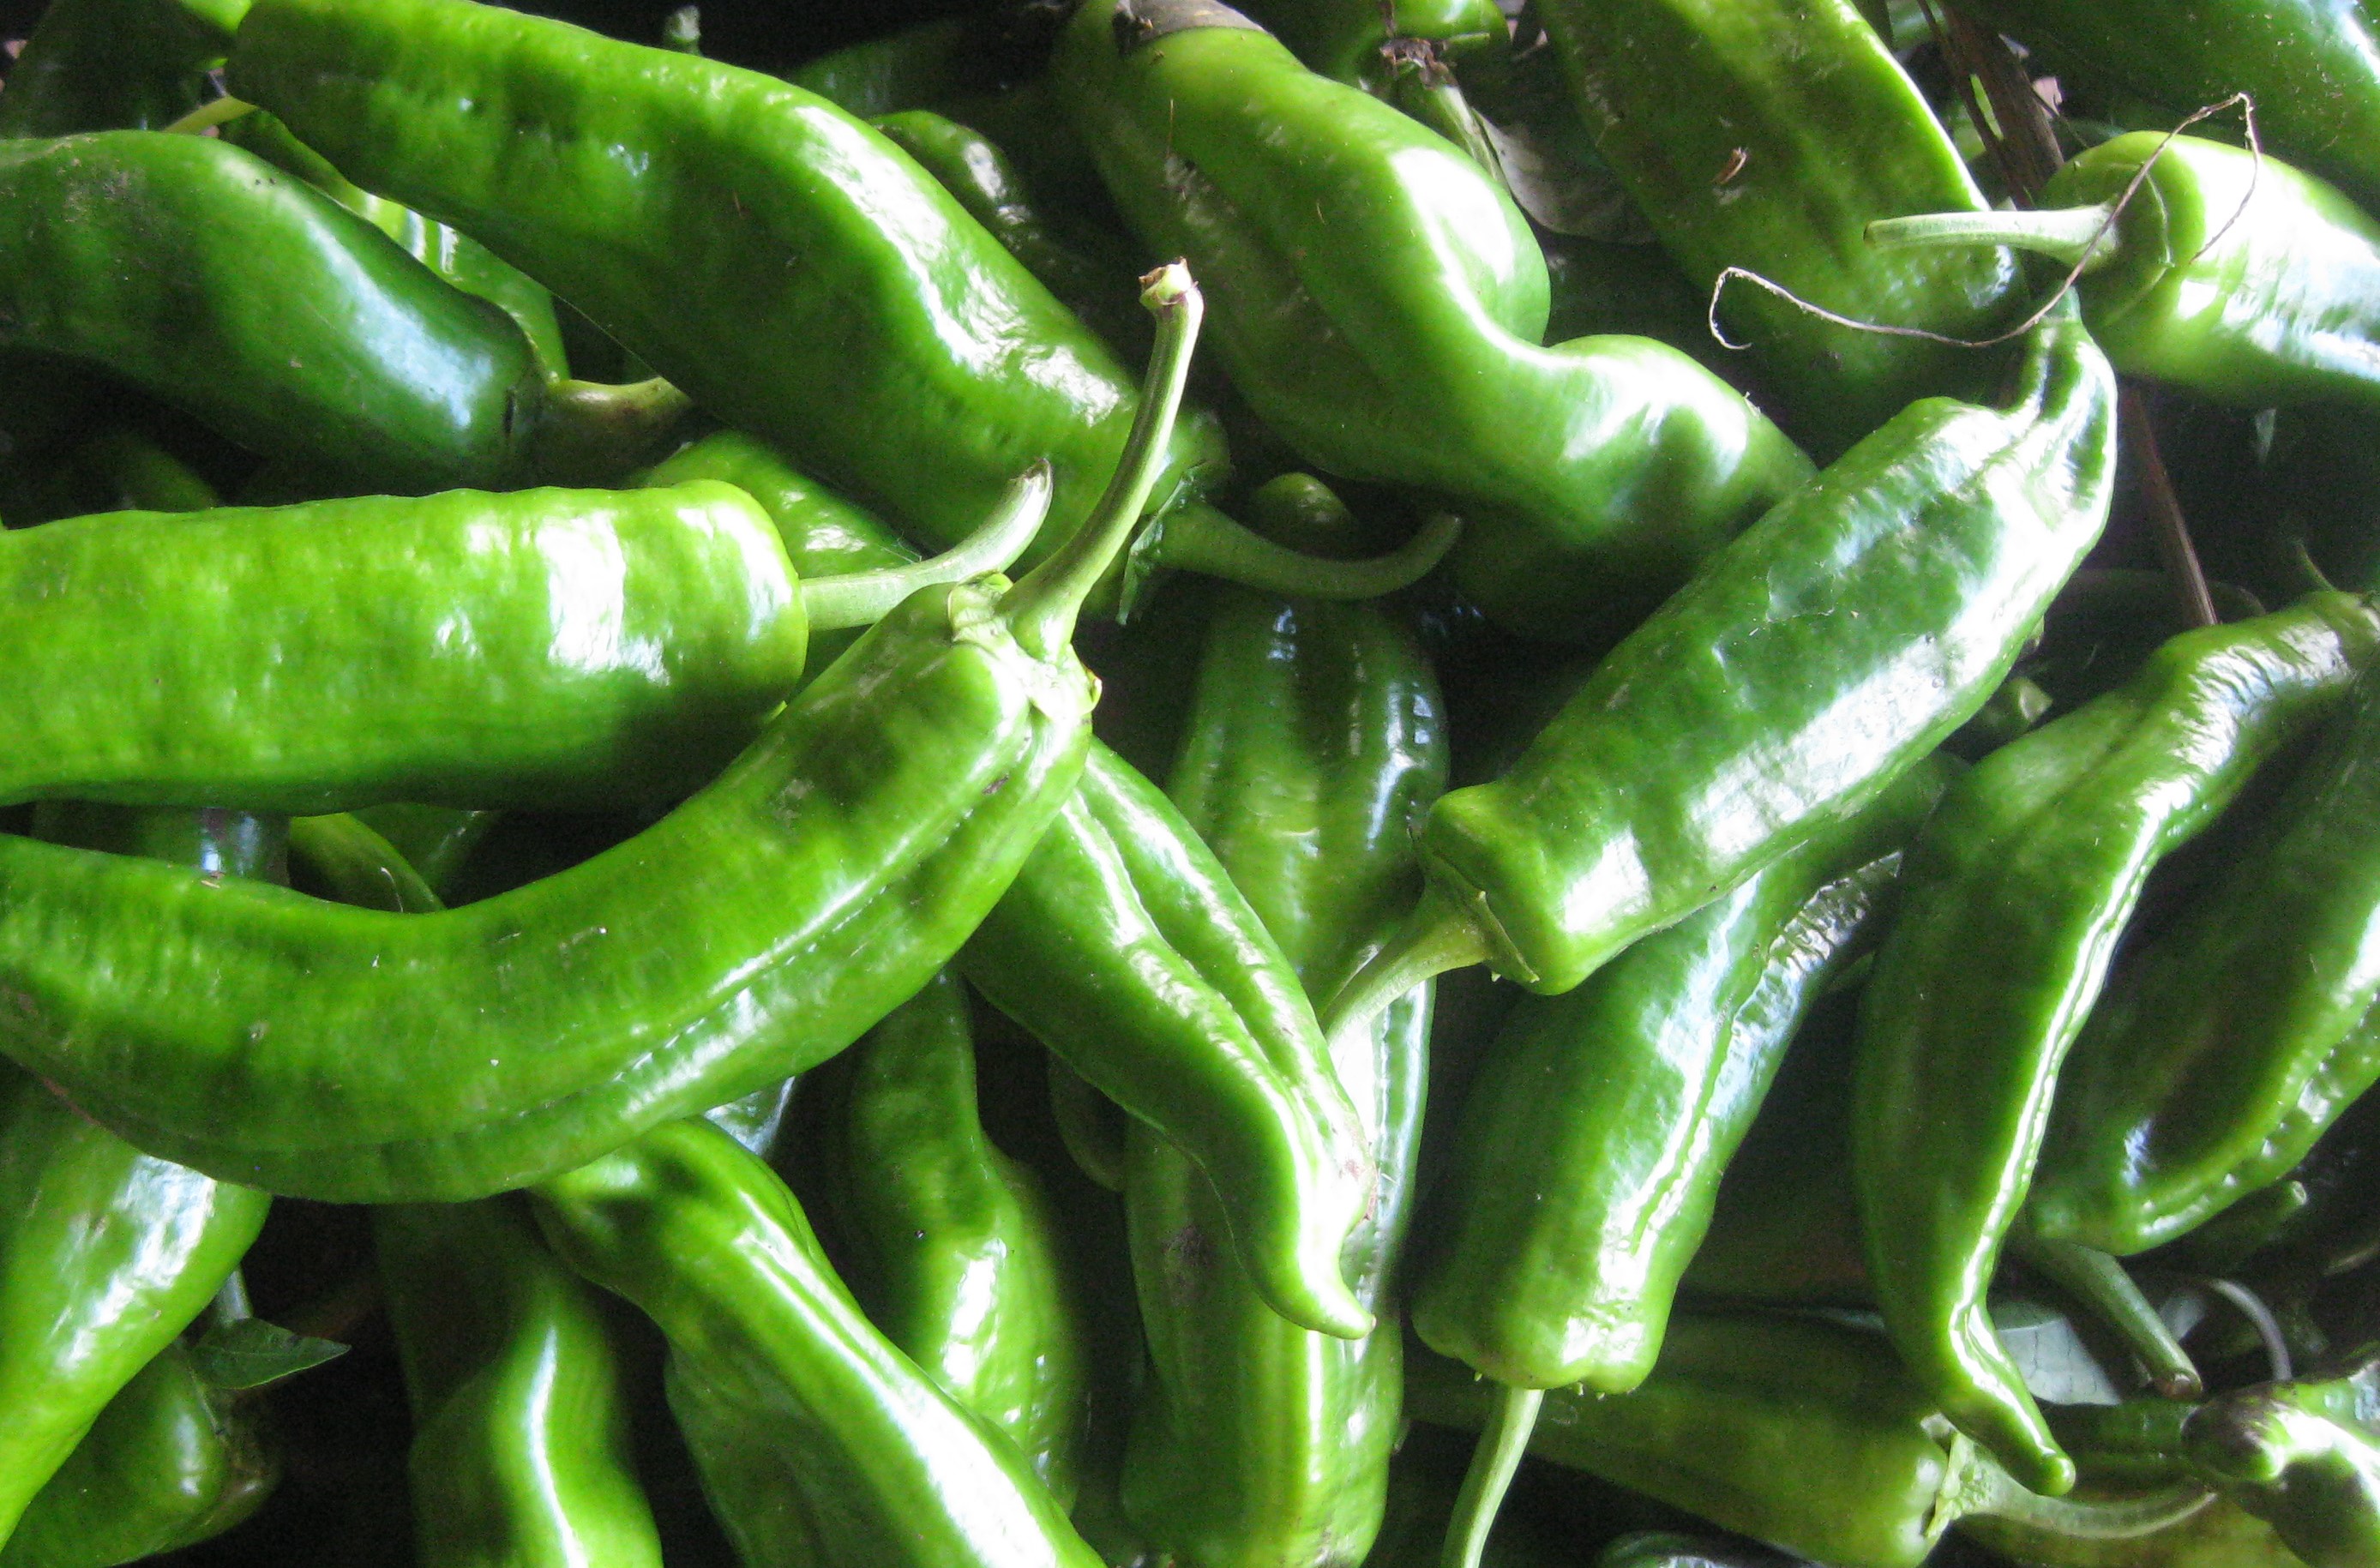
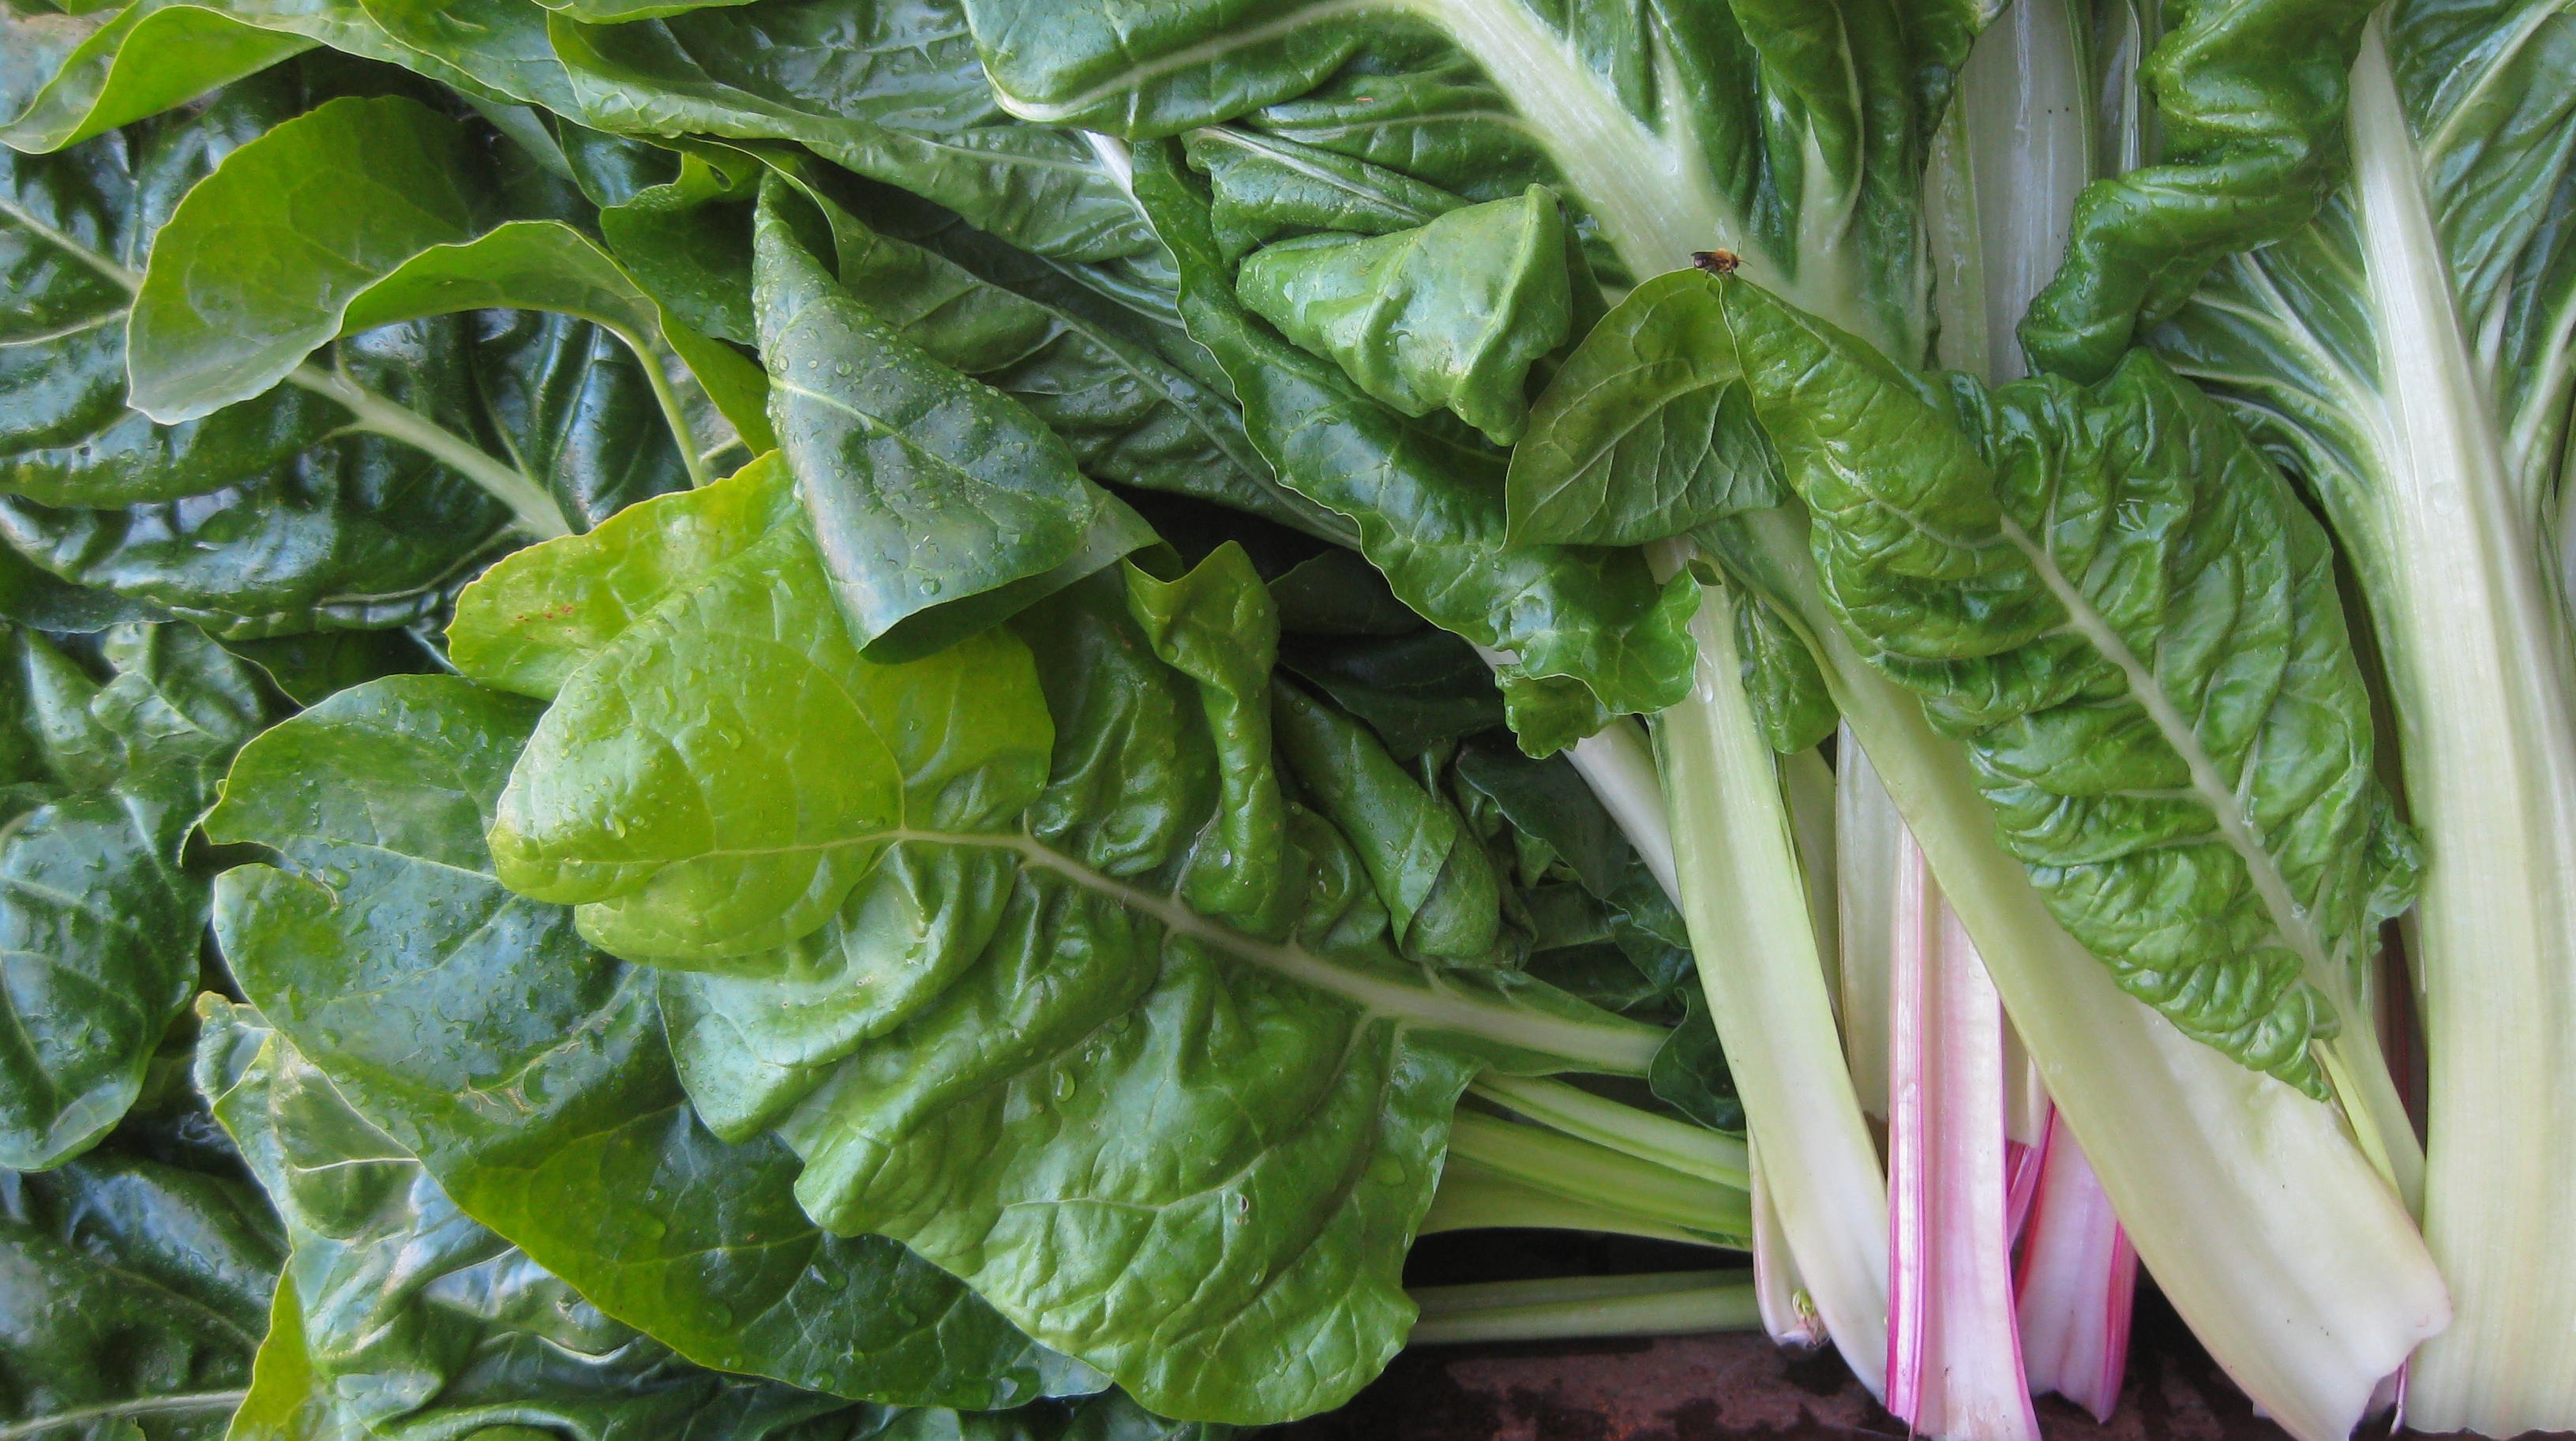
Figure VI.30.- Fruit, vegetables and edible flowers collage ready to be introduced into the bio-boxes in the vegetable market
In our one-hectare property we have a bit more than 3.000 m2 of usable agricultural surface, where we cultivate over 300 varieties of useful plants (edible, aromatic, producing forage, melliferous and for mulch); we have a weekly production of thirty-five bio-boxes for our collaborators and a surplus that is distributed in eight market stalls. We are talking about an average of six kilograms per bio-box and twenty-one products from different varieties (Figure VI.31).
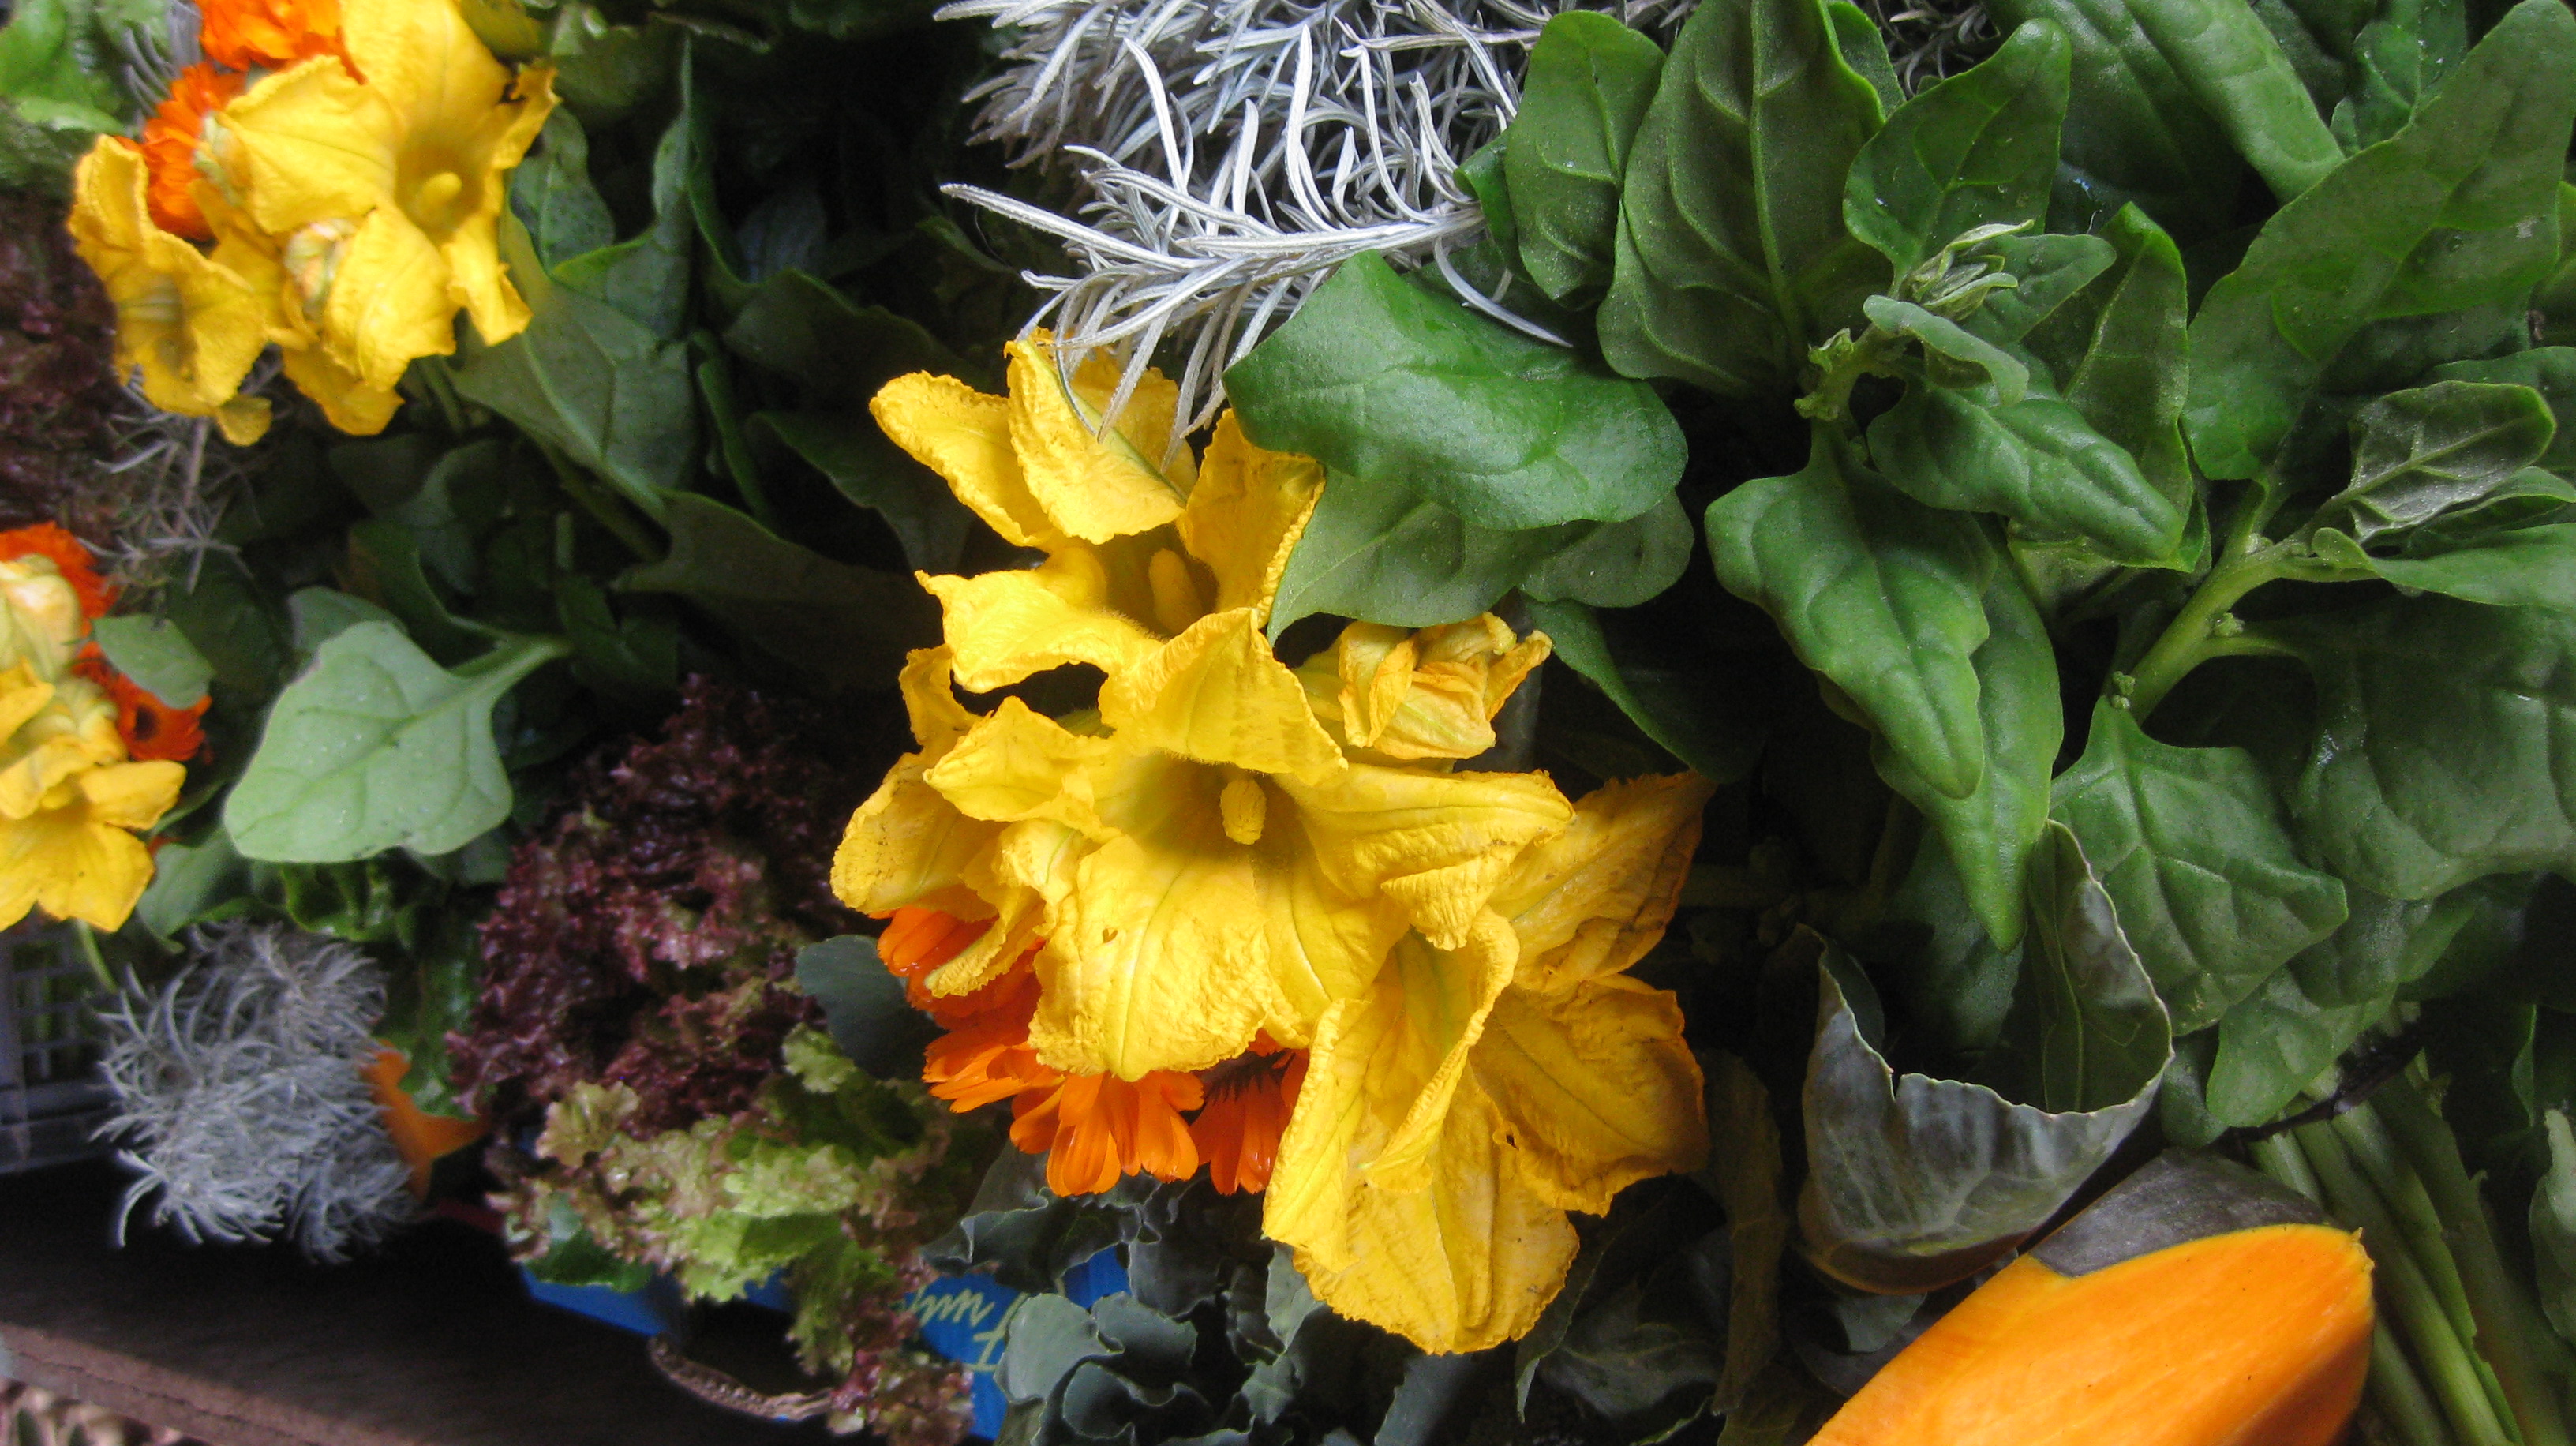

Figure VI.31.- A sample of the top part of the bio-boxes
For instance, during spring and summer, we sell baskets filled with Swiss chard, basil, celery, eggplant, red beetroot, broccoli, marrow, zucchini, pumpkin, onion, coriander, cabbage, cauliflower, rutabaga, spinach, kohlrabi, beans, lettuce, turnip, parsley, green pepper, leek, malabar gourd, radish, little radish, arugula, tomato, carrot, etc. And of course we shouldn’t forget the fruit from the fruit trees we talked about in the Didactic Unit IV that we can also commercialize.
In our gardens we also have vegetables that grow fast and that force us to rotate and succeed them quicker than others that can stay much longer in the garden, such as cauliflower, cabbage, broccoli, Florence fennel, etc. These last types of plants can be cut several times since they grow more fruit when we cut the first fruit. Each time we cut, the plant will grow new fruits; but if the plant grows too many new branches the fruit will get progressively smaller. If, on the contrary, we cut the plant and only leave two or three branches, we will obtain large sized fruit again.
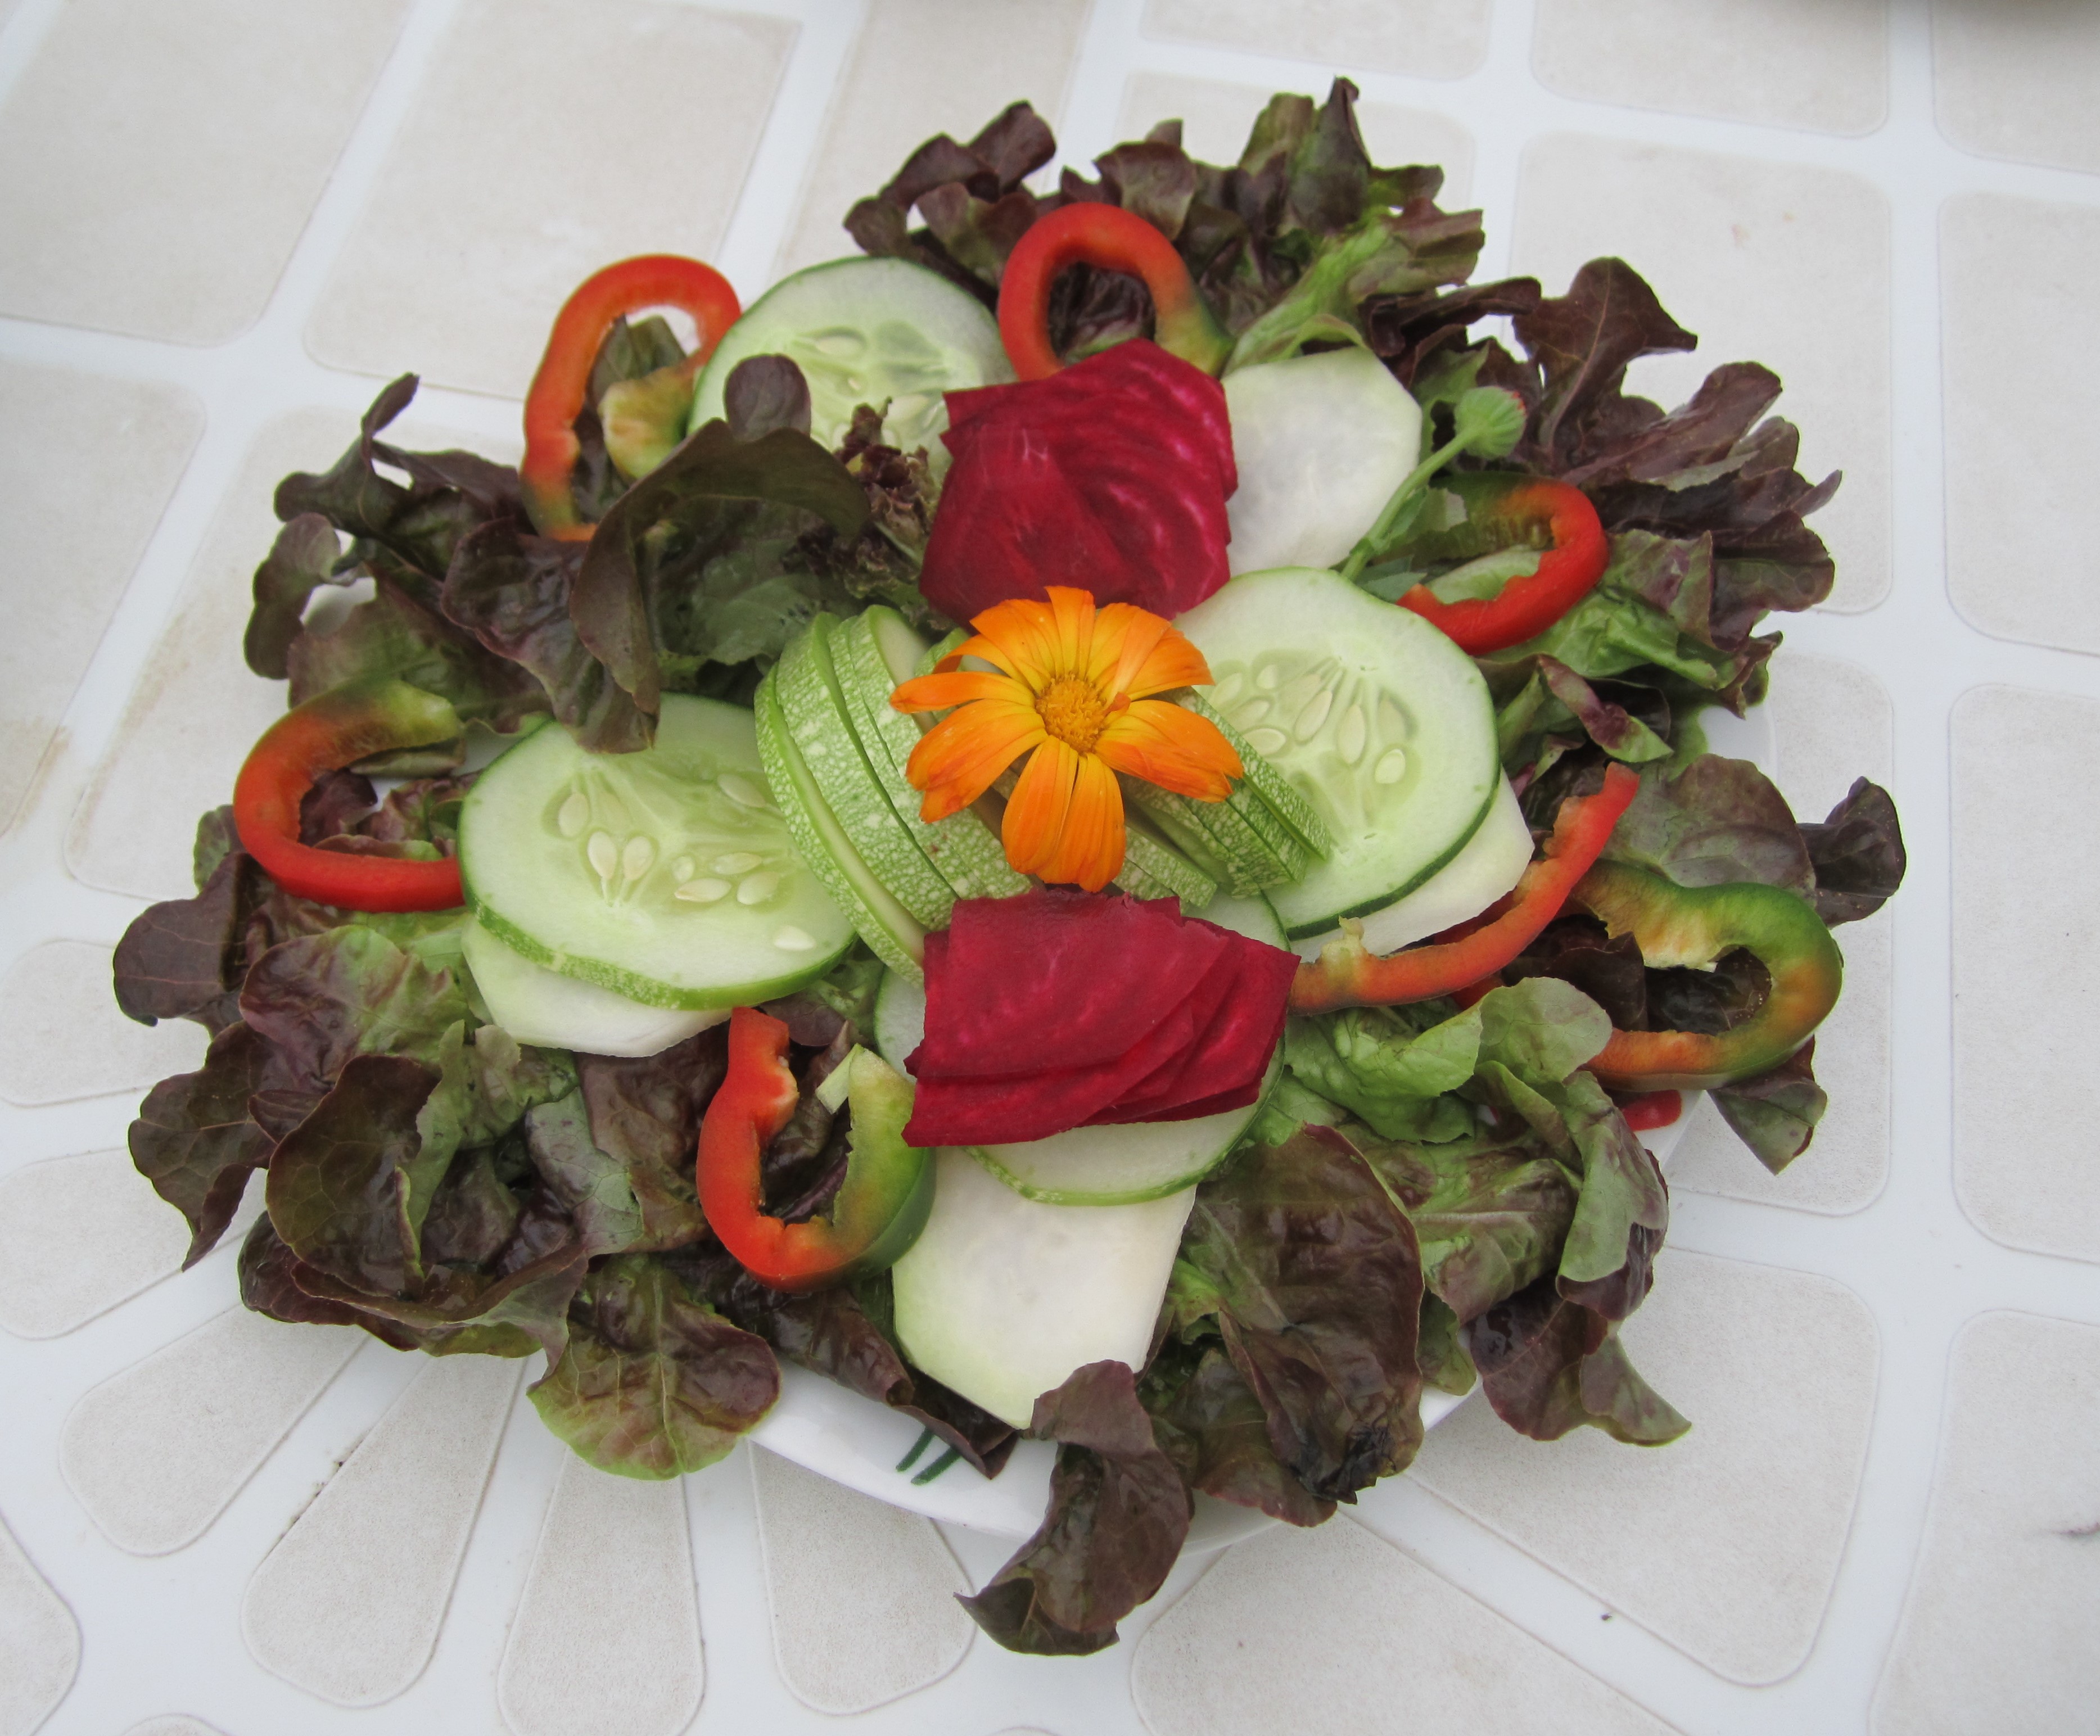
We can also plant several types of edible flowers between the vegetables of our edible gardens and garden forests, such as marigold, sunflower, nasturtium, pansy, etc. These flowers will naturally spread their seeds and reproduce themselves. (Figure VI.32). We can make small posies with them to offer in our vegetable baskets. These flowers are melliferous as well, which attract beneficial insects such as the bee among others, which pollinate tomatoes, zucchinis, cucumbers, etc.

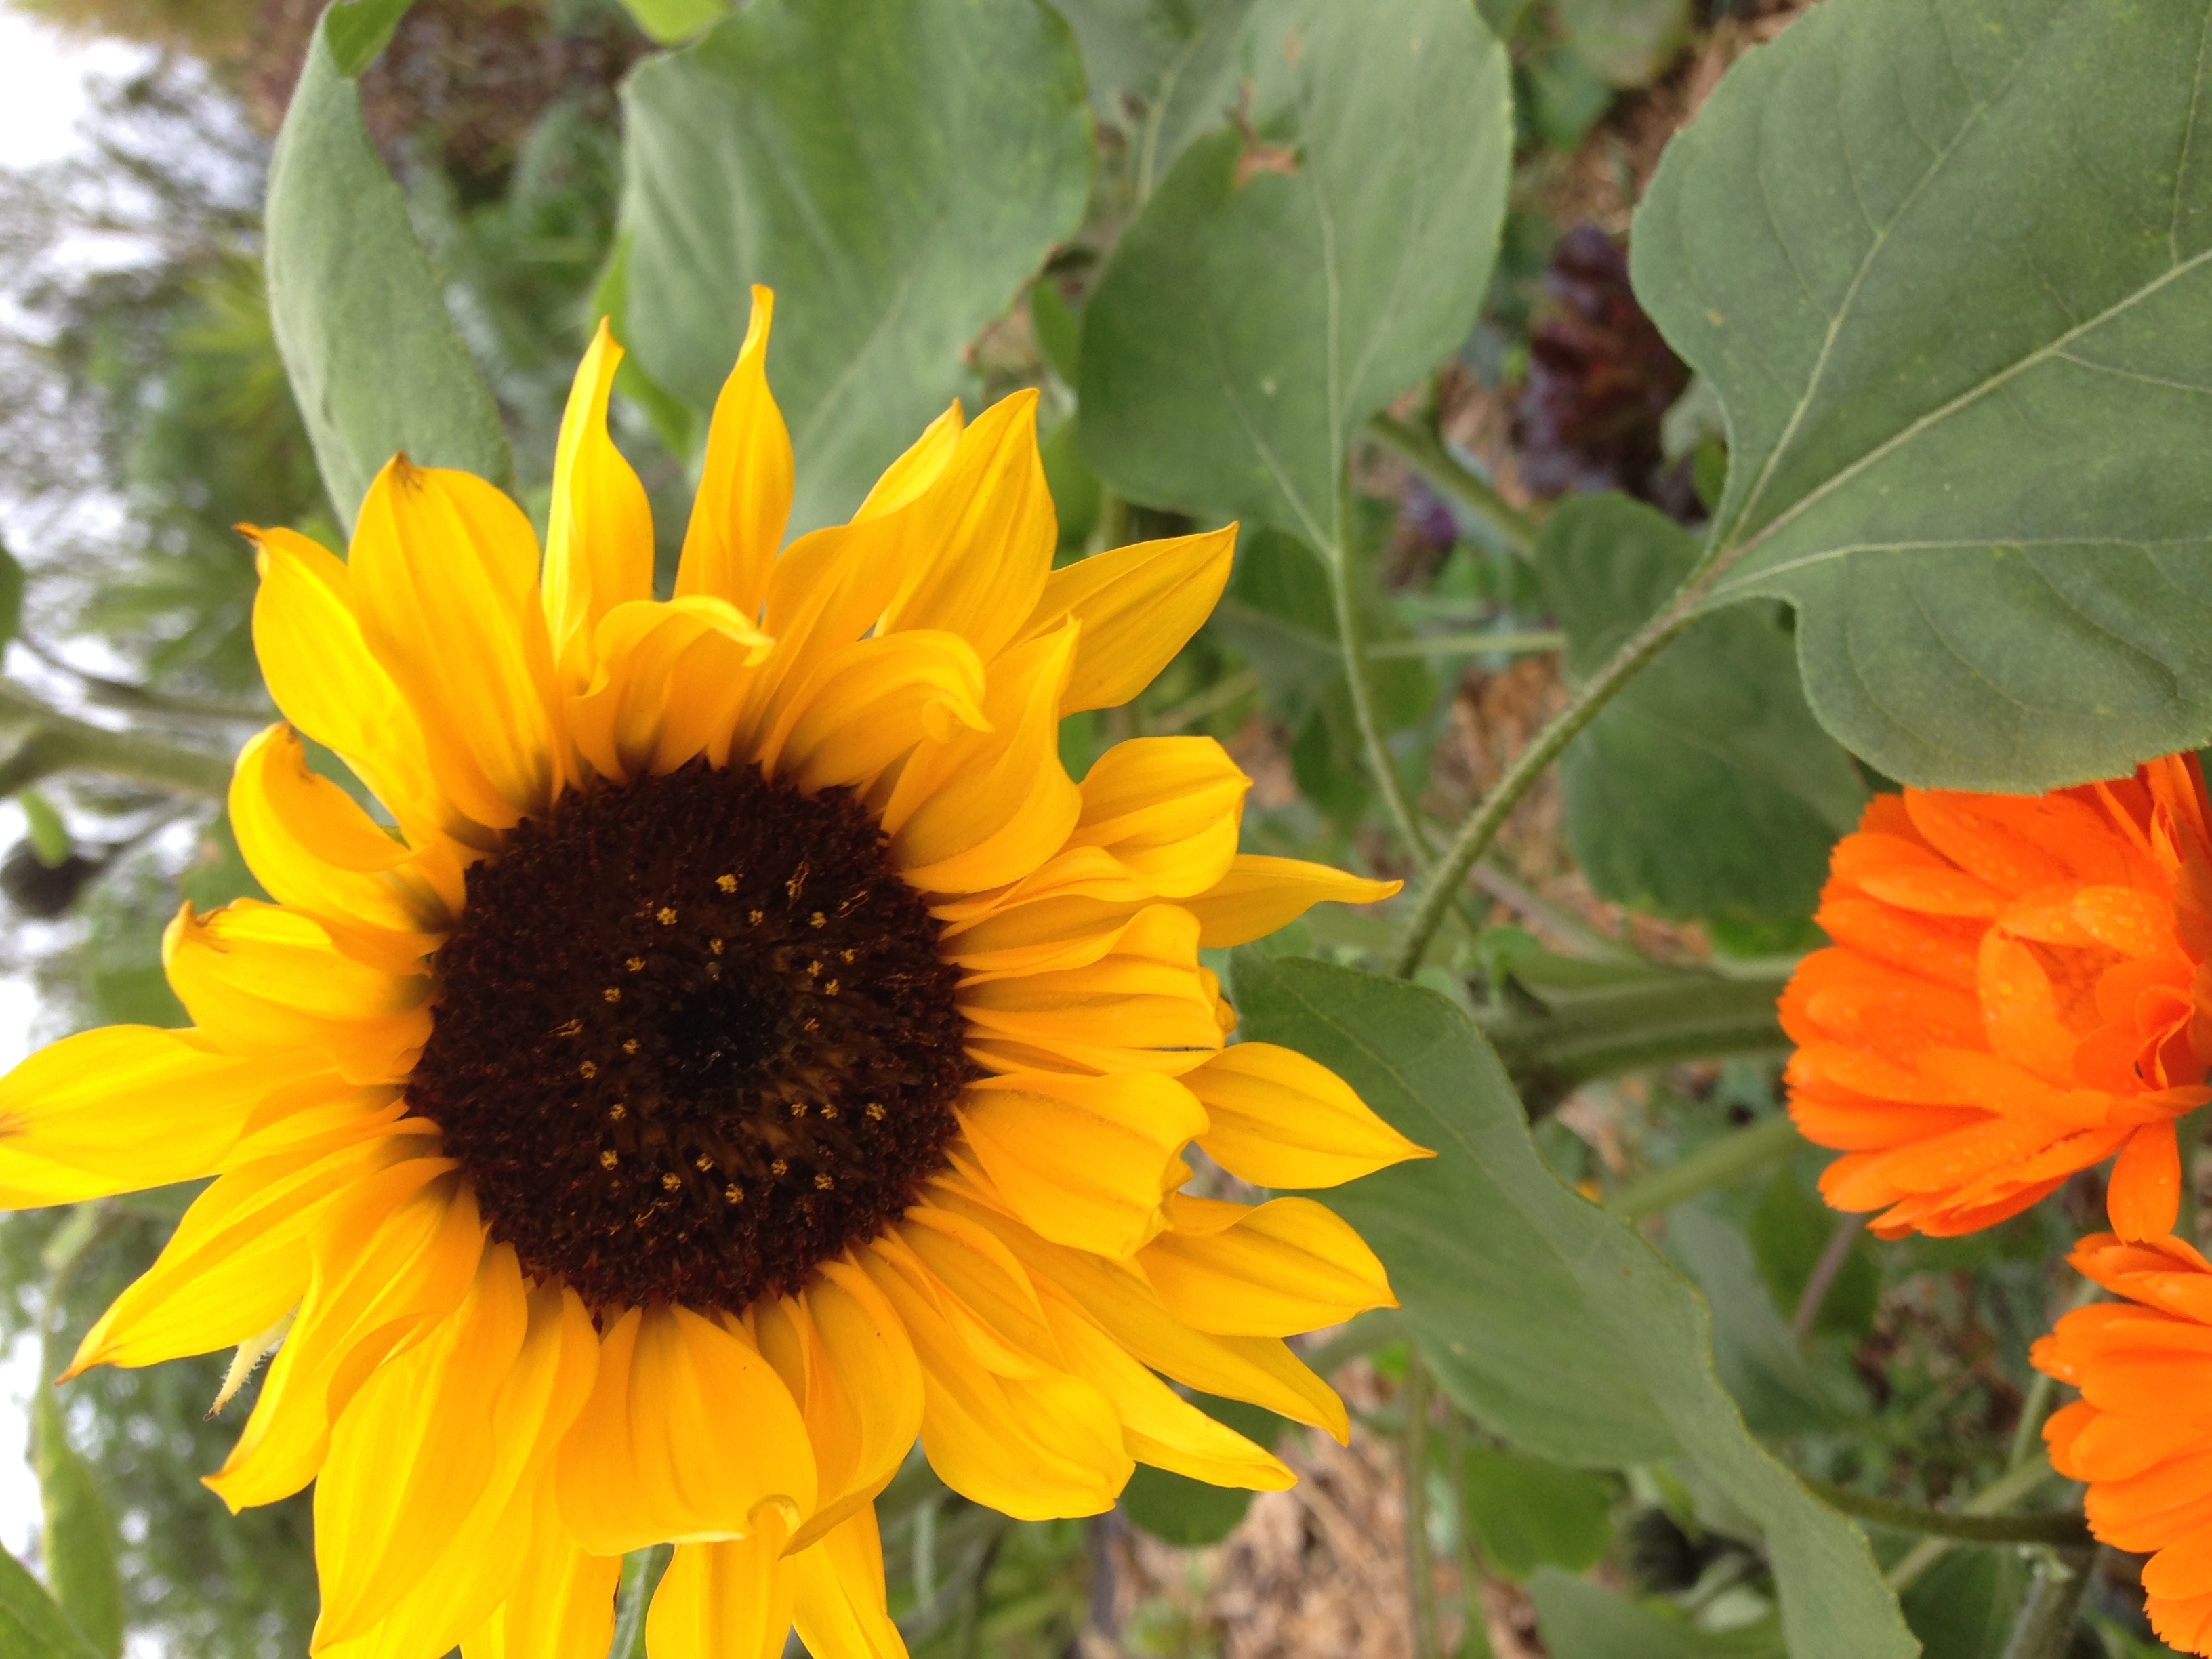
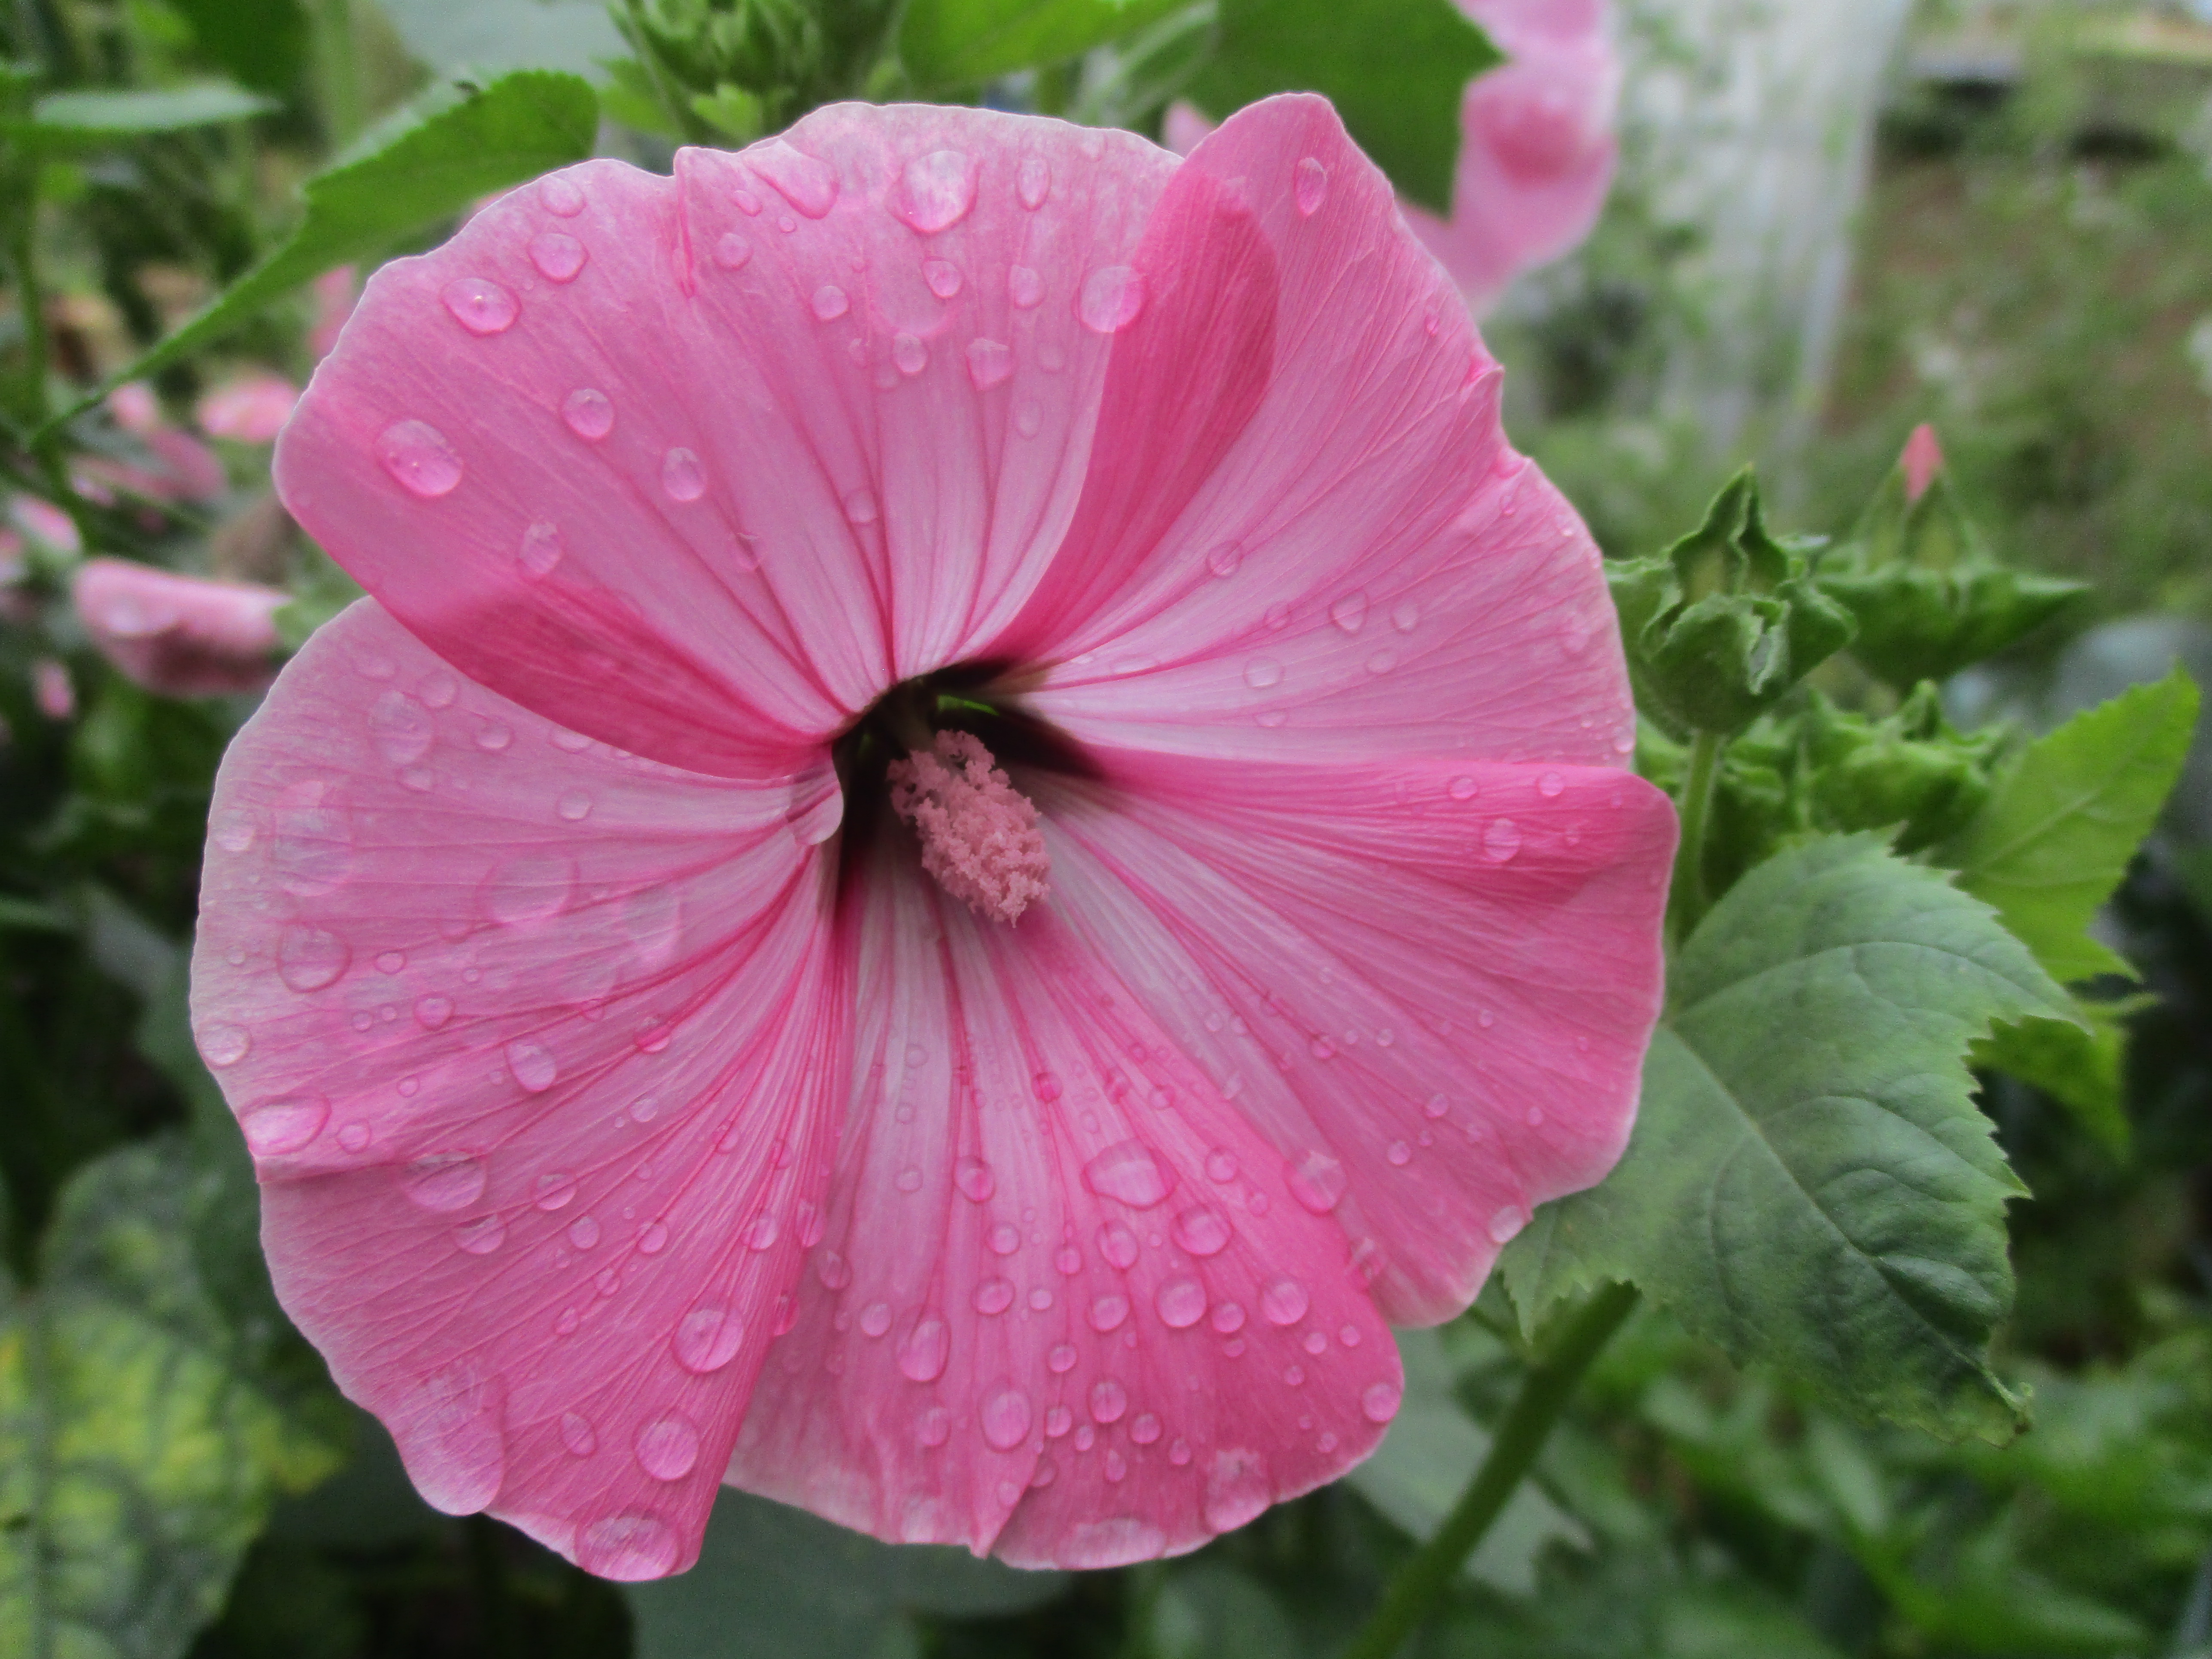
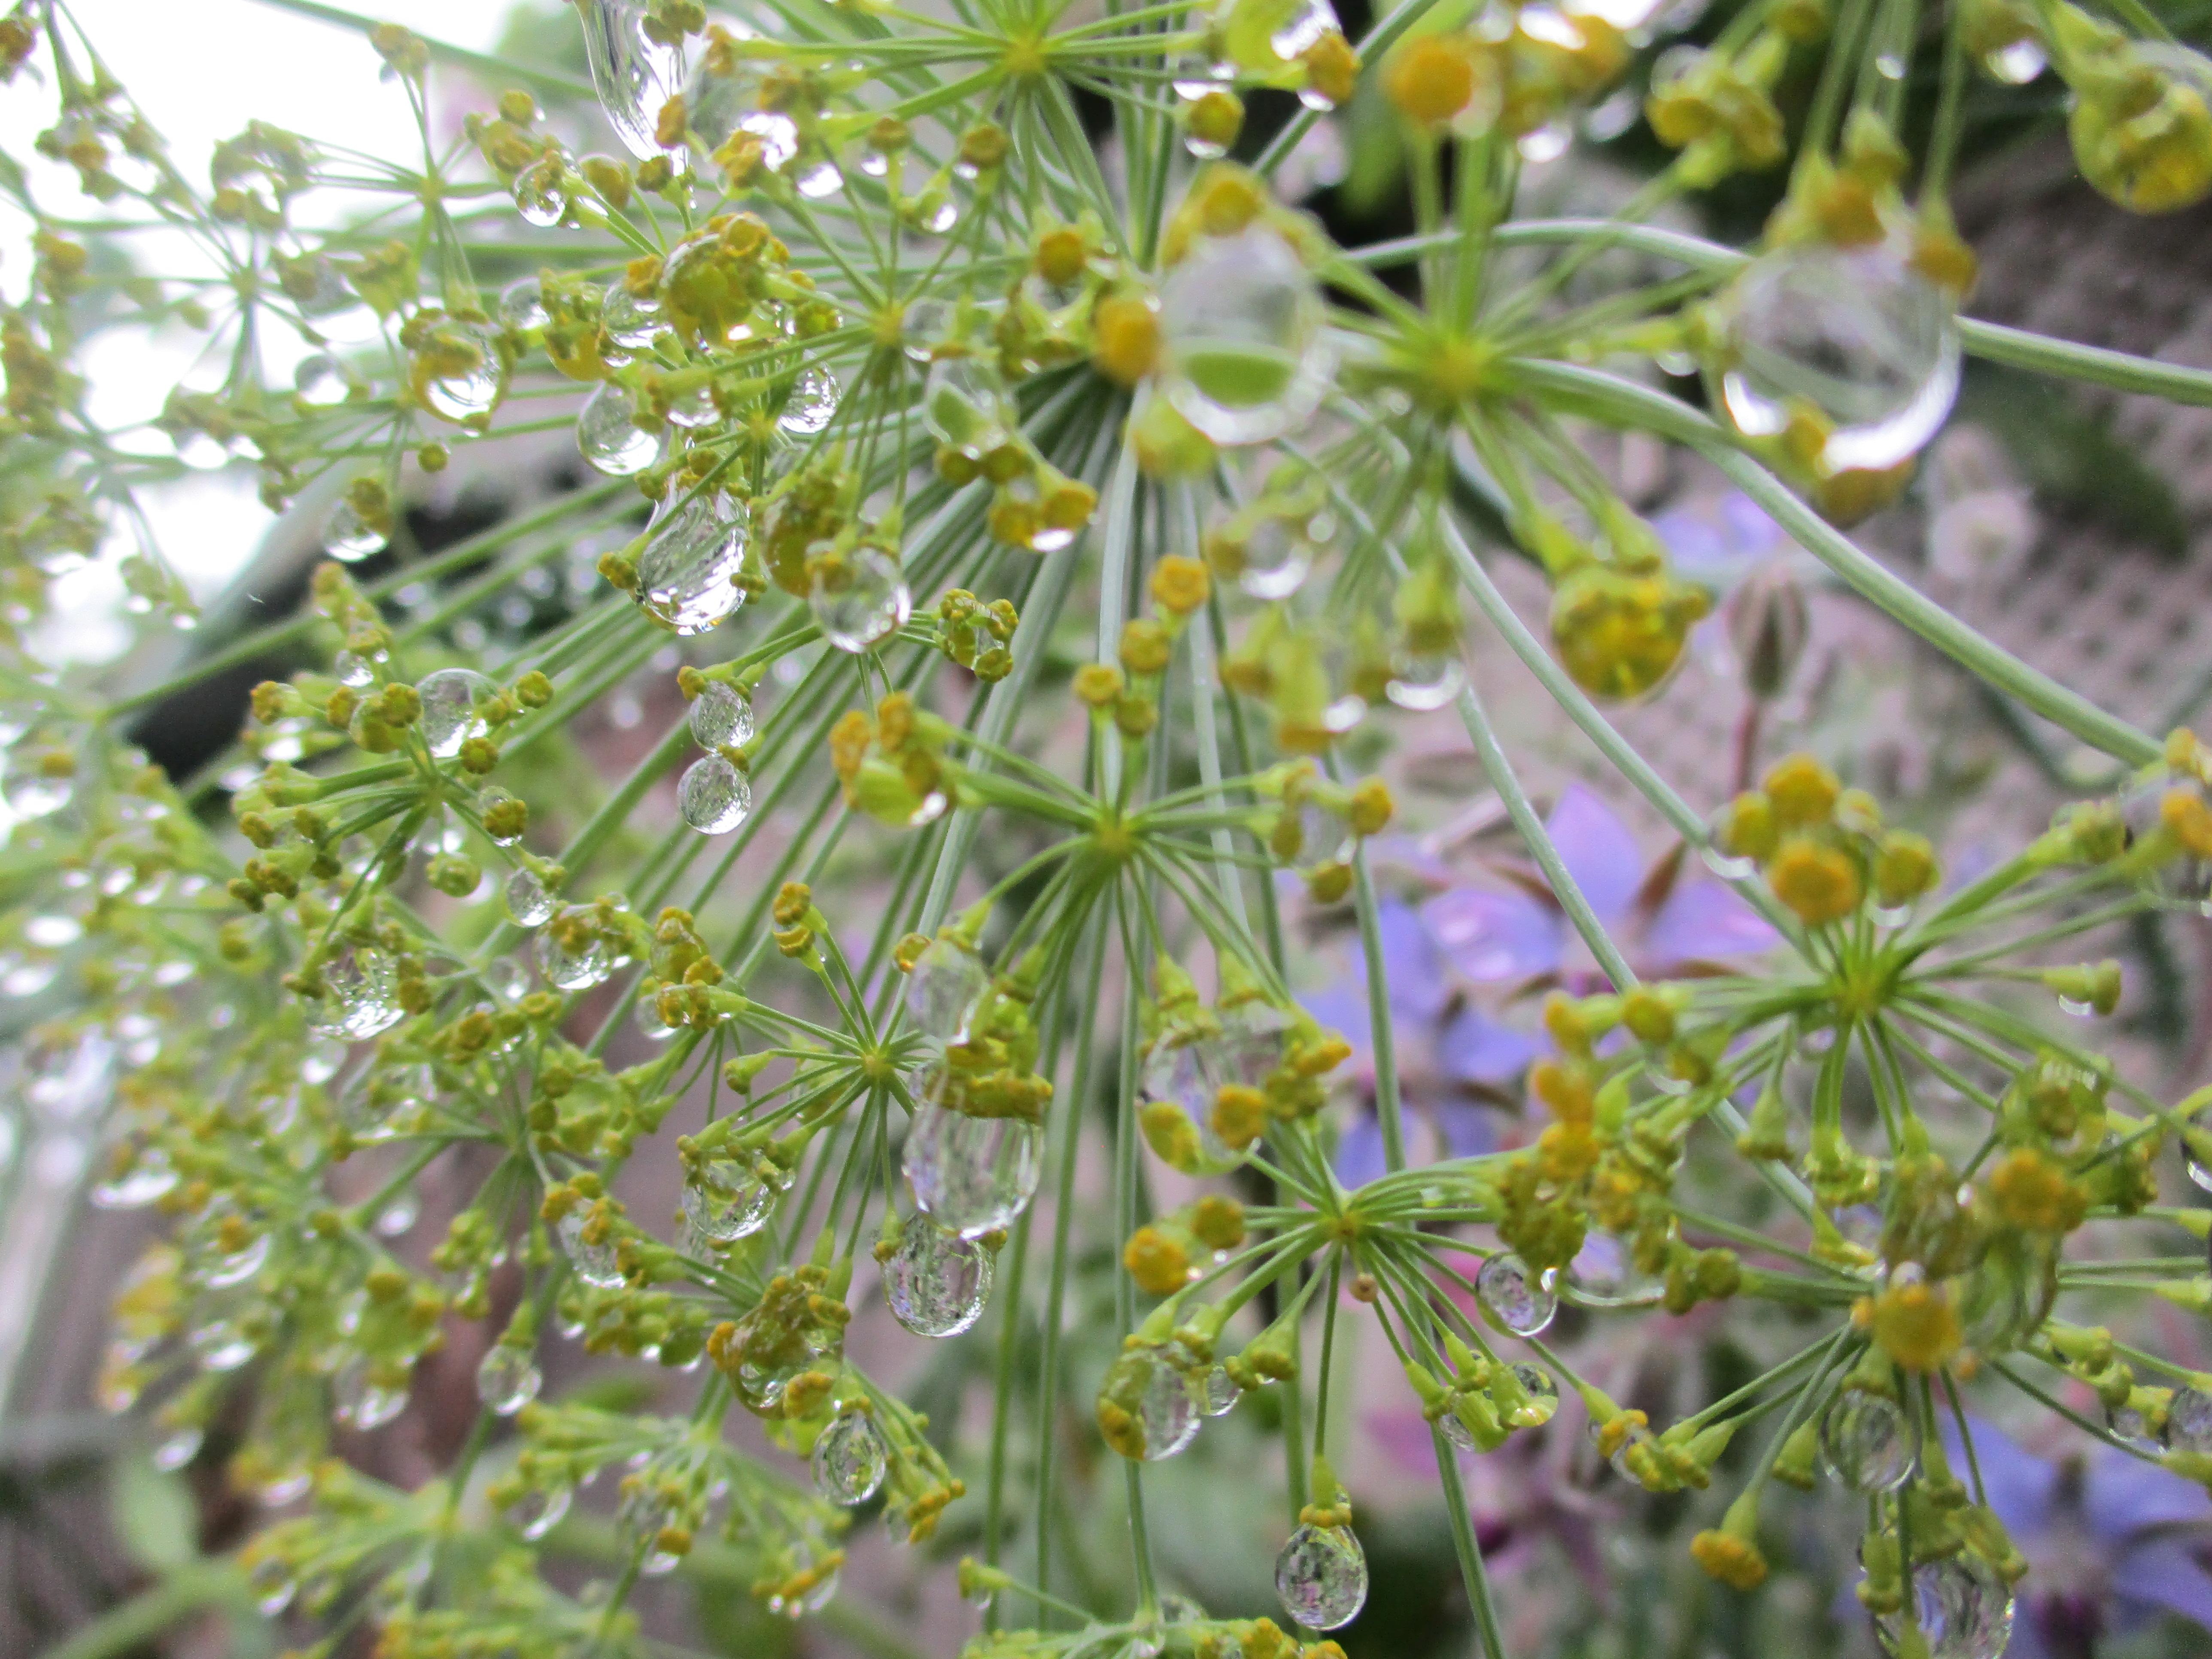
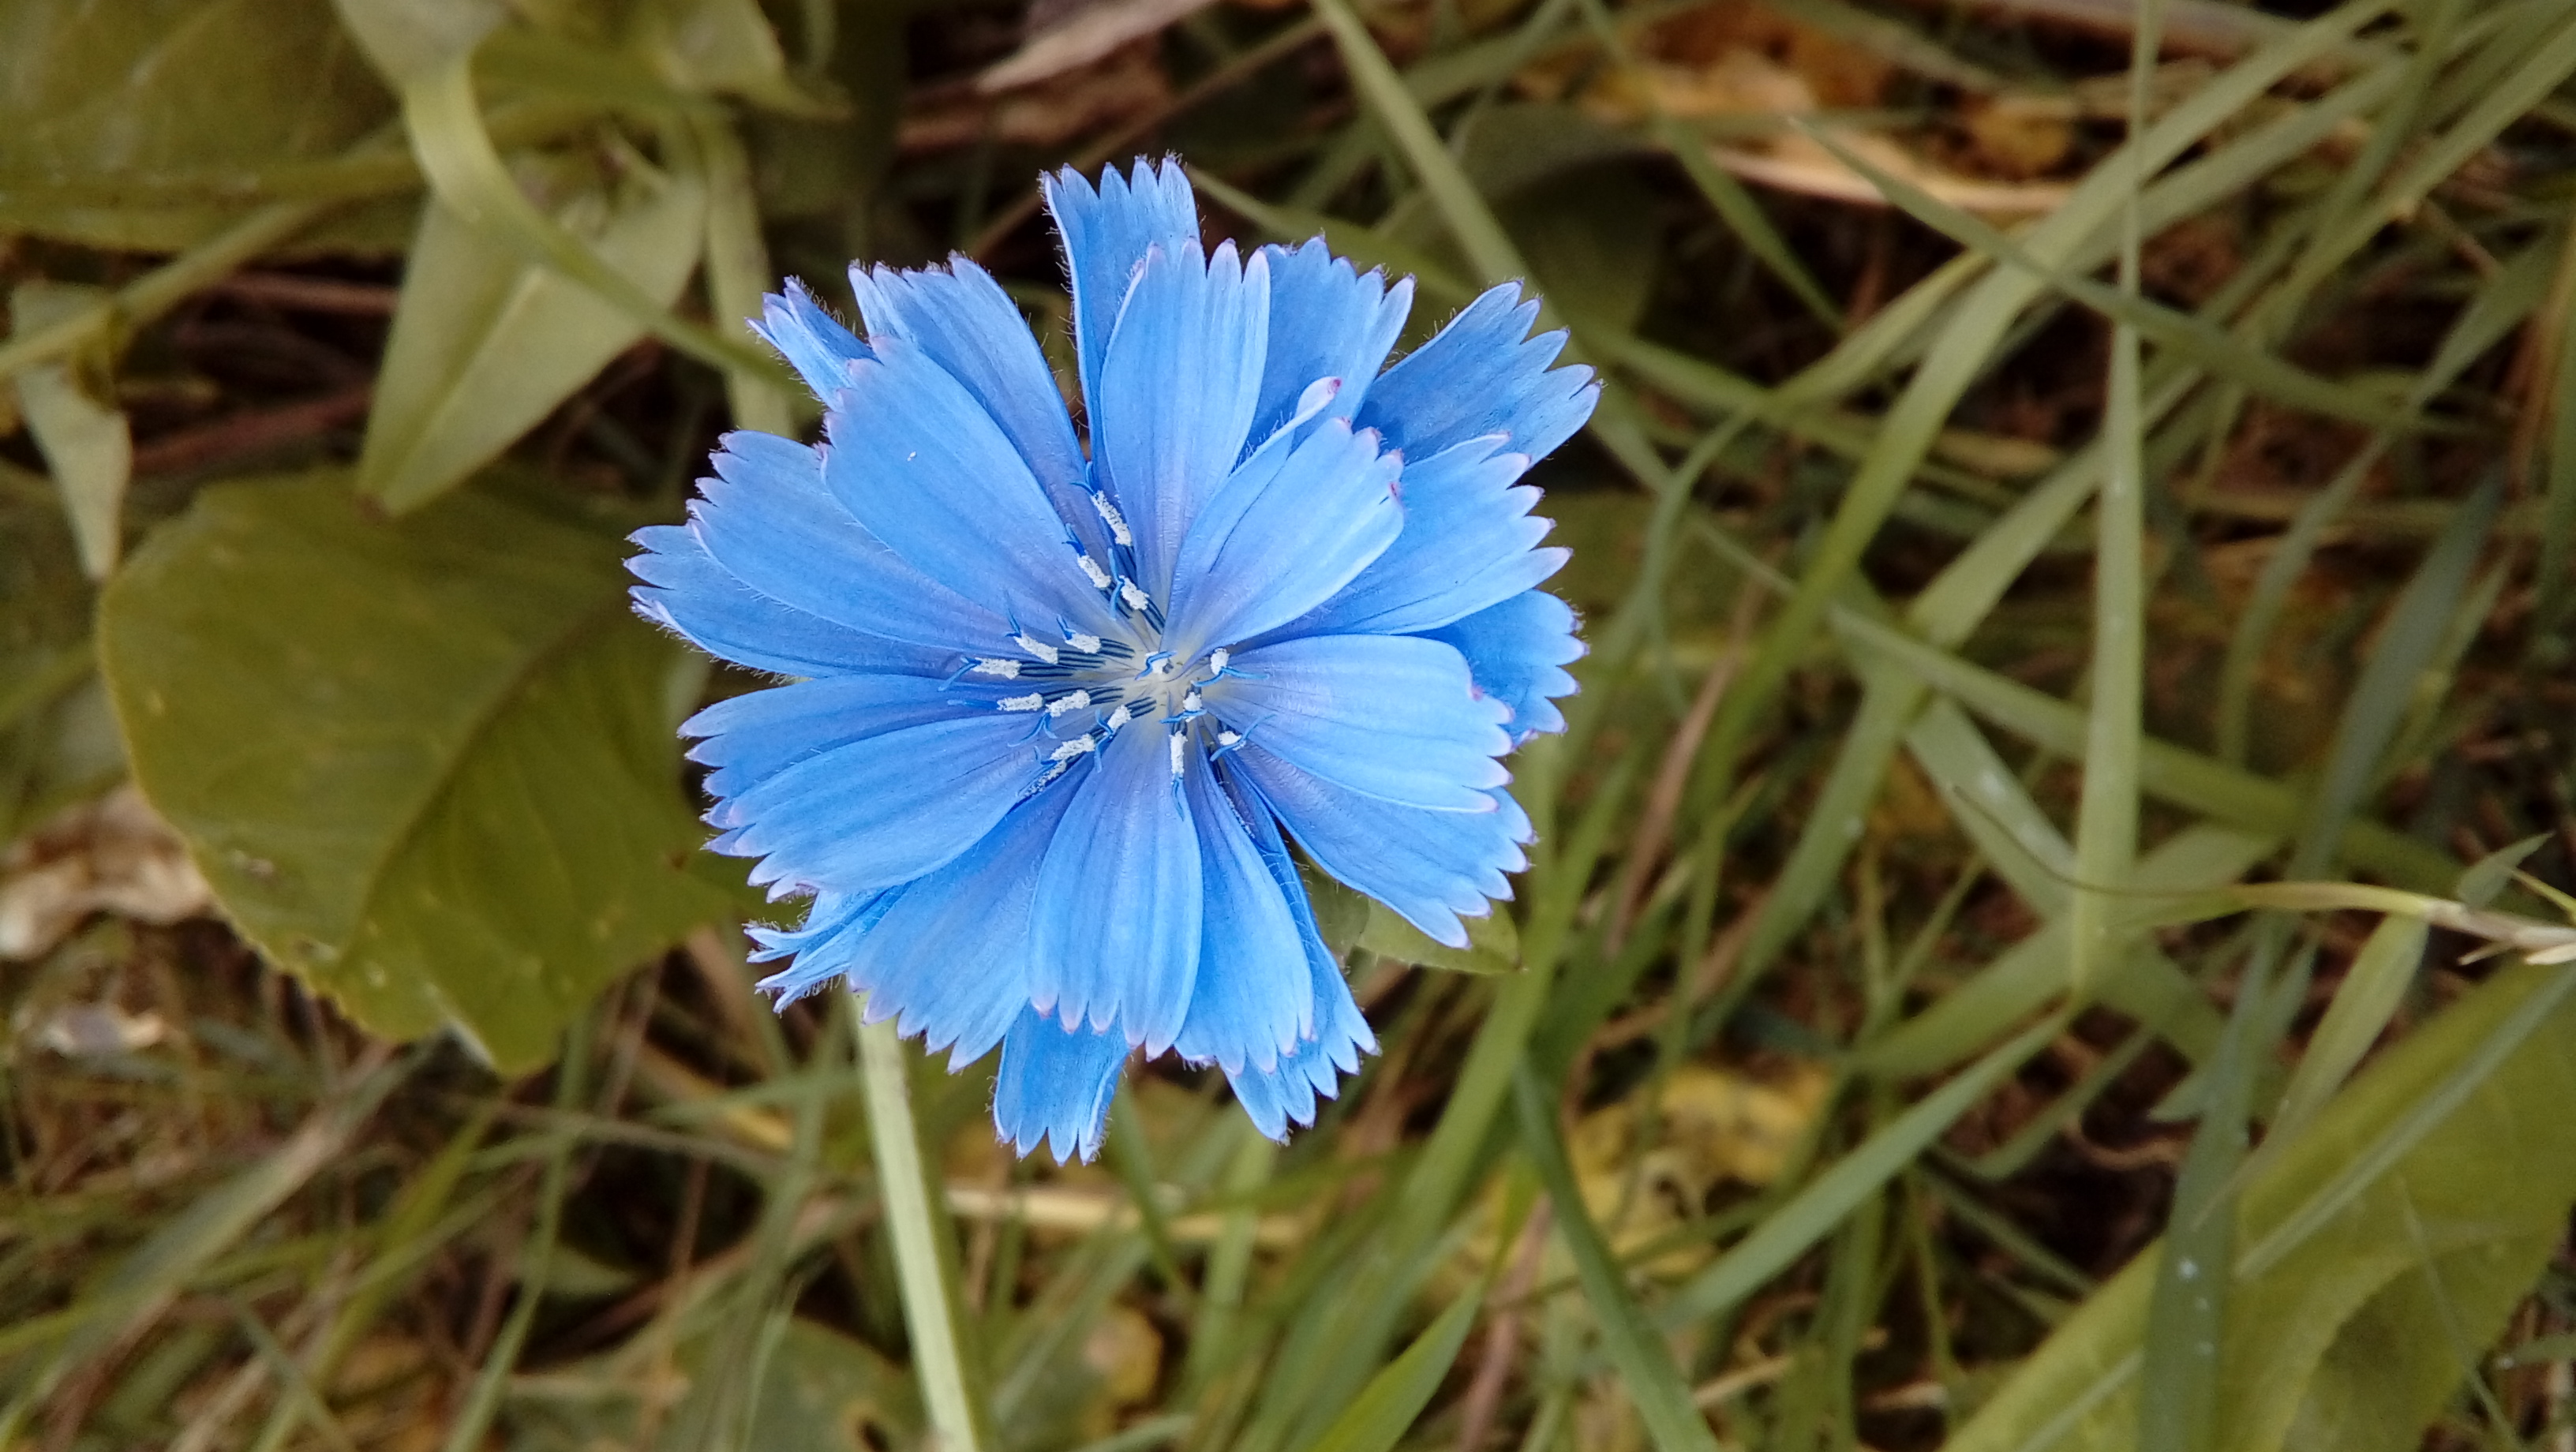
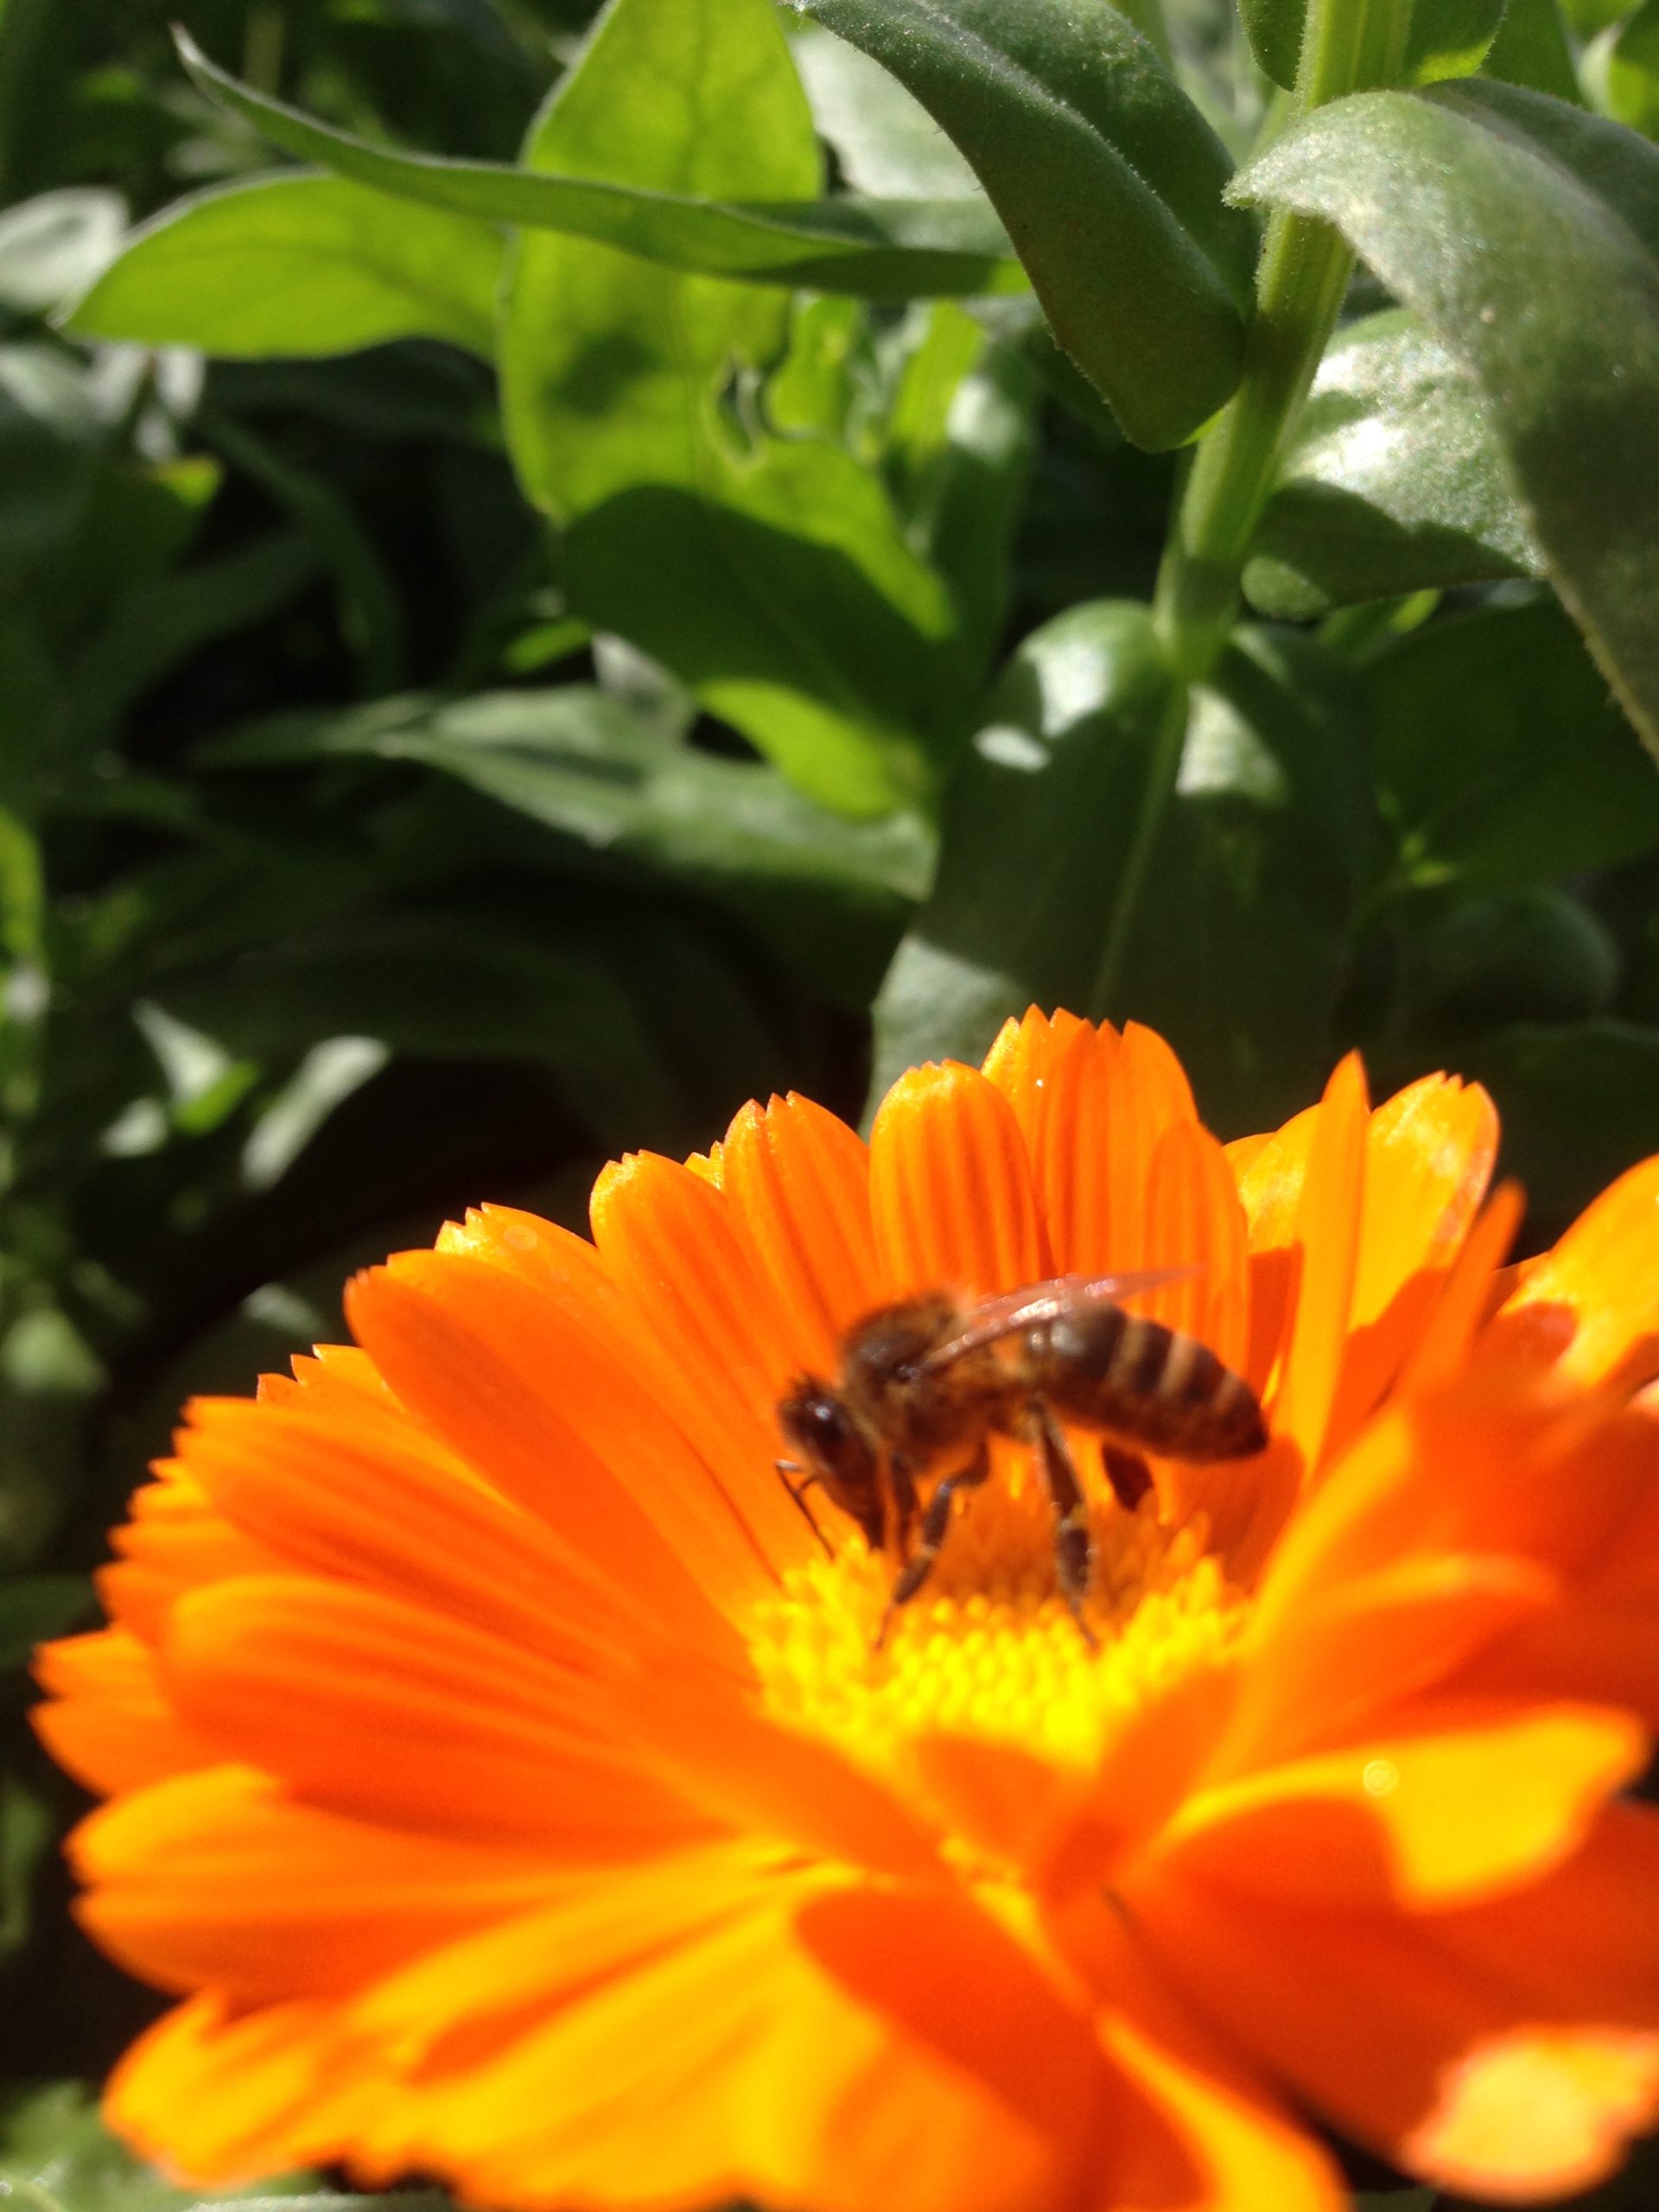
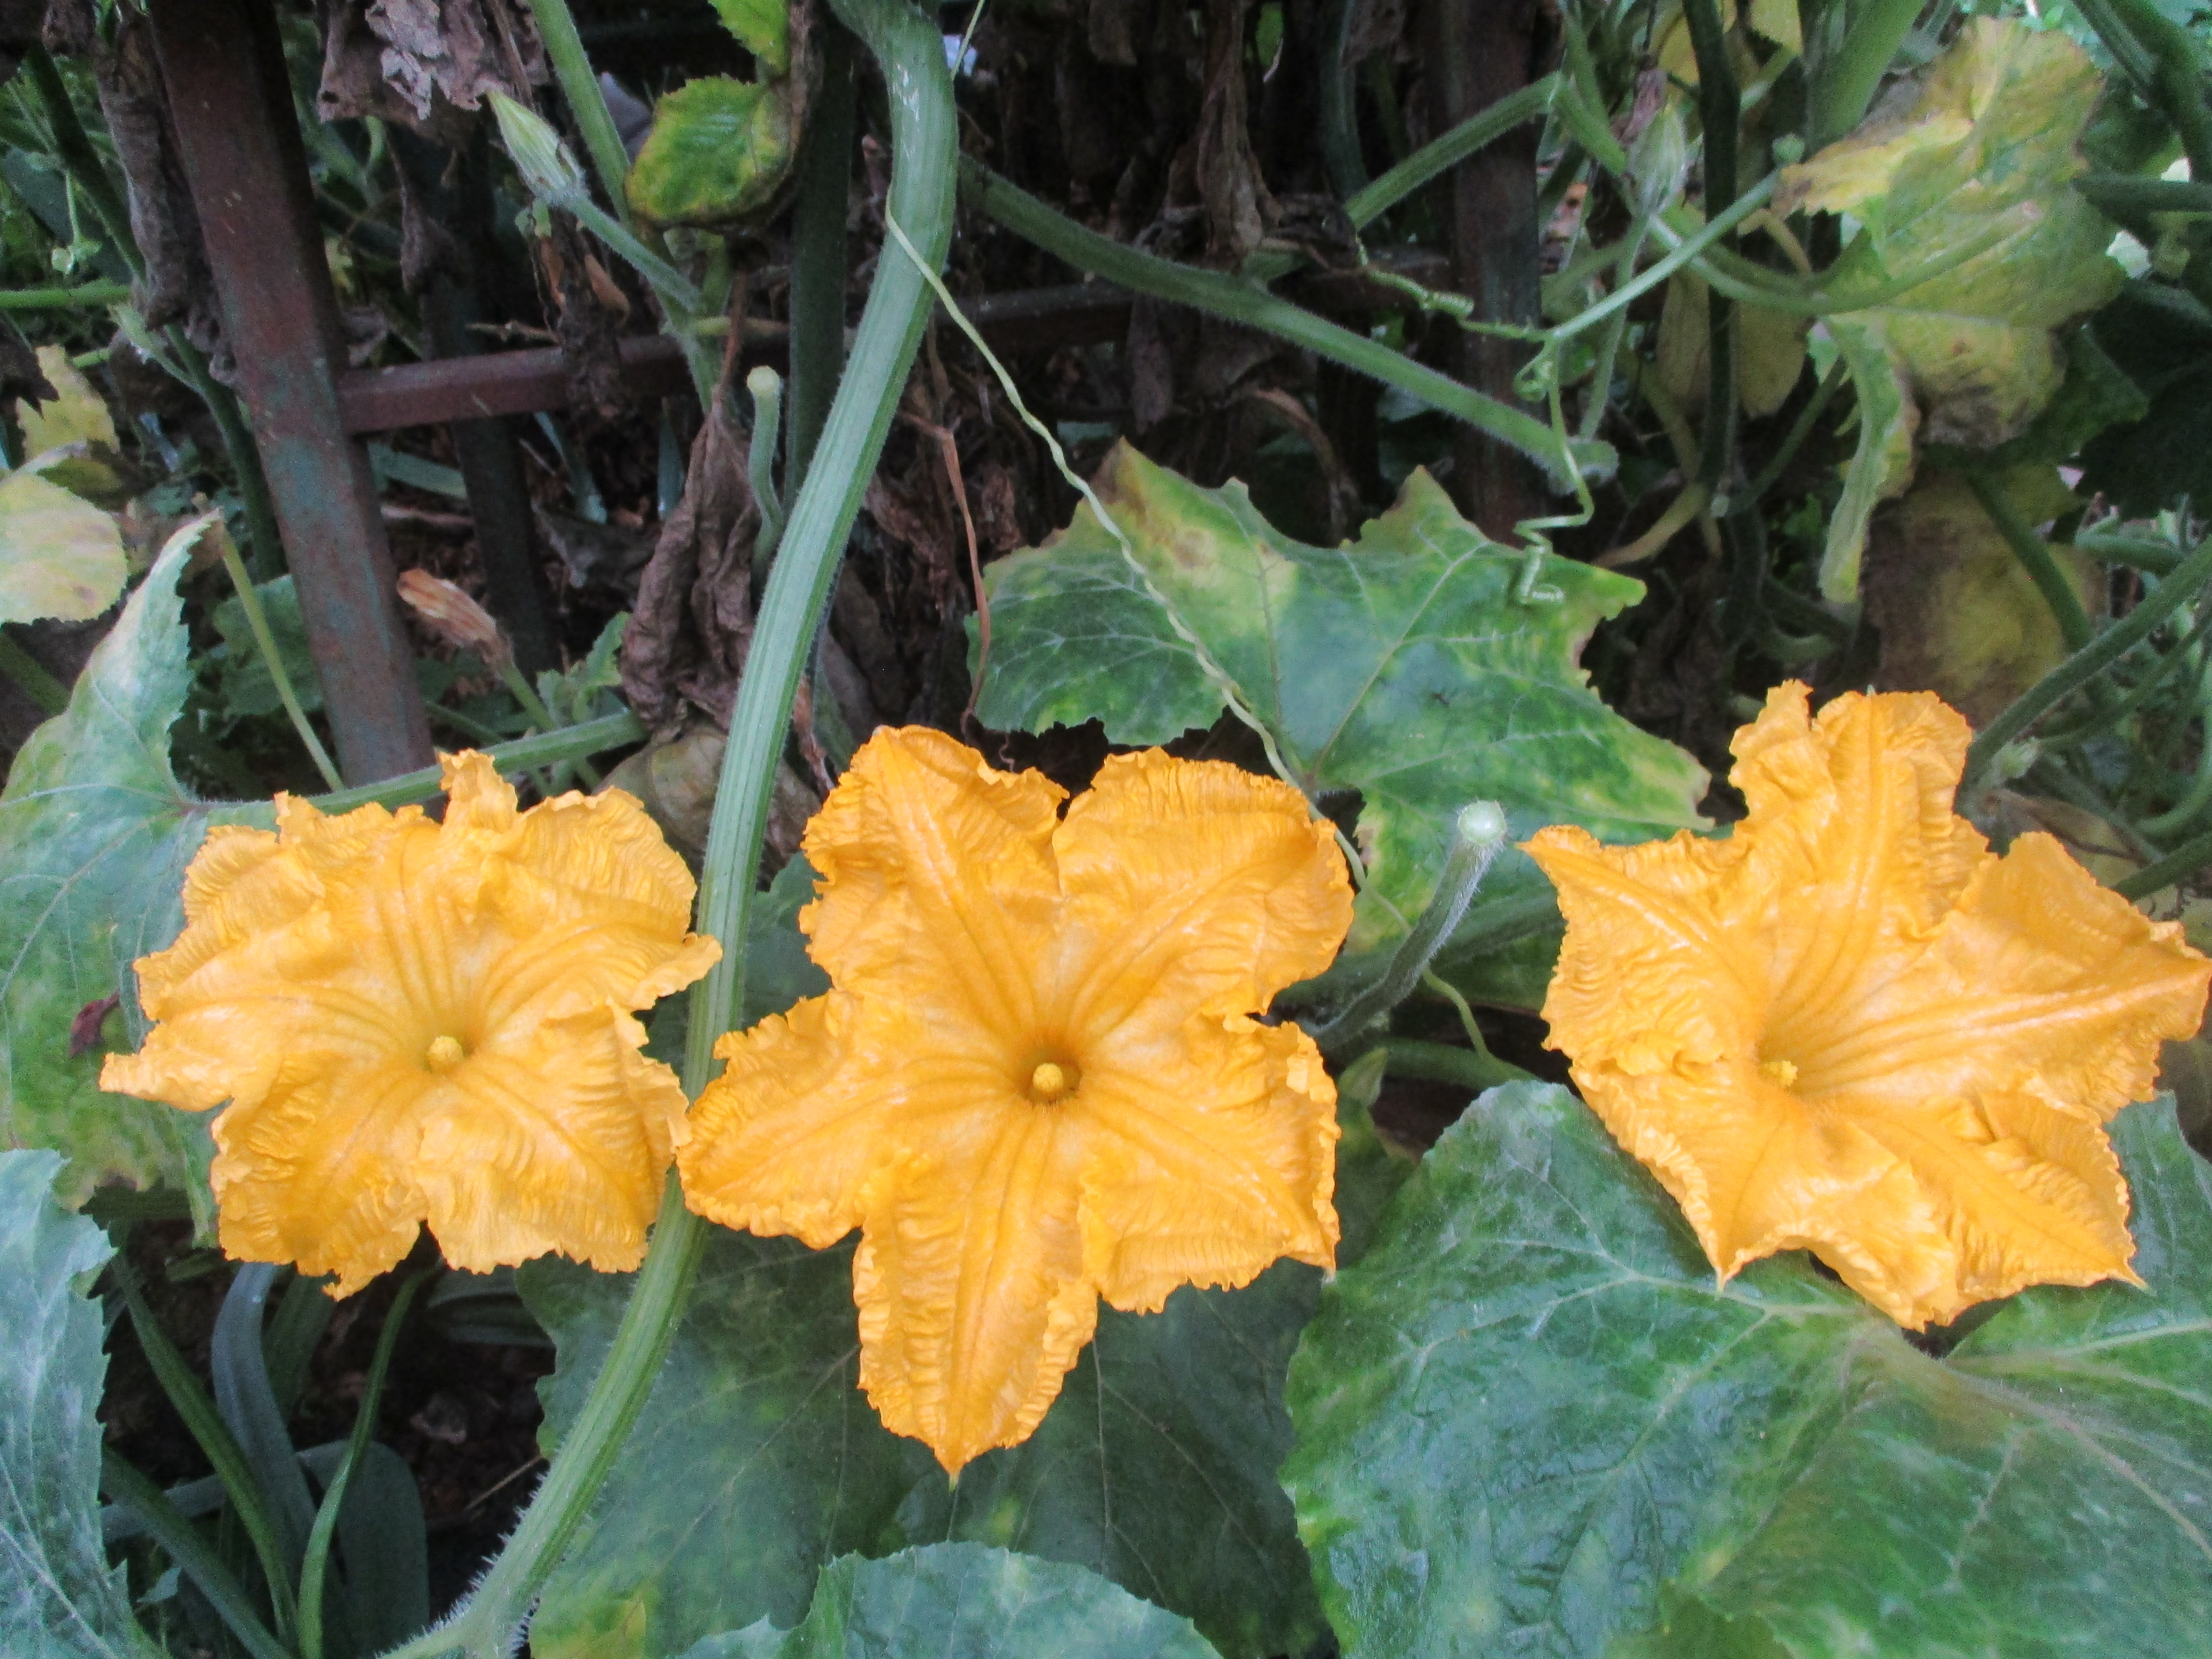
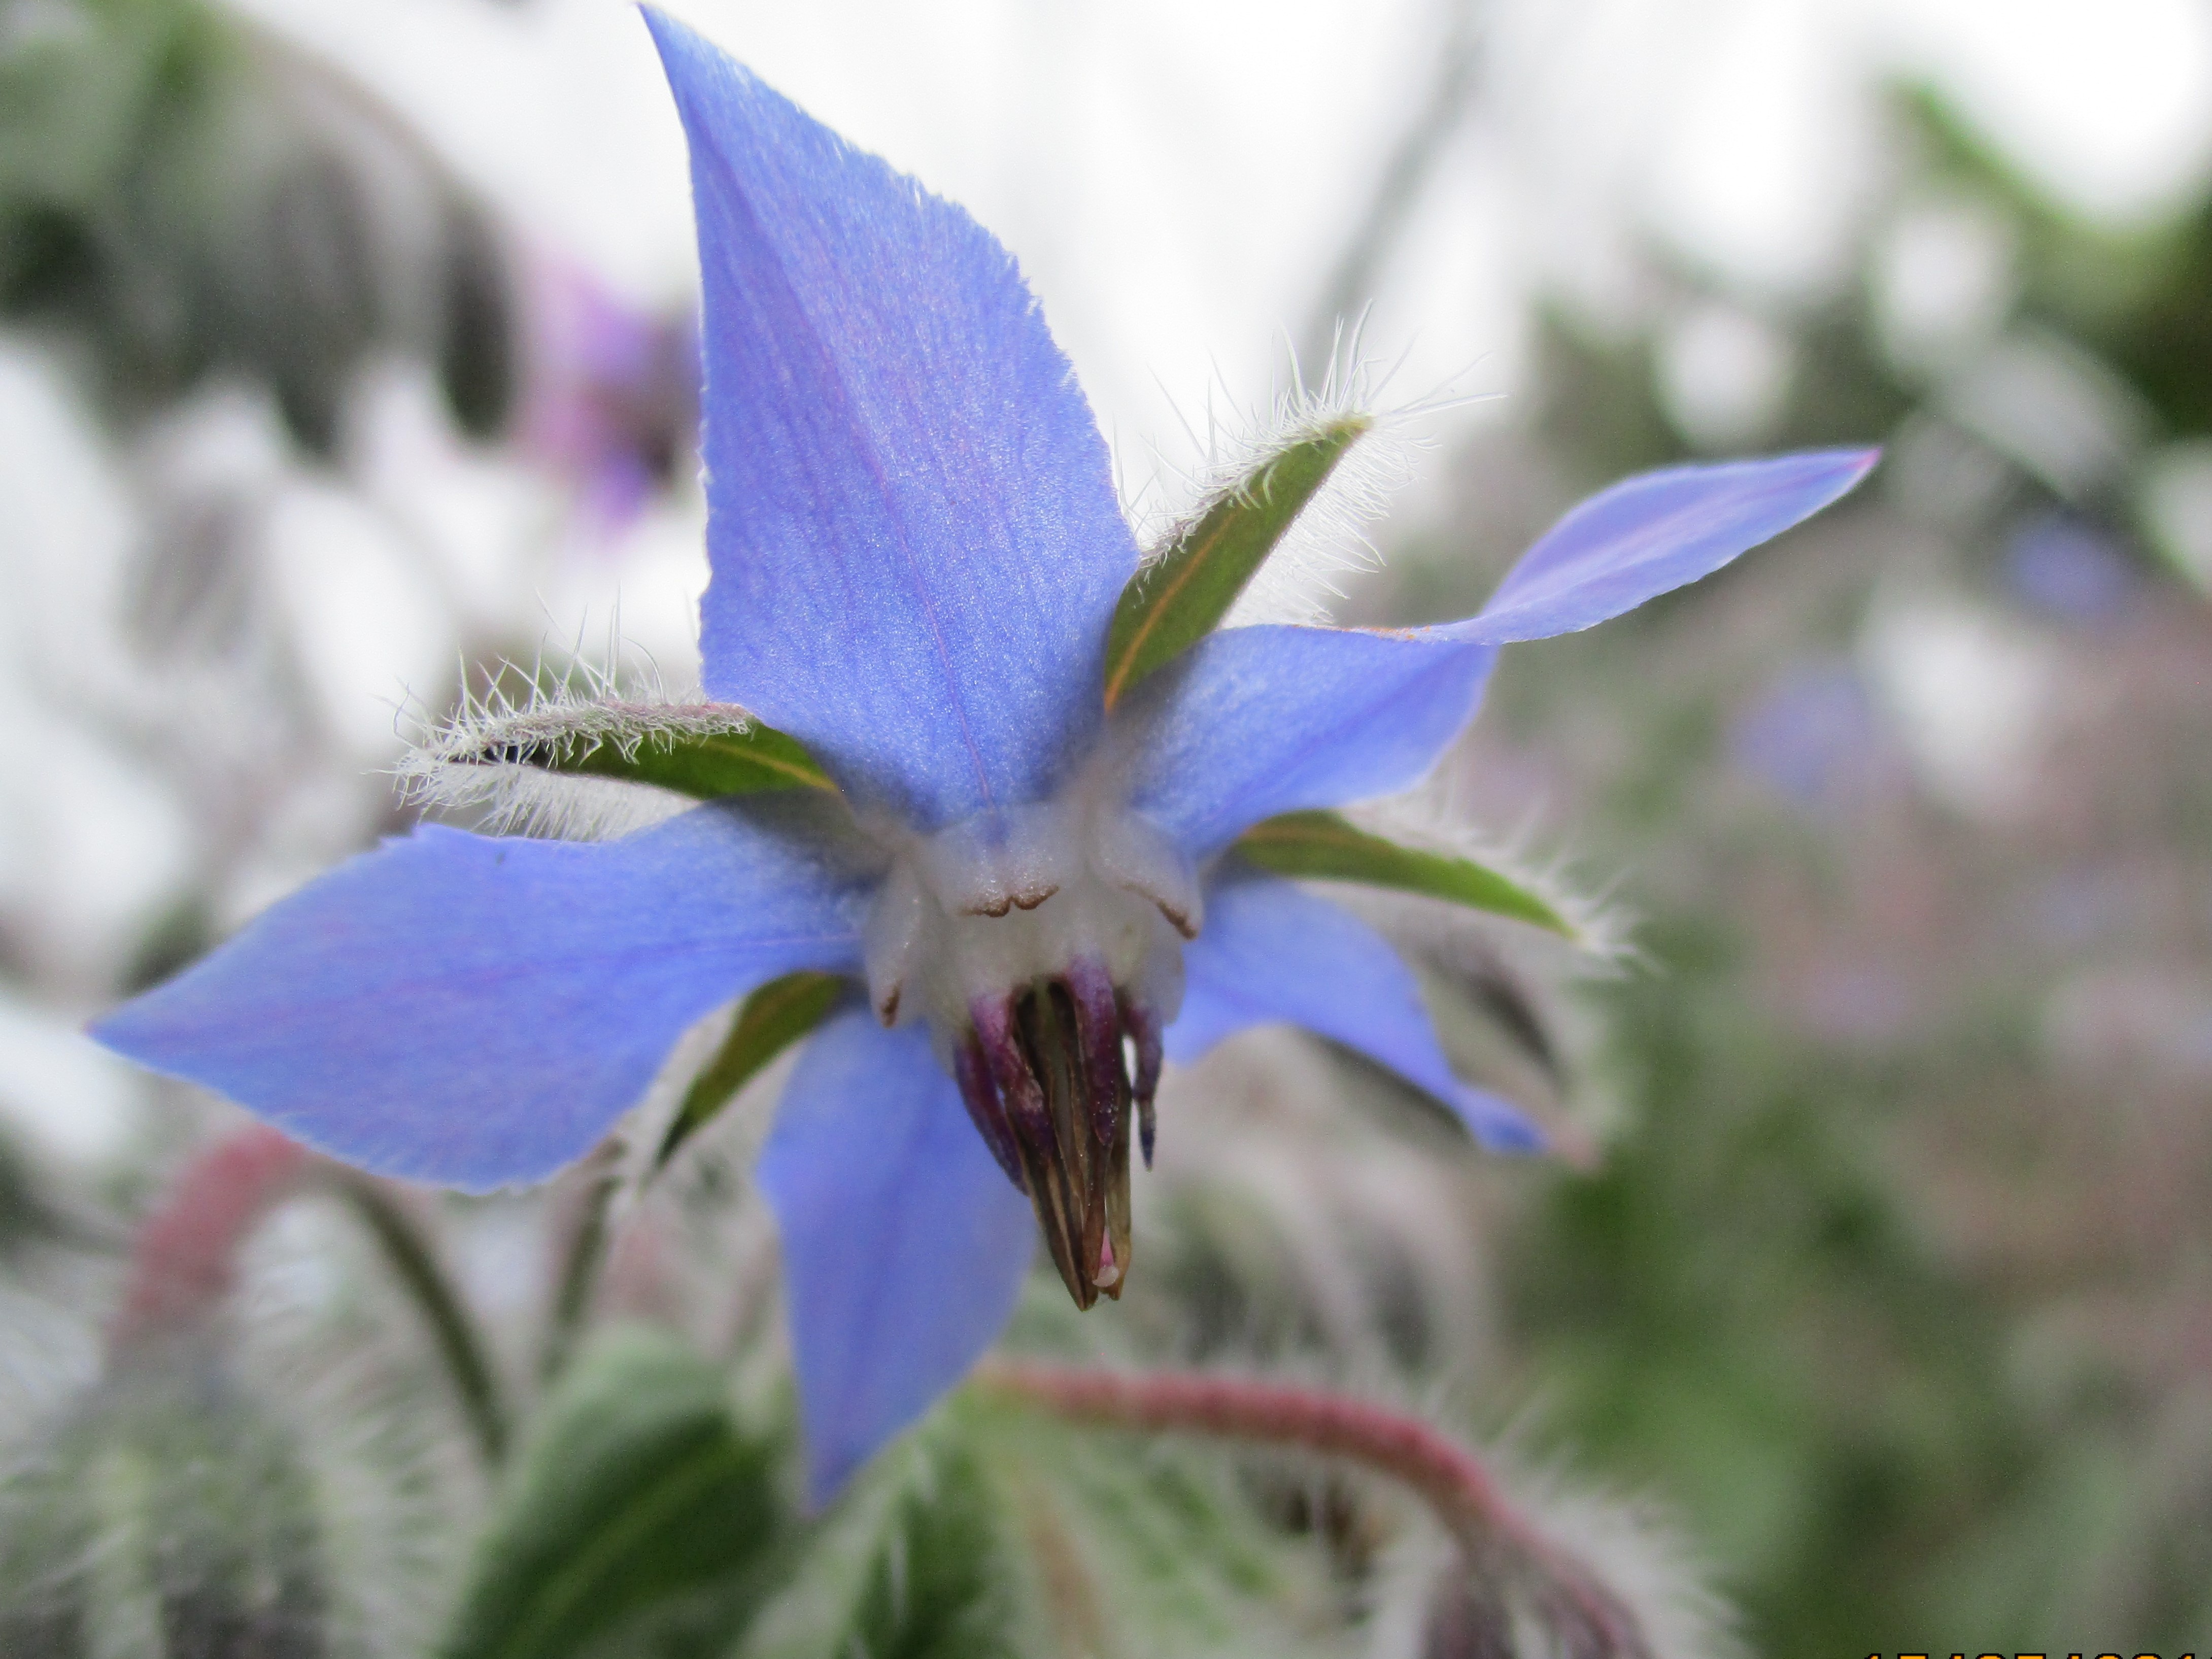
Figure VI.32.- Edible flowers in the garden
We can also plant different perennial aromatic plants that adapt to the area such as rosemary, lavender, perennial basil, etc., which have small flowers that are edible as well. Since the size of these plants is bigger, we need to plant them in strategic places like the corners of the beds or scattered in the center of the beds. These plants are melliferous and aromatic and thus very beneficial for our edible gardens and garden forests. We also make bundles with them.
As we have described in this Didactic Unit, we can obtain a significant variety of edible vegetables based on our experience in a place with a great potential for diversity during the entire year due to its climate. With an appropriate permacultural design in another severe winter’s climate, we will make the most of the useful planting season, and we can still obtain a variety large enough to guarantee the continuity of seeds and produce.
VI.6 Harvesting for the bio-boxes
The task of harvesting the vegetables, flowers and aromatic plants of our edible garden can seem, at first glance, a difficult and inefficient activity from the point of view of the time it takes to harvest them in comparison to harvesting vegetables that are growing in a bed with only one variety. Based on our experience we can ensure that this is not the case because in each bed we dispose of a great variety and quantity of products without having to move too much, in addition to the aesthetical design created by the students, that’s why we gave it the name of edible garden.
With help from the field notebook and the weekly maintenance tasks of the beds, we can identify when and where to collect the vegetables that are ready to be collected that week. Remember that approximately all the allotments have the same diversity of vegetables.
The days when we harvest, we rotate the different allotments (Figure VI.33). For example, if we harvest the products that are to be consumed that week in one allotment, the second week we will harvest the products in a different allotment so the first one can grow and recuperate again. By doing so we can harvest the first allotment again in the third week, and so on.
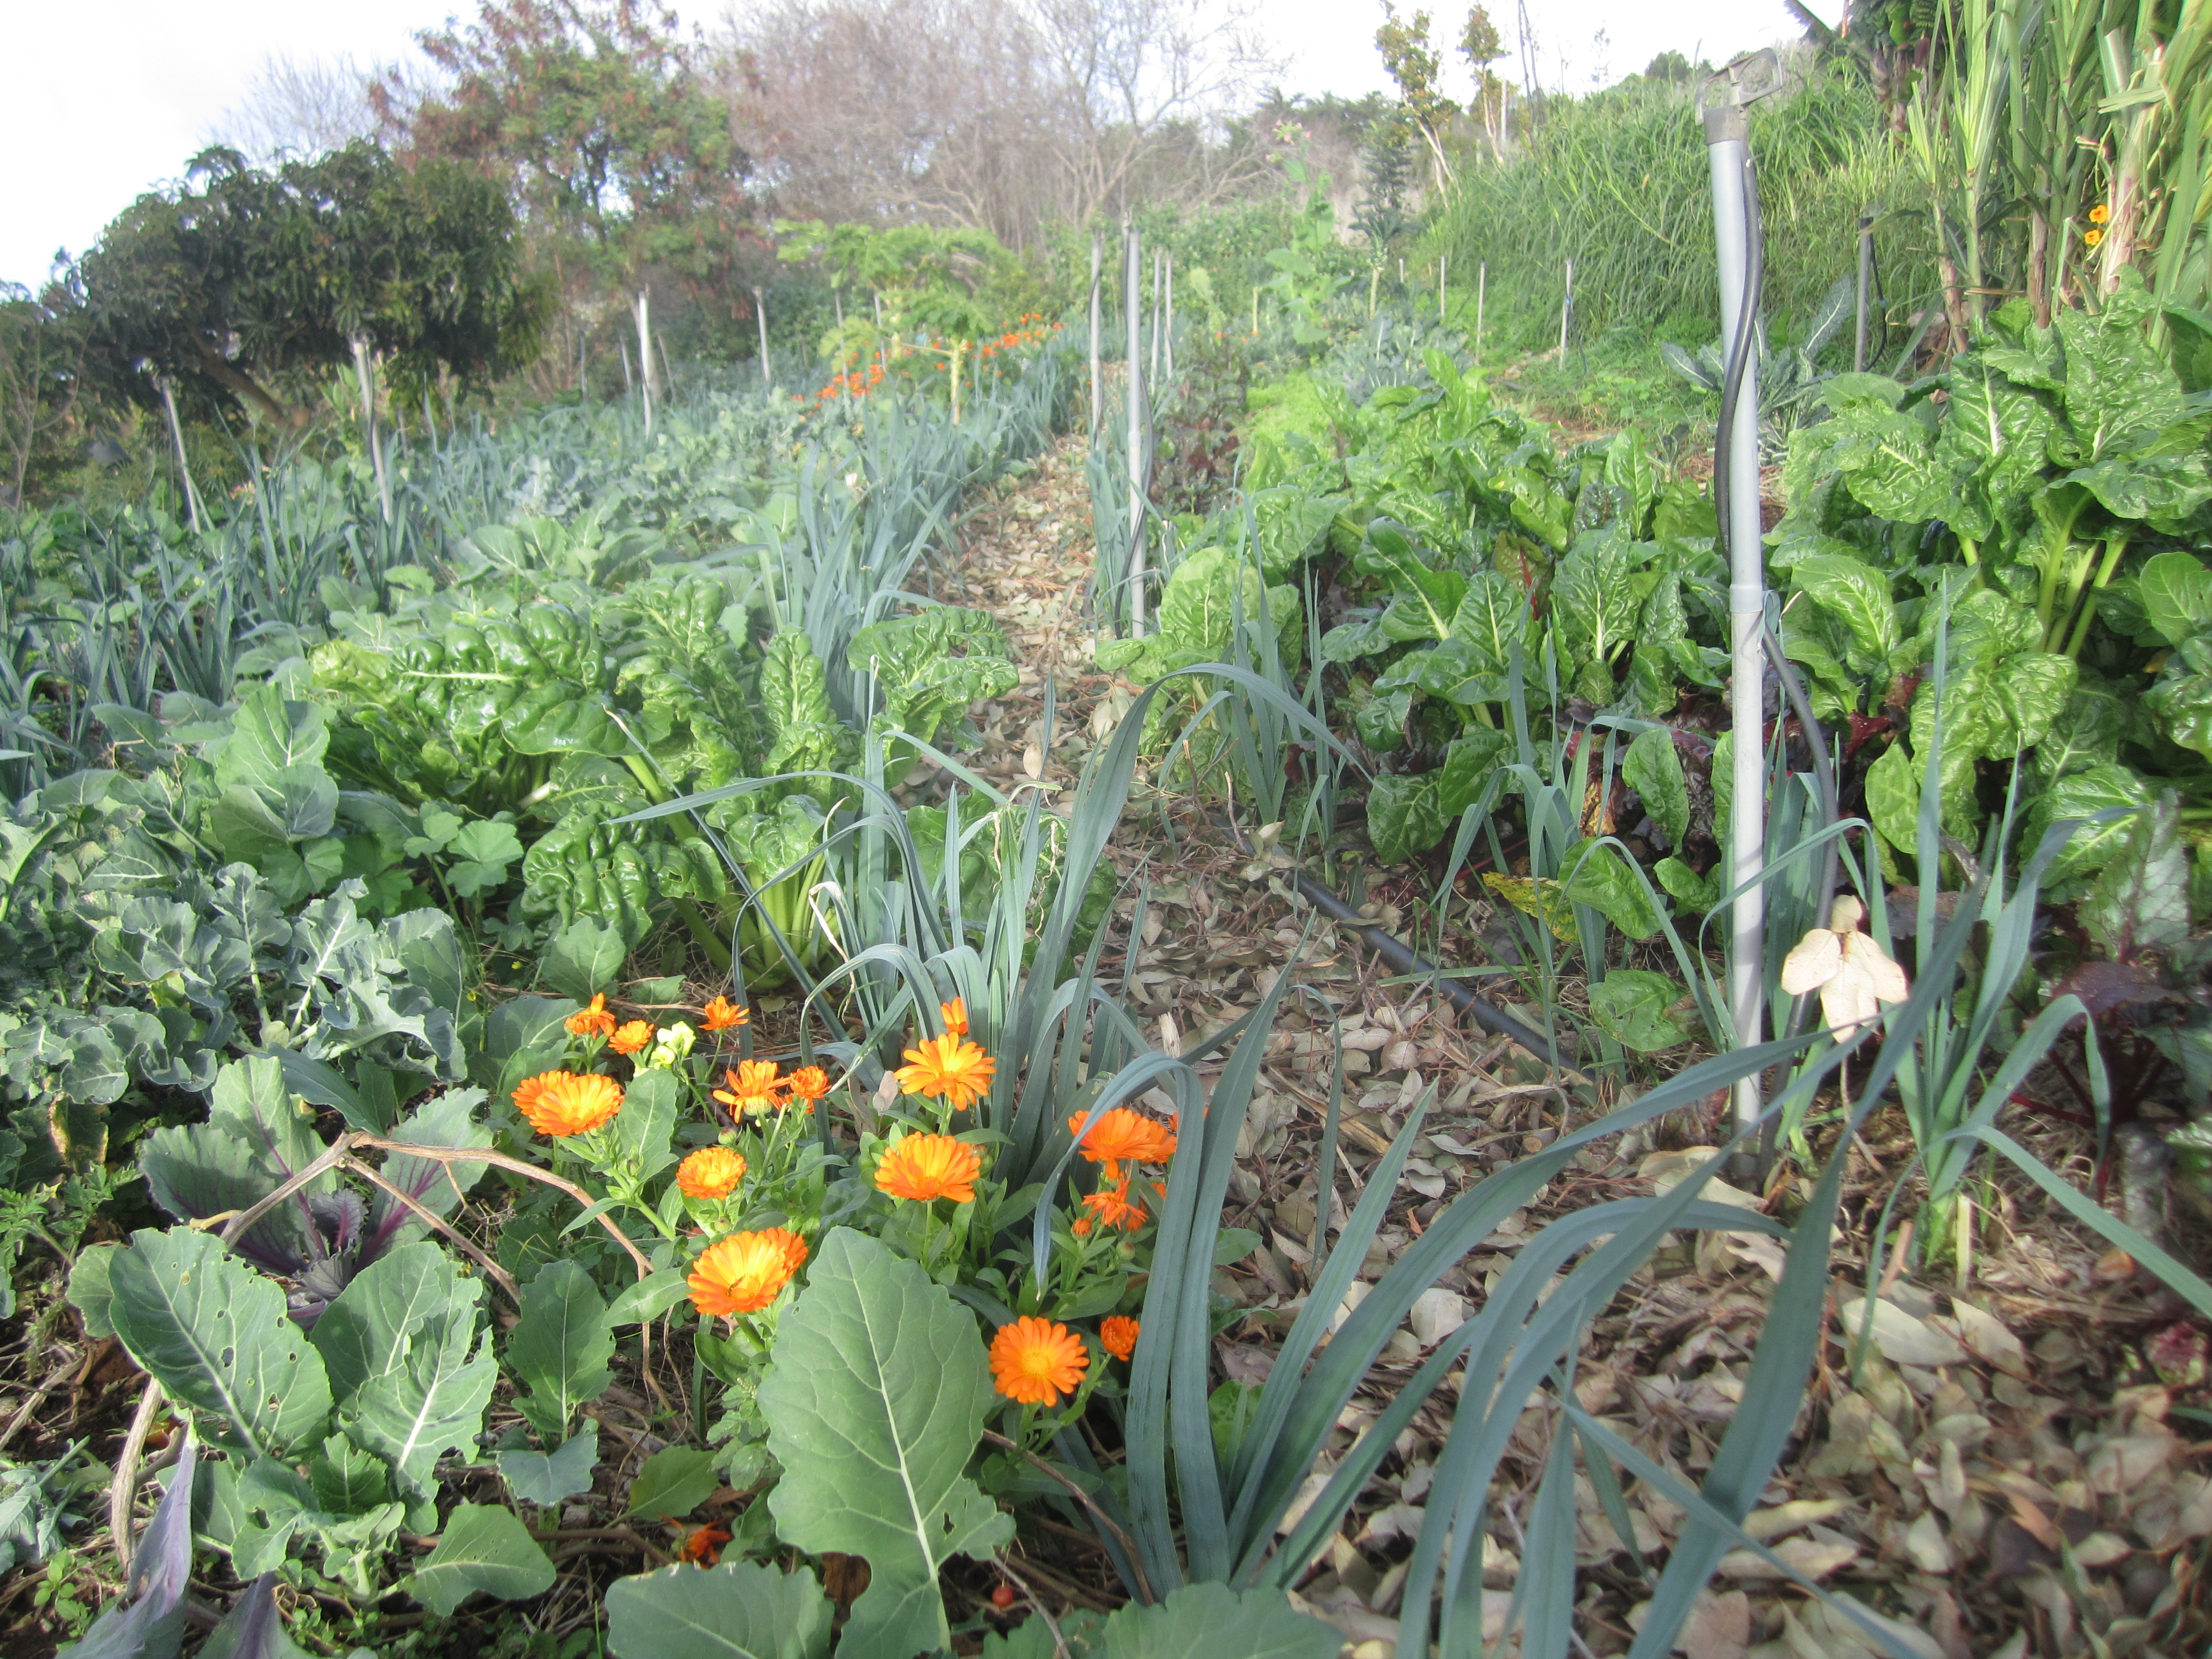
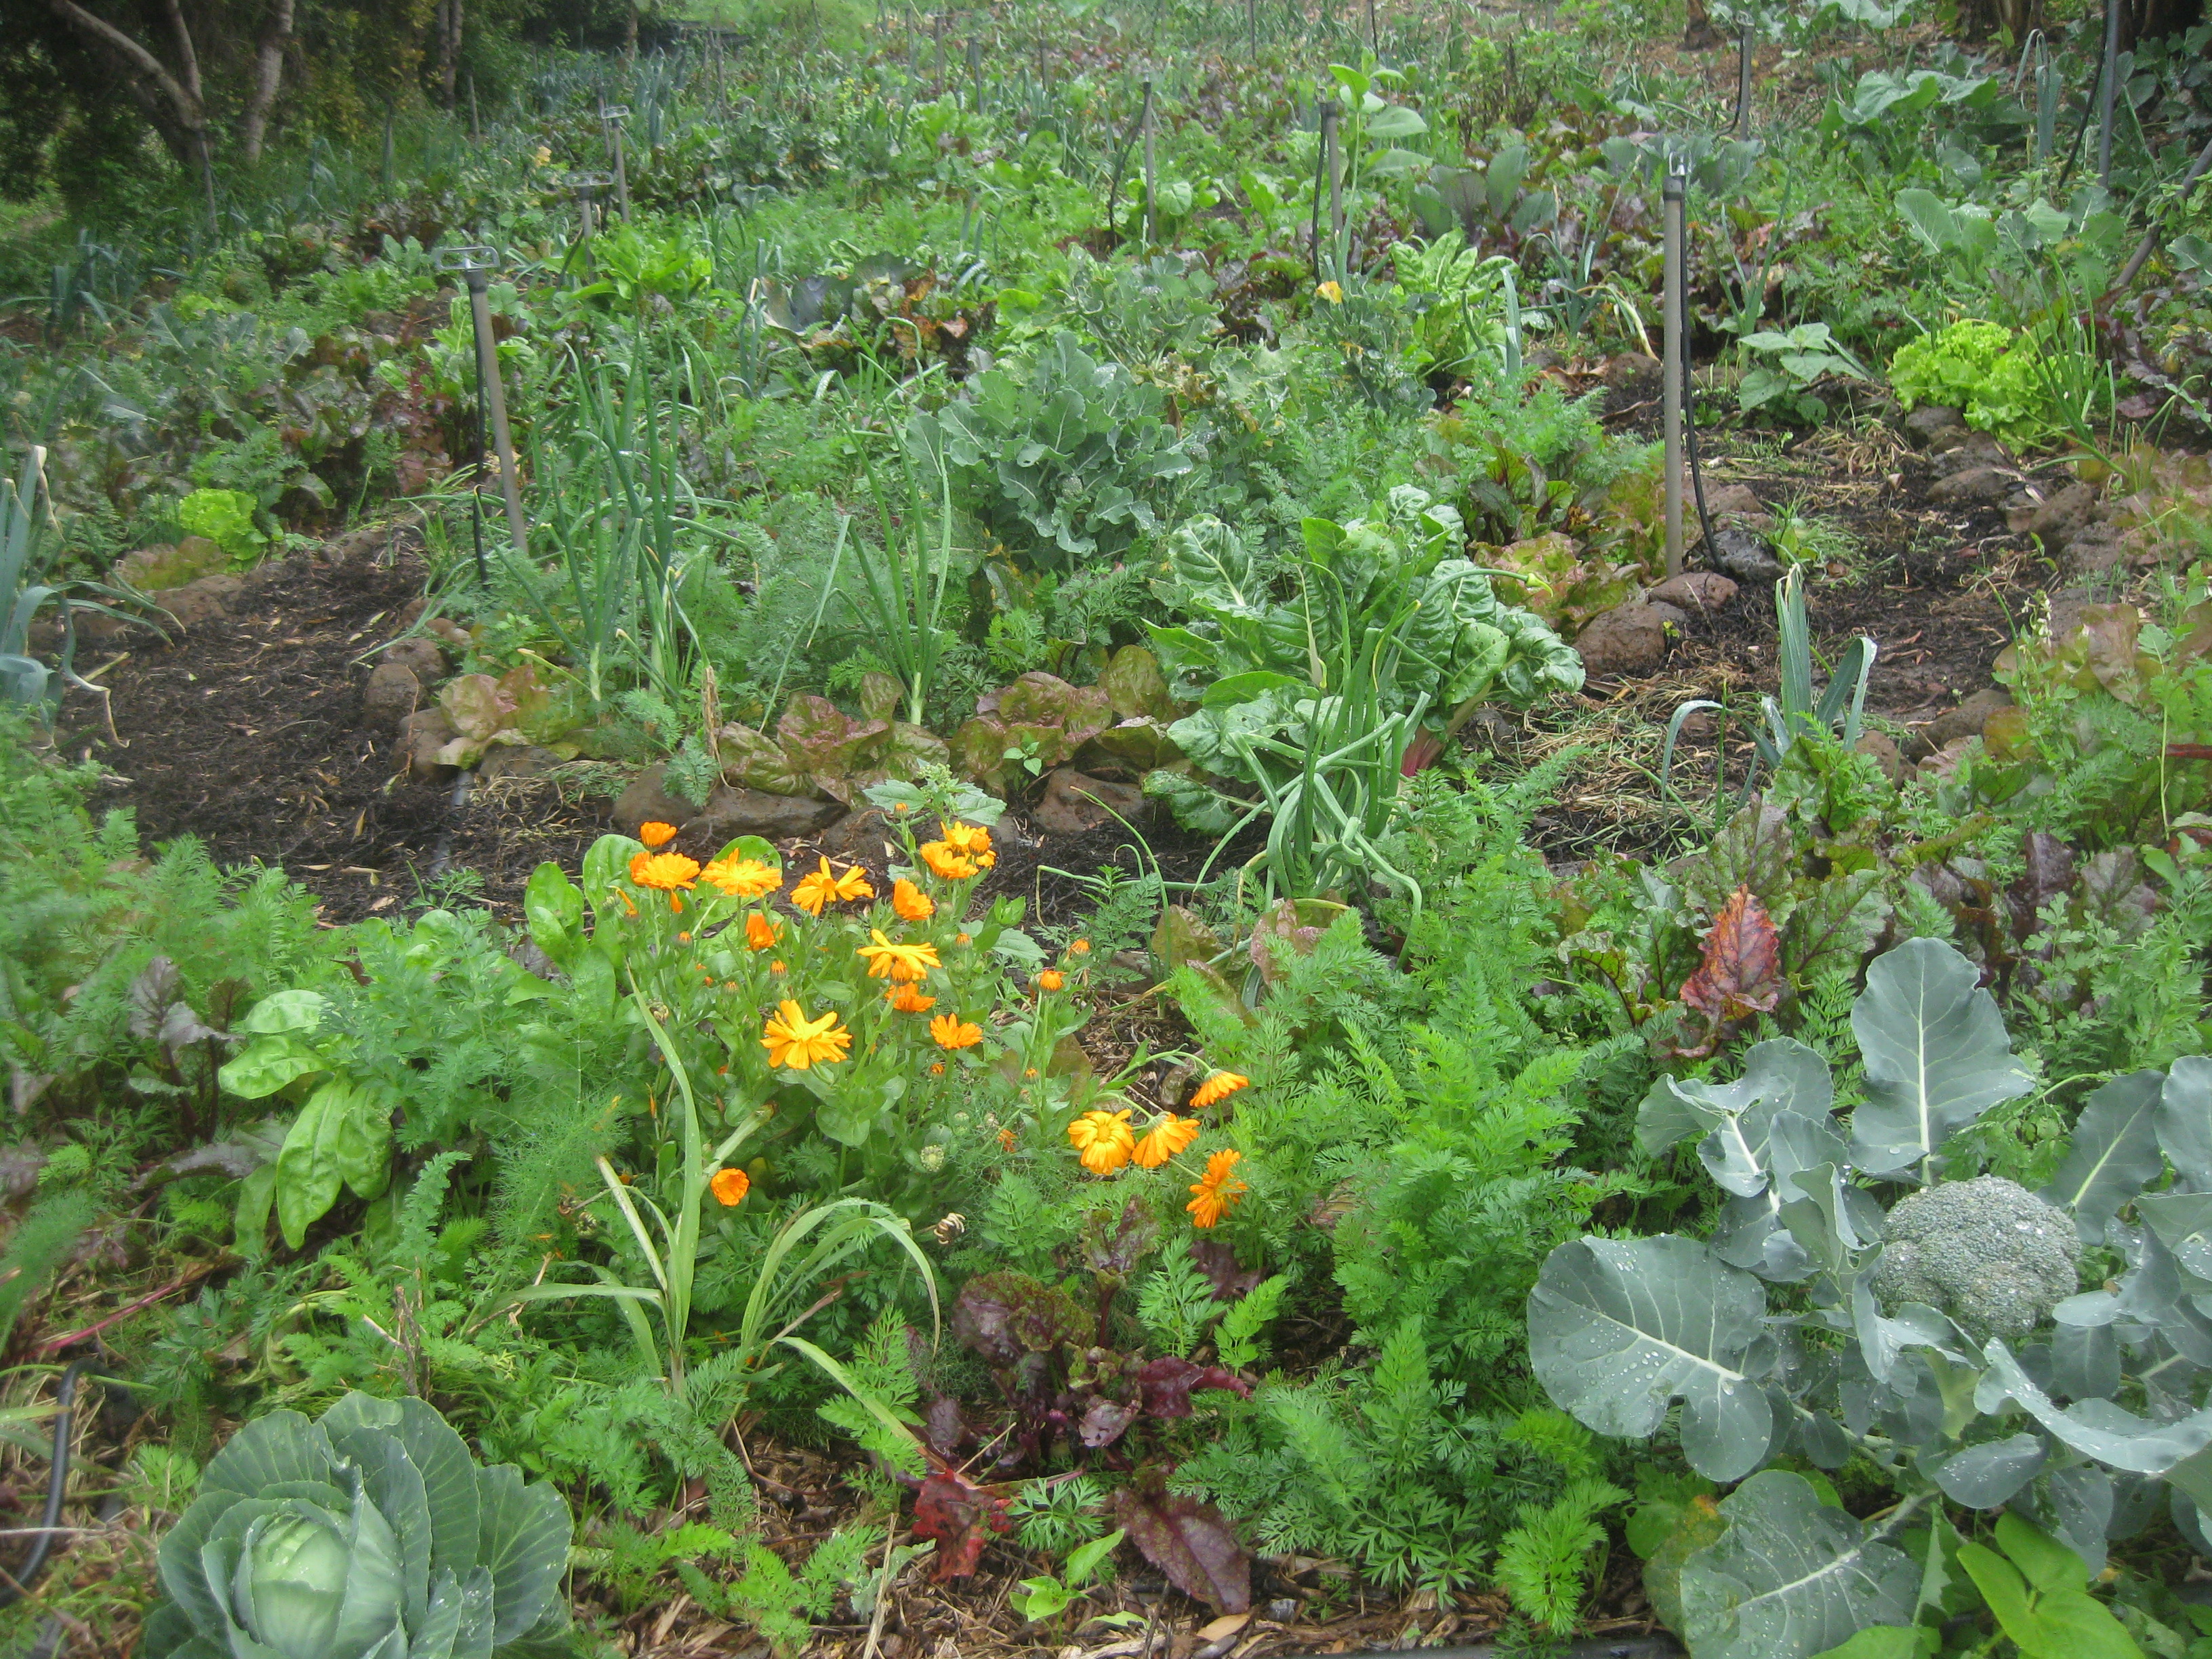
Figure VI.33.- Different beds of the same farm in constant production and rotation of the harvest
The harvesting of vegetables in such a diverse area, apparently chaotic due to our hole planting technique, becomes an important therapeutic exercise.
We assign a different vegetable to each person of the center to collect in days of harvest. For a certain period, we will maintain the same assignment so the student can become skilled with the type of harvesting and can already start to identify the best places to harvest during the week.
With this personalized harvesting technique, the students acquire self-assurance and learn to be efficient in their work when choosing what utensils and tools they need to take with them to go harvesting, for example, knifes or pruning shears for cutting, and wheelbarrows or boxes for transporting vegetables.
Once the person that participates in this activity feels skilled enough, it is crucial to rotate the assigned vegetable with a fellow student. This moment is a good opportunity for the most skilled person in the harvesting technique to teach this system to another person or new students of the course. With this activity we encourage support in pairs (which is proven to be efficient on people with mental illness), making them develop their self-esteem and self-assurance, and making sure there is fellowship and communication between them.
The people that work in the edible garden and garden forest during maintenance days (Tuesday, Wednesday and Thursday in our case) gather information about the vegetables that are about to be harvested without having to be aware of it. Remember that on maintenance days with our “hole plantation technique”, we plant seedlings near the vegetables that are ready to be cut. As a consequence, this information is gathered in the nomad dimension of our brain as a tacit knowledge curve that unfolds itself in the harvesting stage (Friday and Monday in our case).
We can choose the harvesting days that best suit us (Figure VI.34). It could be done on one or more days per week, as it is in our case. With our polyculture system we have different types and varieties of plants, but also different sizes. If we do this, we will make sure we always have plants in different maturation levels in our edible garden. In our system the land functions as a storehouse since it allows us to keep vegetables in the soil for a longer period of time, giving us a bigger margin when harvesting, and therefore when commercializing with them.
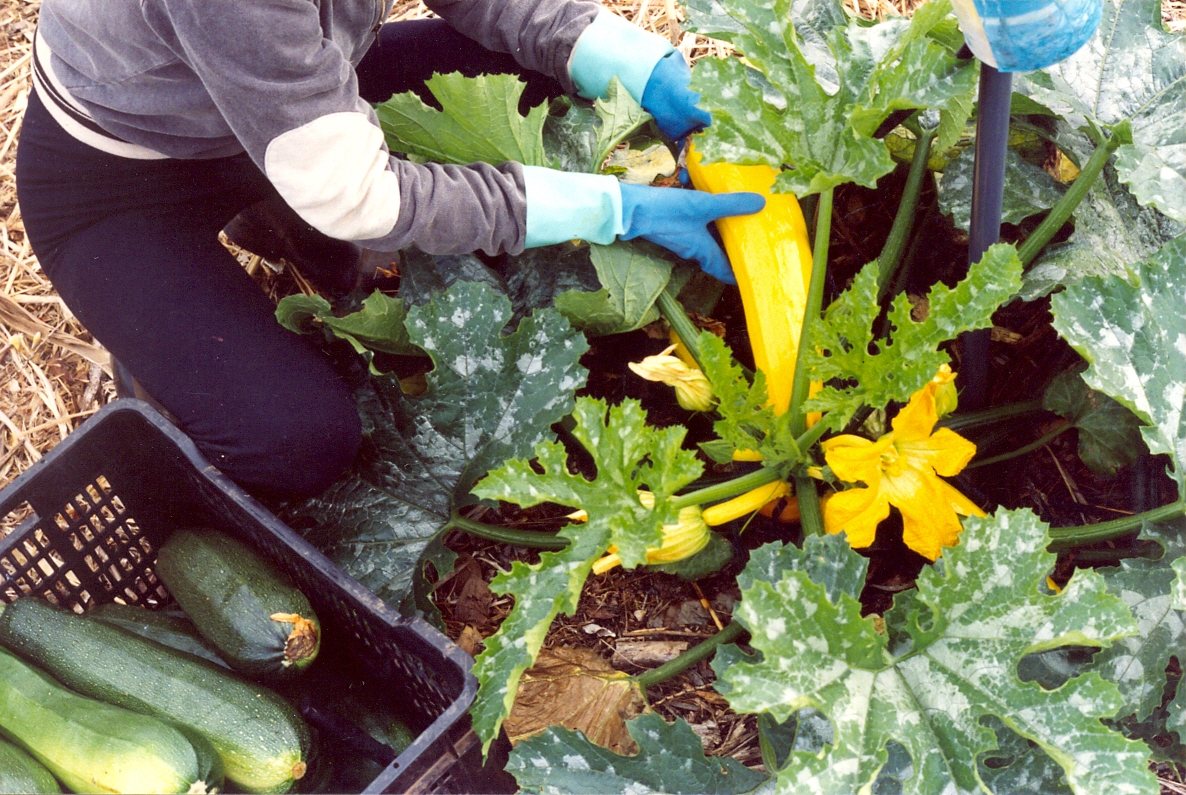


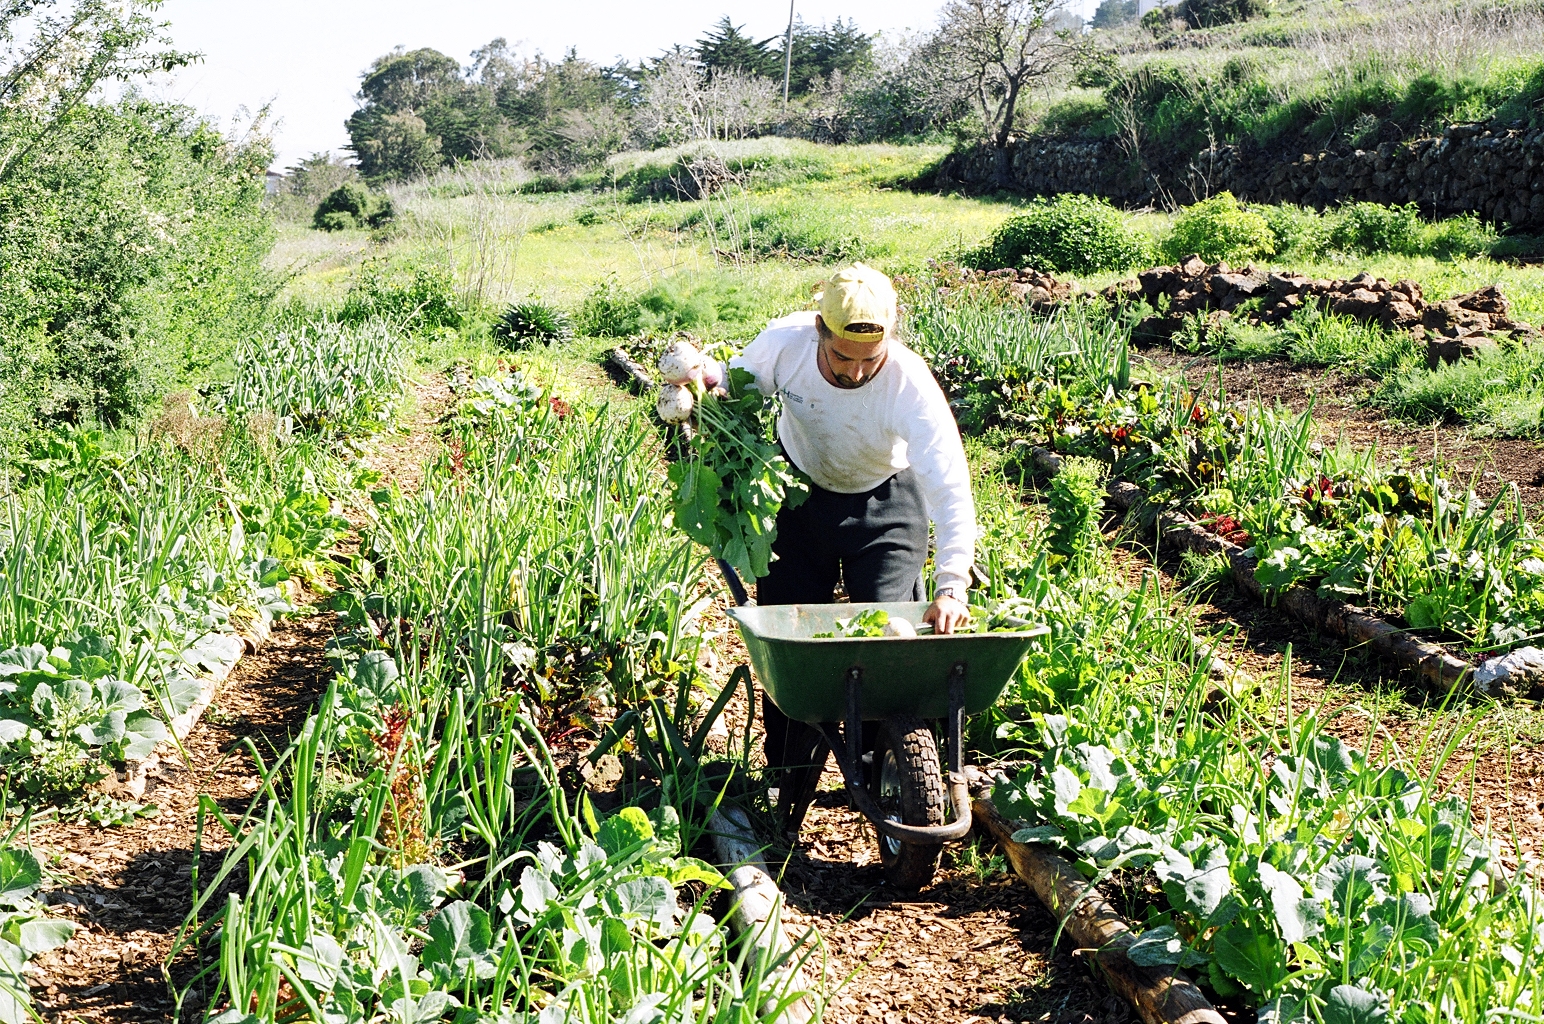
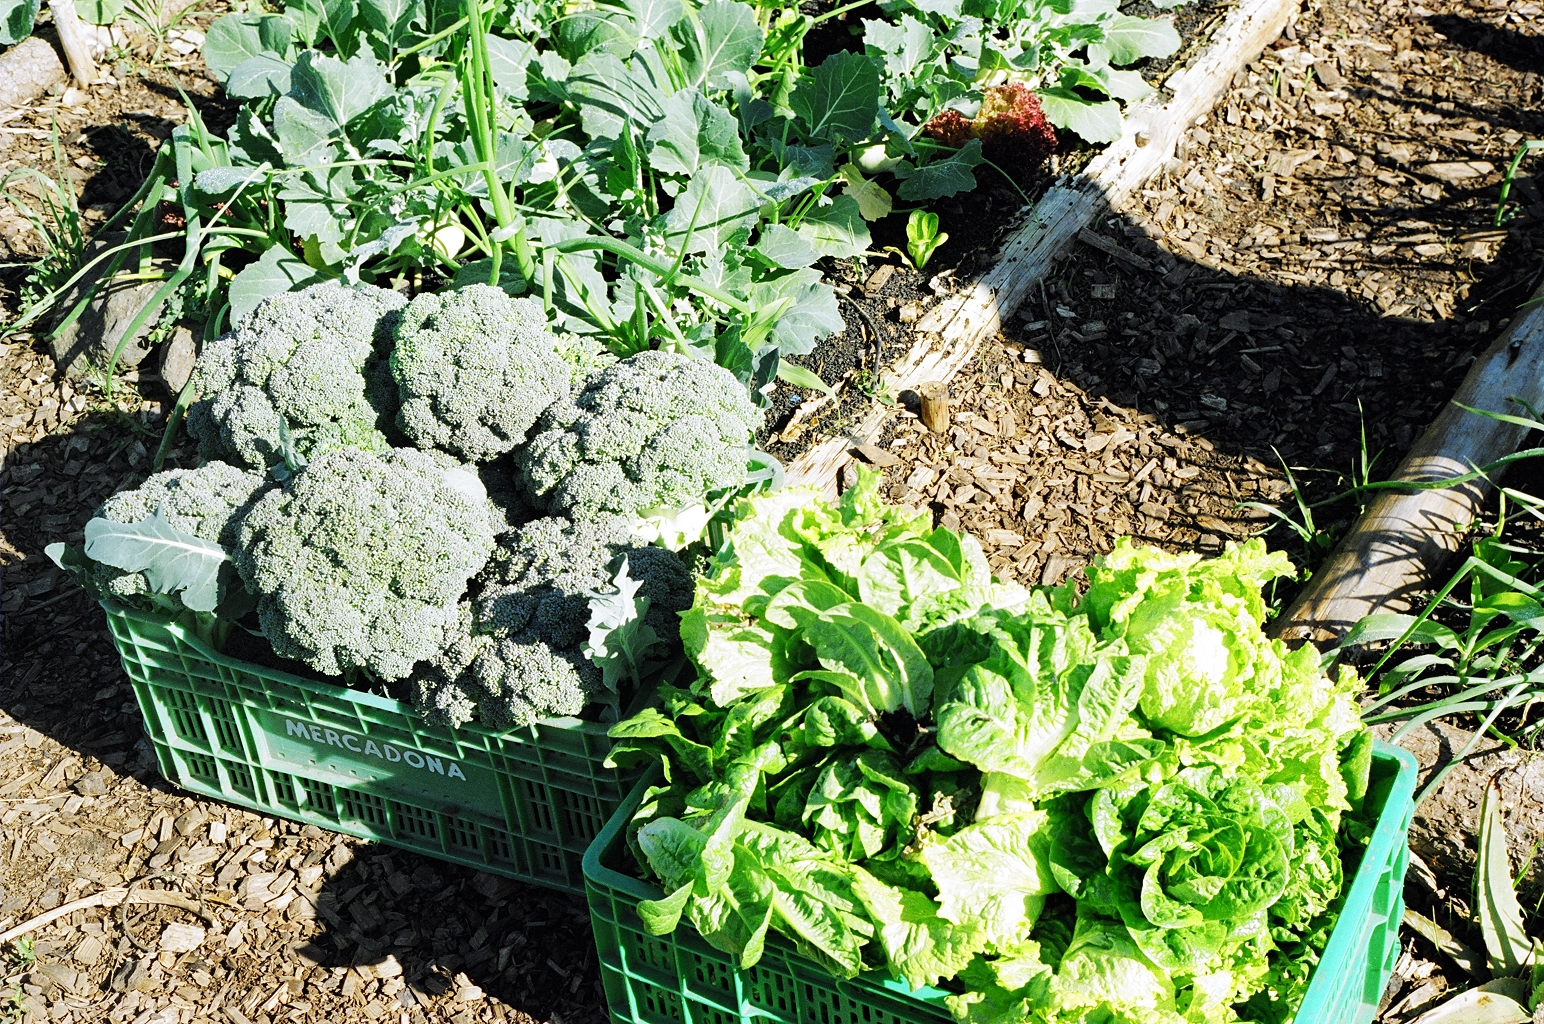

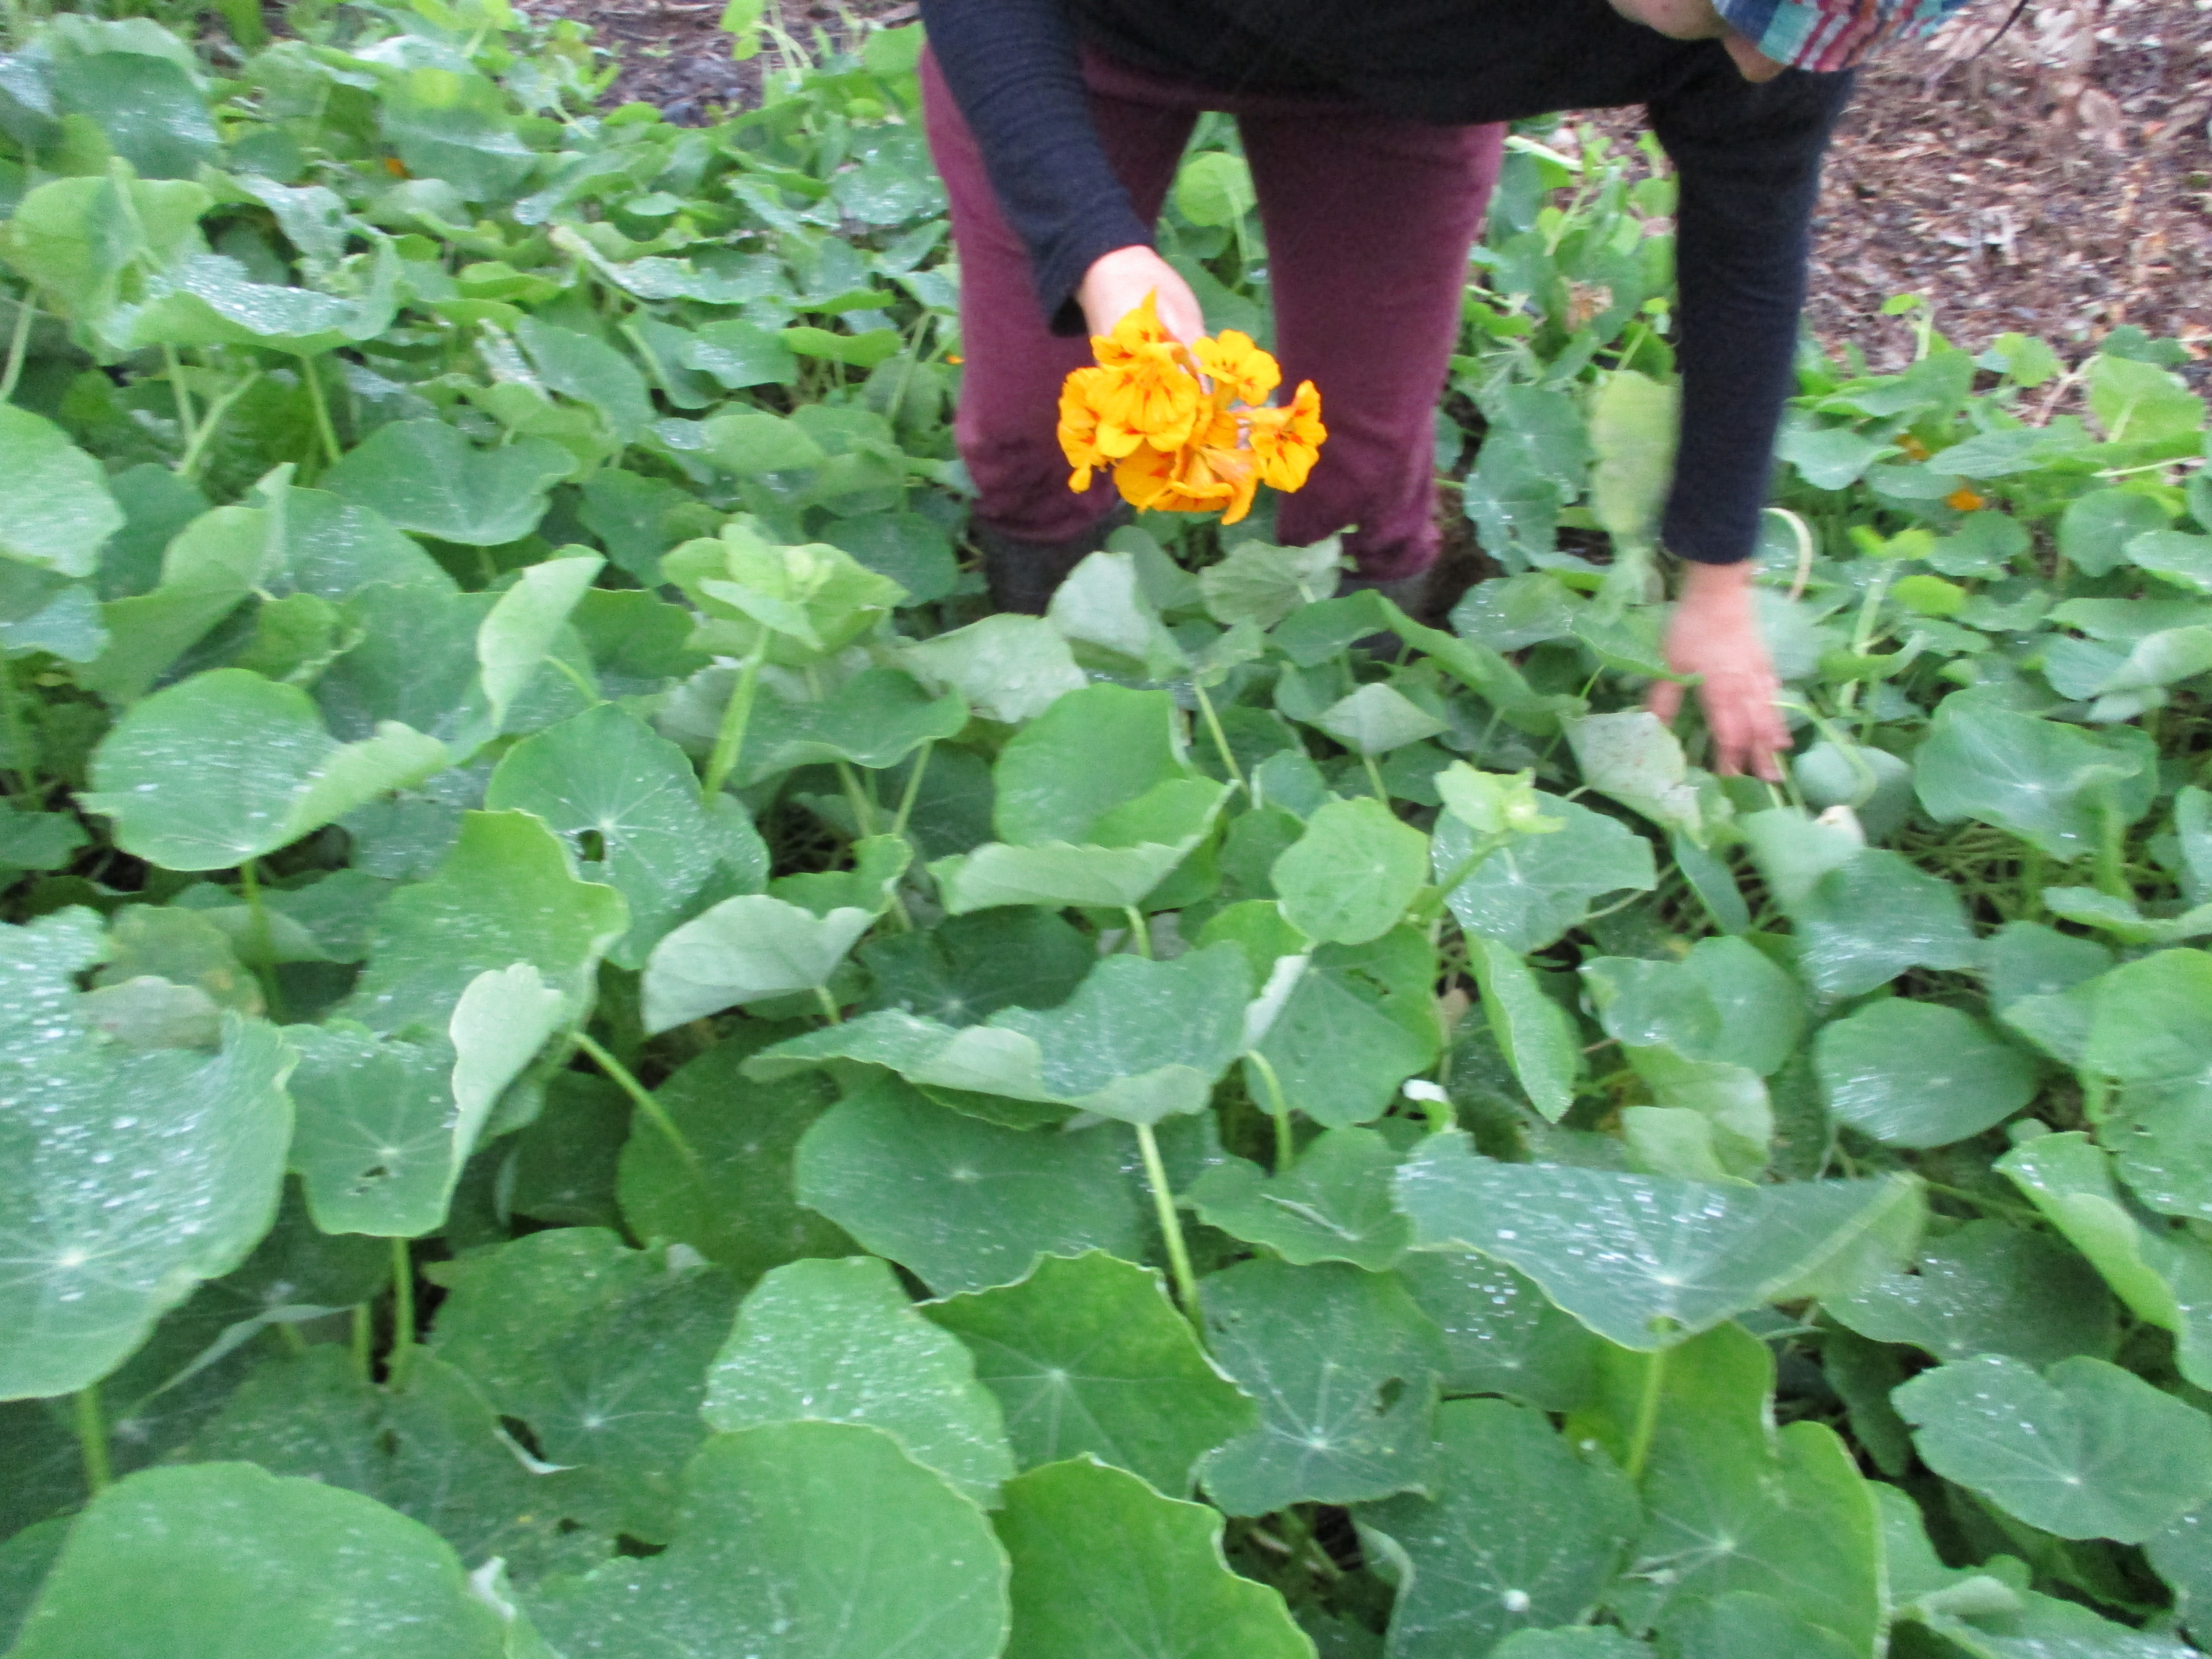
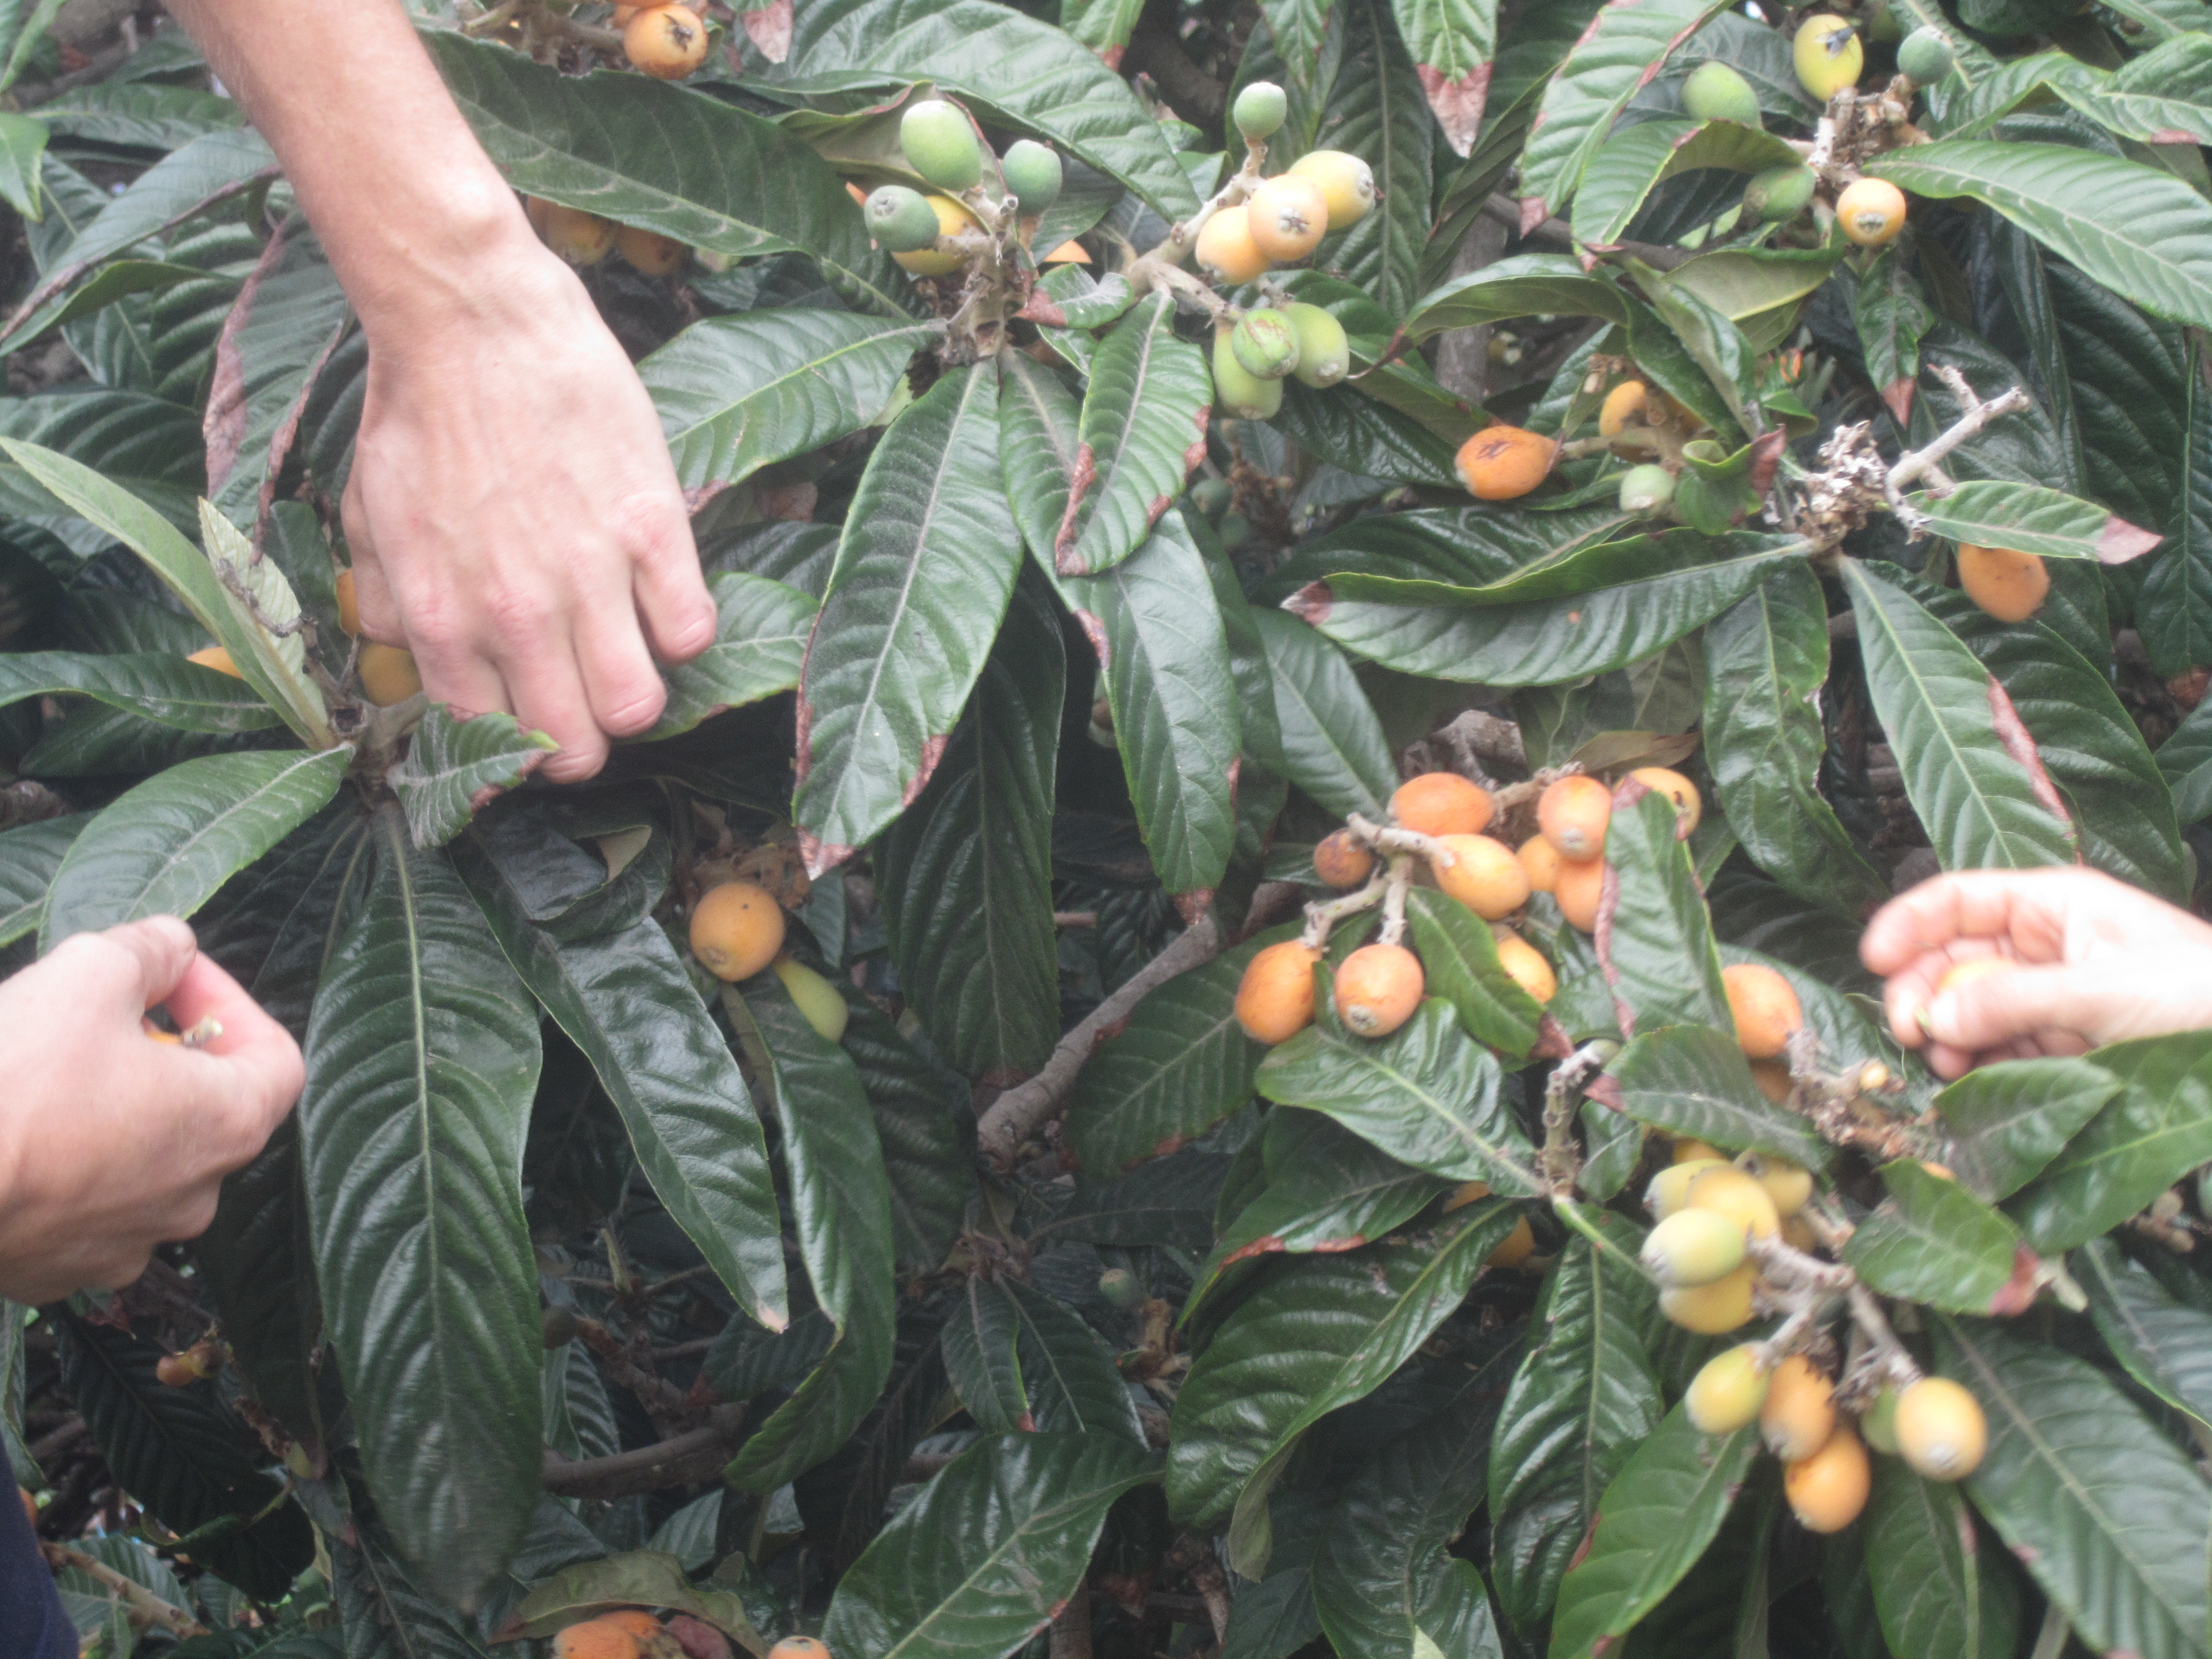
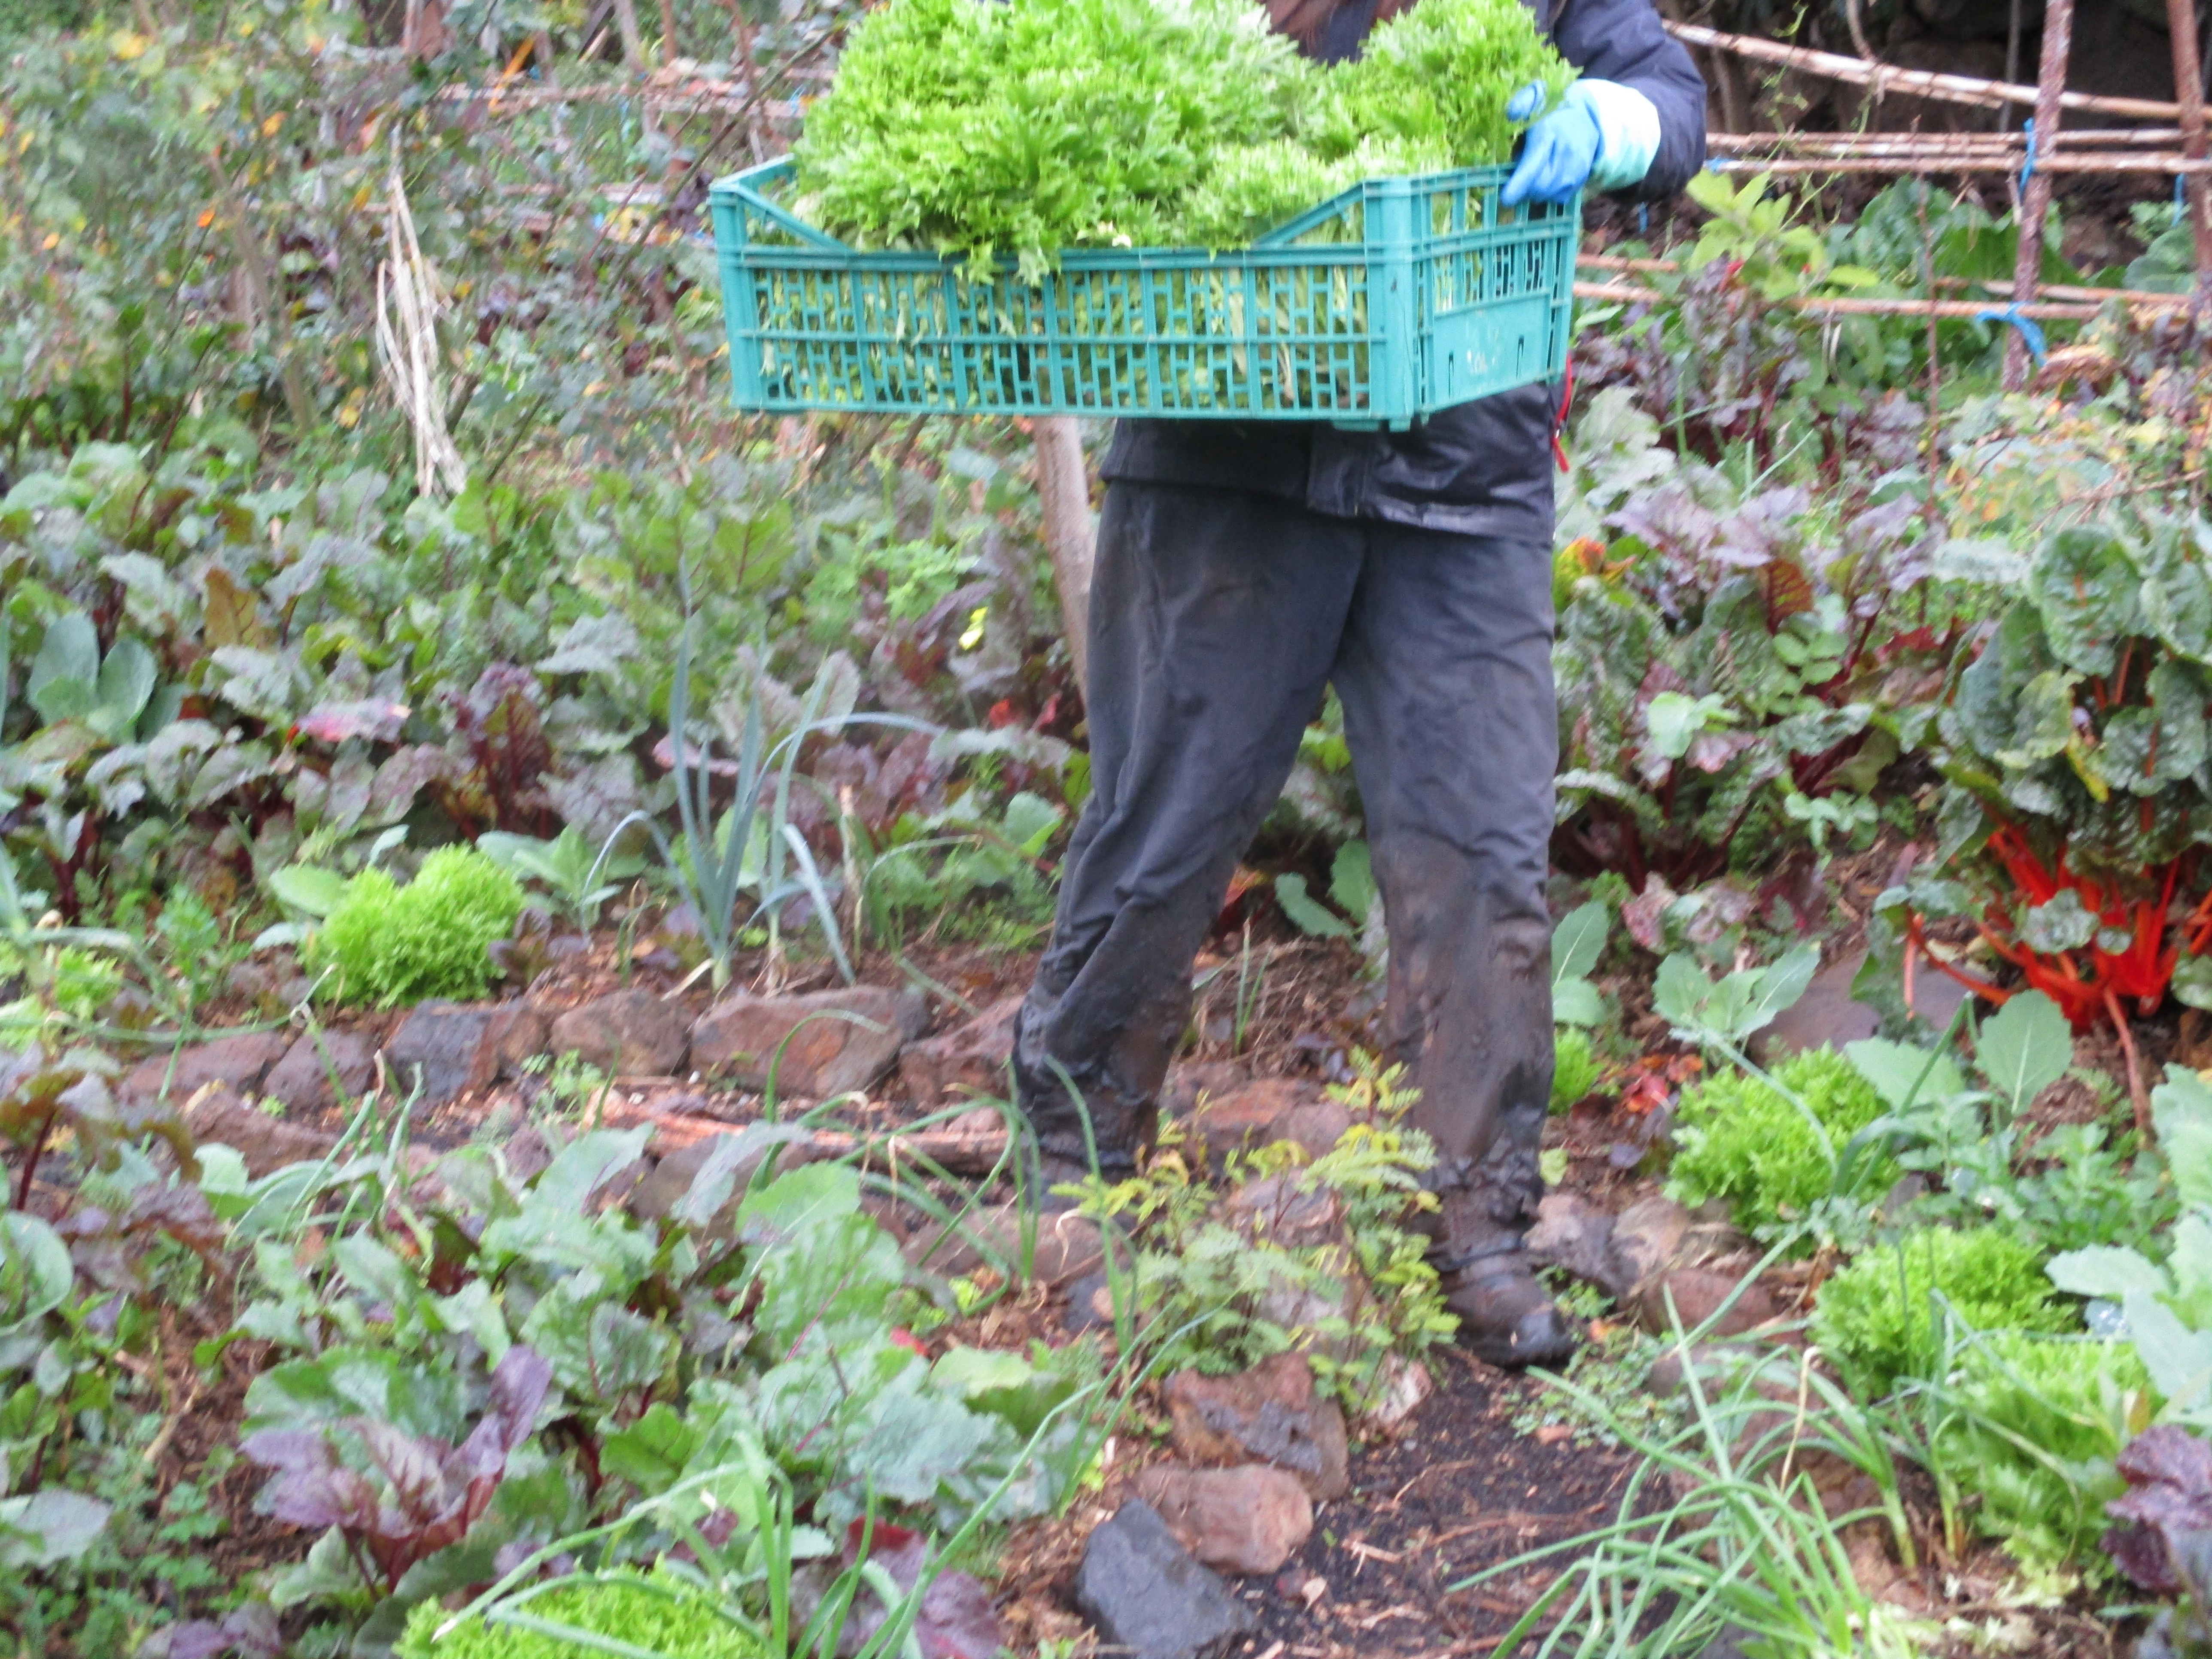
Figure VI.34.- Collecting vegetables, edible flowers and fruit from the edible garden
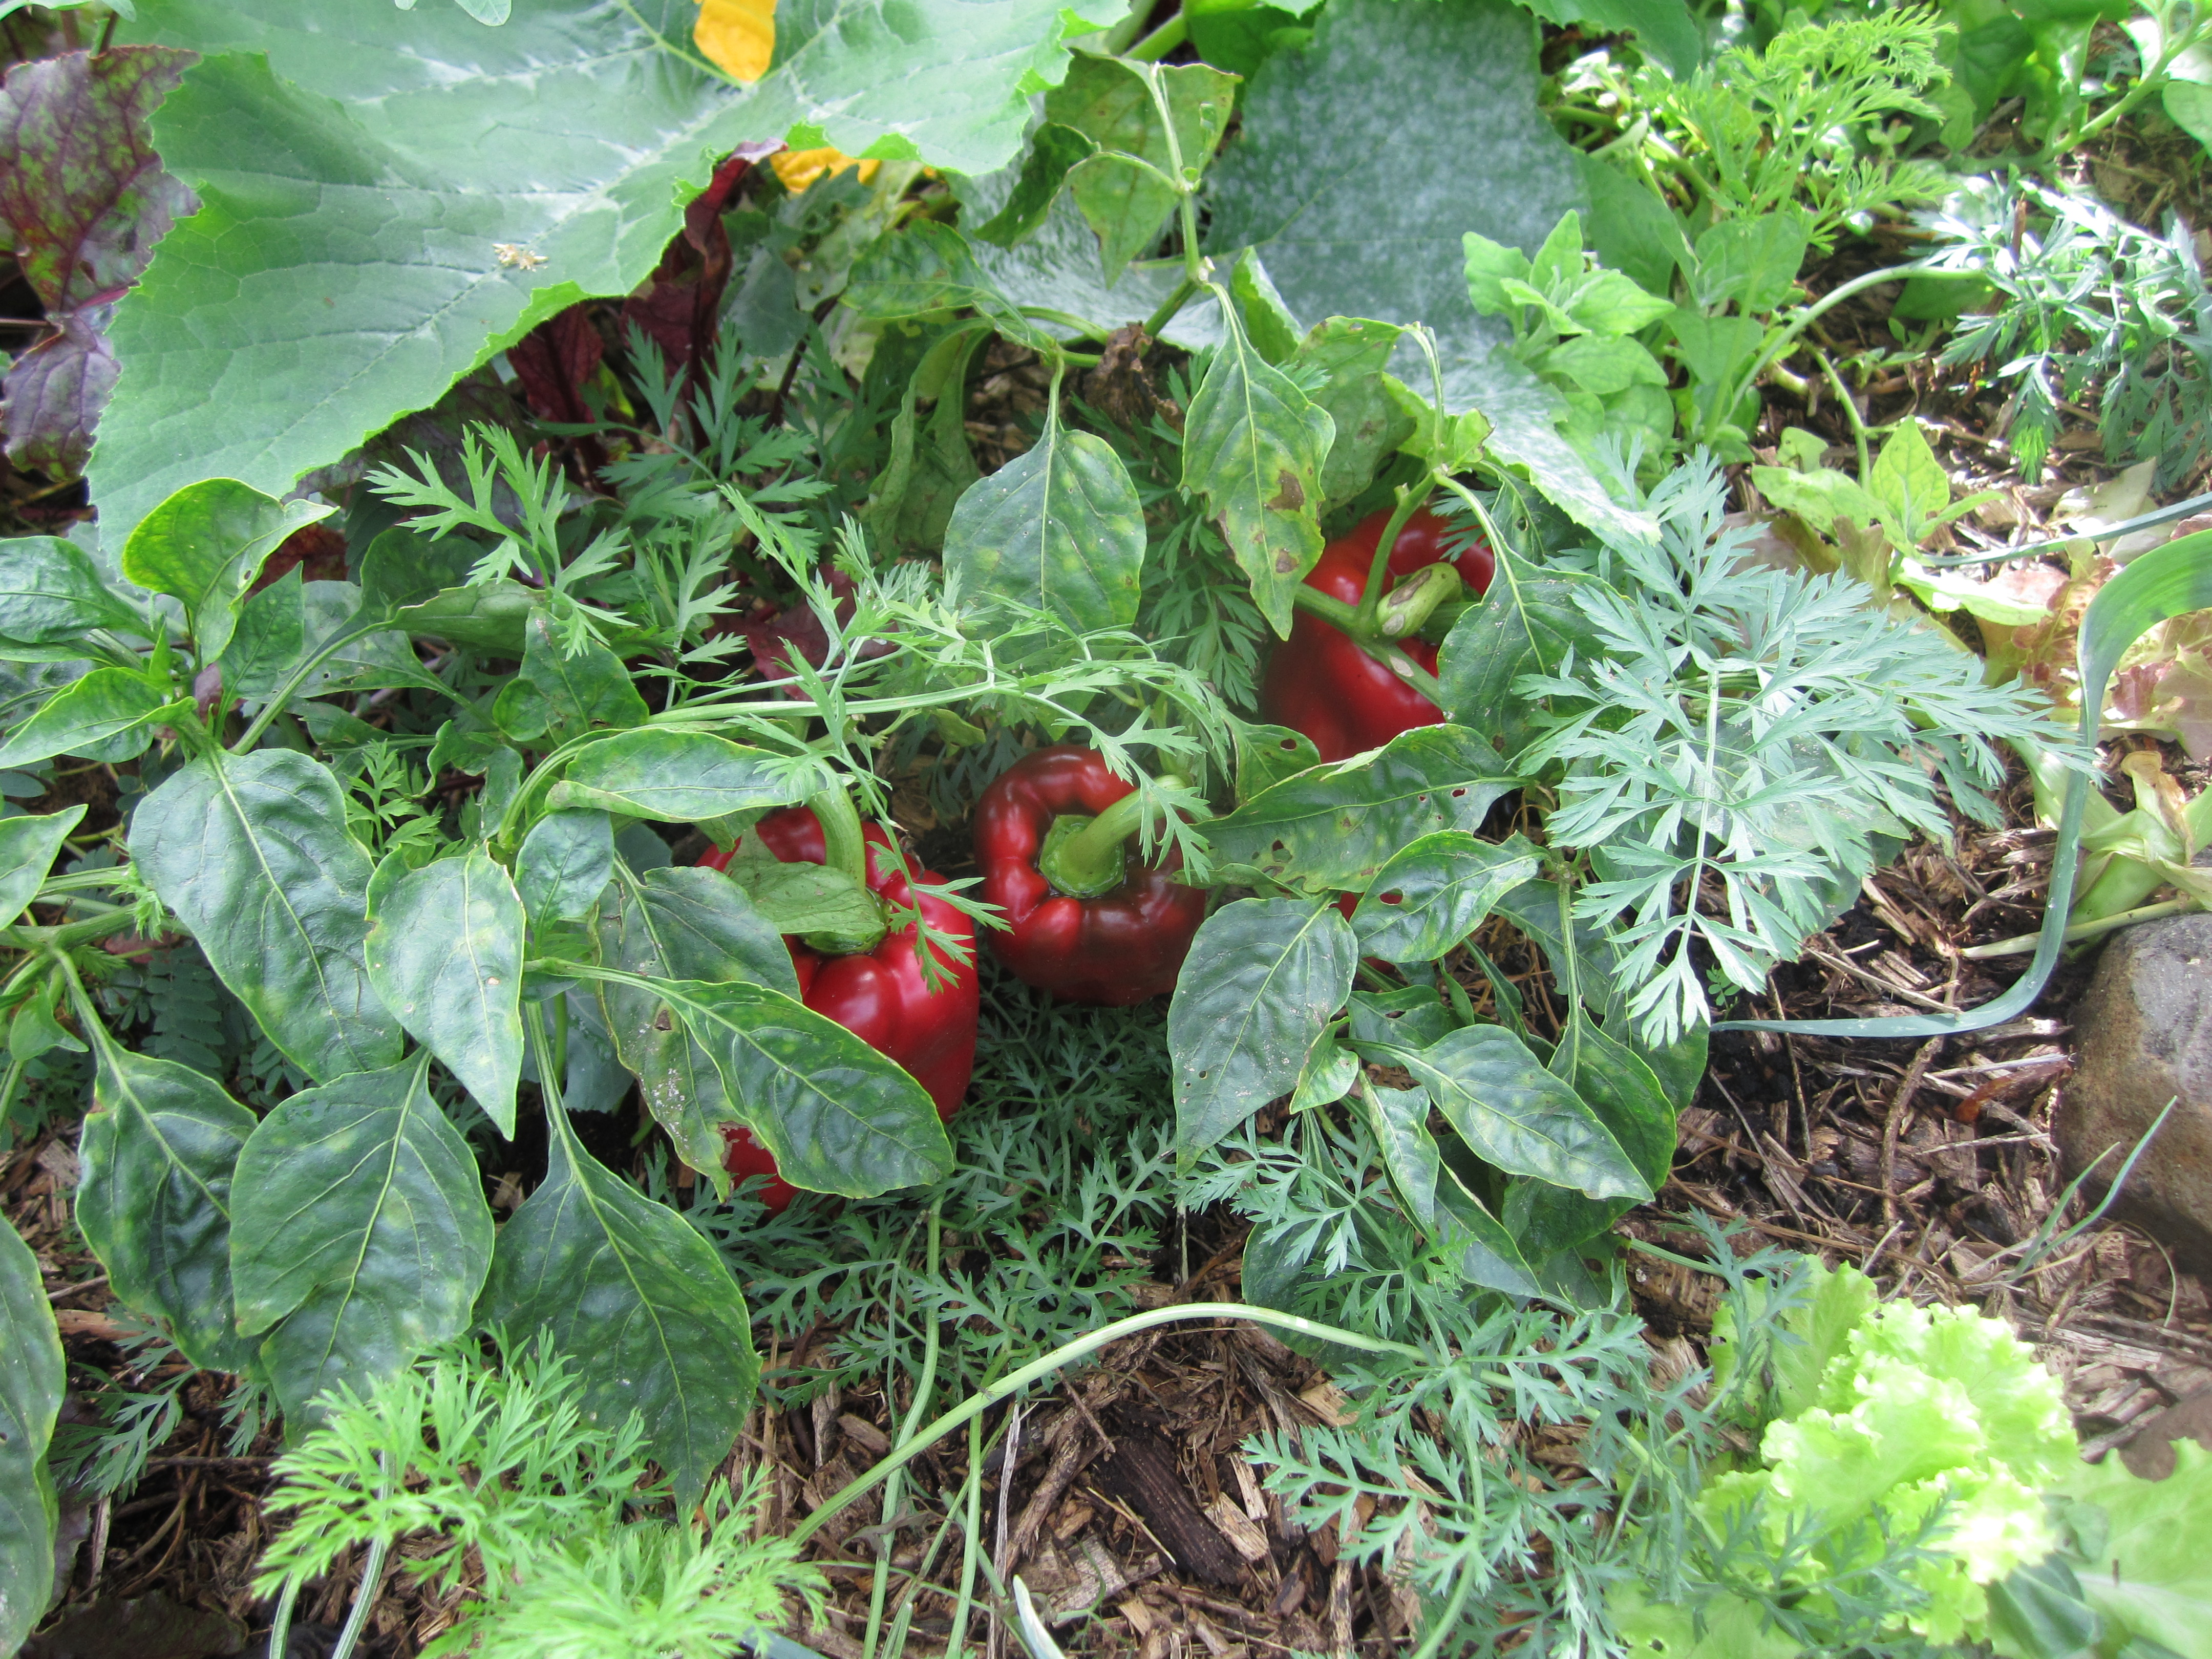
If we only harvest once a week we need to identify and observe which vegetables are the most perishable and thus ready to be harvested, and which ones can stay a bit longer in the garden since they still have not reached their full growth.
As an example, if we grow head lettuce, we cut the ones that are tight and crispy, we cut the broccoli that is less tight and we cut the cauliflower when we see its fruit almost entirely, and if we needed to keep the cauliflower in the garden for a few more days we bend the leaves covering the fruit and protecting it from light since it turns the cauliflower yellow. There are other vegetables that can last longer in the ground such as leeks, onions, red beetroots, radishes, garlic, kohlrabi, etc. (Figure VI.35).
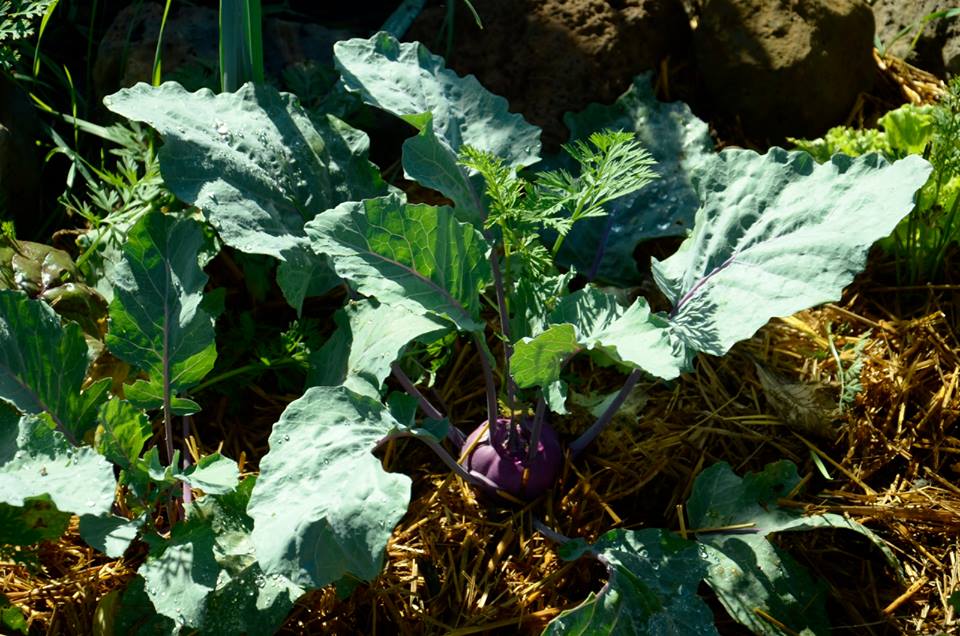
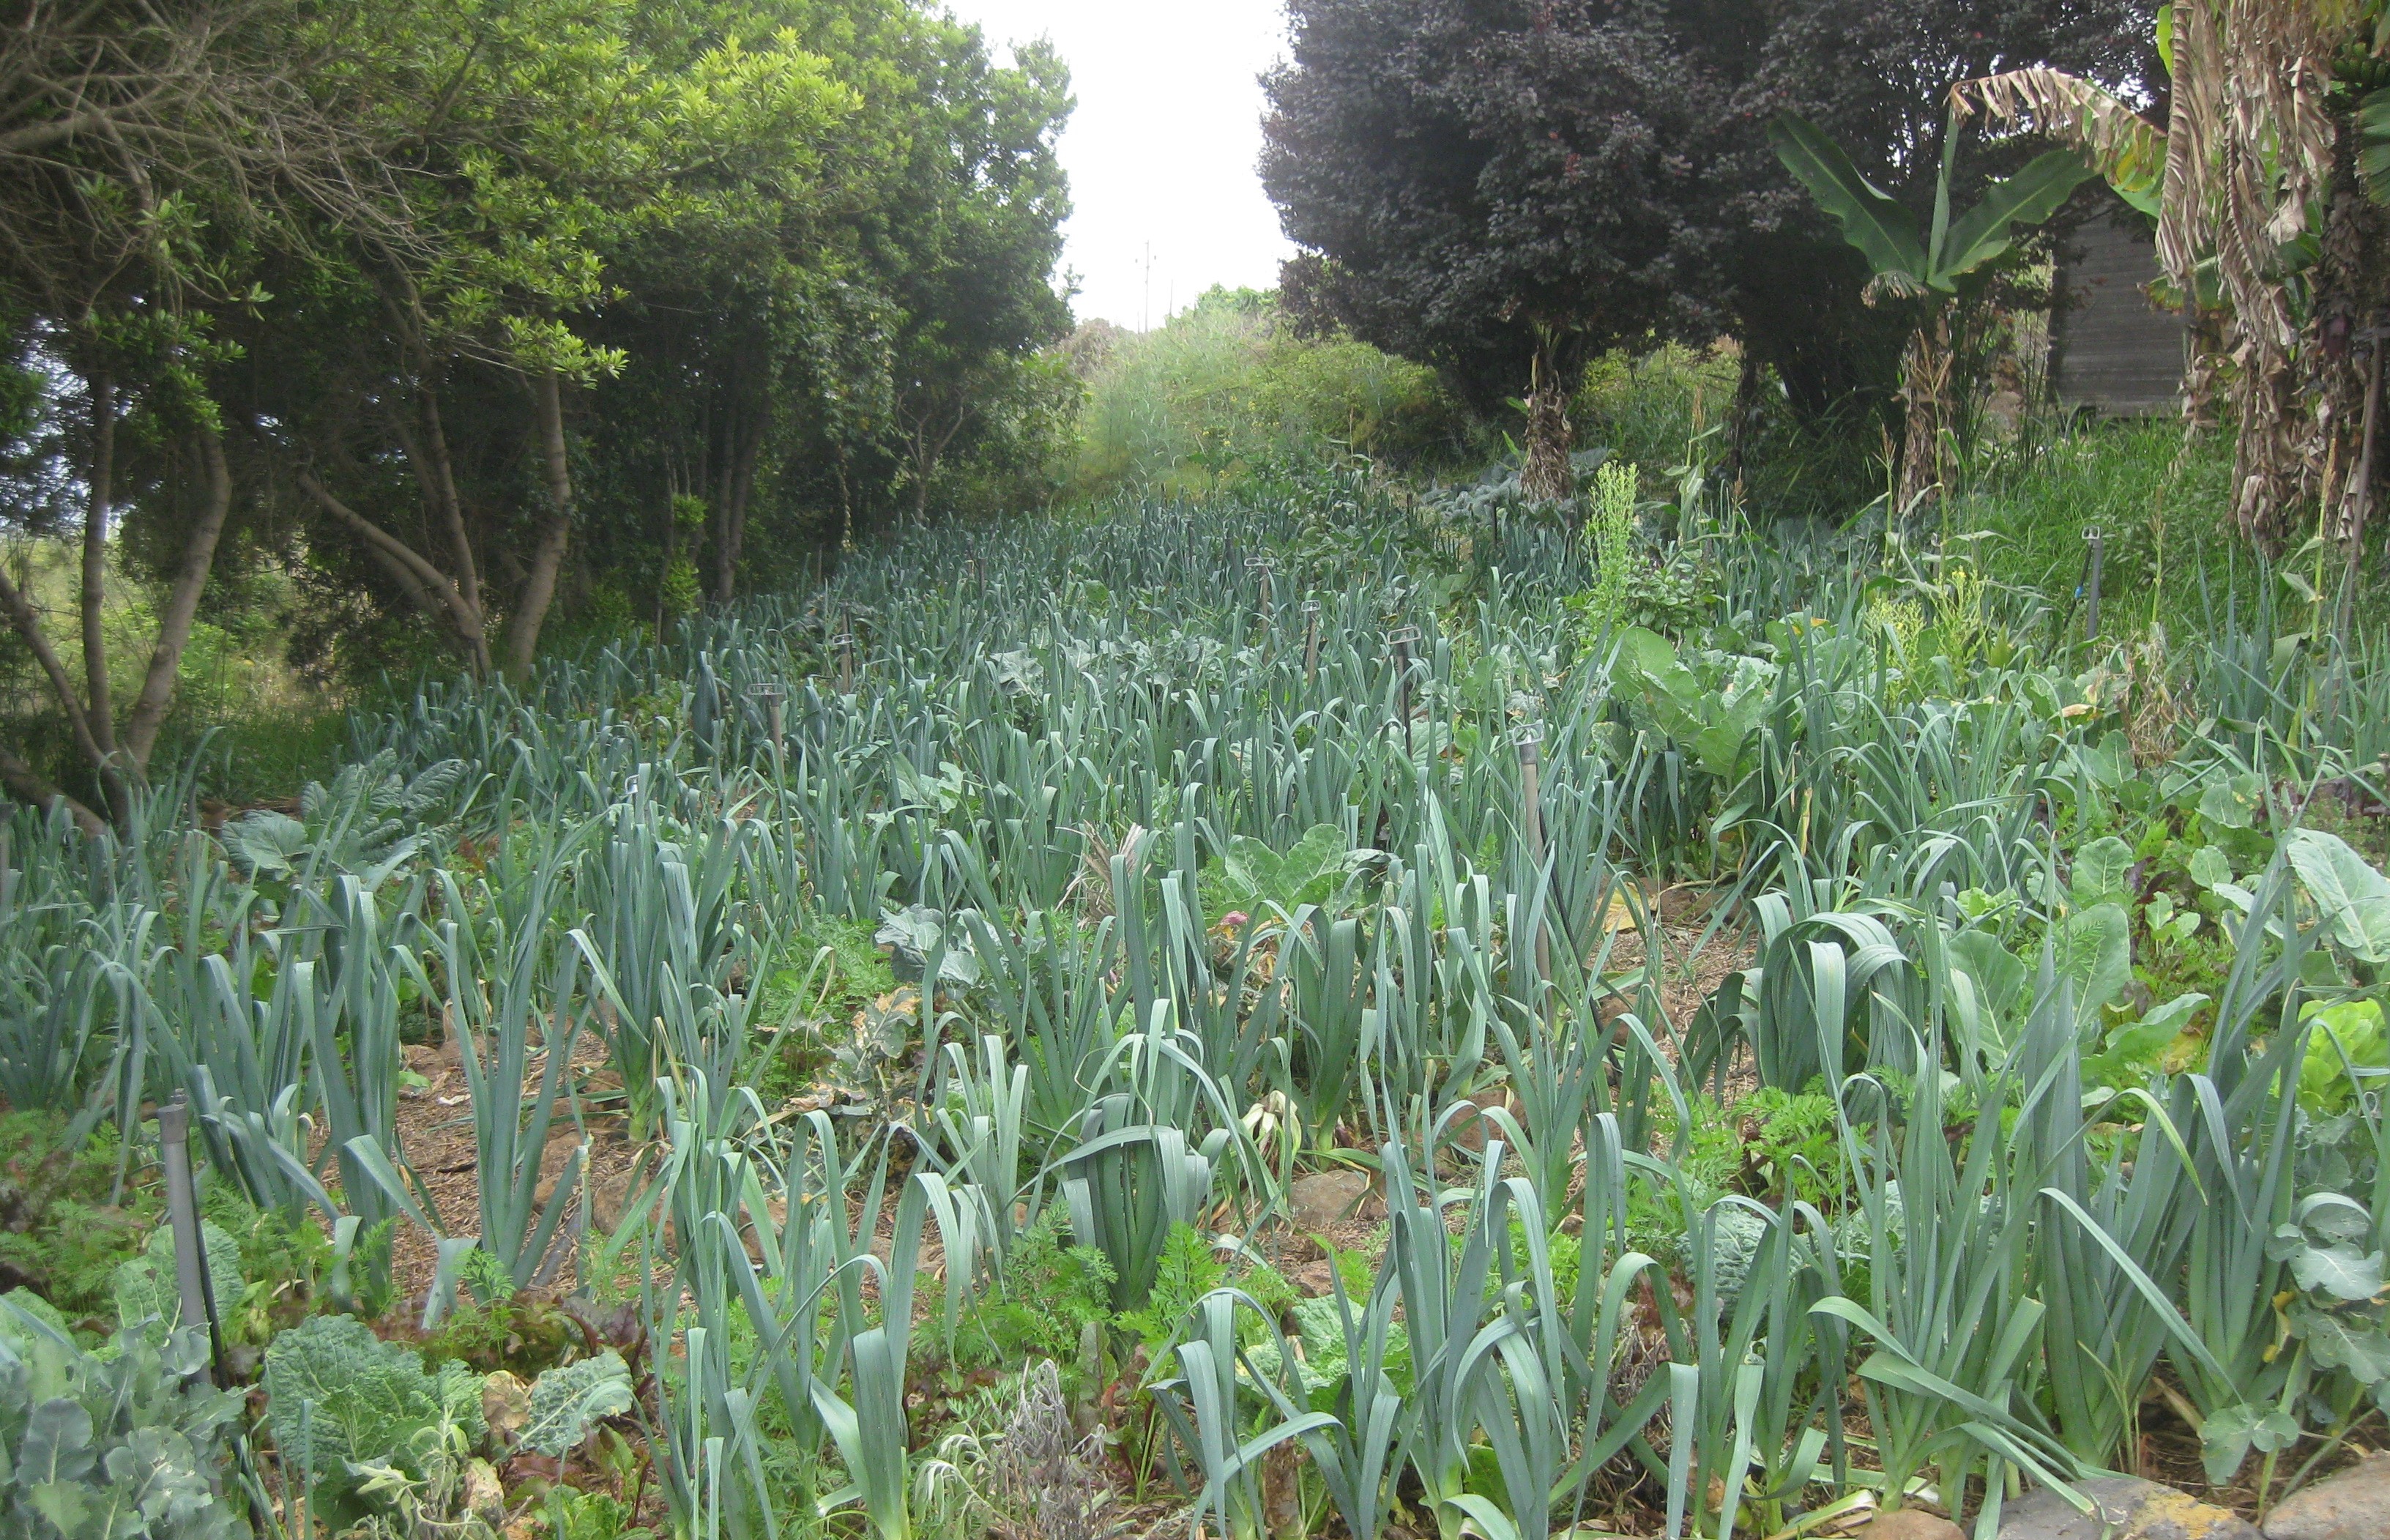
Figure VI.35.- Plants that can stay longer in the ground
On the contrary, in conventional systems, vegetables that are planted on the same day are harvested all together, so the products are more limited to commercialize. This could also happen in the ecologic system that usually plants the same variety in one section of the garden.
After harvesting with the people from the project we bring all the vegetables we have collected to the area of the market that is meant for cleaning and assembling the vegetable boxes (Figure VI.36).
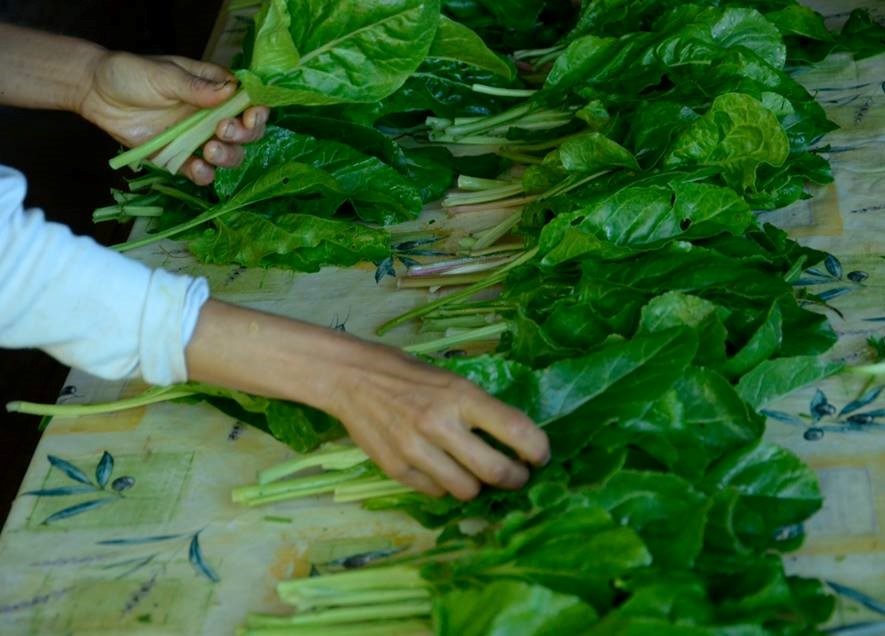
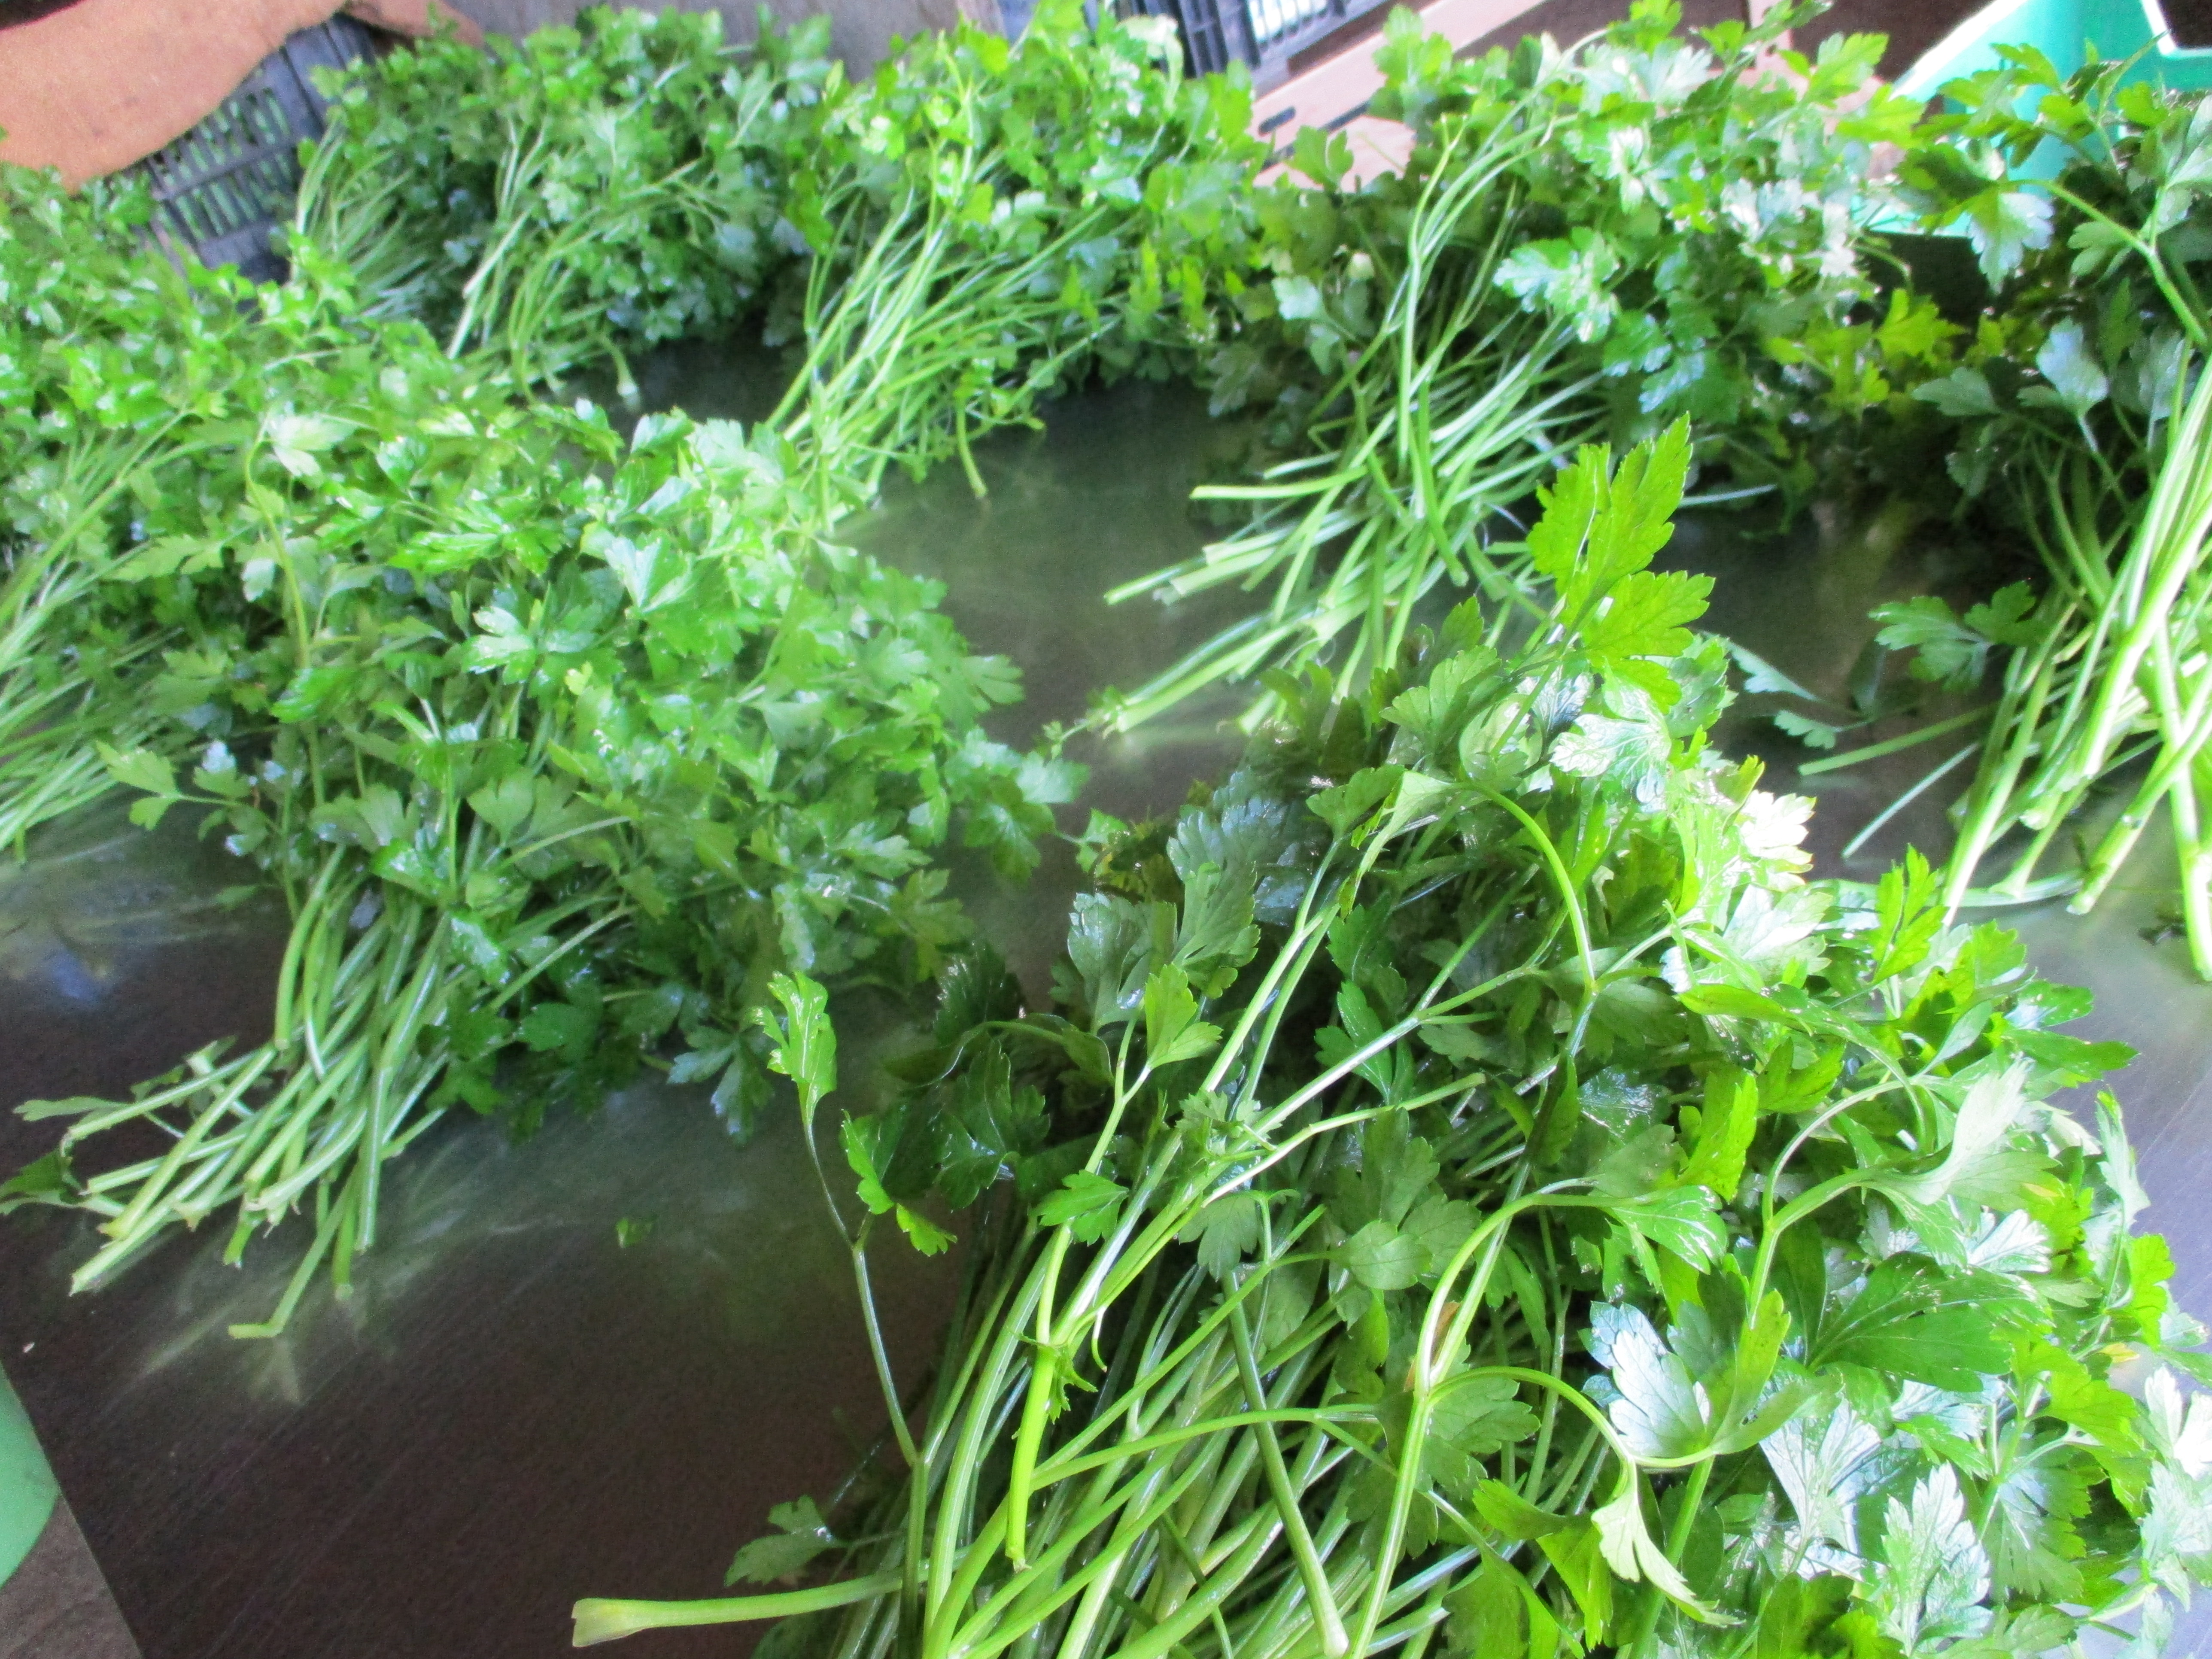
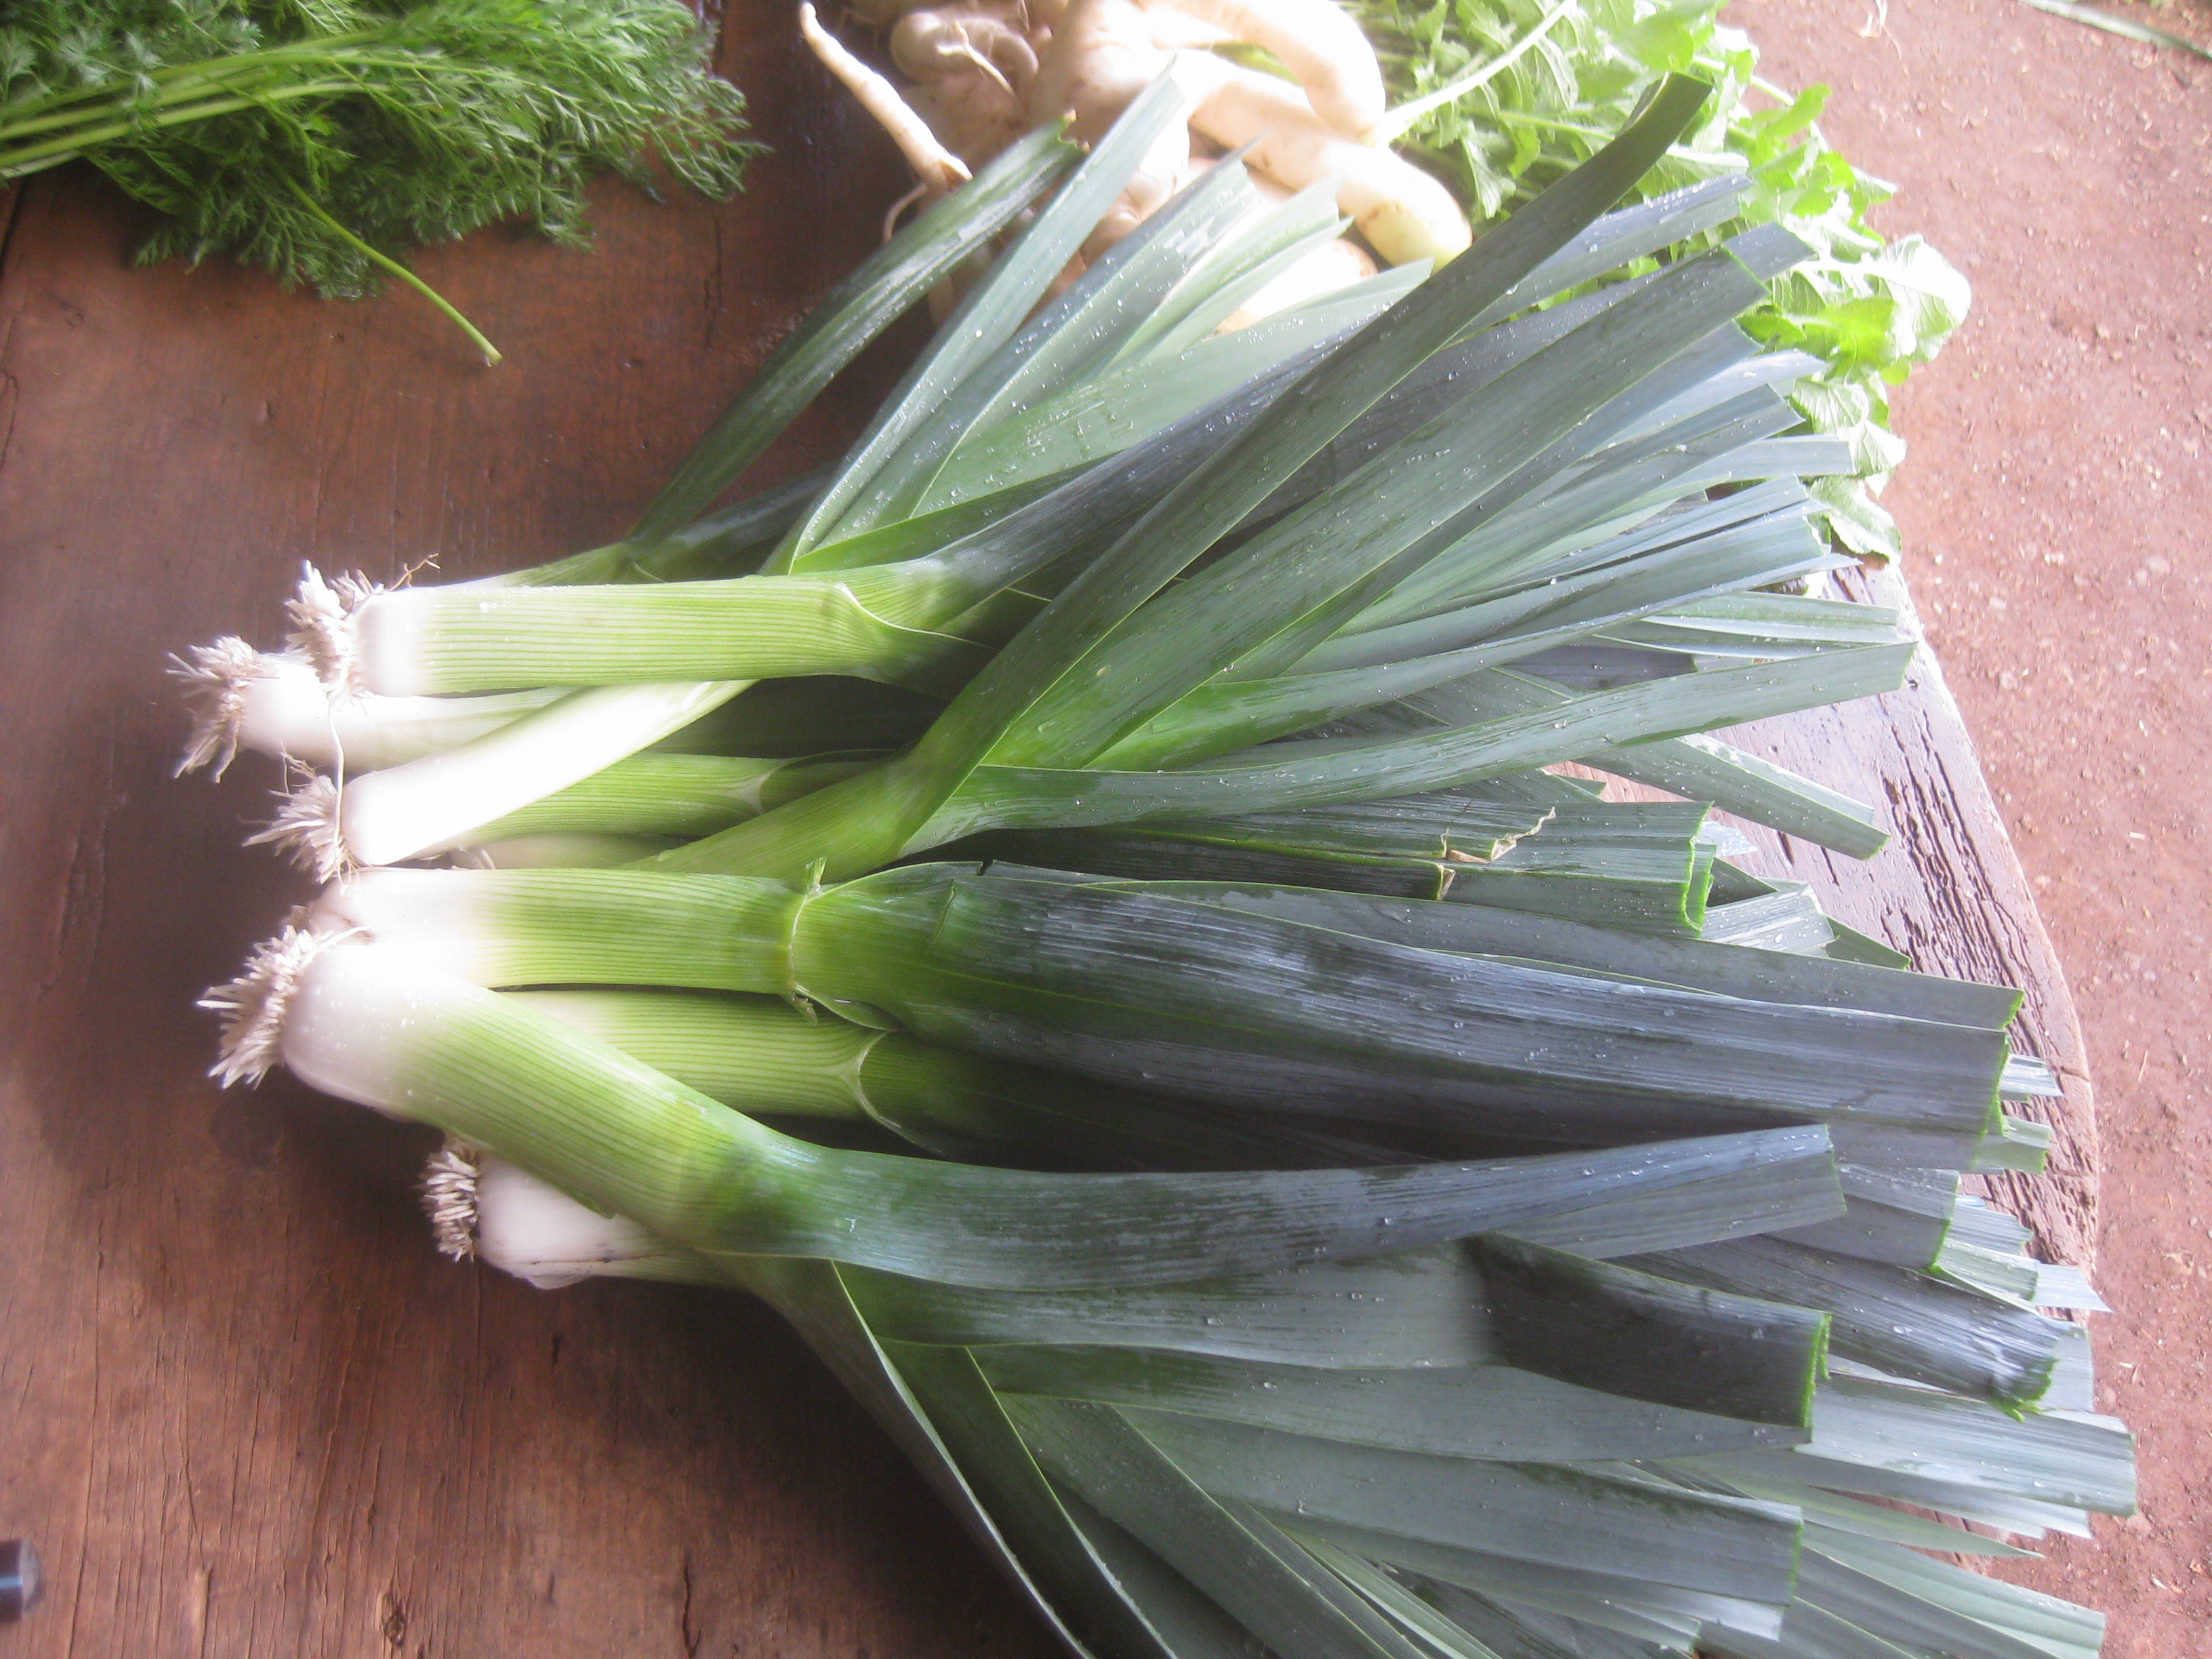
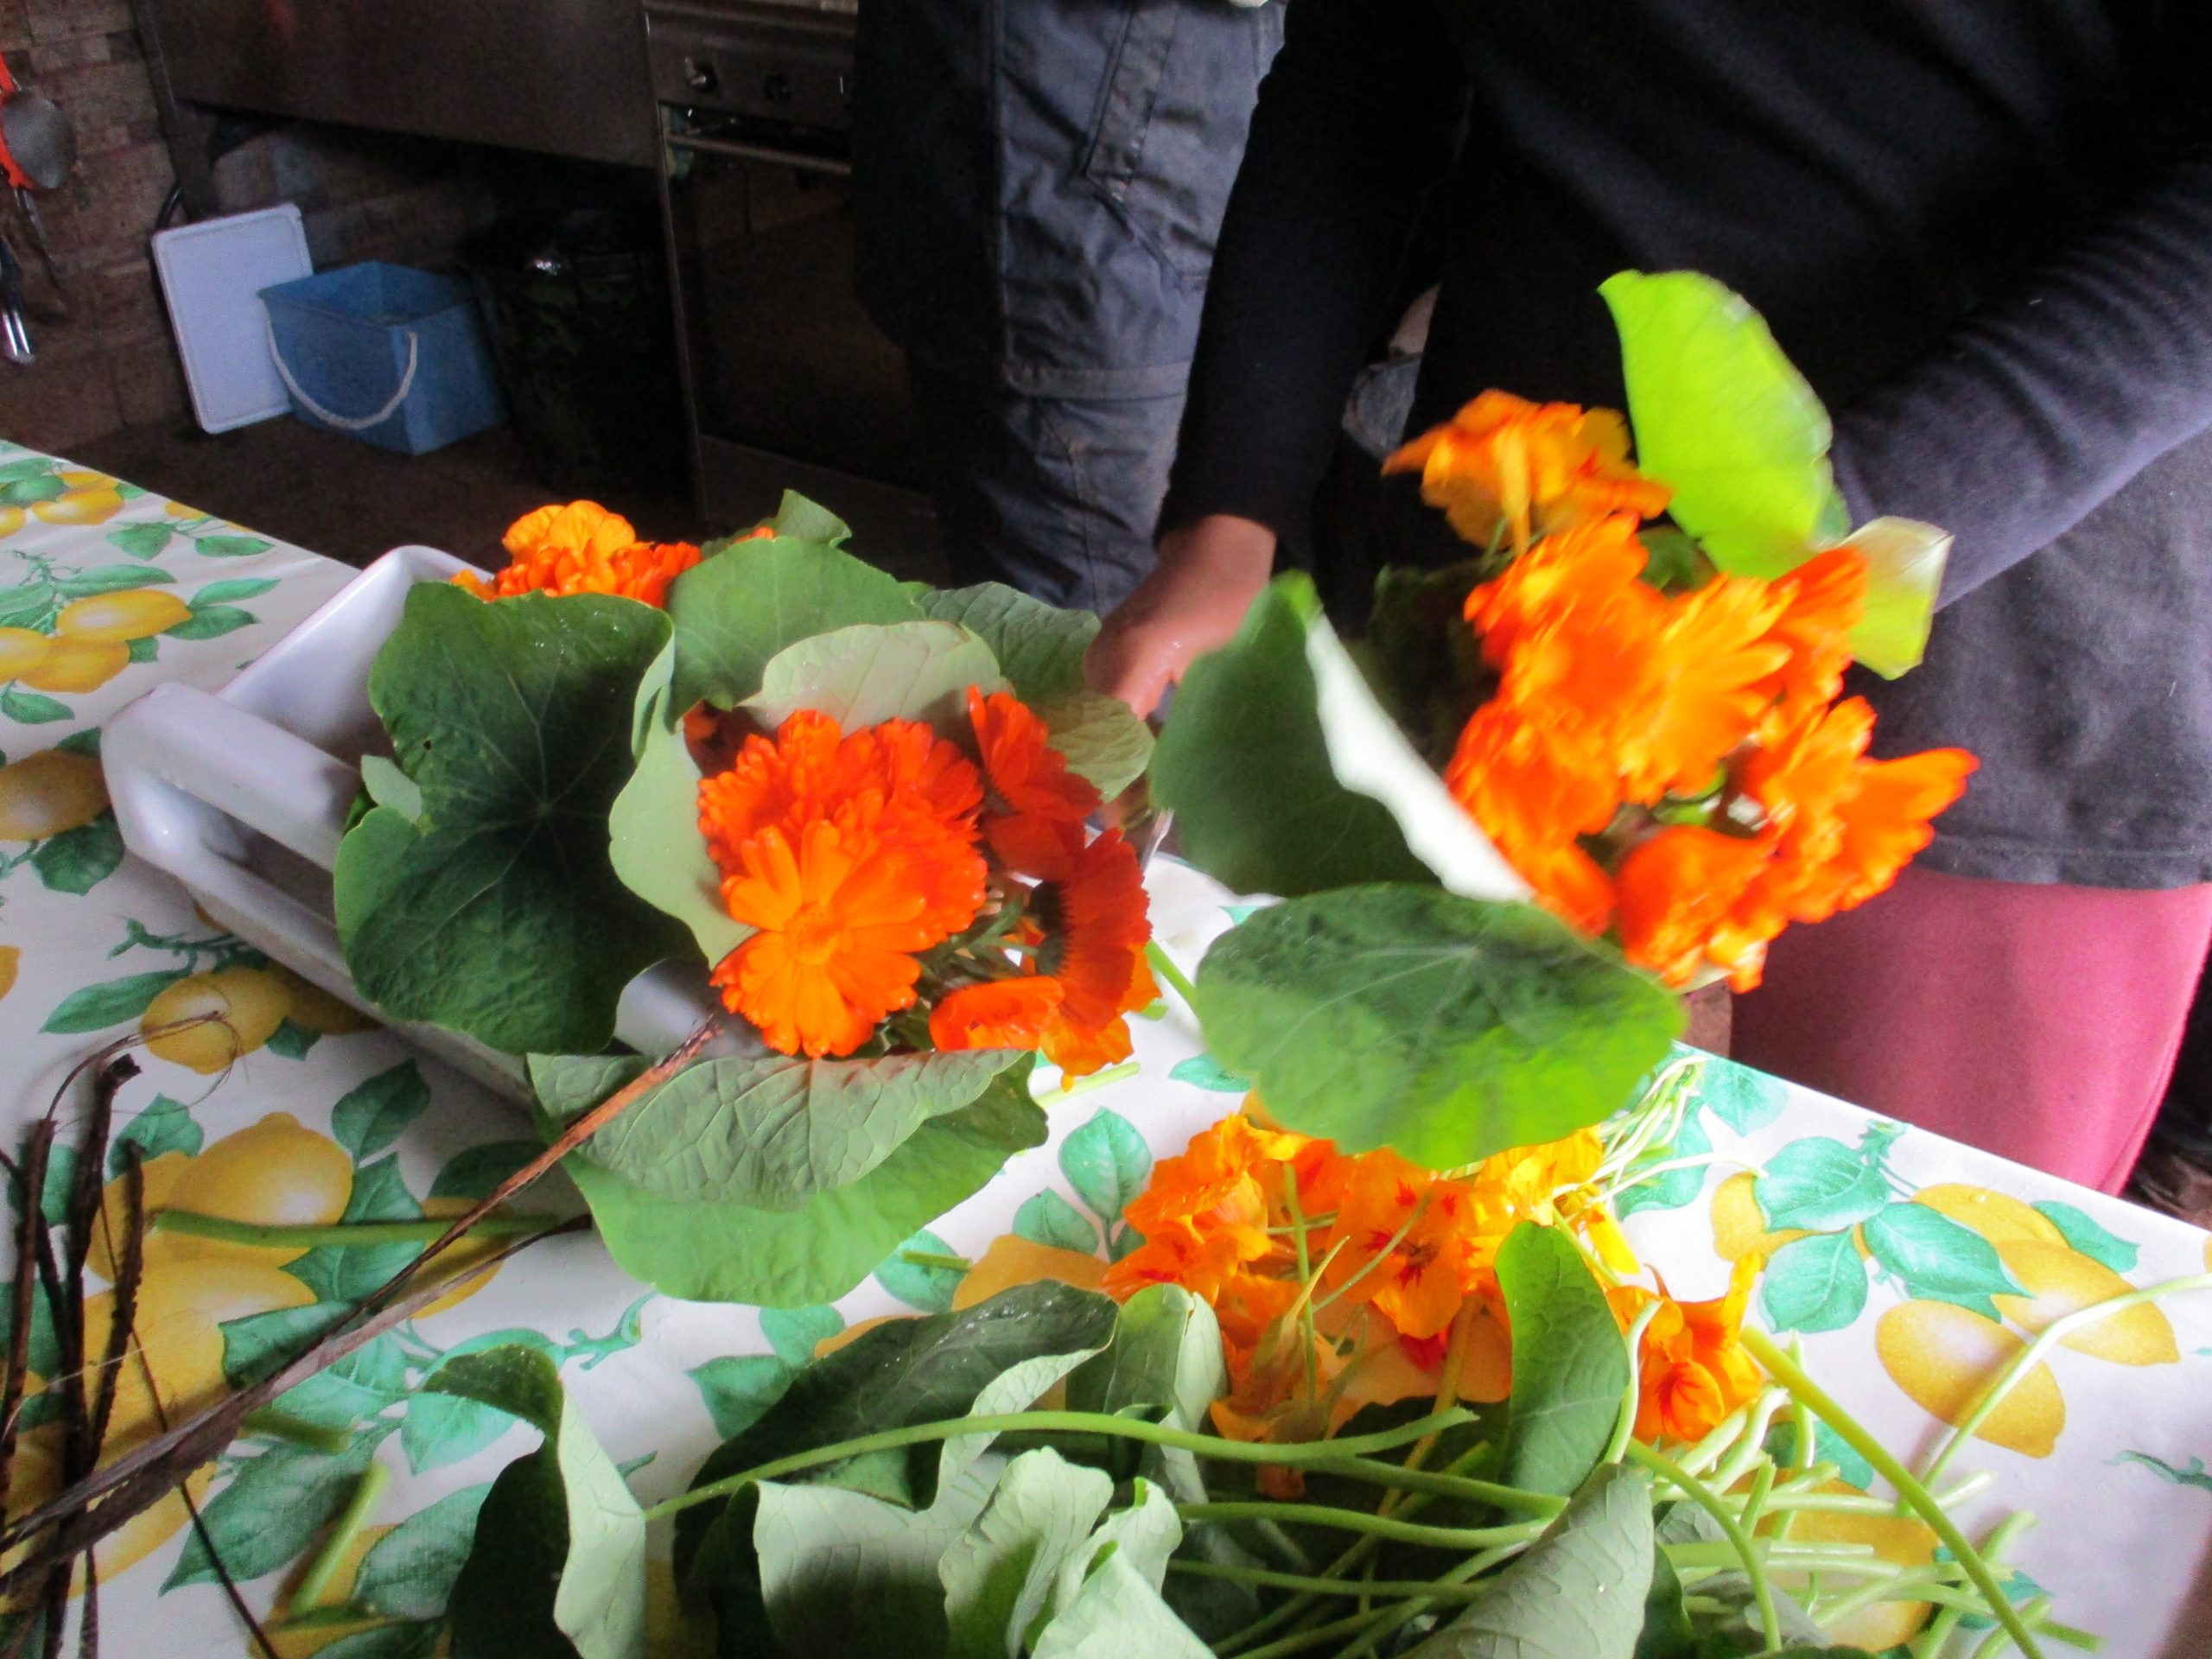
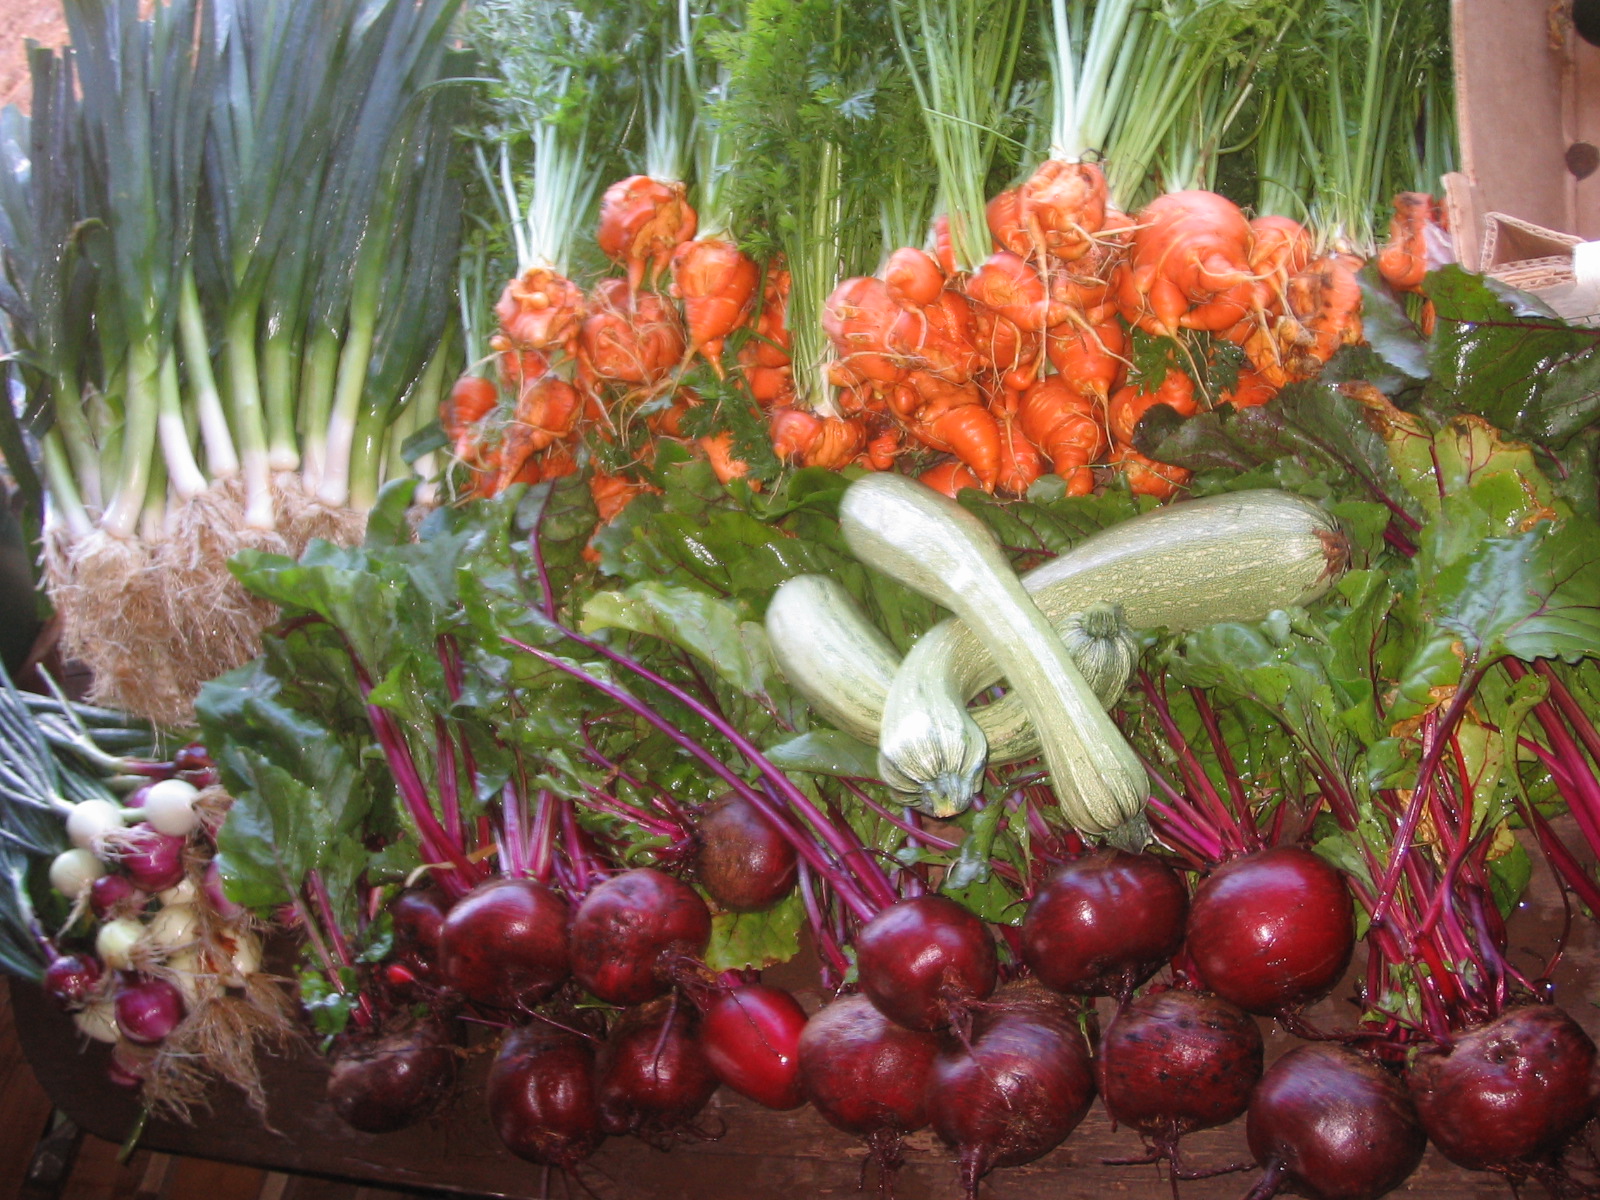
Figure VI.36.- Products at the vegetable market
We reserve one section of the market for the vegetables that require to be tied together in bundles, such as Swiss chards, parsley, coriander, edible and aromatic flowers… We tie the bundles with some kind of resistant plant fiber typical of the area that we have planted in our permacultural garden (Figure VI.37). By doing so, we avoid using plastic strings.
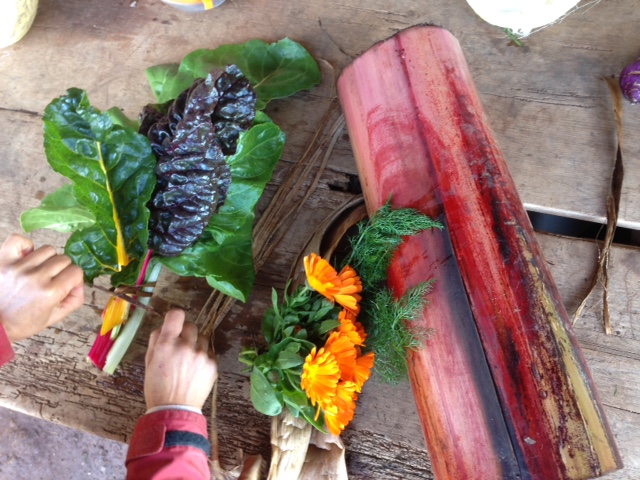
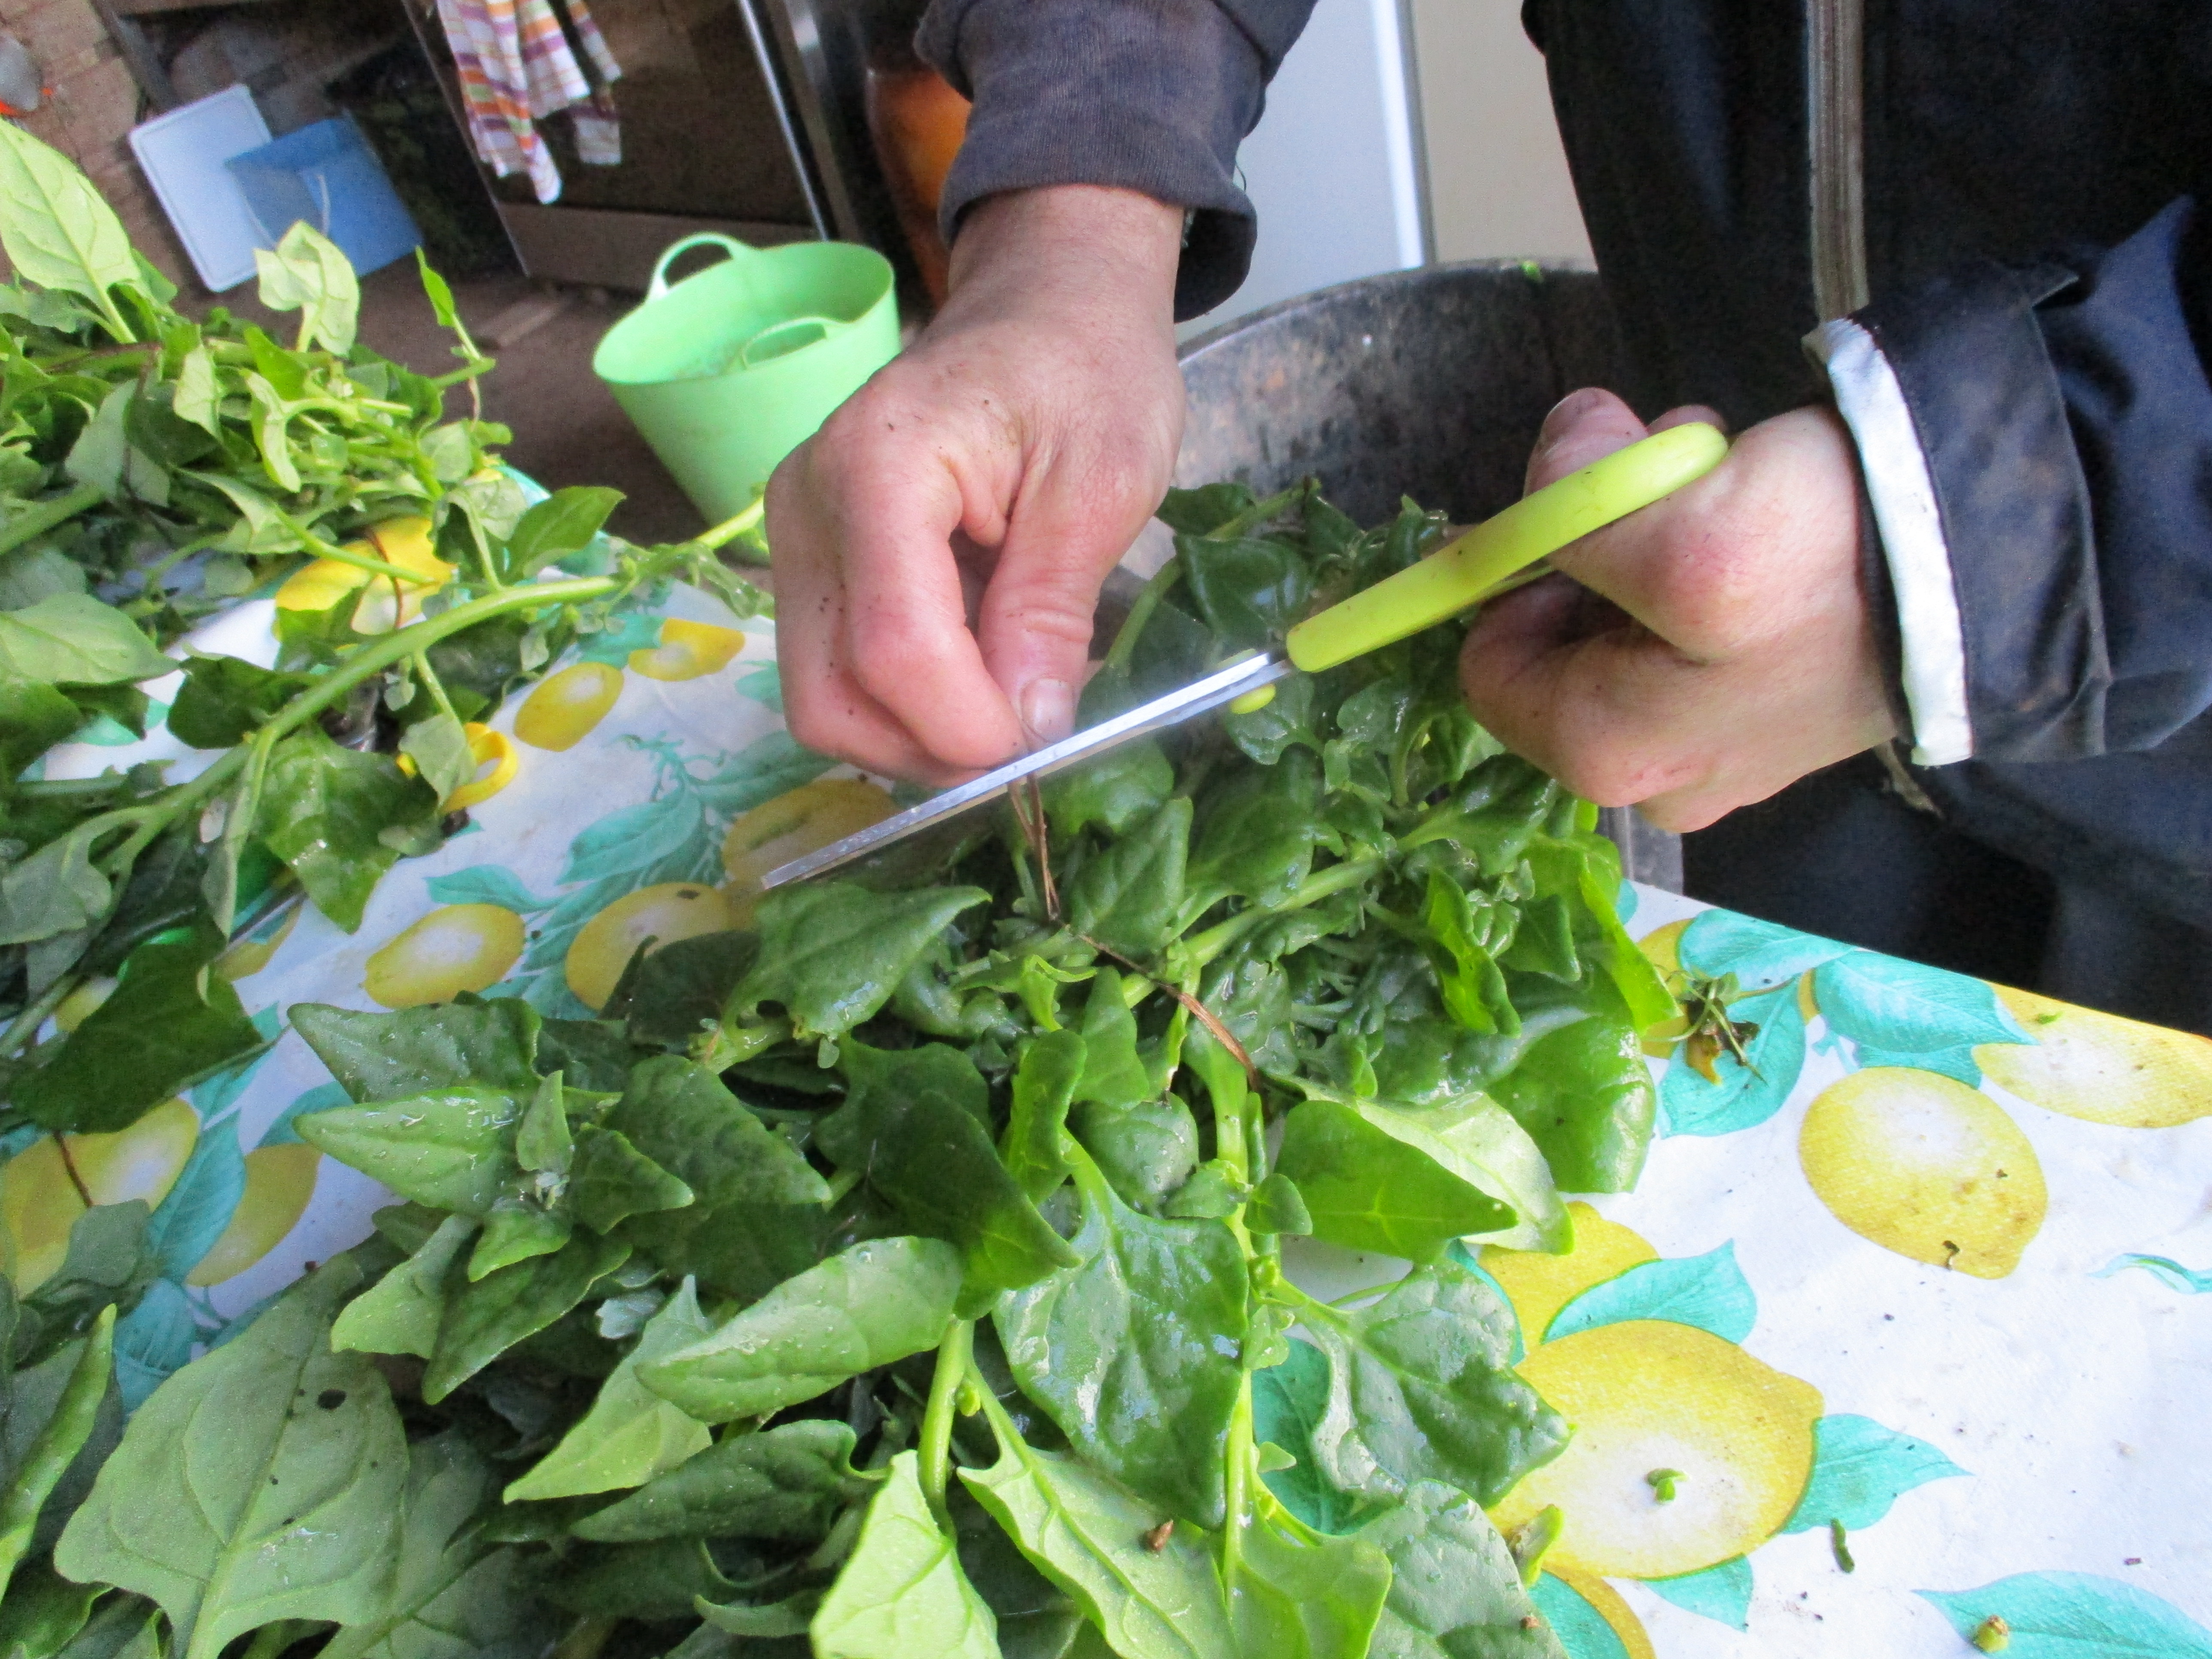
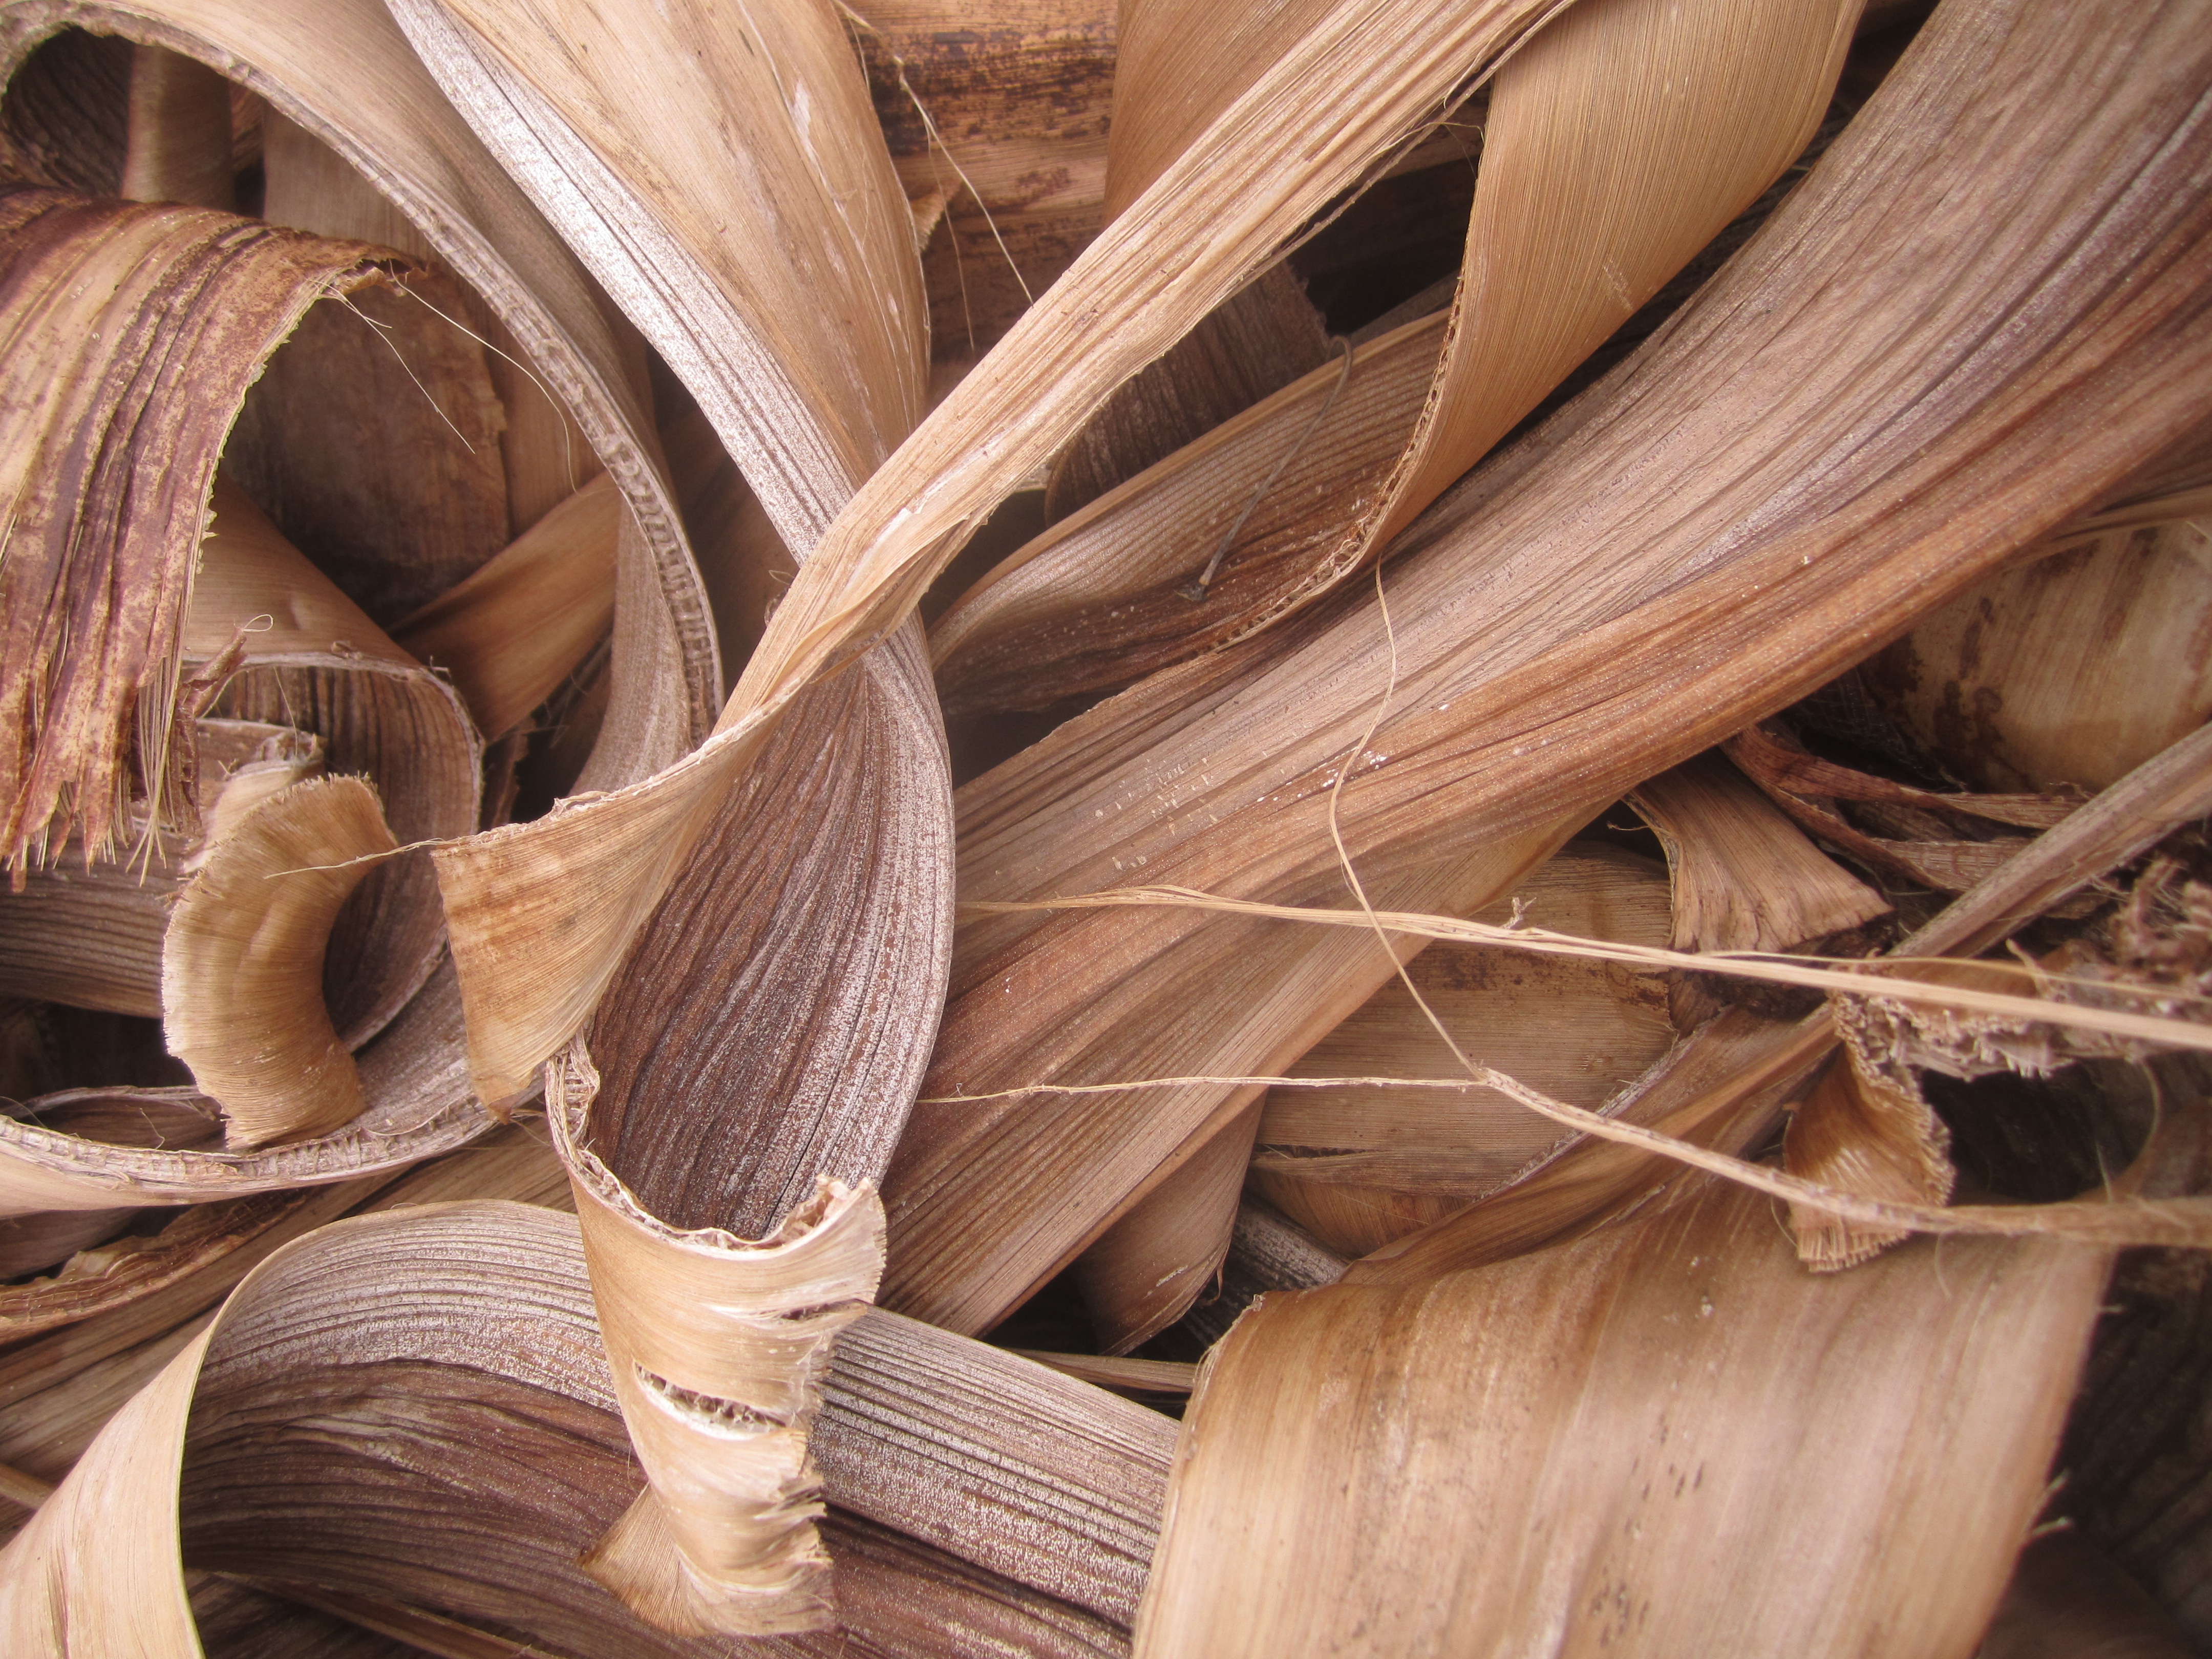
Figure VI.37.- Making bundles with banana fiber
Another section of the market is used for the vegetables of which roots and leaves need to be cleaned with water, such as red beetroots, leeks, radishes, carrots, lettuces, etc. We only remove the outer leaves of these vegetables that due to their aspect are not appropriate to sell. We only keep the young leaves since they keep the vegetable fresh for a longer period of time and because they also contain a significant nutritional value (Figure VI.38). For instance, we can use the leaves of the carrot as if they were parsley.
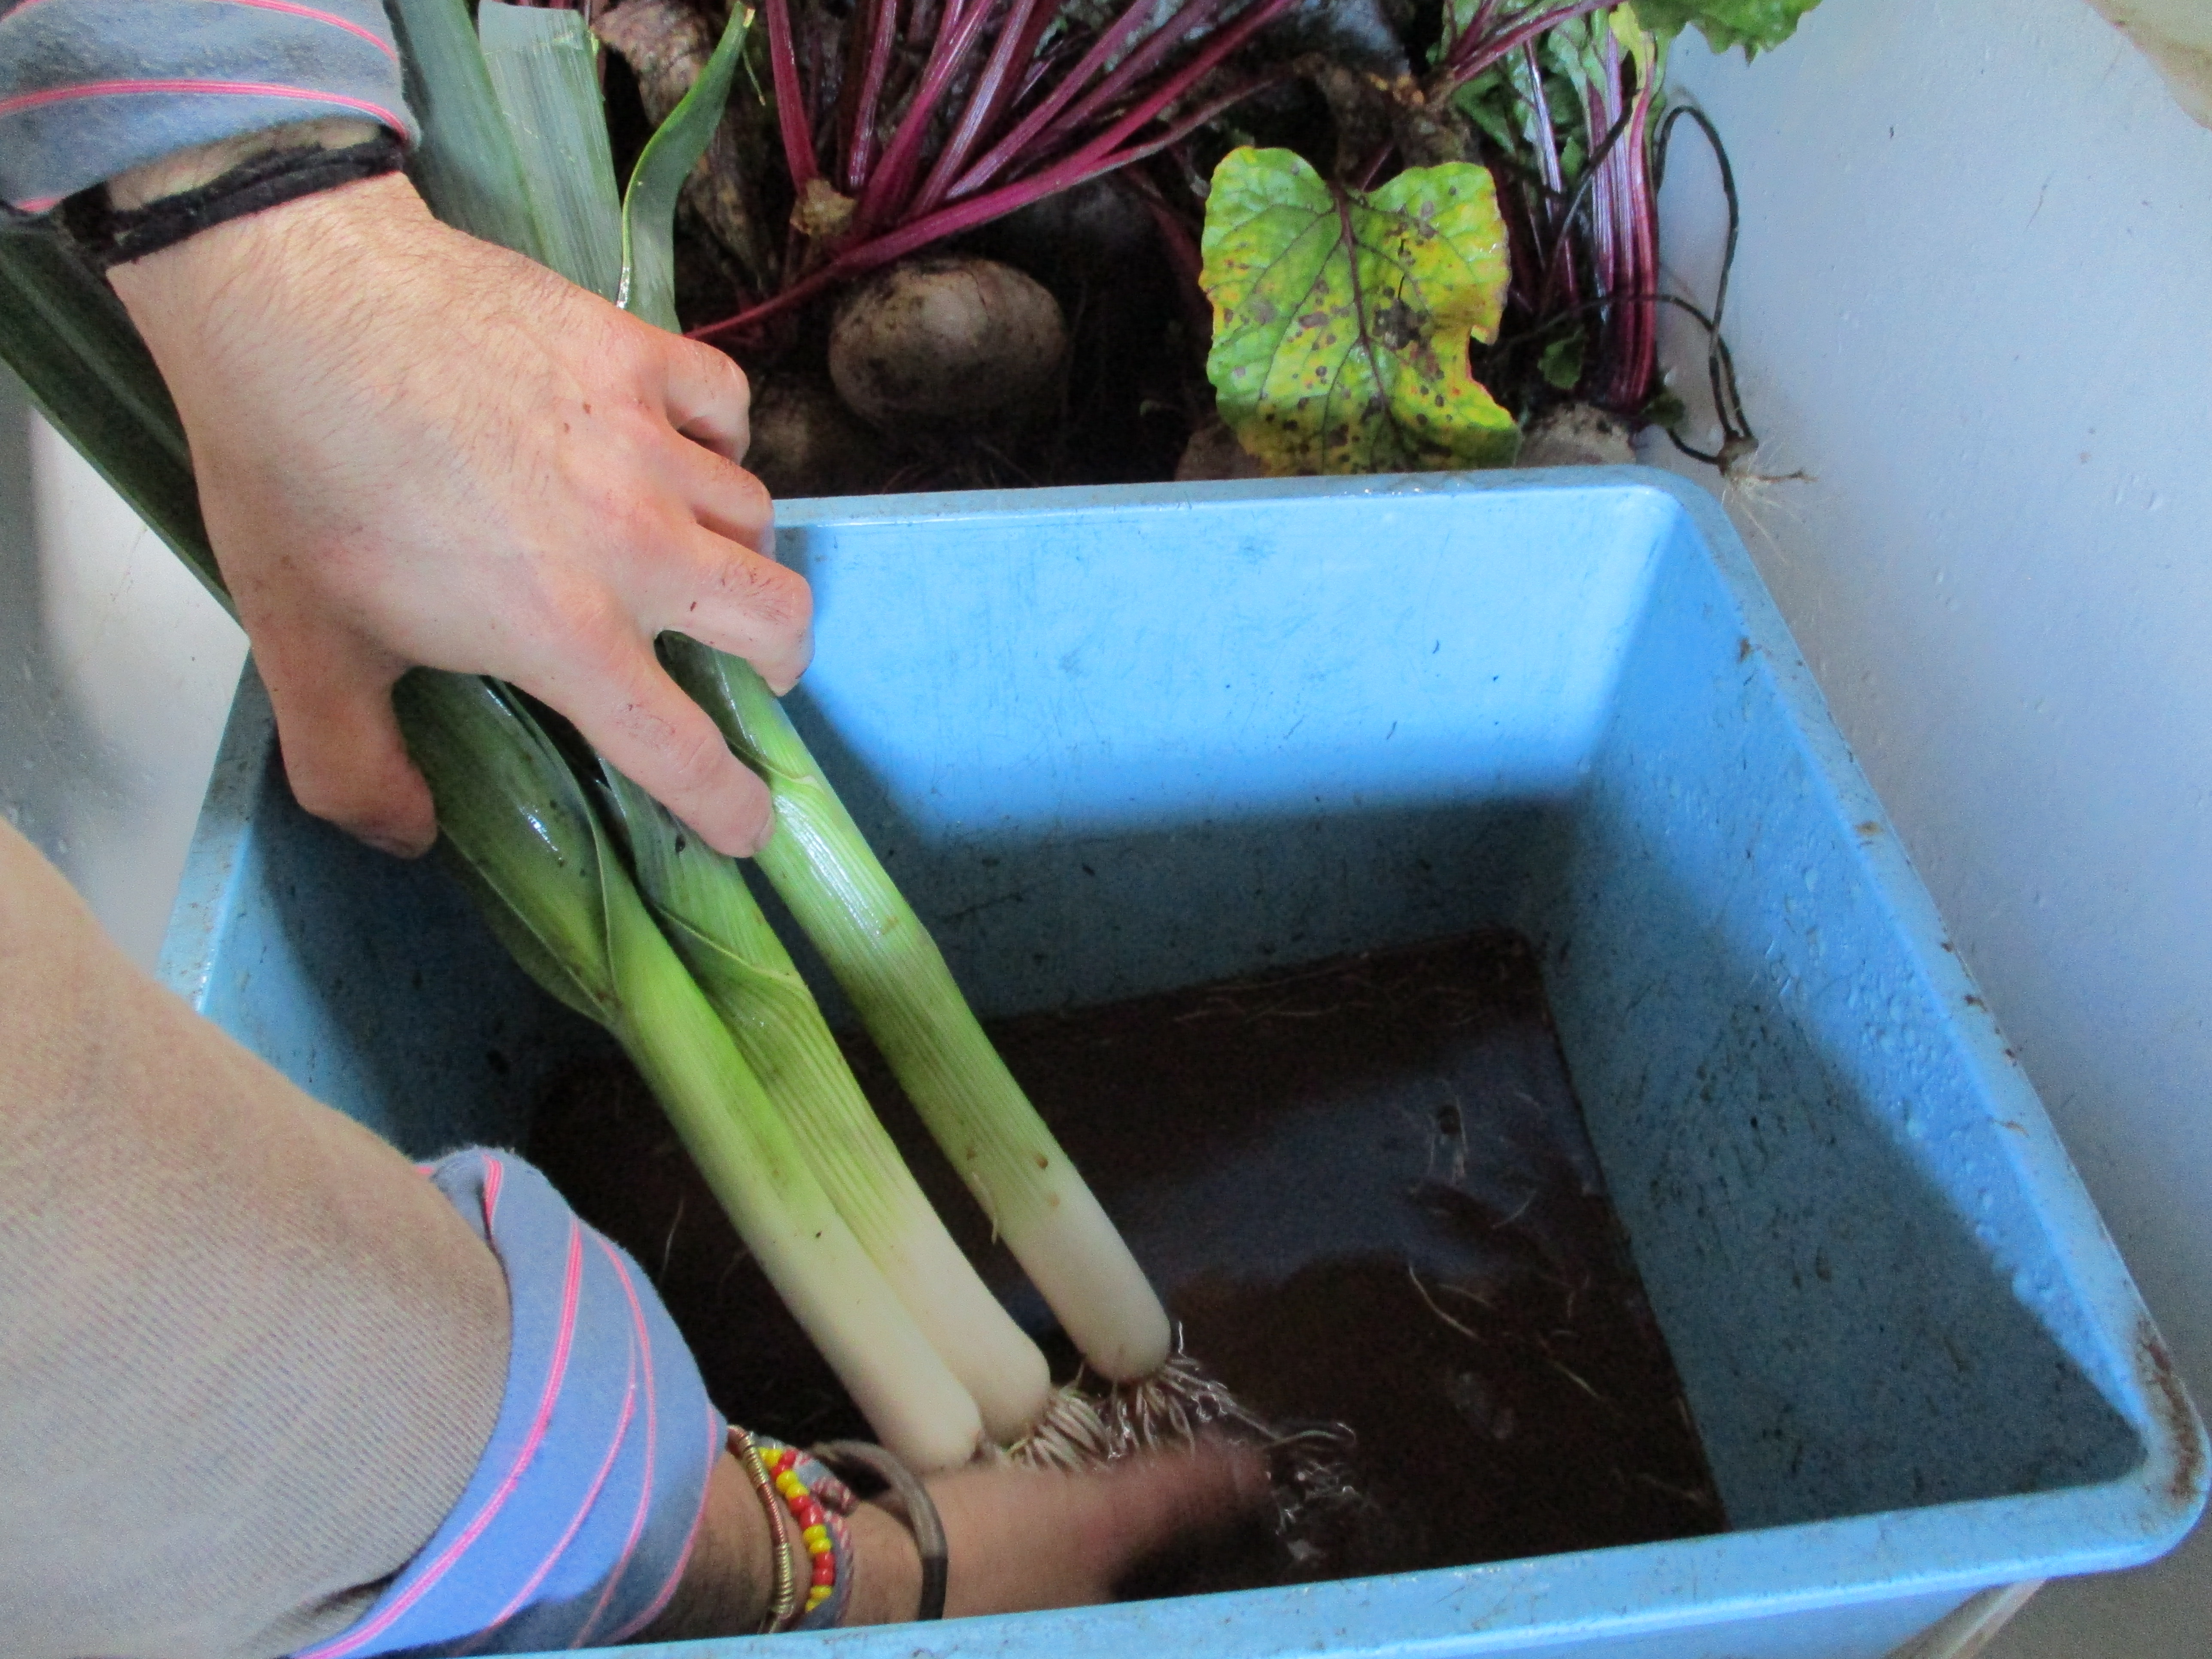
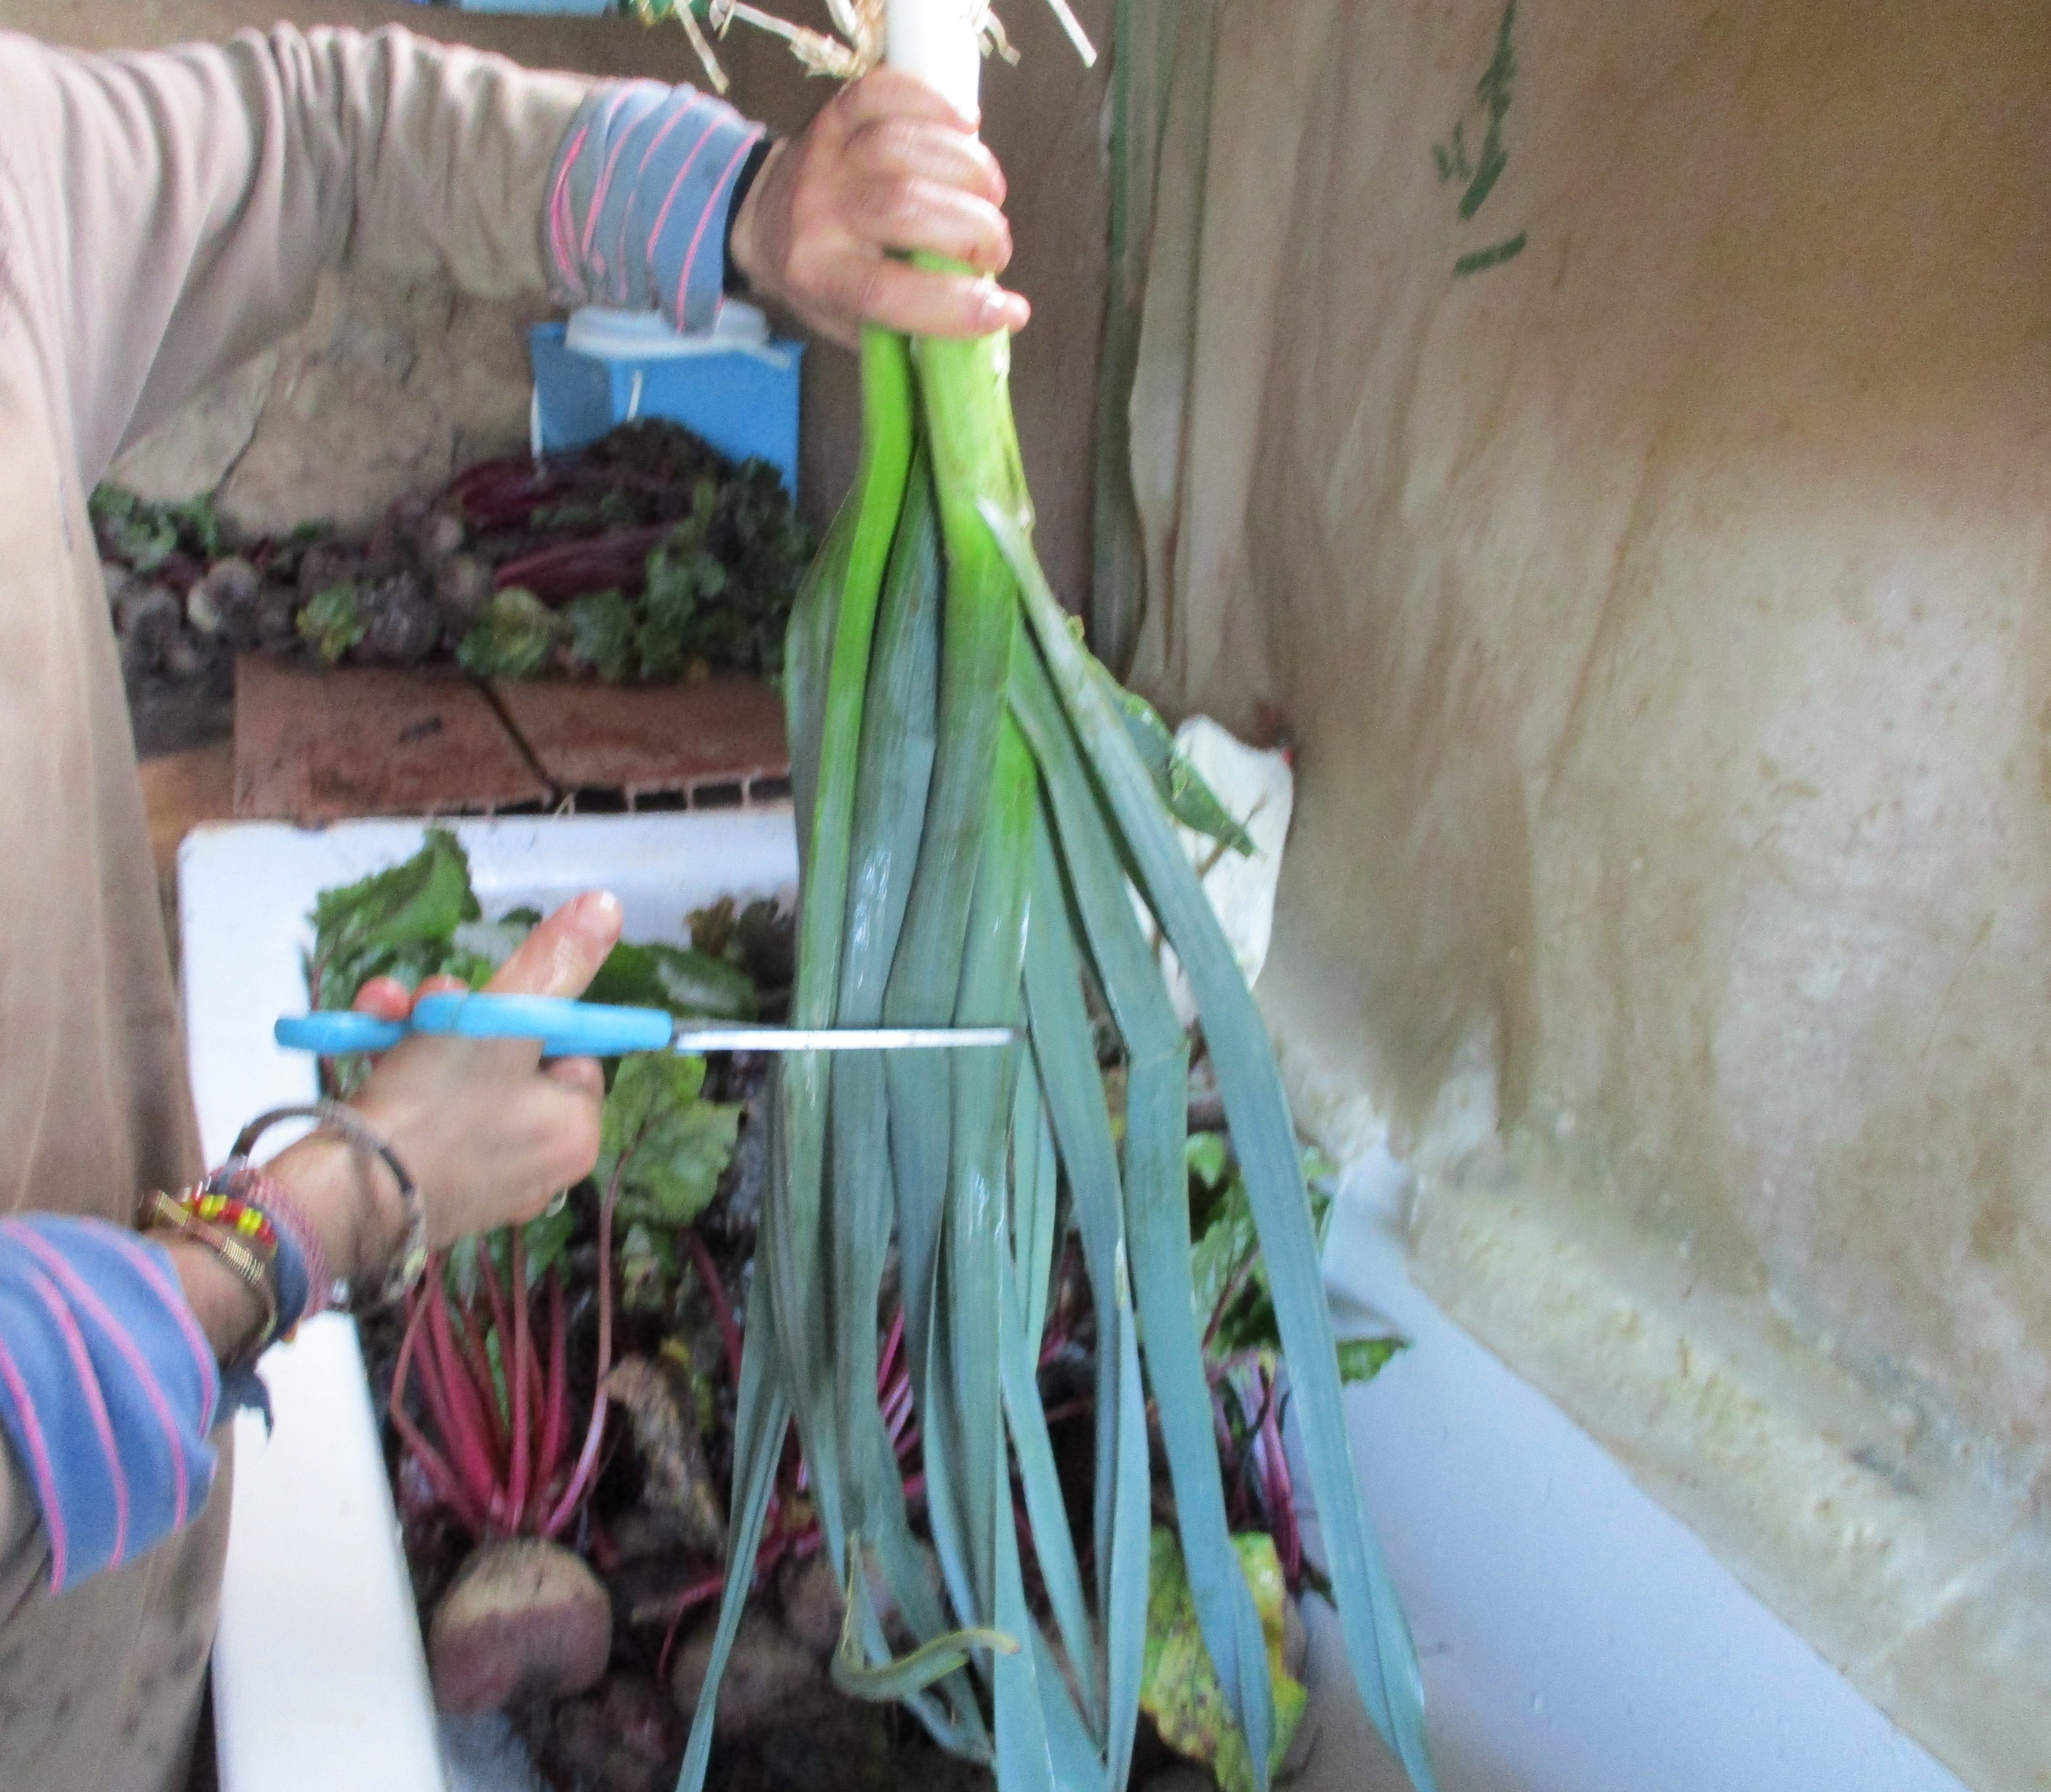

Figure VI.38.- Washing and cleaning different vegetables
A different therapeutic activity that is interesting for the students of the PERMIND course is the organization, in spring, of an exhibition of a variety of crops of our garden in different stages of growth. A growth made possible thanks to the students. This exhibition can be organized in the greenhouse or another place that is suitable.
For the exhibition, the users have to choose one of their favourite vegetables and observe the different stages of the plants they have chosen in order to present them artistically, and explain them by describing their stages in the correct order. This is a good exercise in order to work with the concept of cycle (Figure VI.39). For example, if they choose the red beetroot, they exhibit the greenhouse-sized seedling, the plant with its grown root, the flowering plant, and finally, the plant with its seeds.
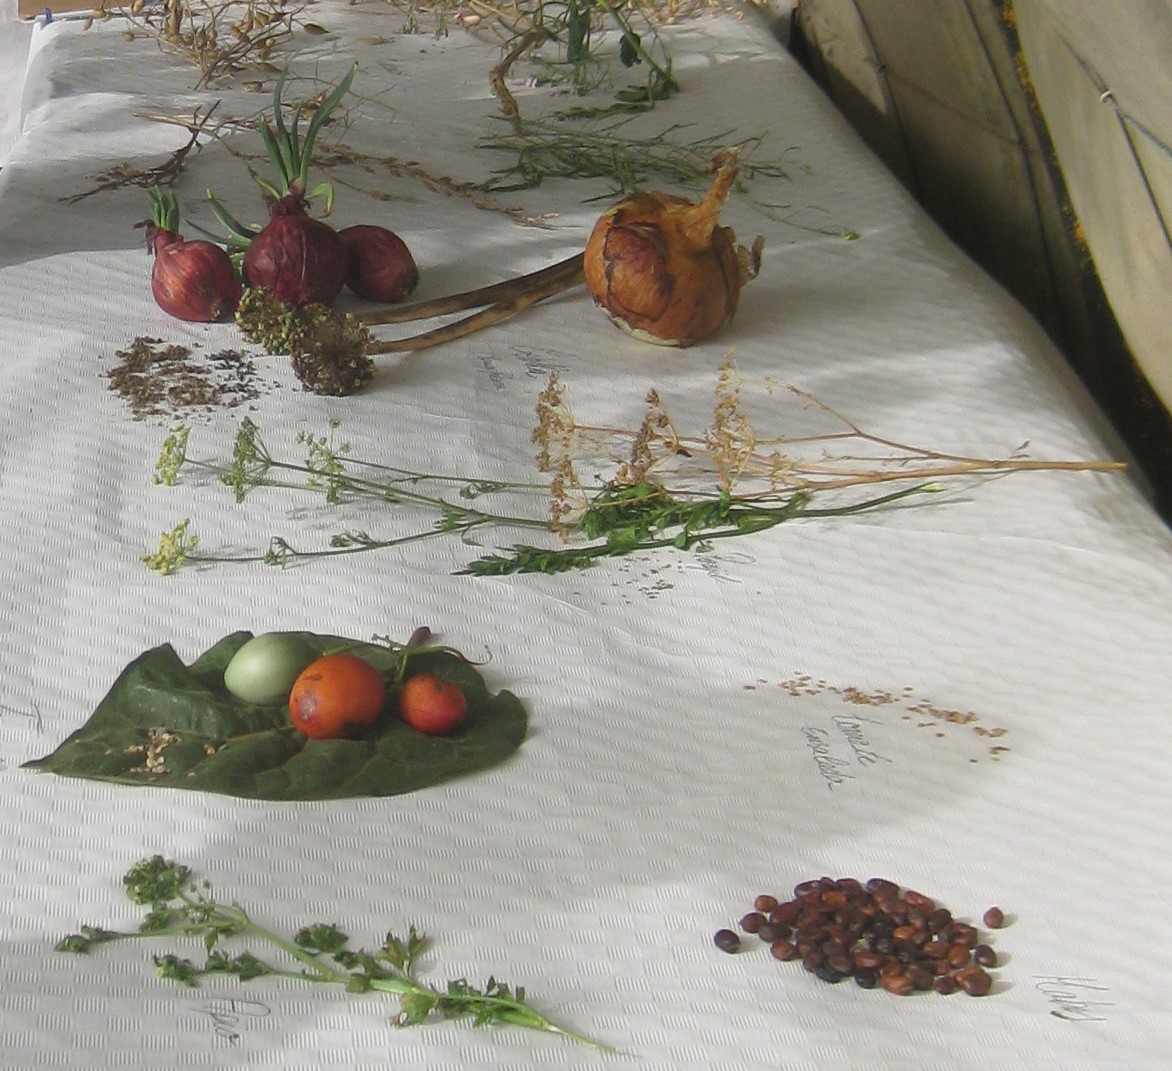
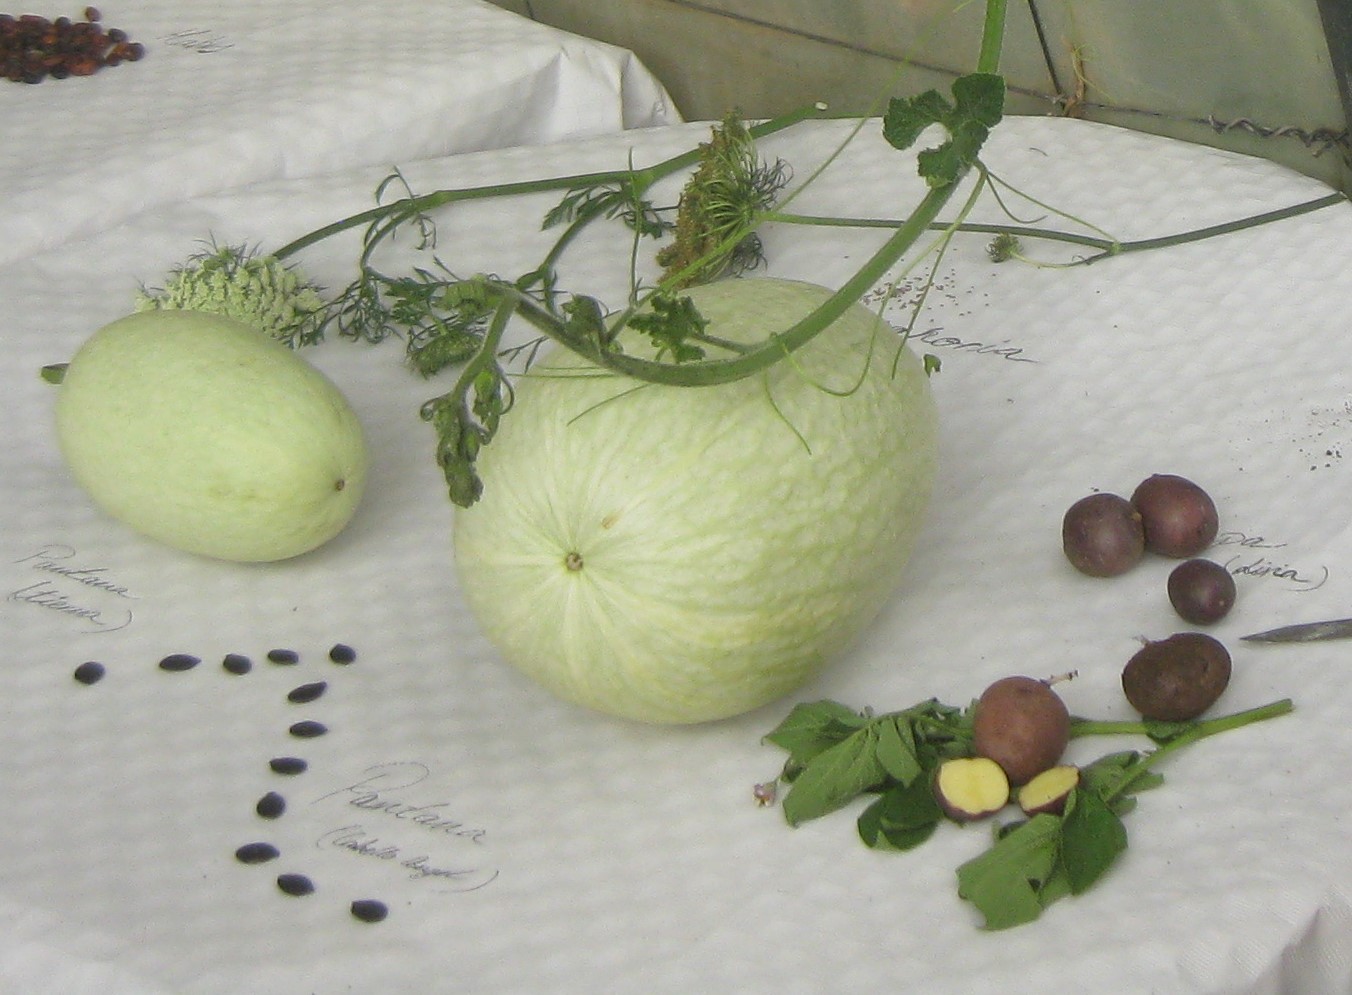
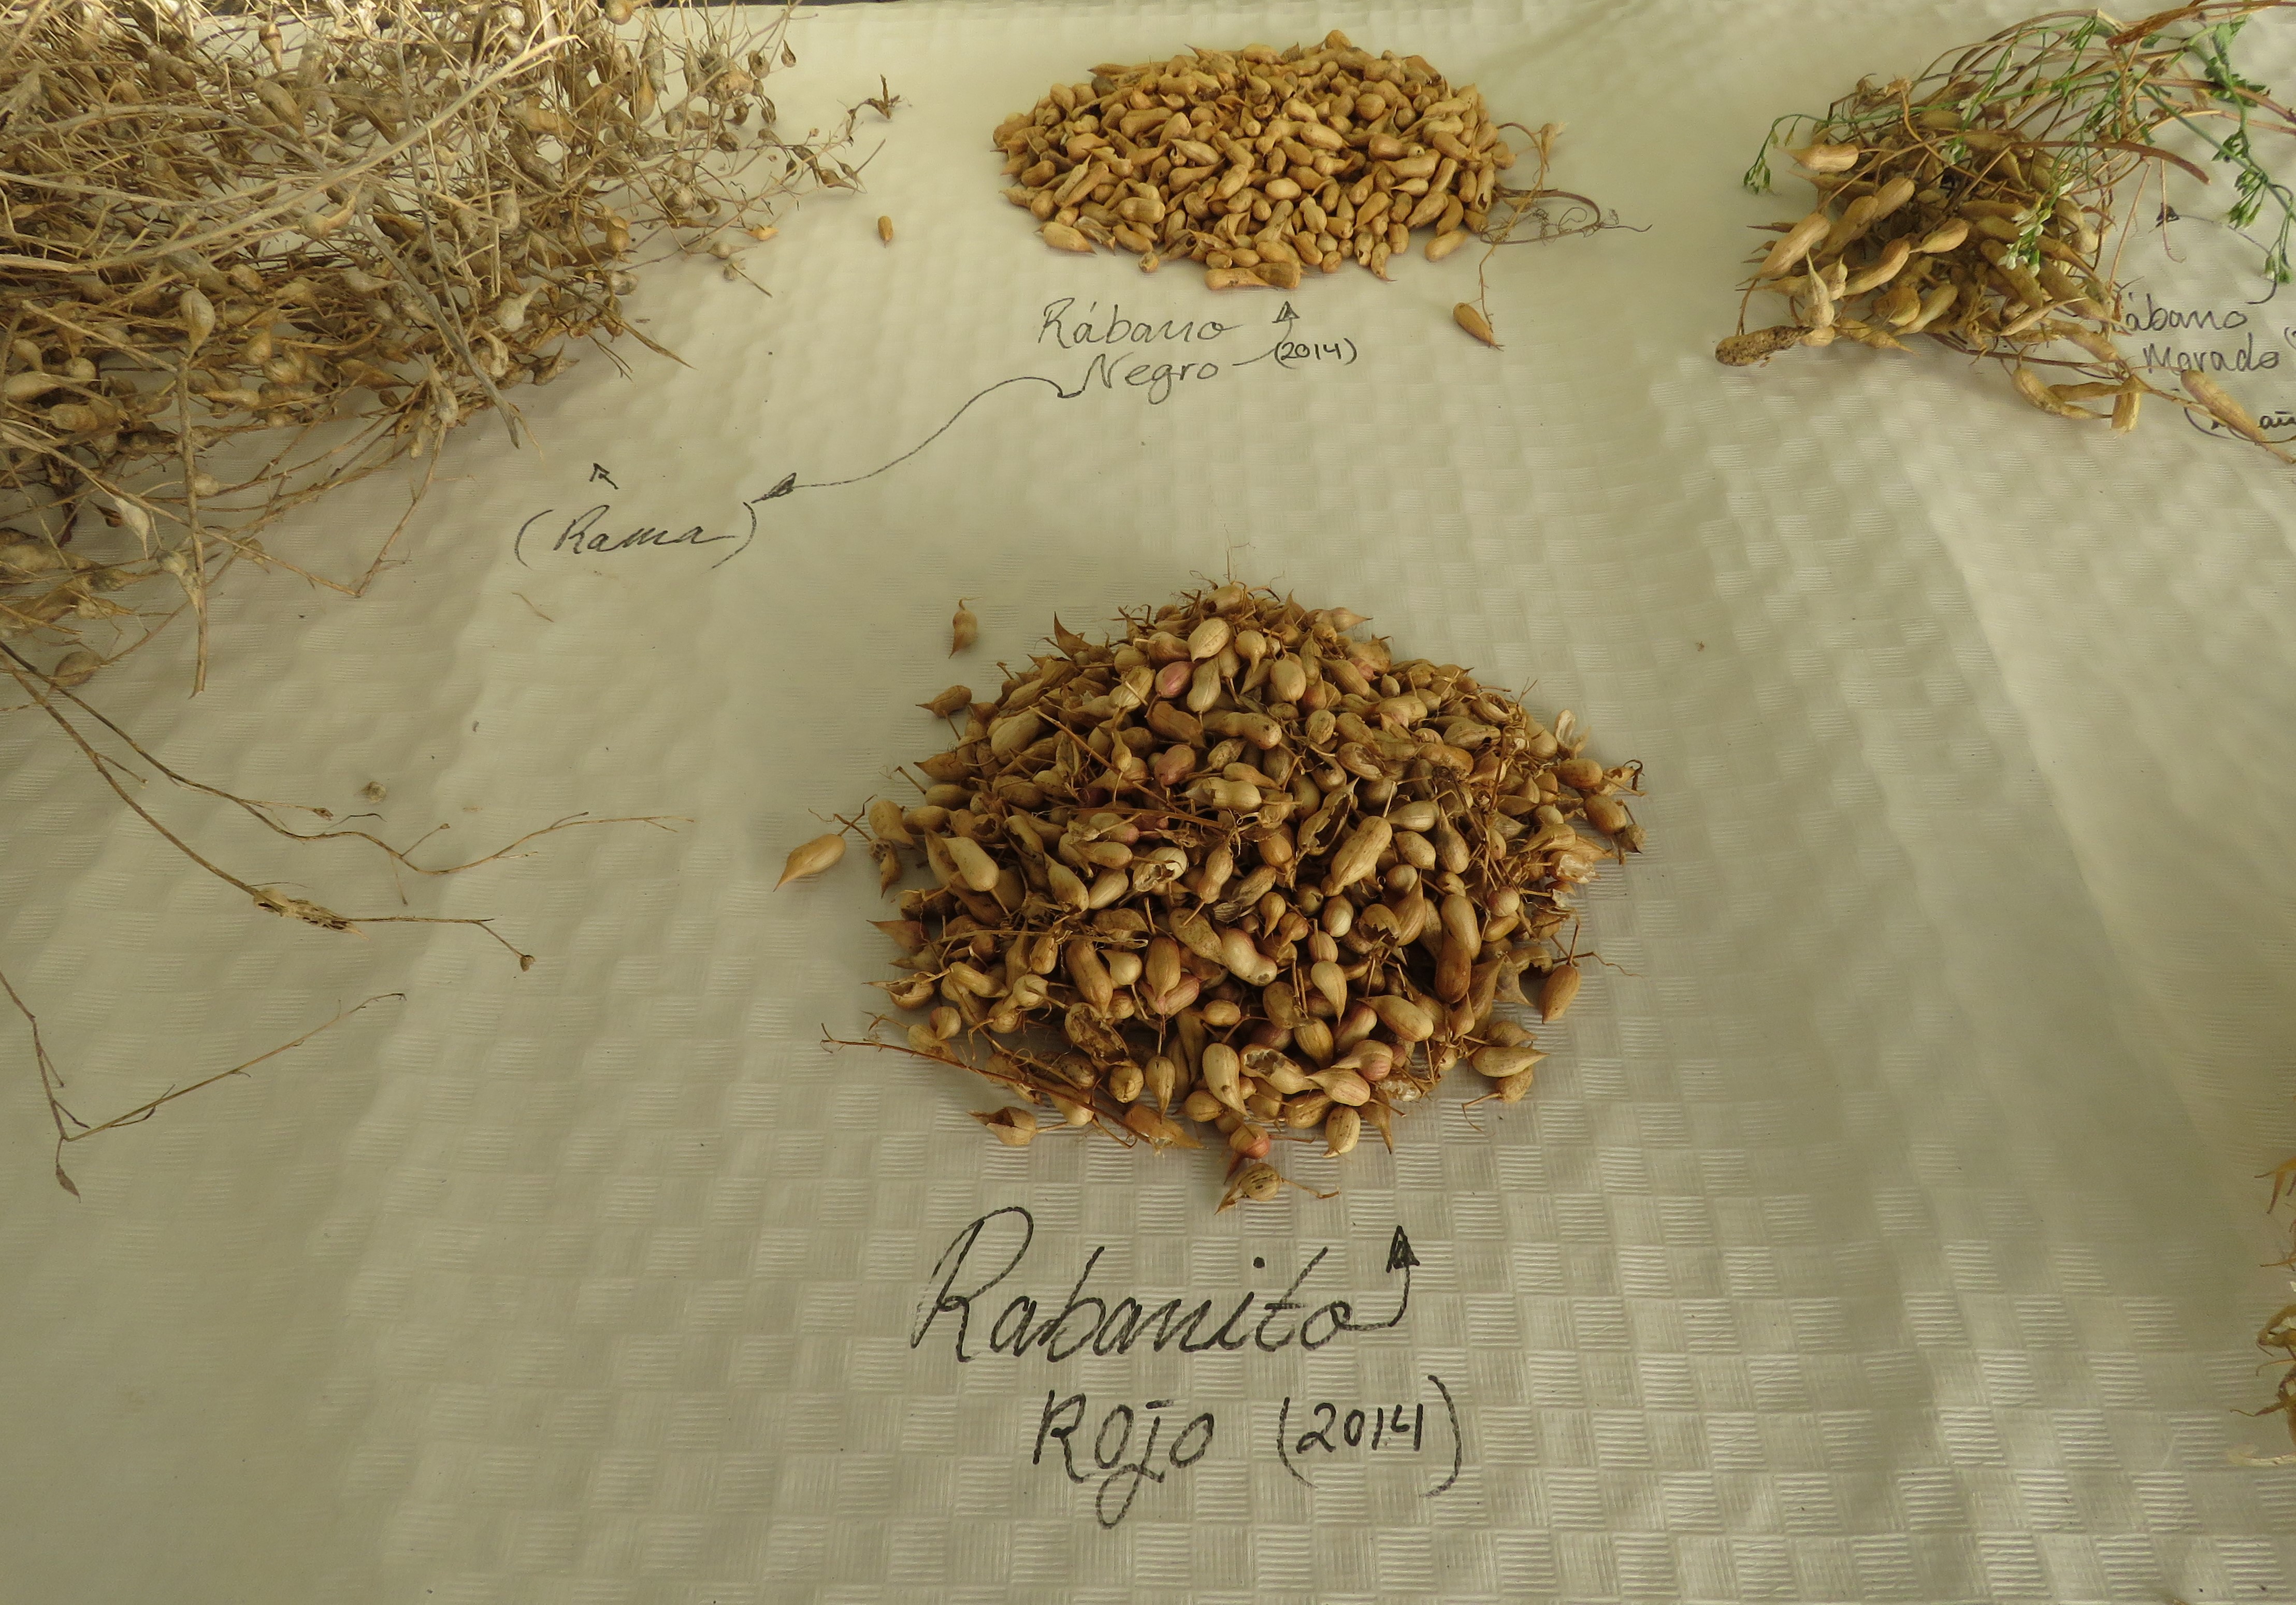
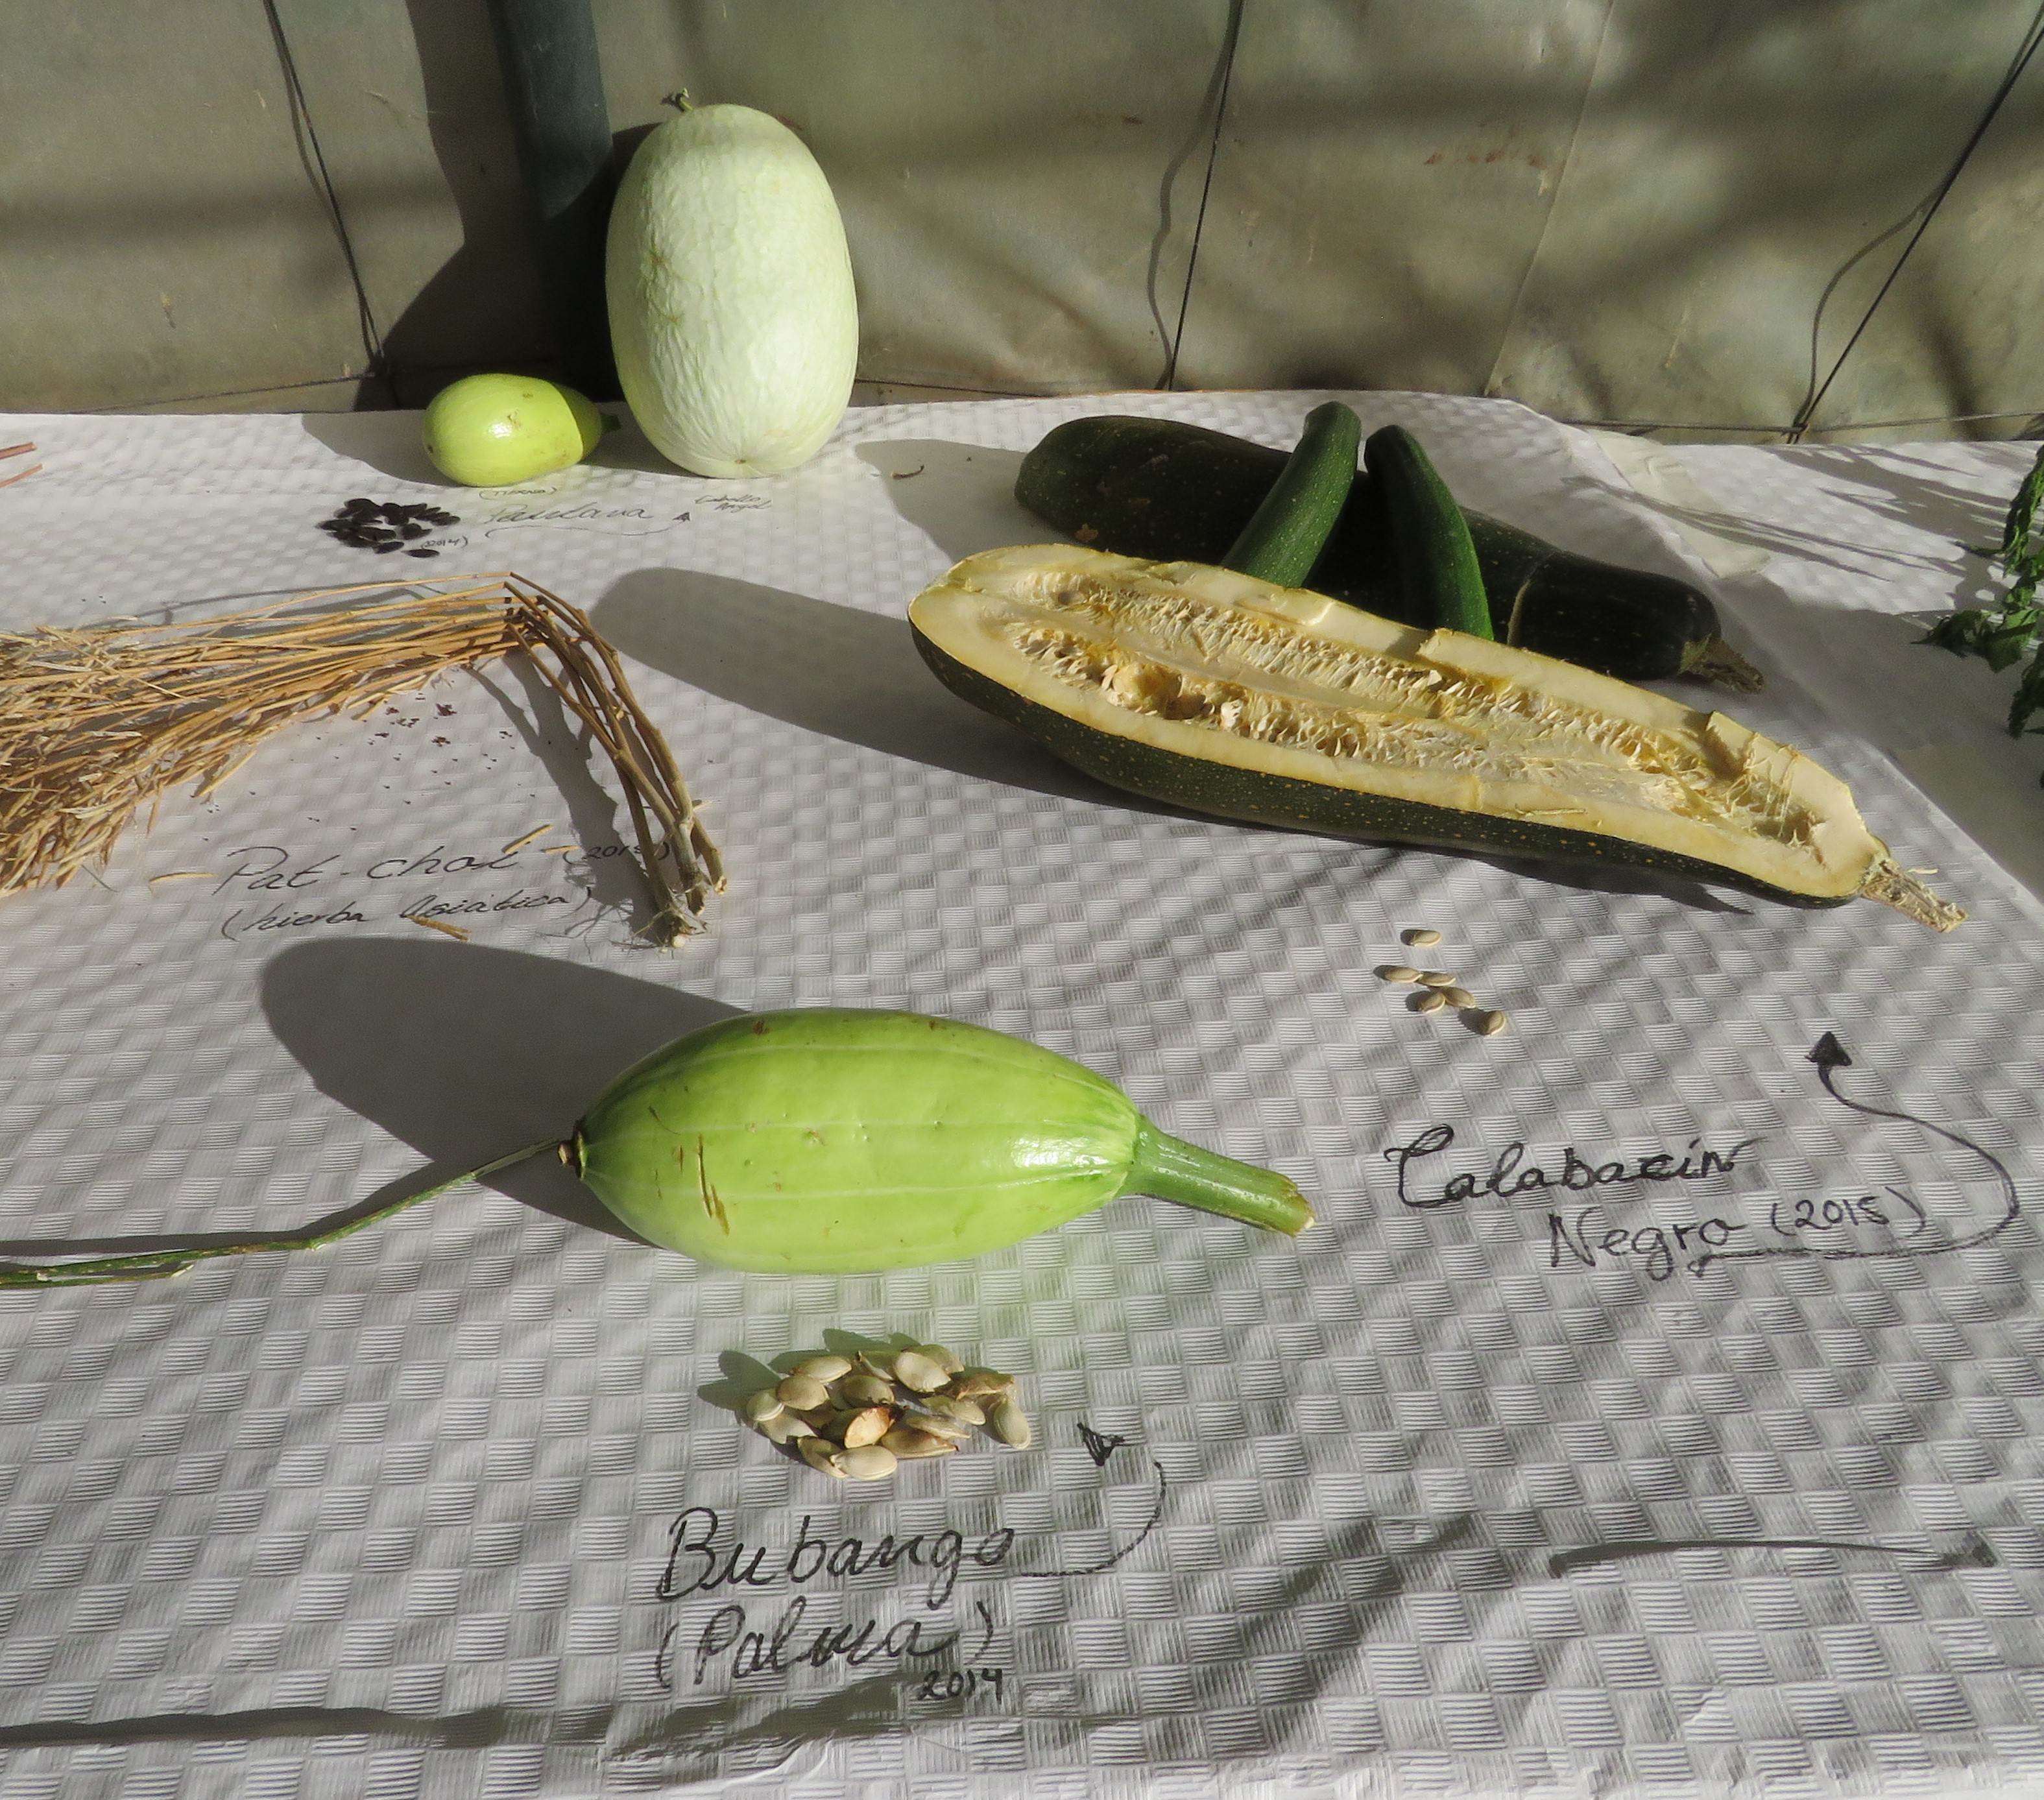
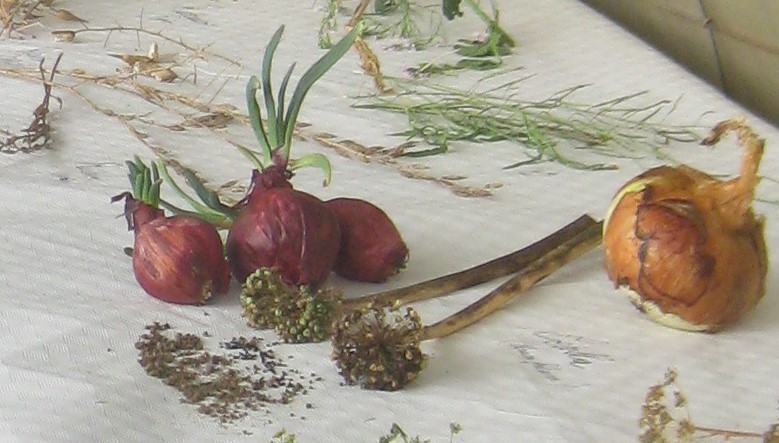
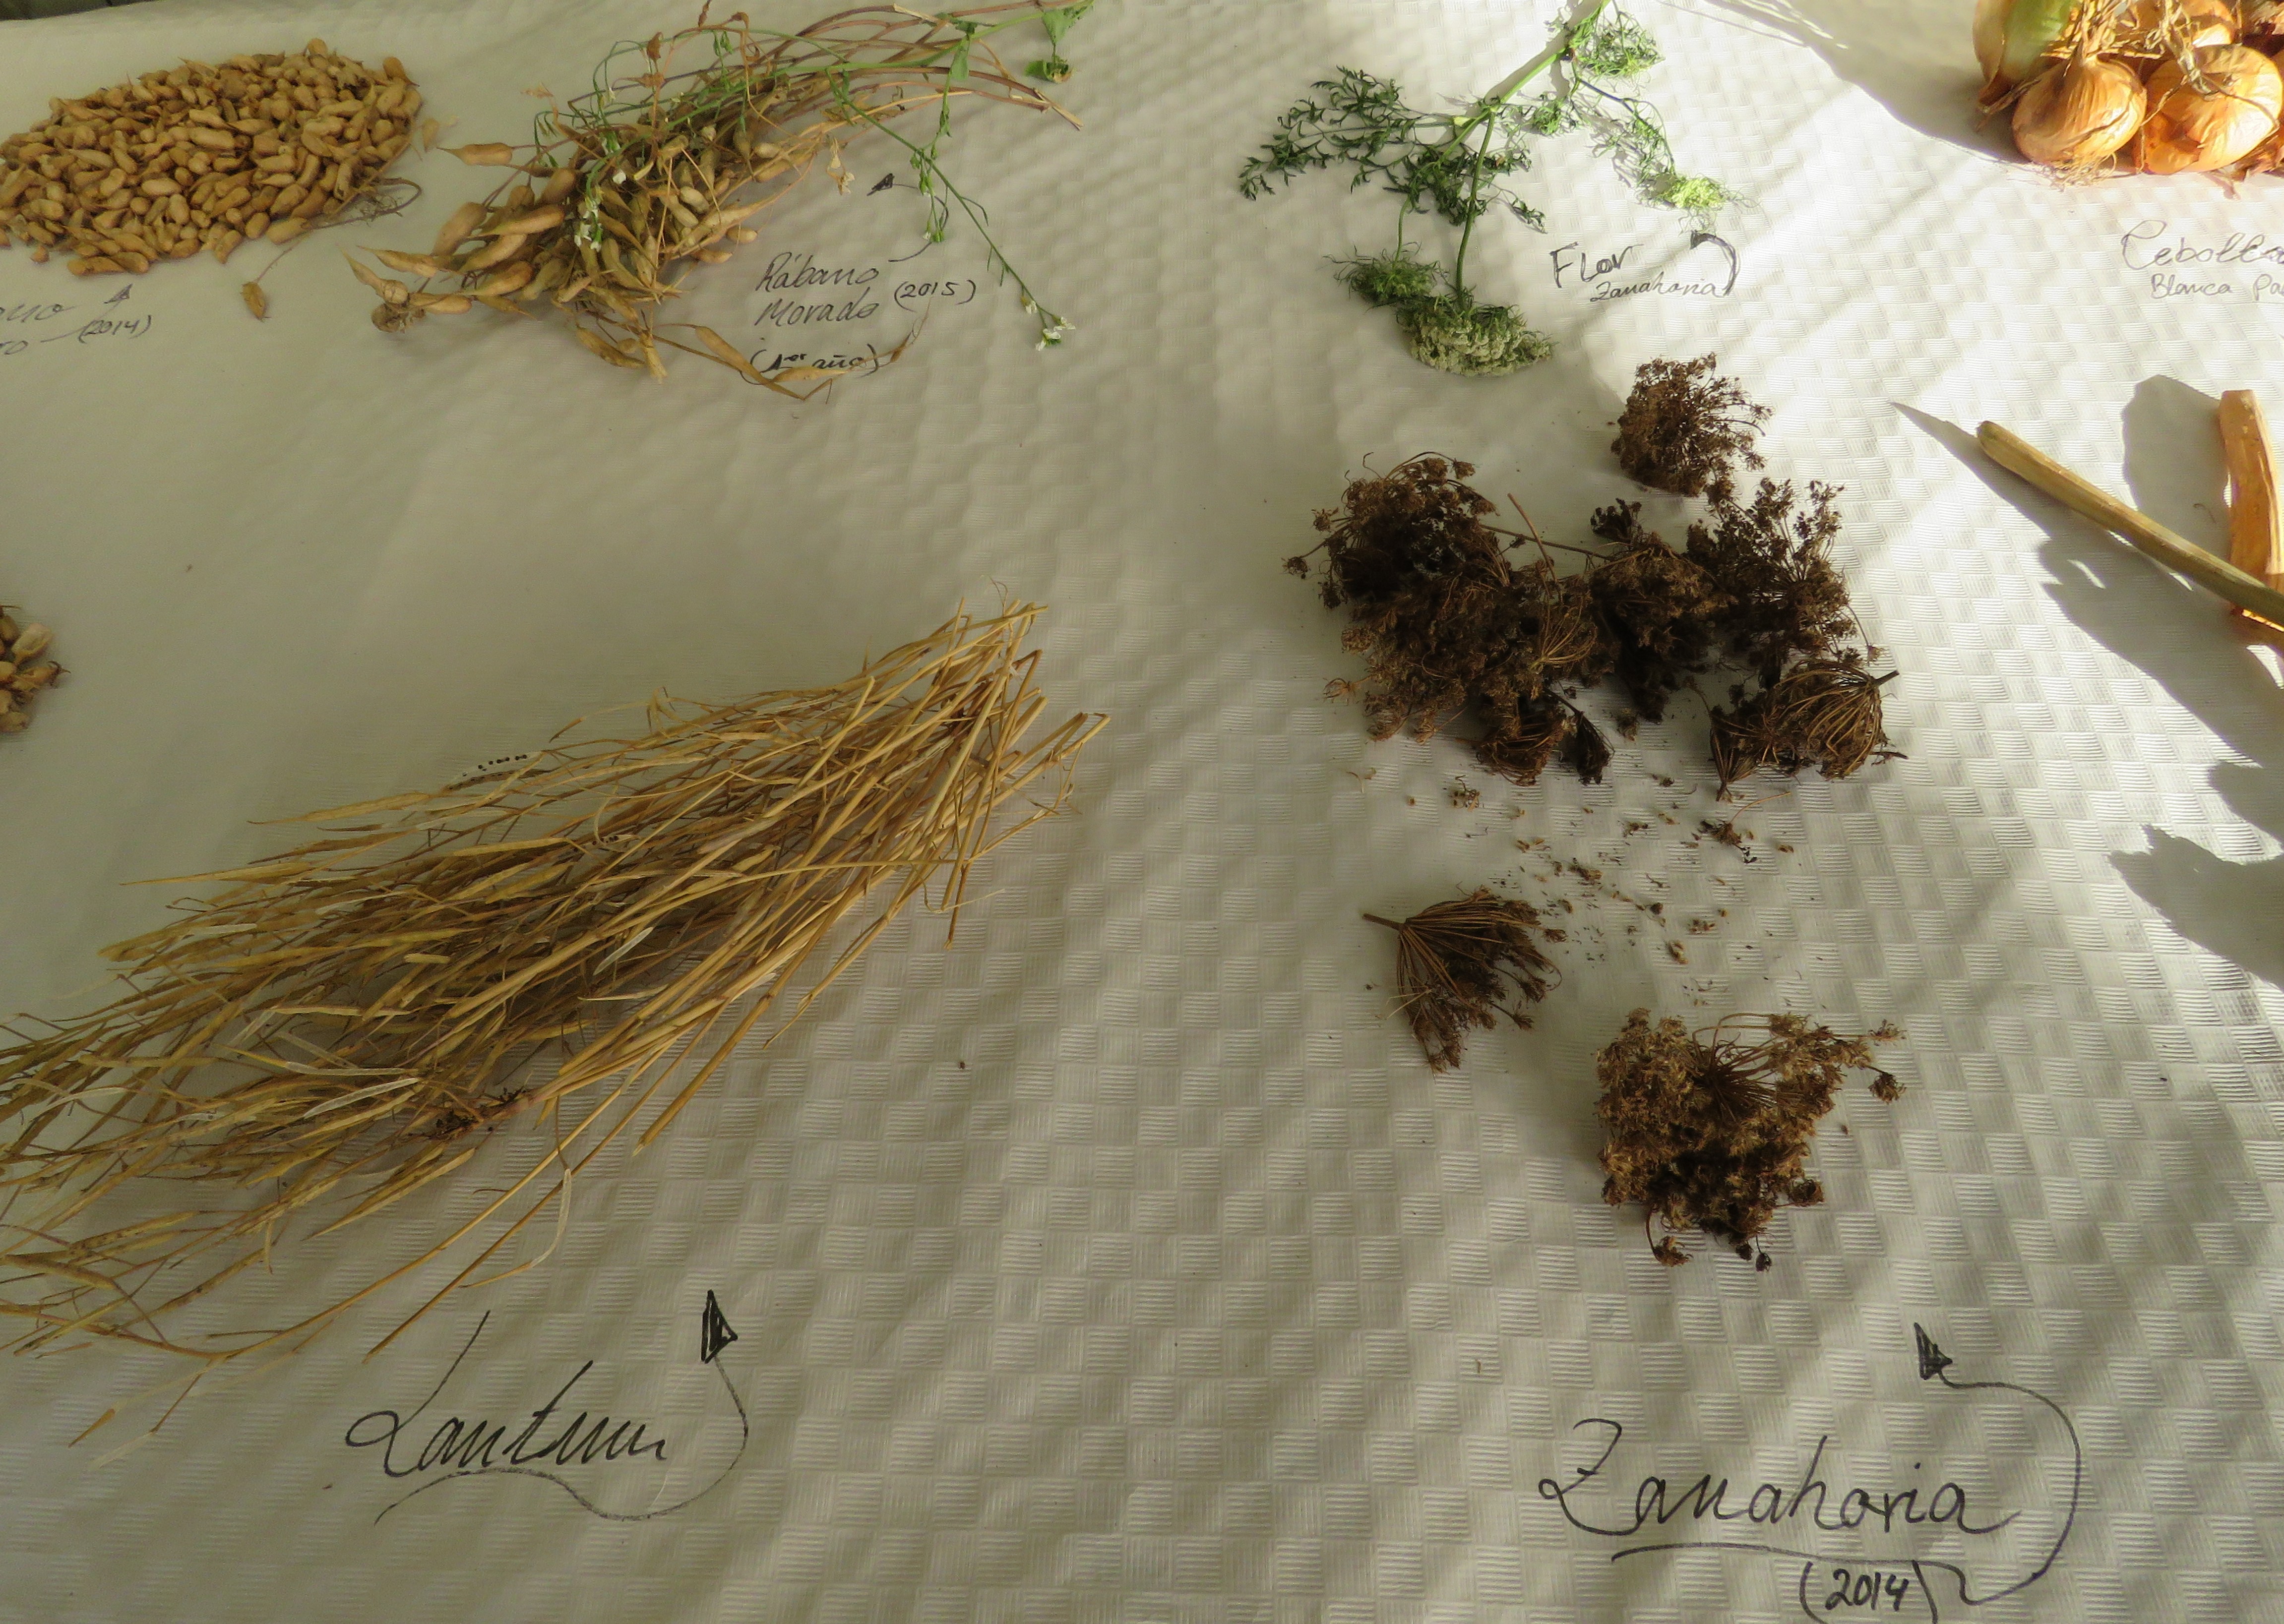
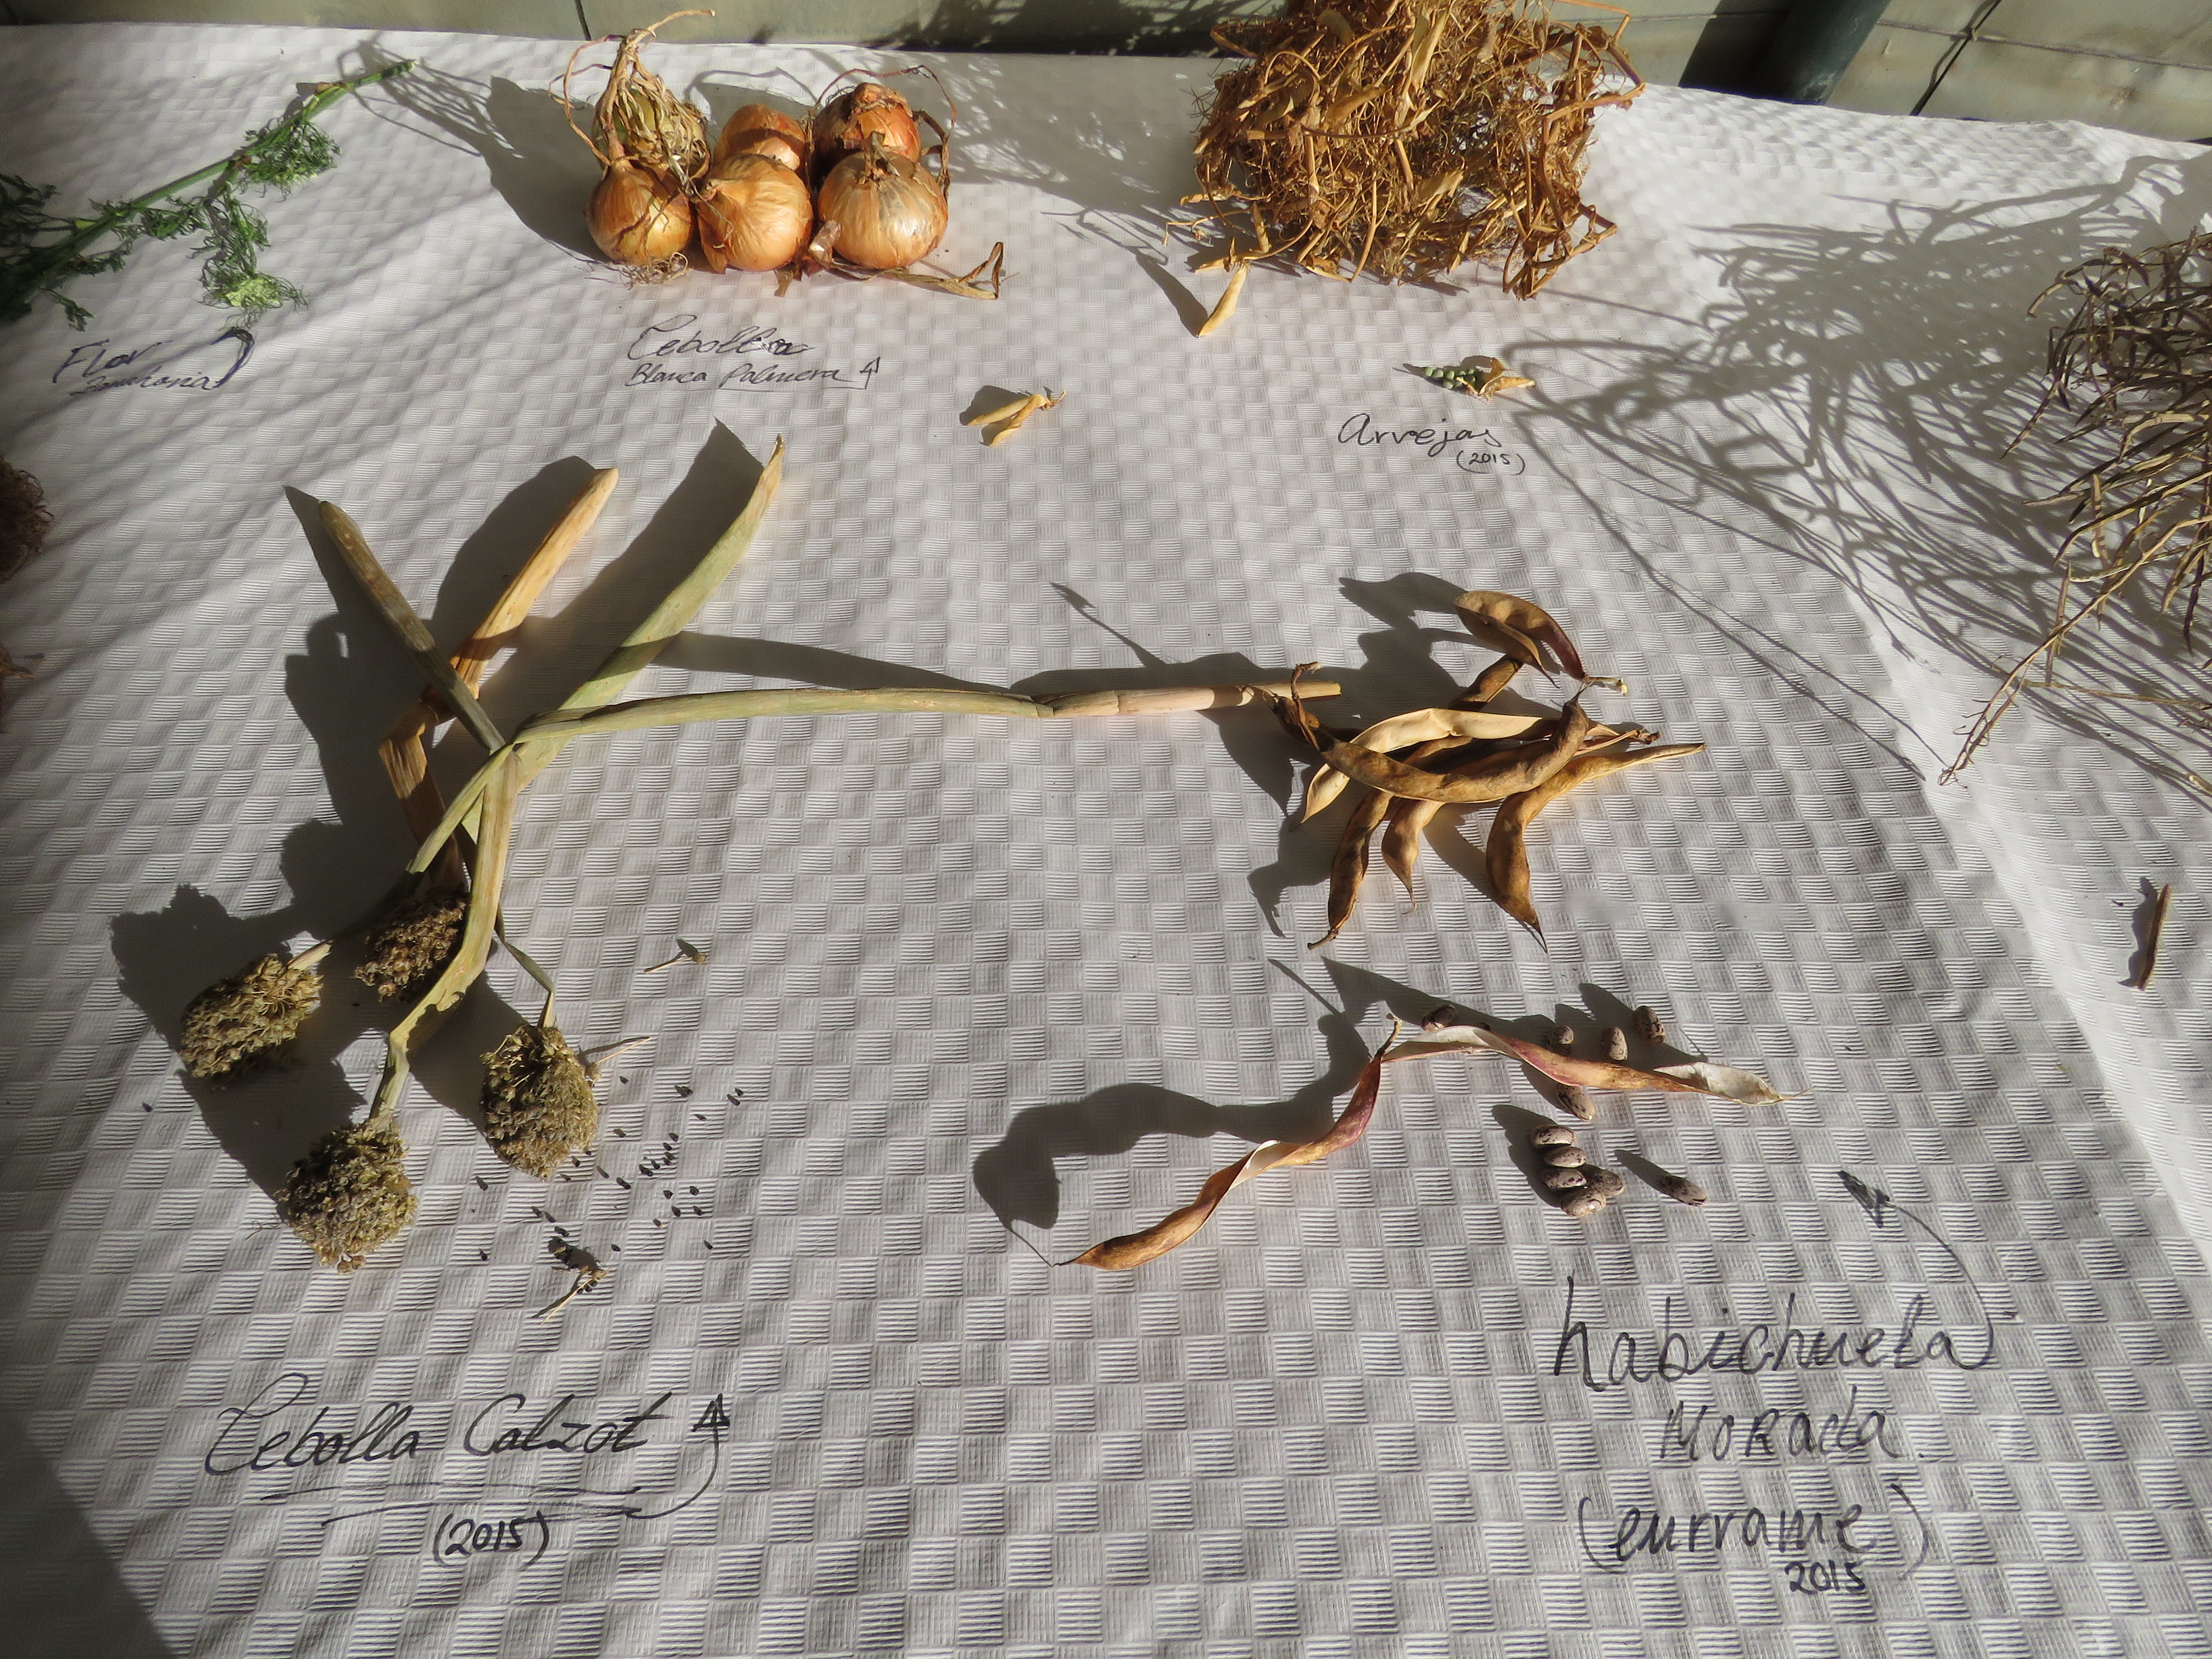
Figure VI.39.- Sample-exhibition of the cycle of life of various vegetables
The aim of this activity is to observe the cycle of life, the biodiversity of plants that we have in our garden and the variety of seeds that we obtain. The exhibition is a good opportunity to show the collaborators and visitors of the course the different tasks we do in the center, to make visible the work that people with mental illness do and the potential they have.
VI.7.- Commercializing our products
Every day more and more people want to eat healthier, a direct relation with the people that produce the food, an environmental and social awareness, and, as consumers, they adopt an active attitude towards agroecology in general, and Permaculture in particular.
We can channel the sale of vegetables, flowers, aromatic plants and fruits that we have grown in a permacultural way through different homemade short distribution channels such as a vegetable market located in the farm, with loyal collaborators that come to collect and buy the bio-boxes (Figure VI.40).
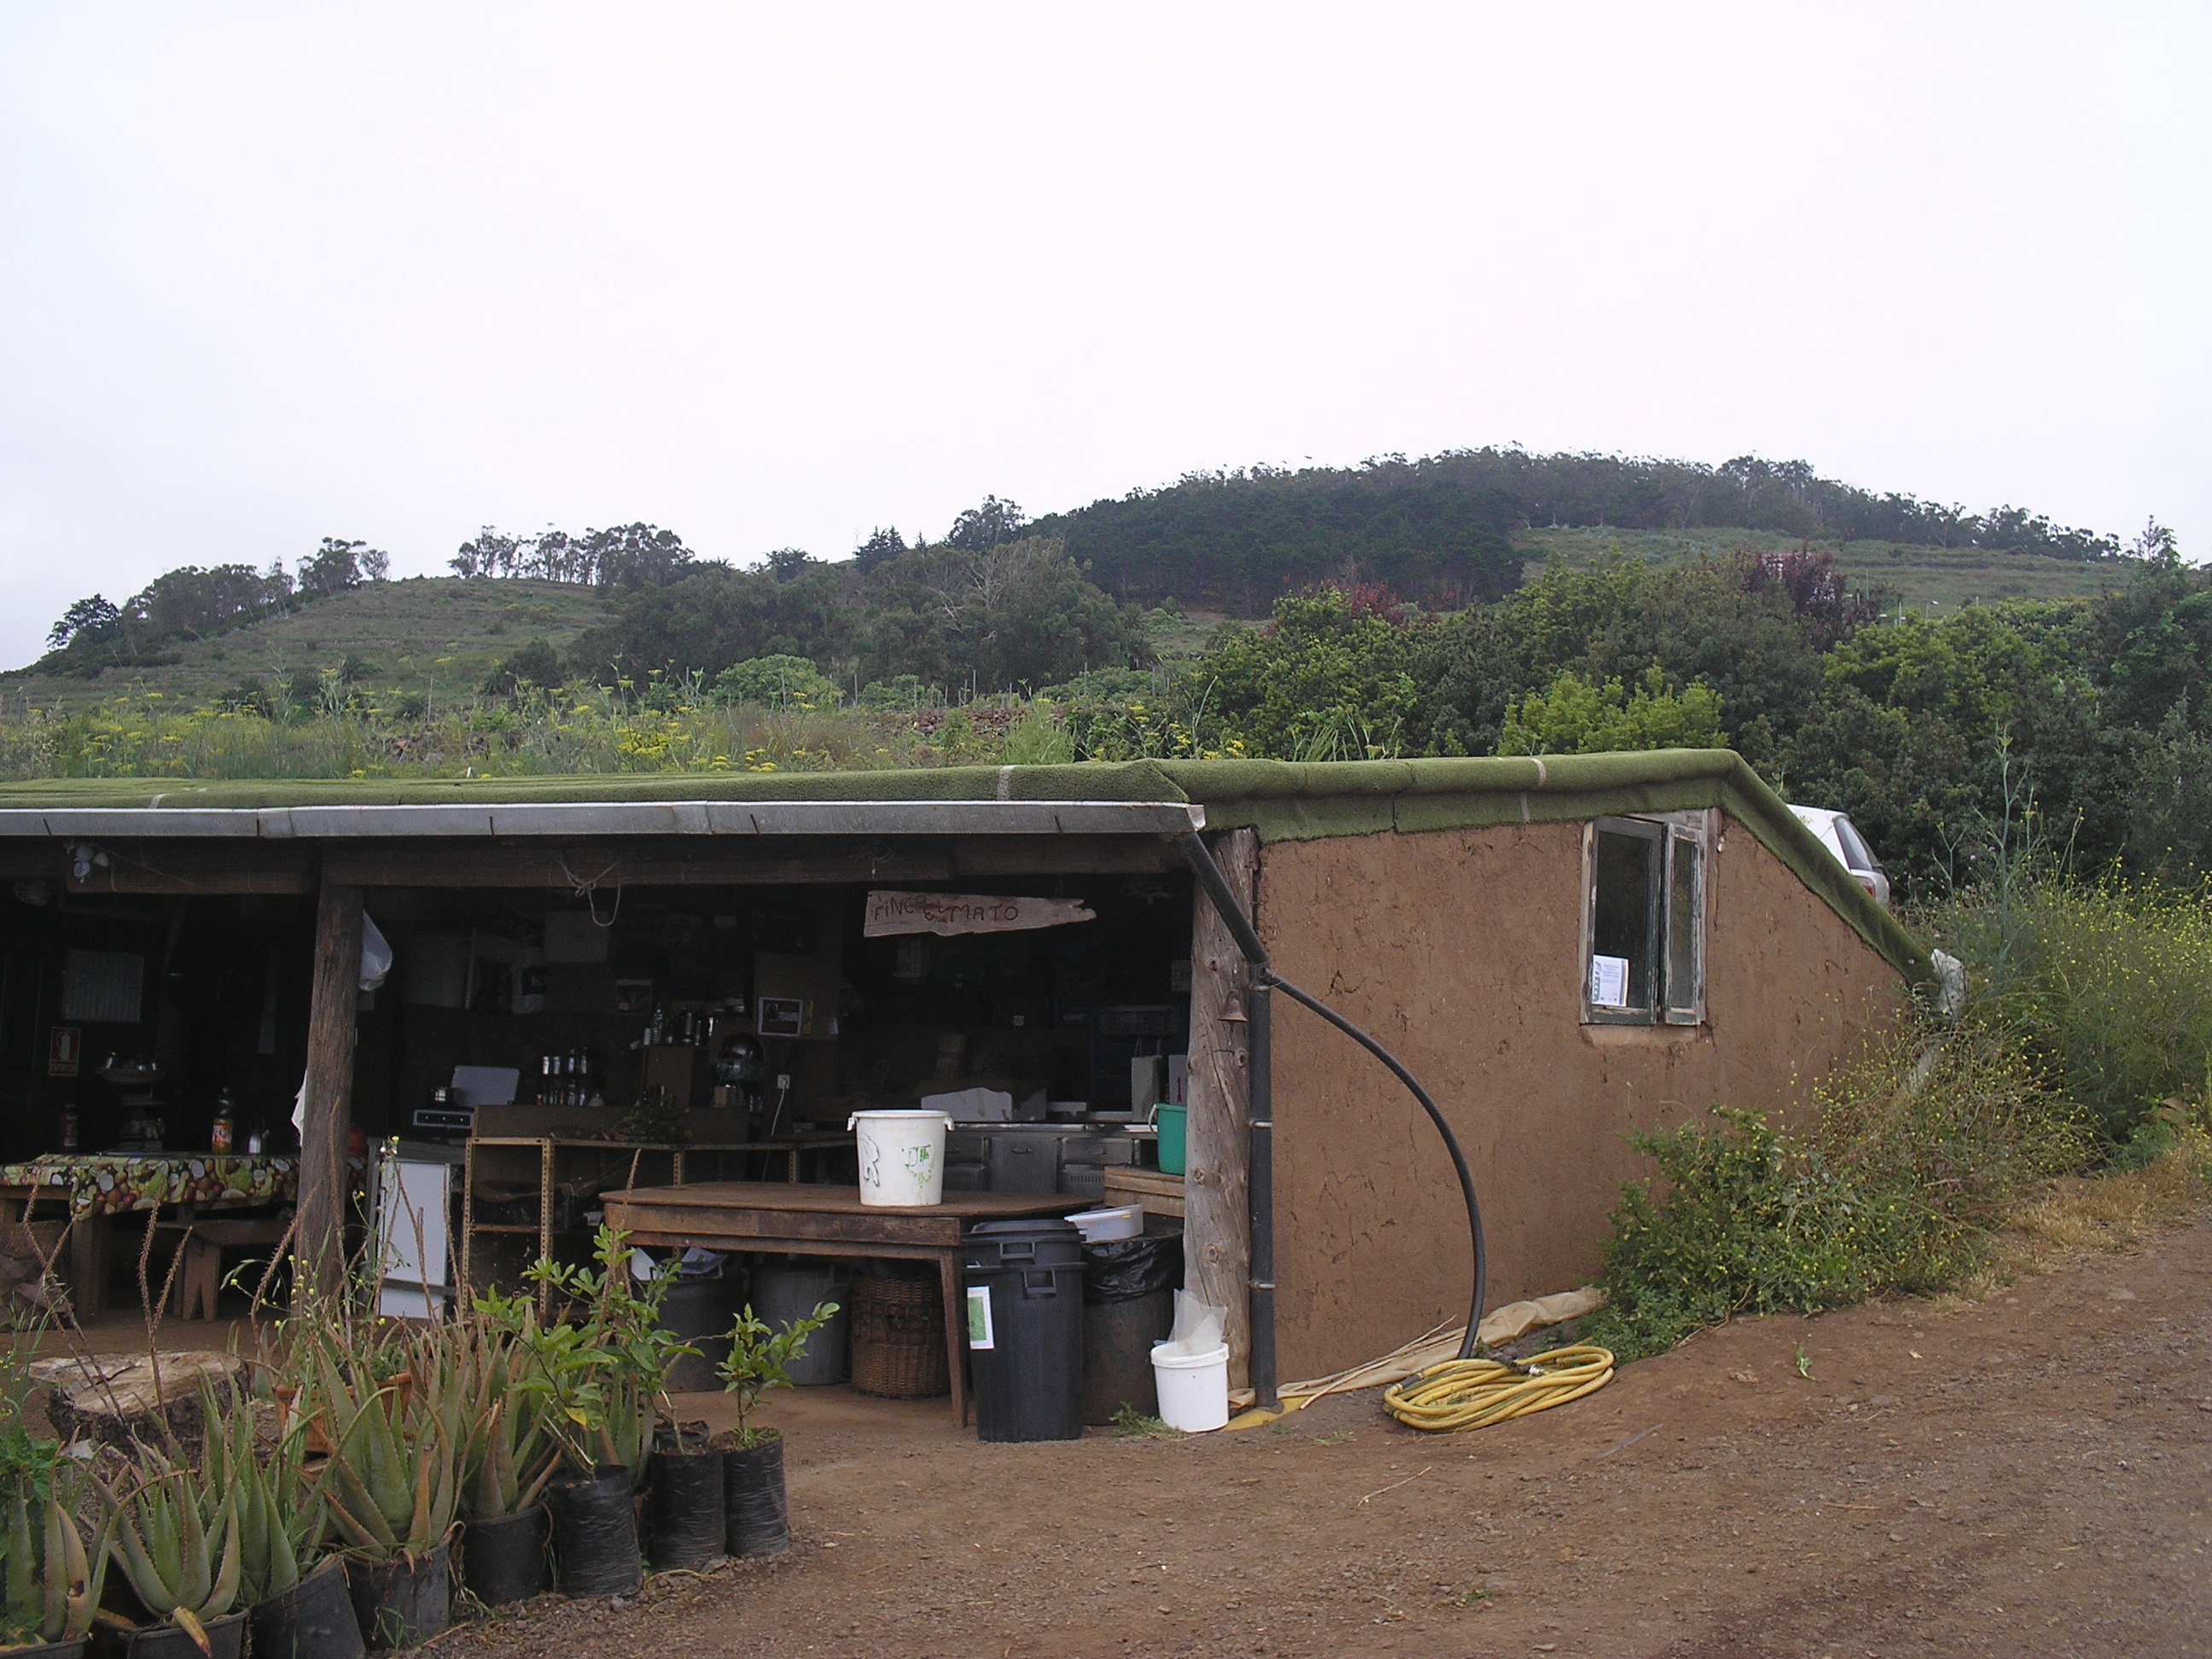
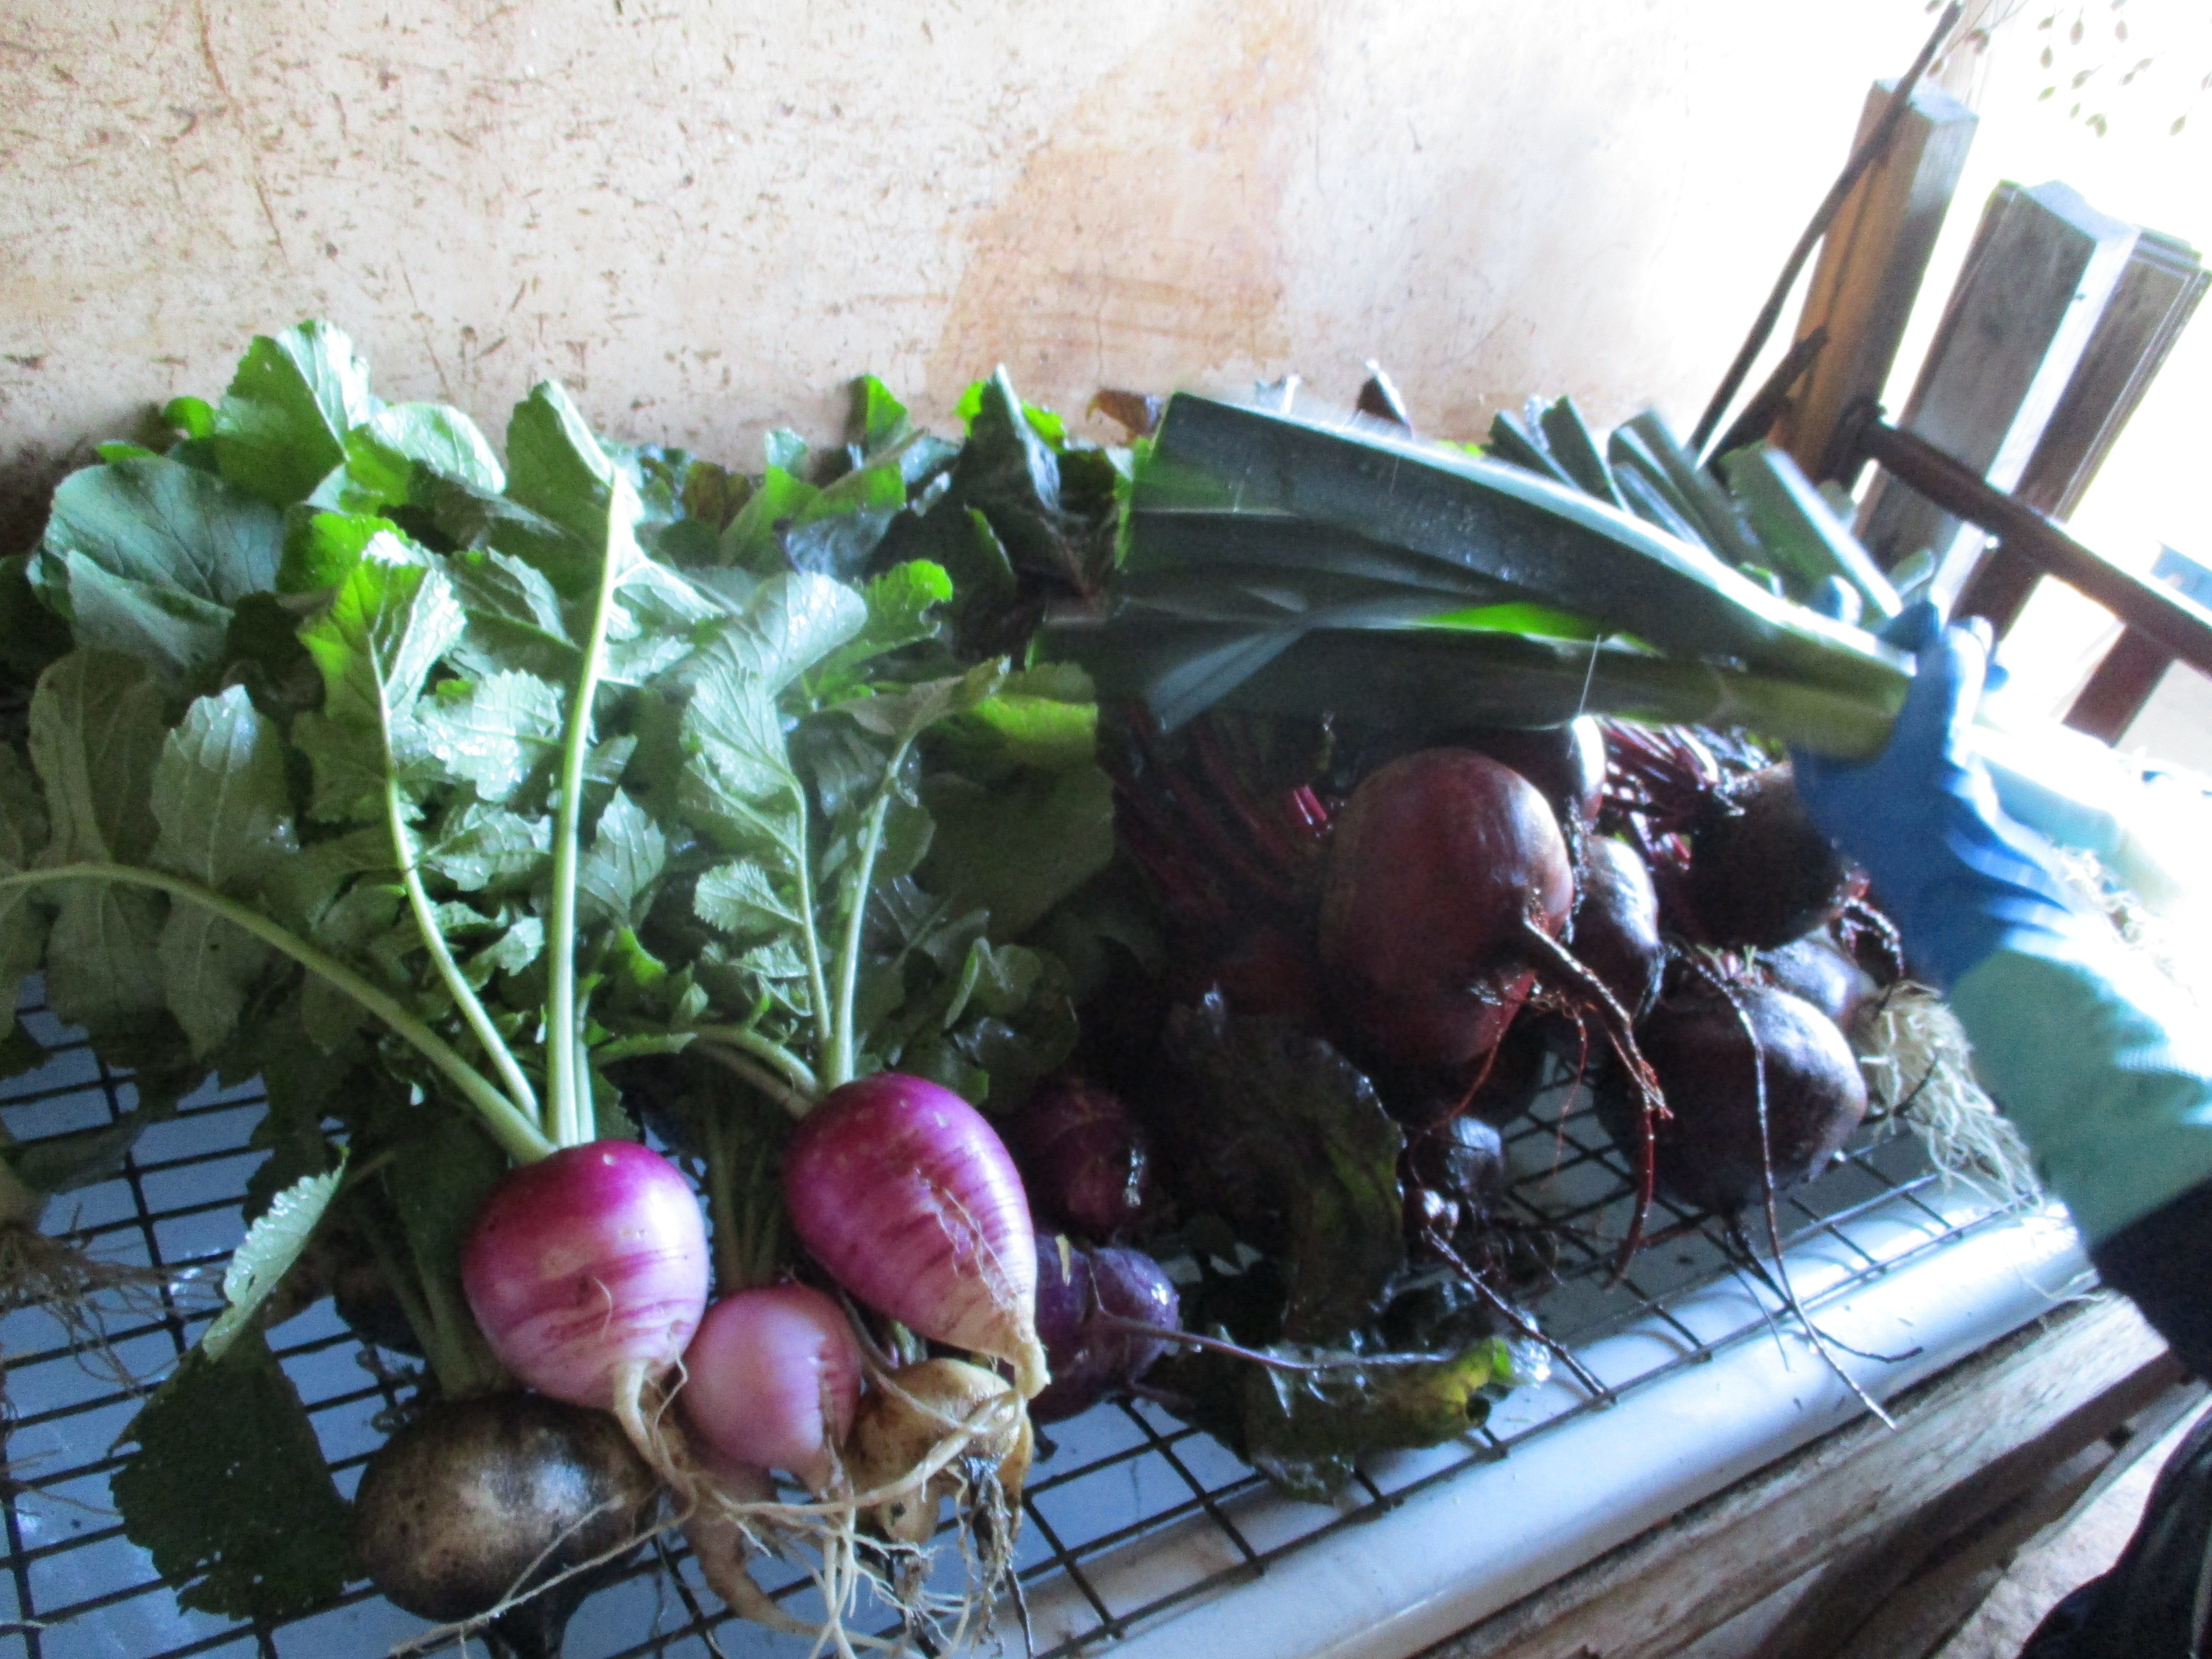
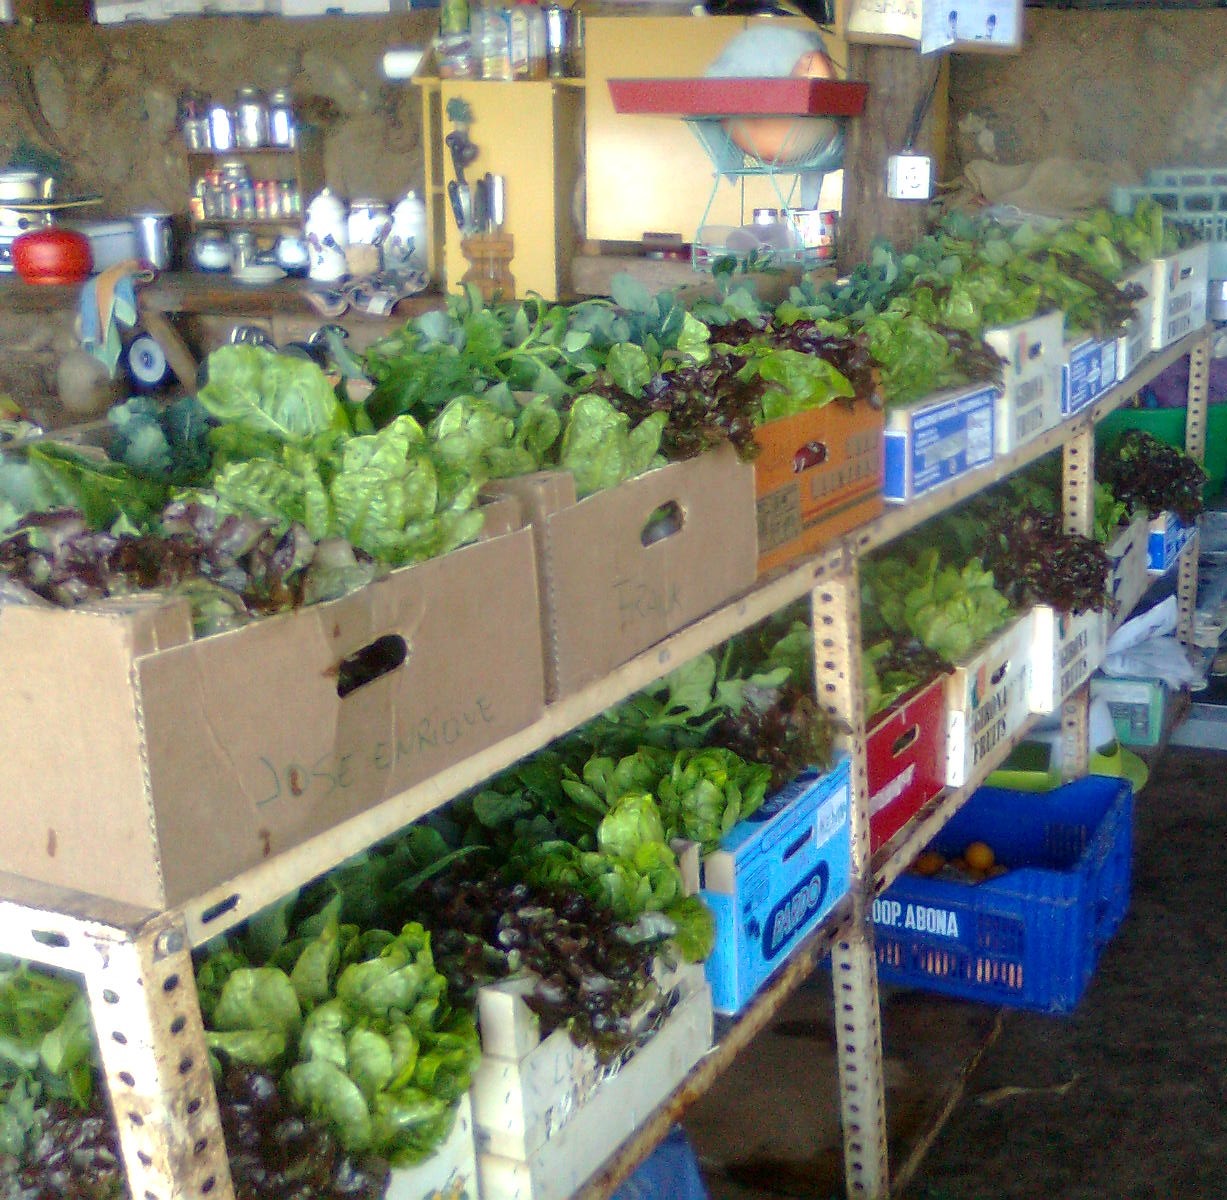
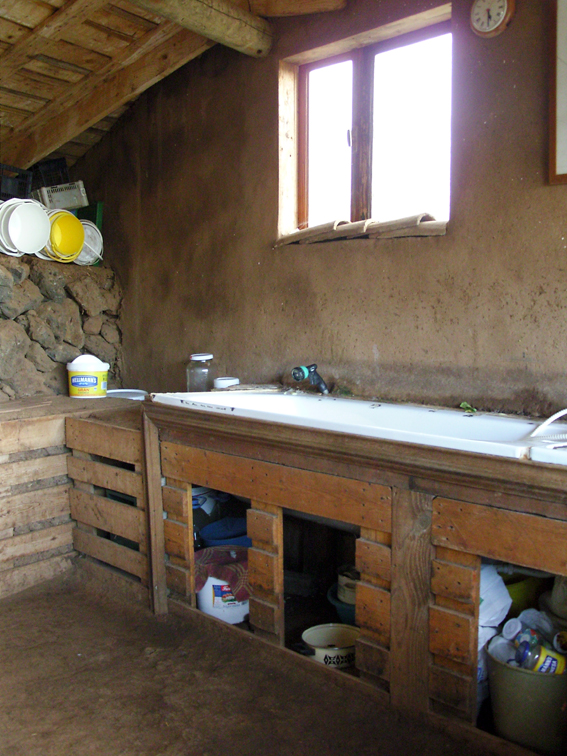
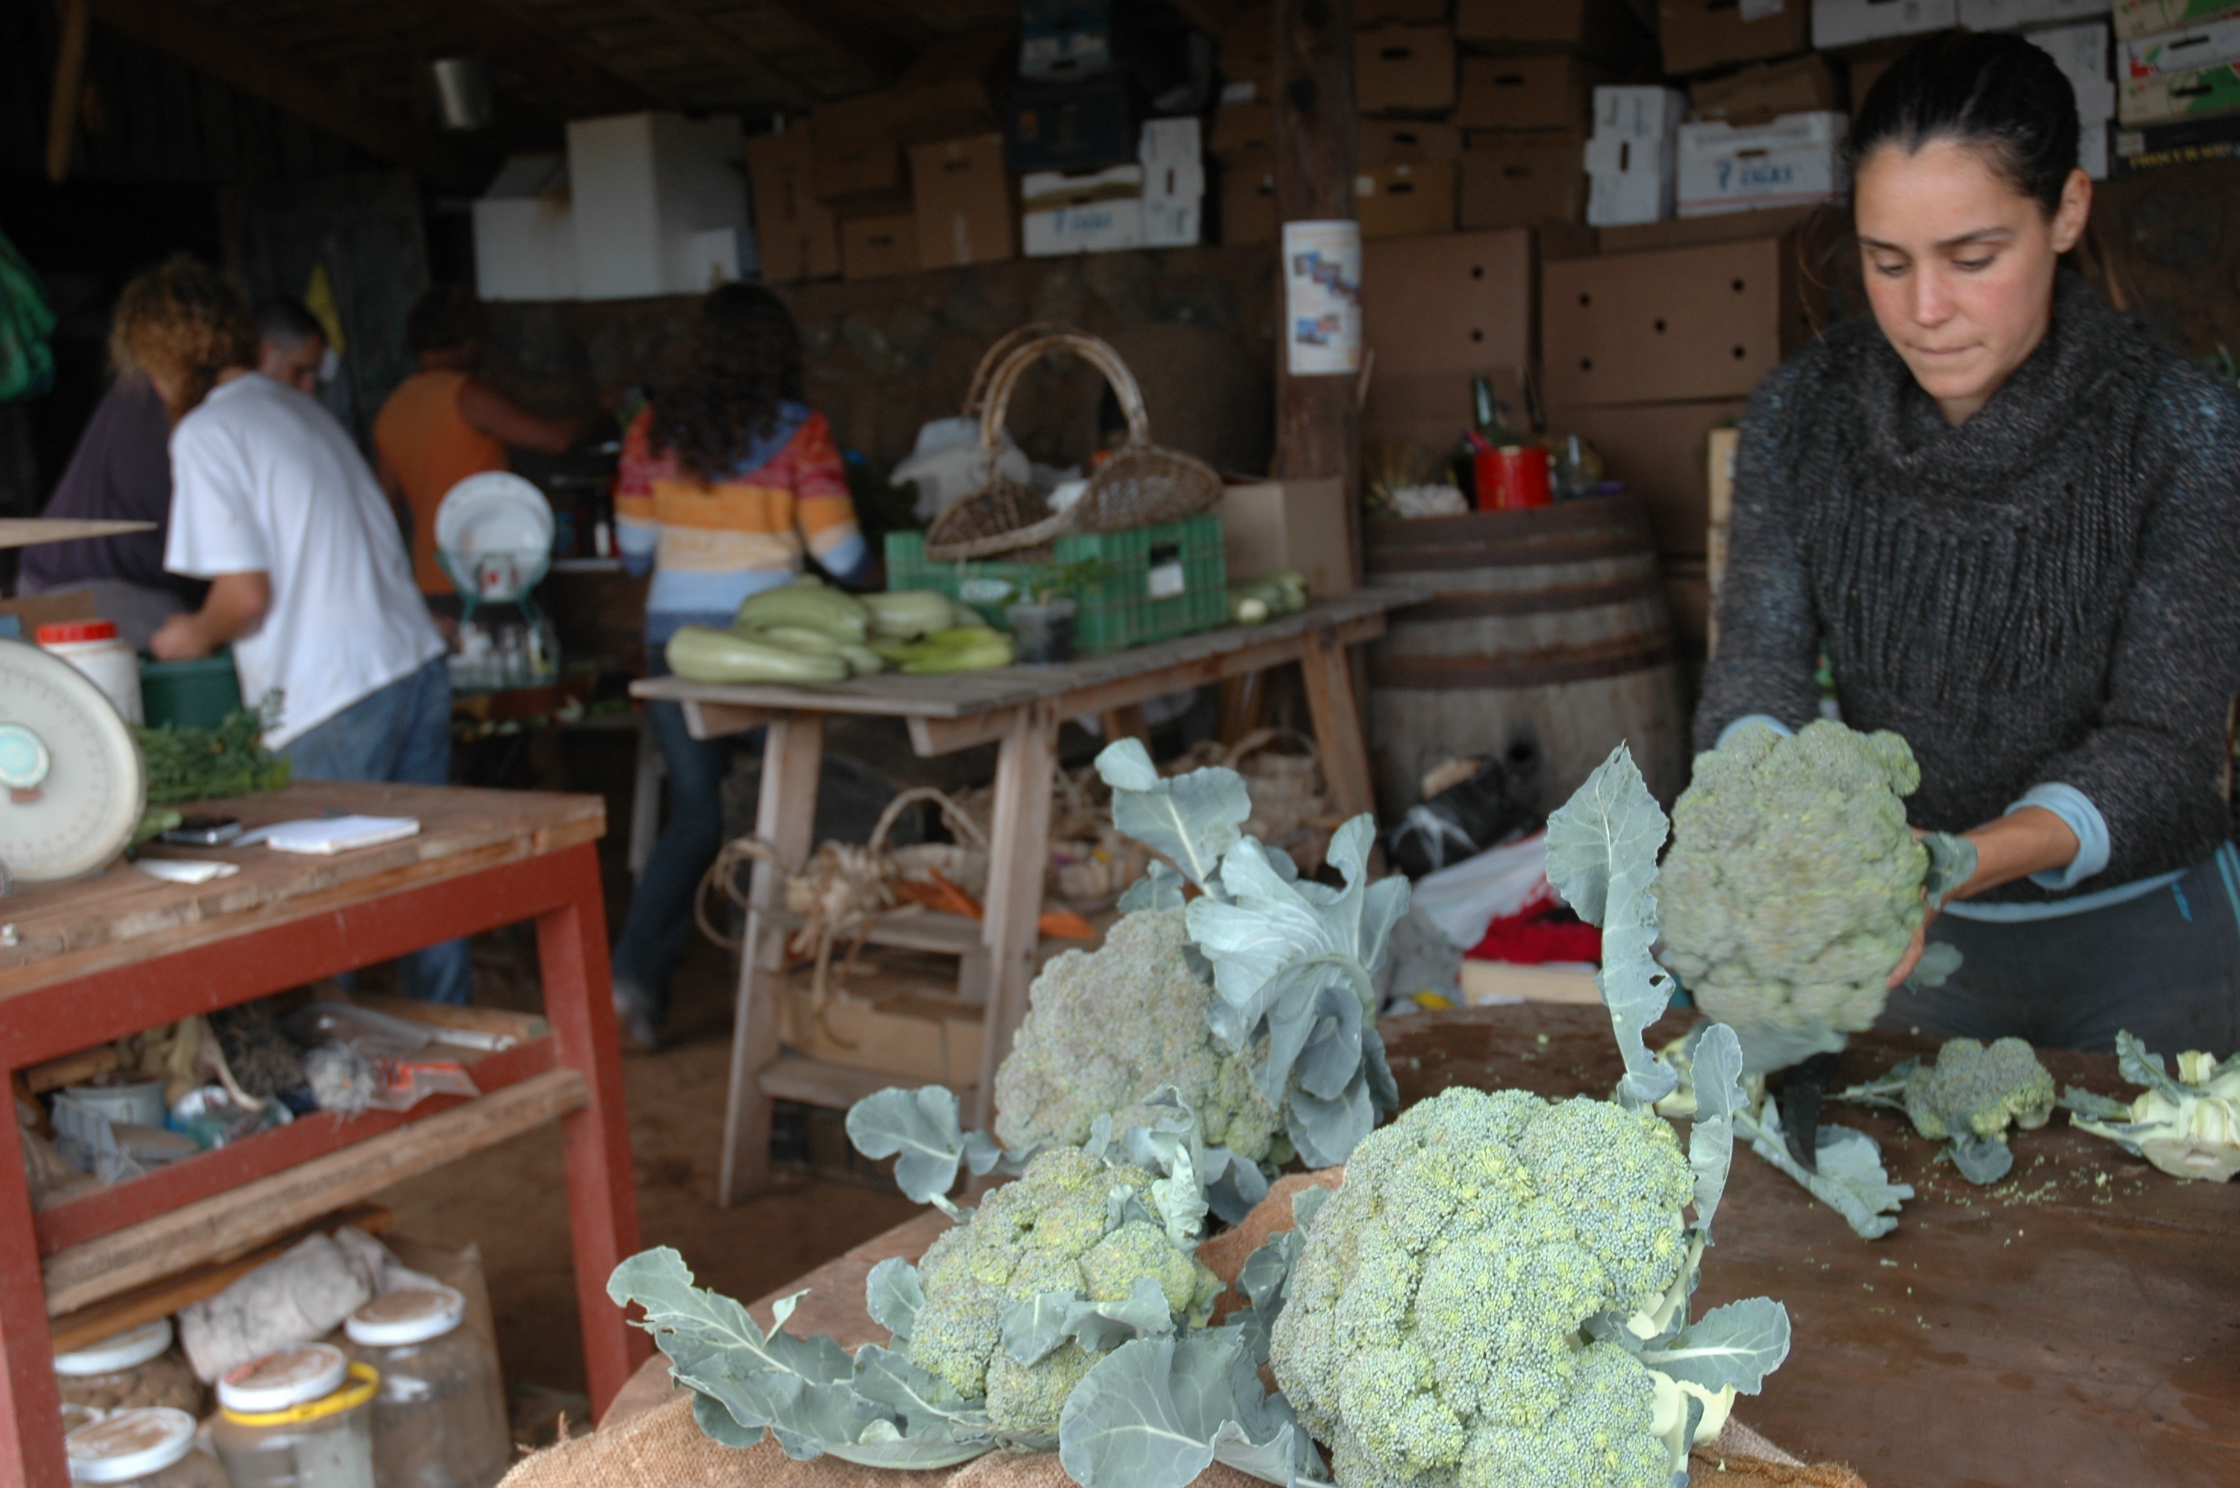
Figure VI.40.- Images of the project´s vegetable market
When we are assembling the organic boxes, we teach the students the distribution of the edible products. At the bottom of the box, we place the heavier vegetables, for example, red beetroot, leek, carrots, onions, zucchini, kohlrabi, etc. (Figure VI.41).
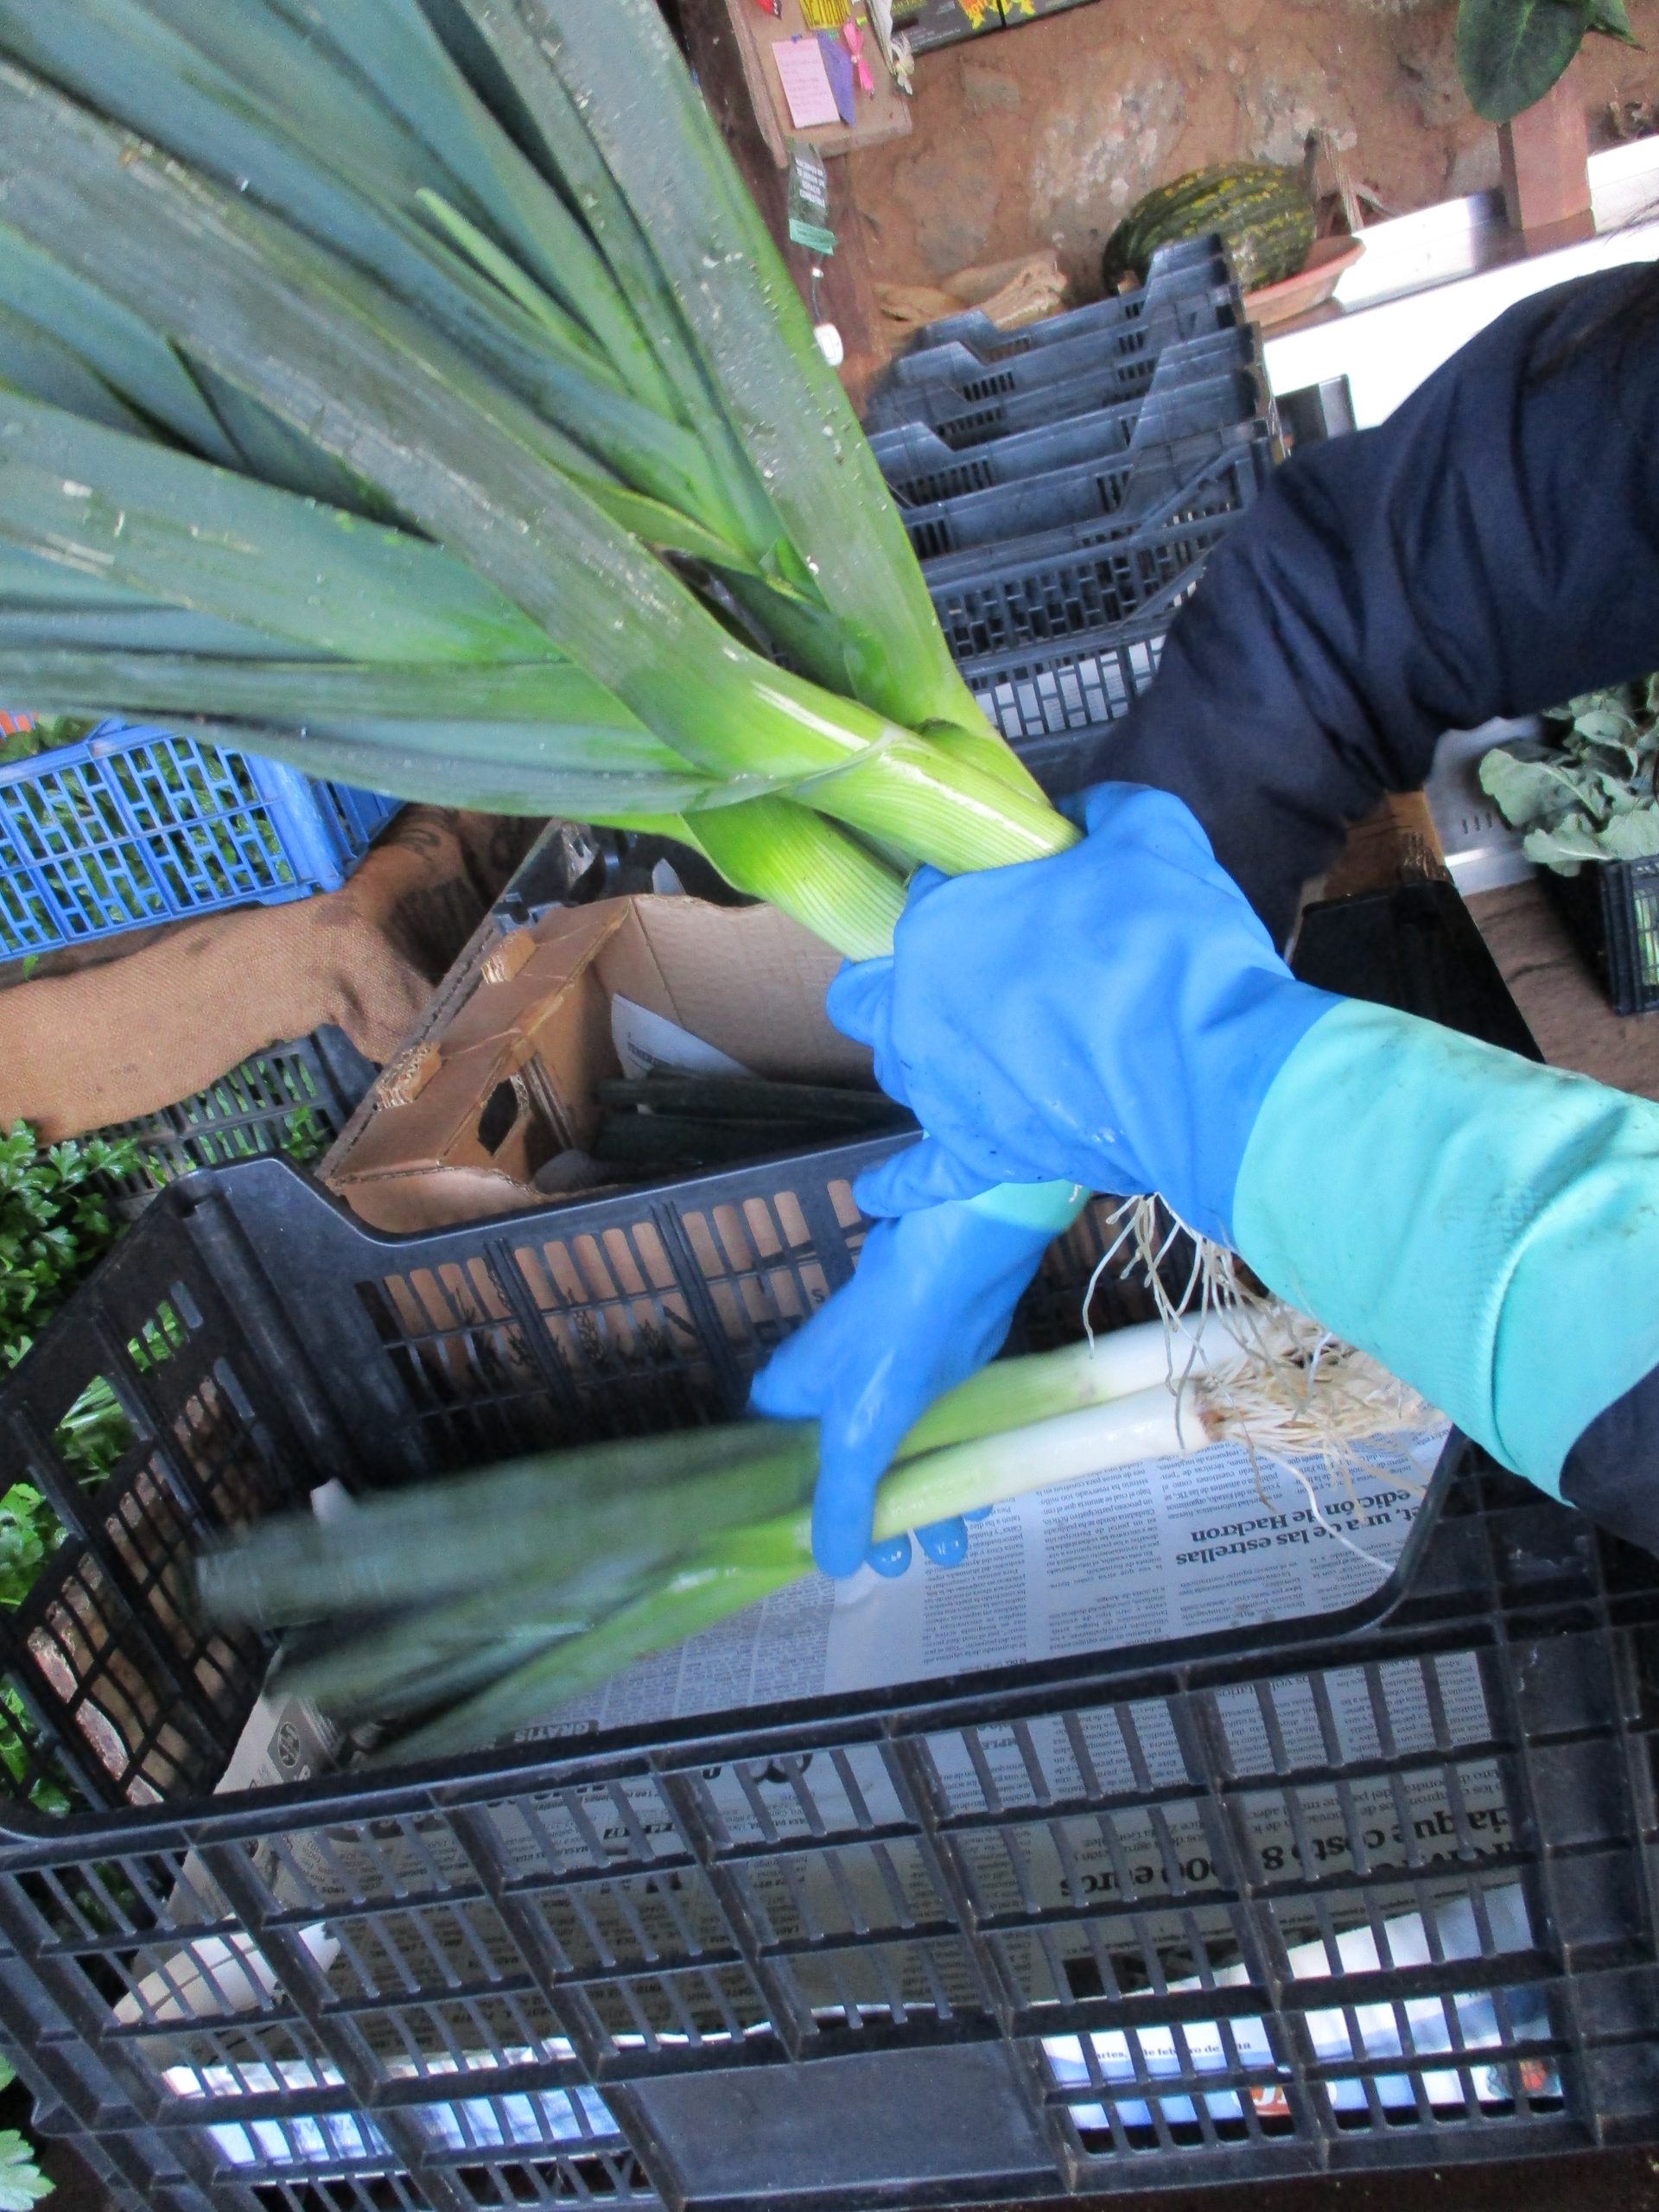
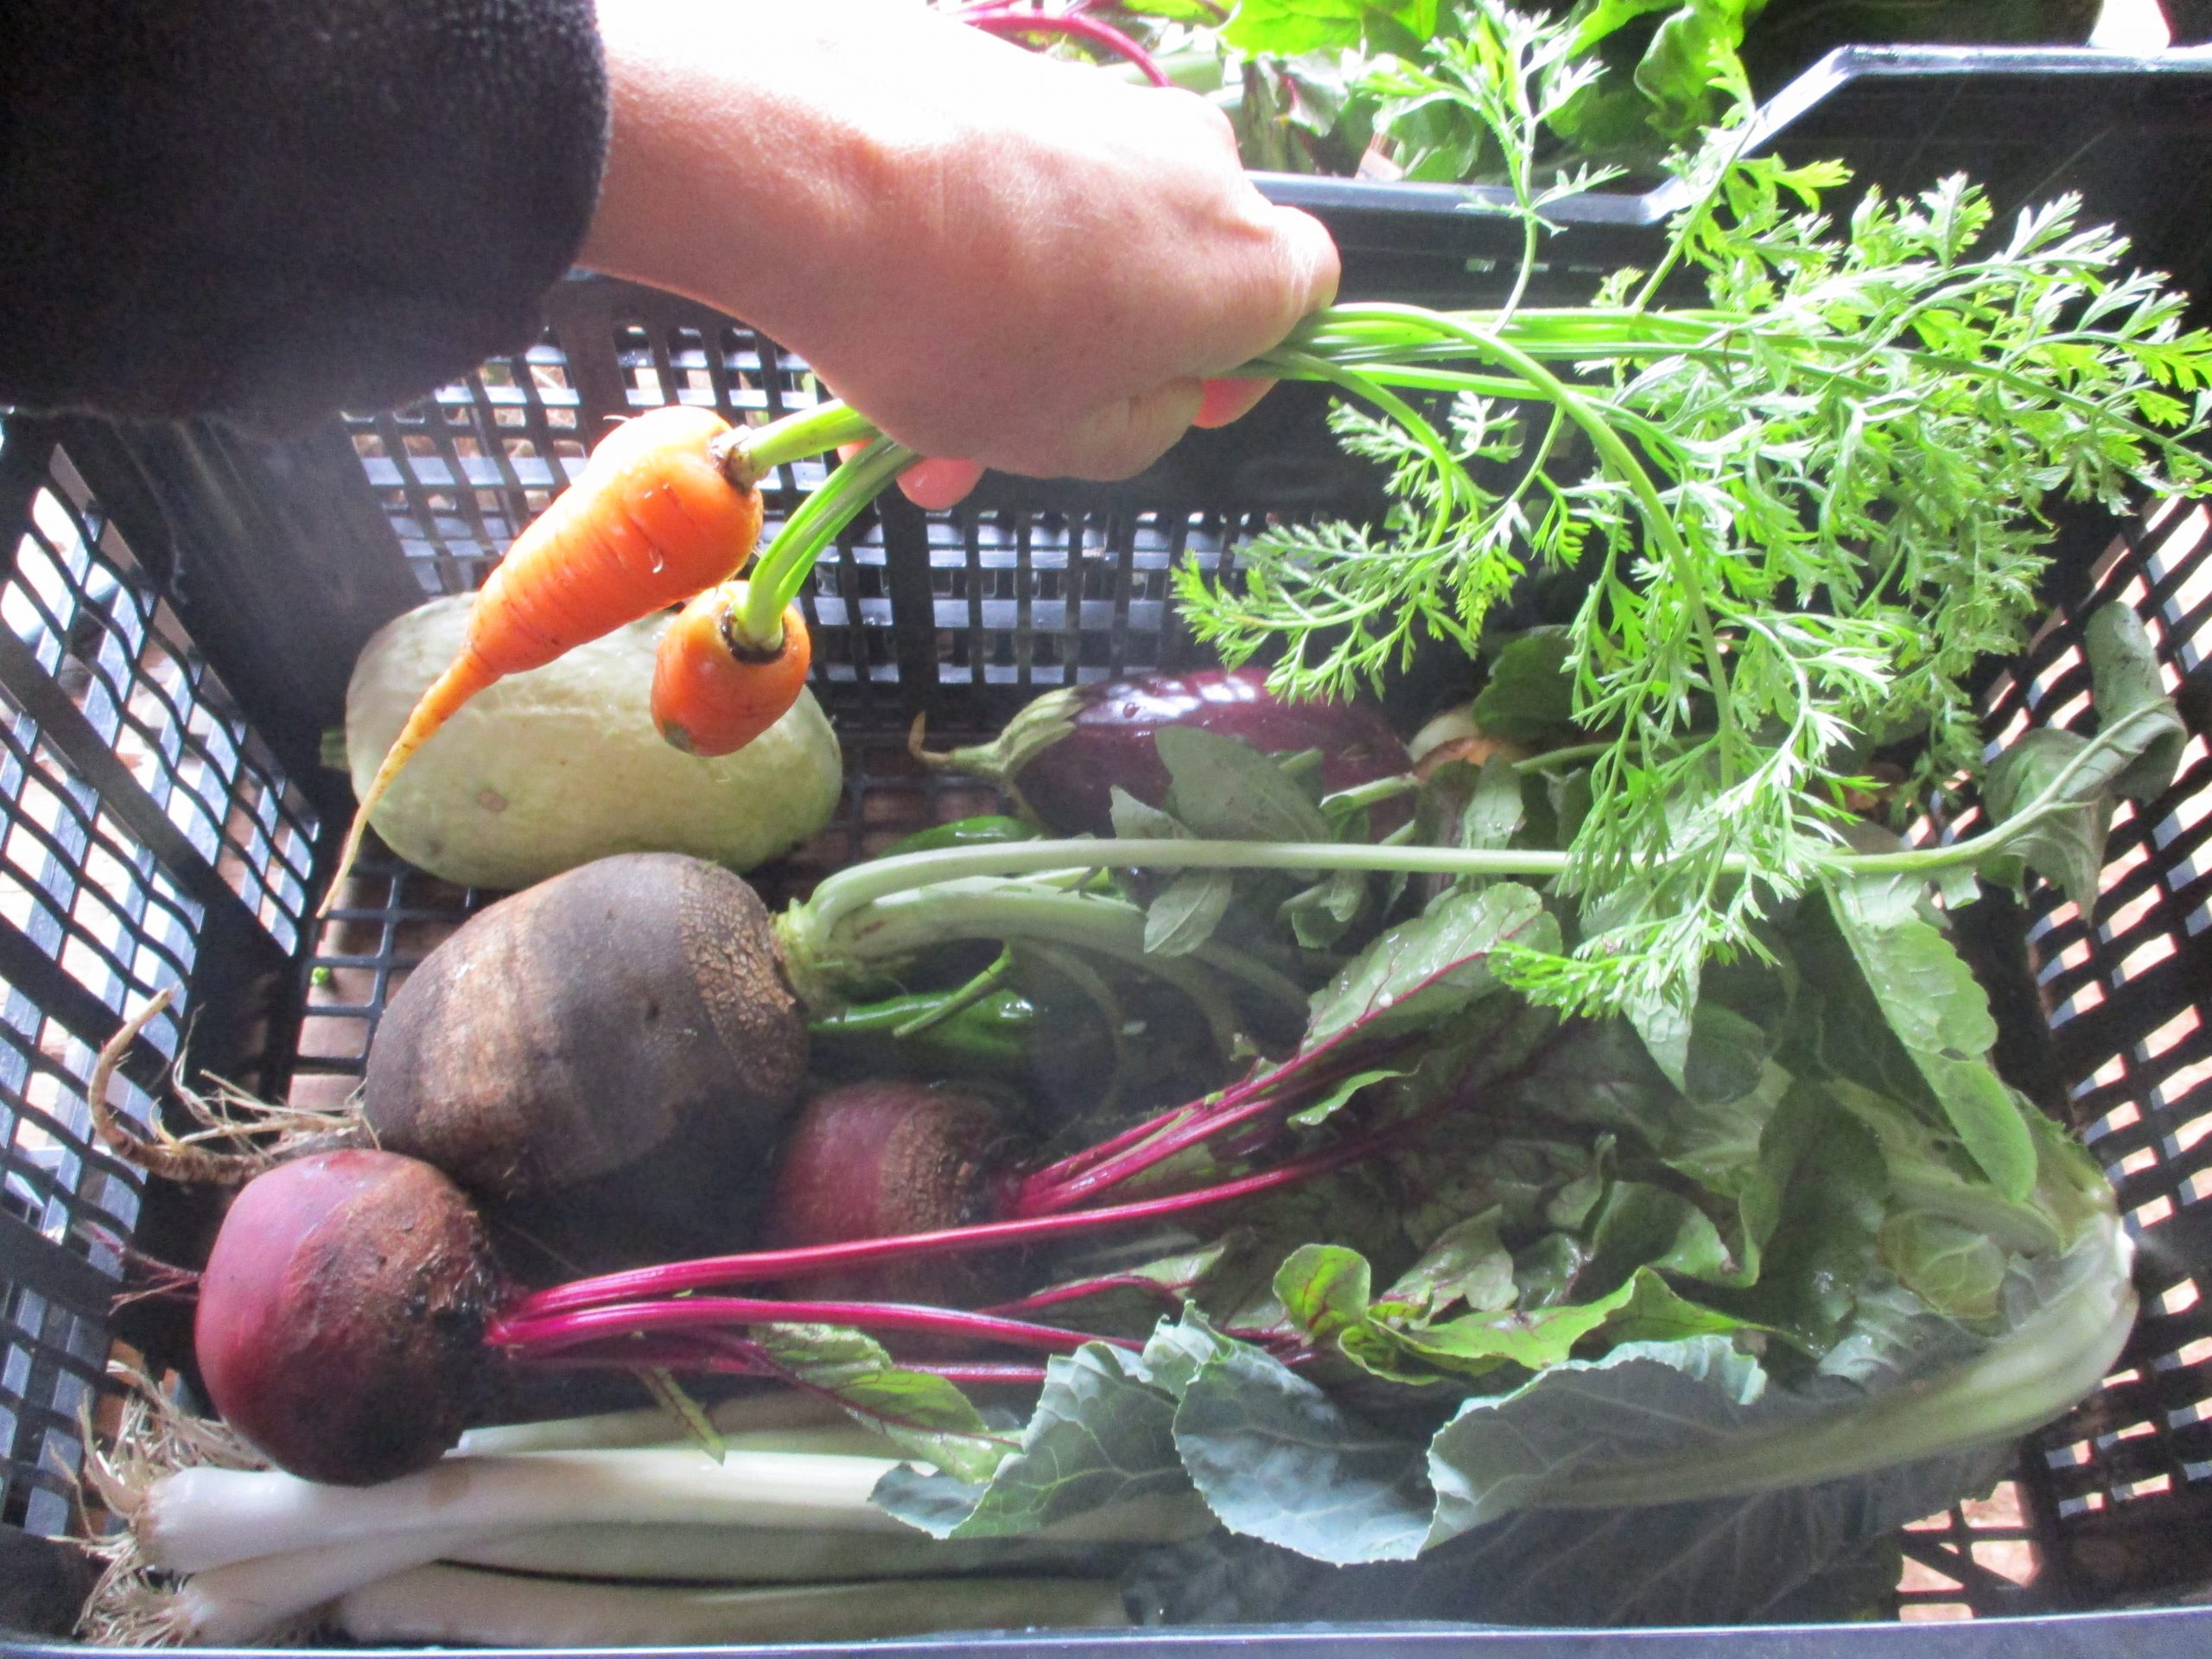
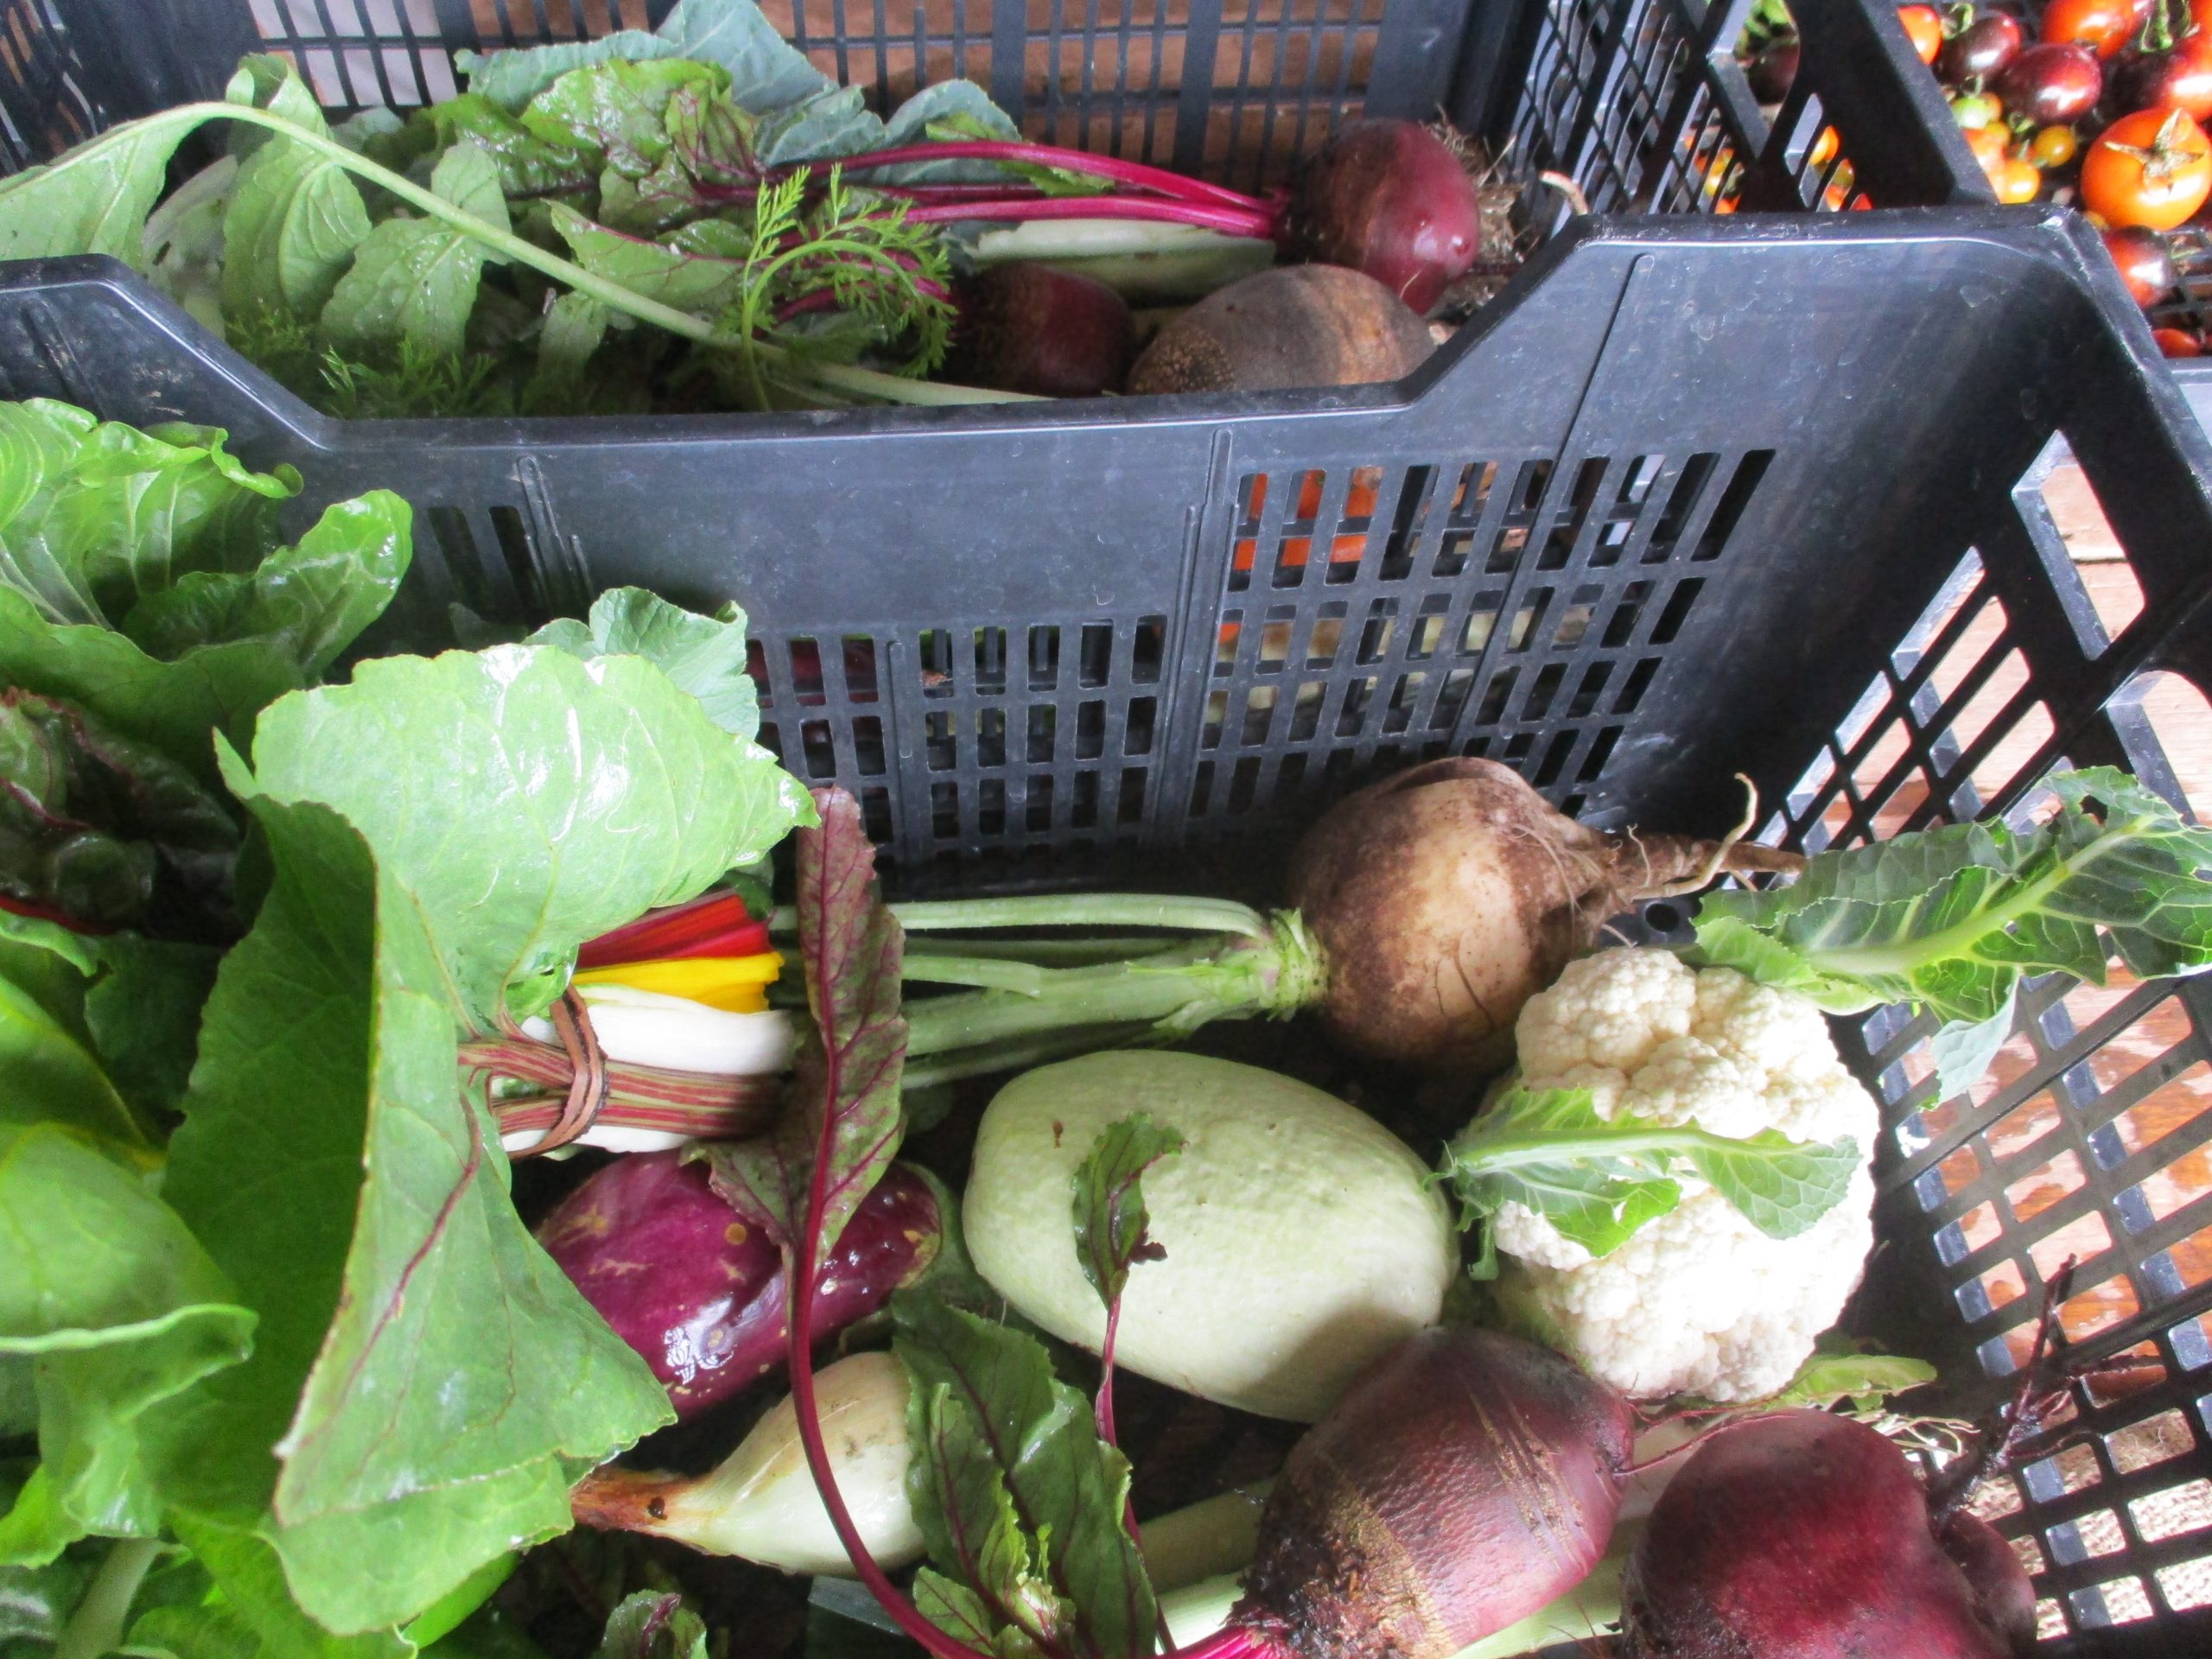
Figure VI.41.- Placing the heavier products at the bottom of the bio-boxes
On top of the heavier products we place the smaller ones such as peppers, eggplants, broccolis, etc. Next, we put bundles of Swiss chard, spinach, parsley, coriander, etc., and we finish by putting lettuces and the most delicate products such as the edible flowers.
By creating bio-boxes this way we stimulate the organization of the users and their attention towards tasks that require gentle handling, and we encourage their creativity when distributing the boxes (Figure VI.42).
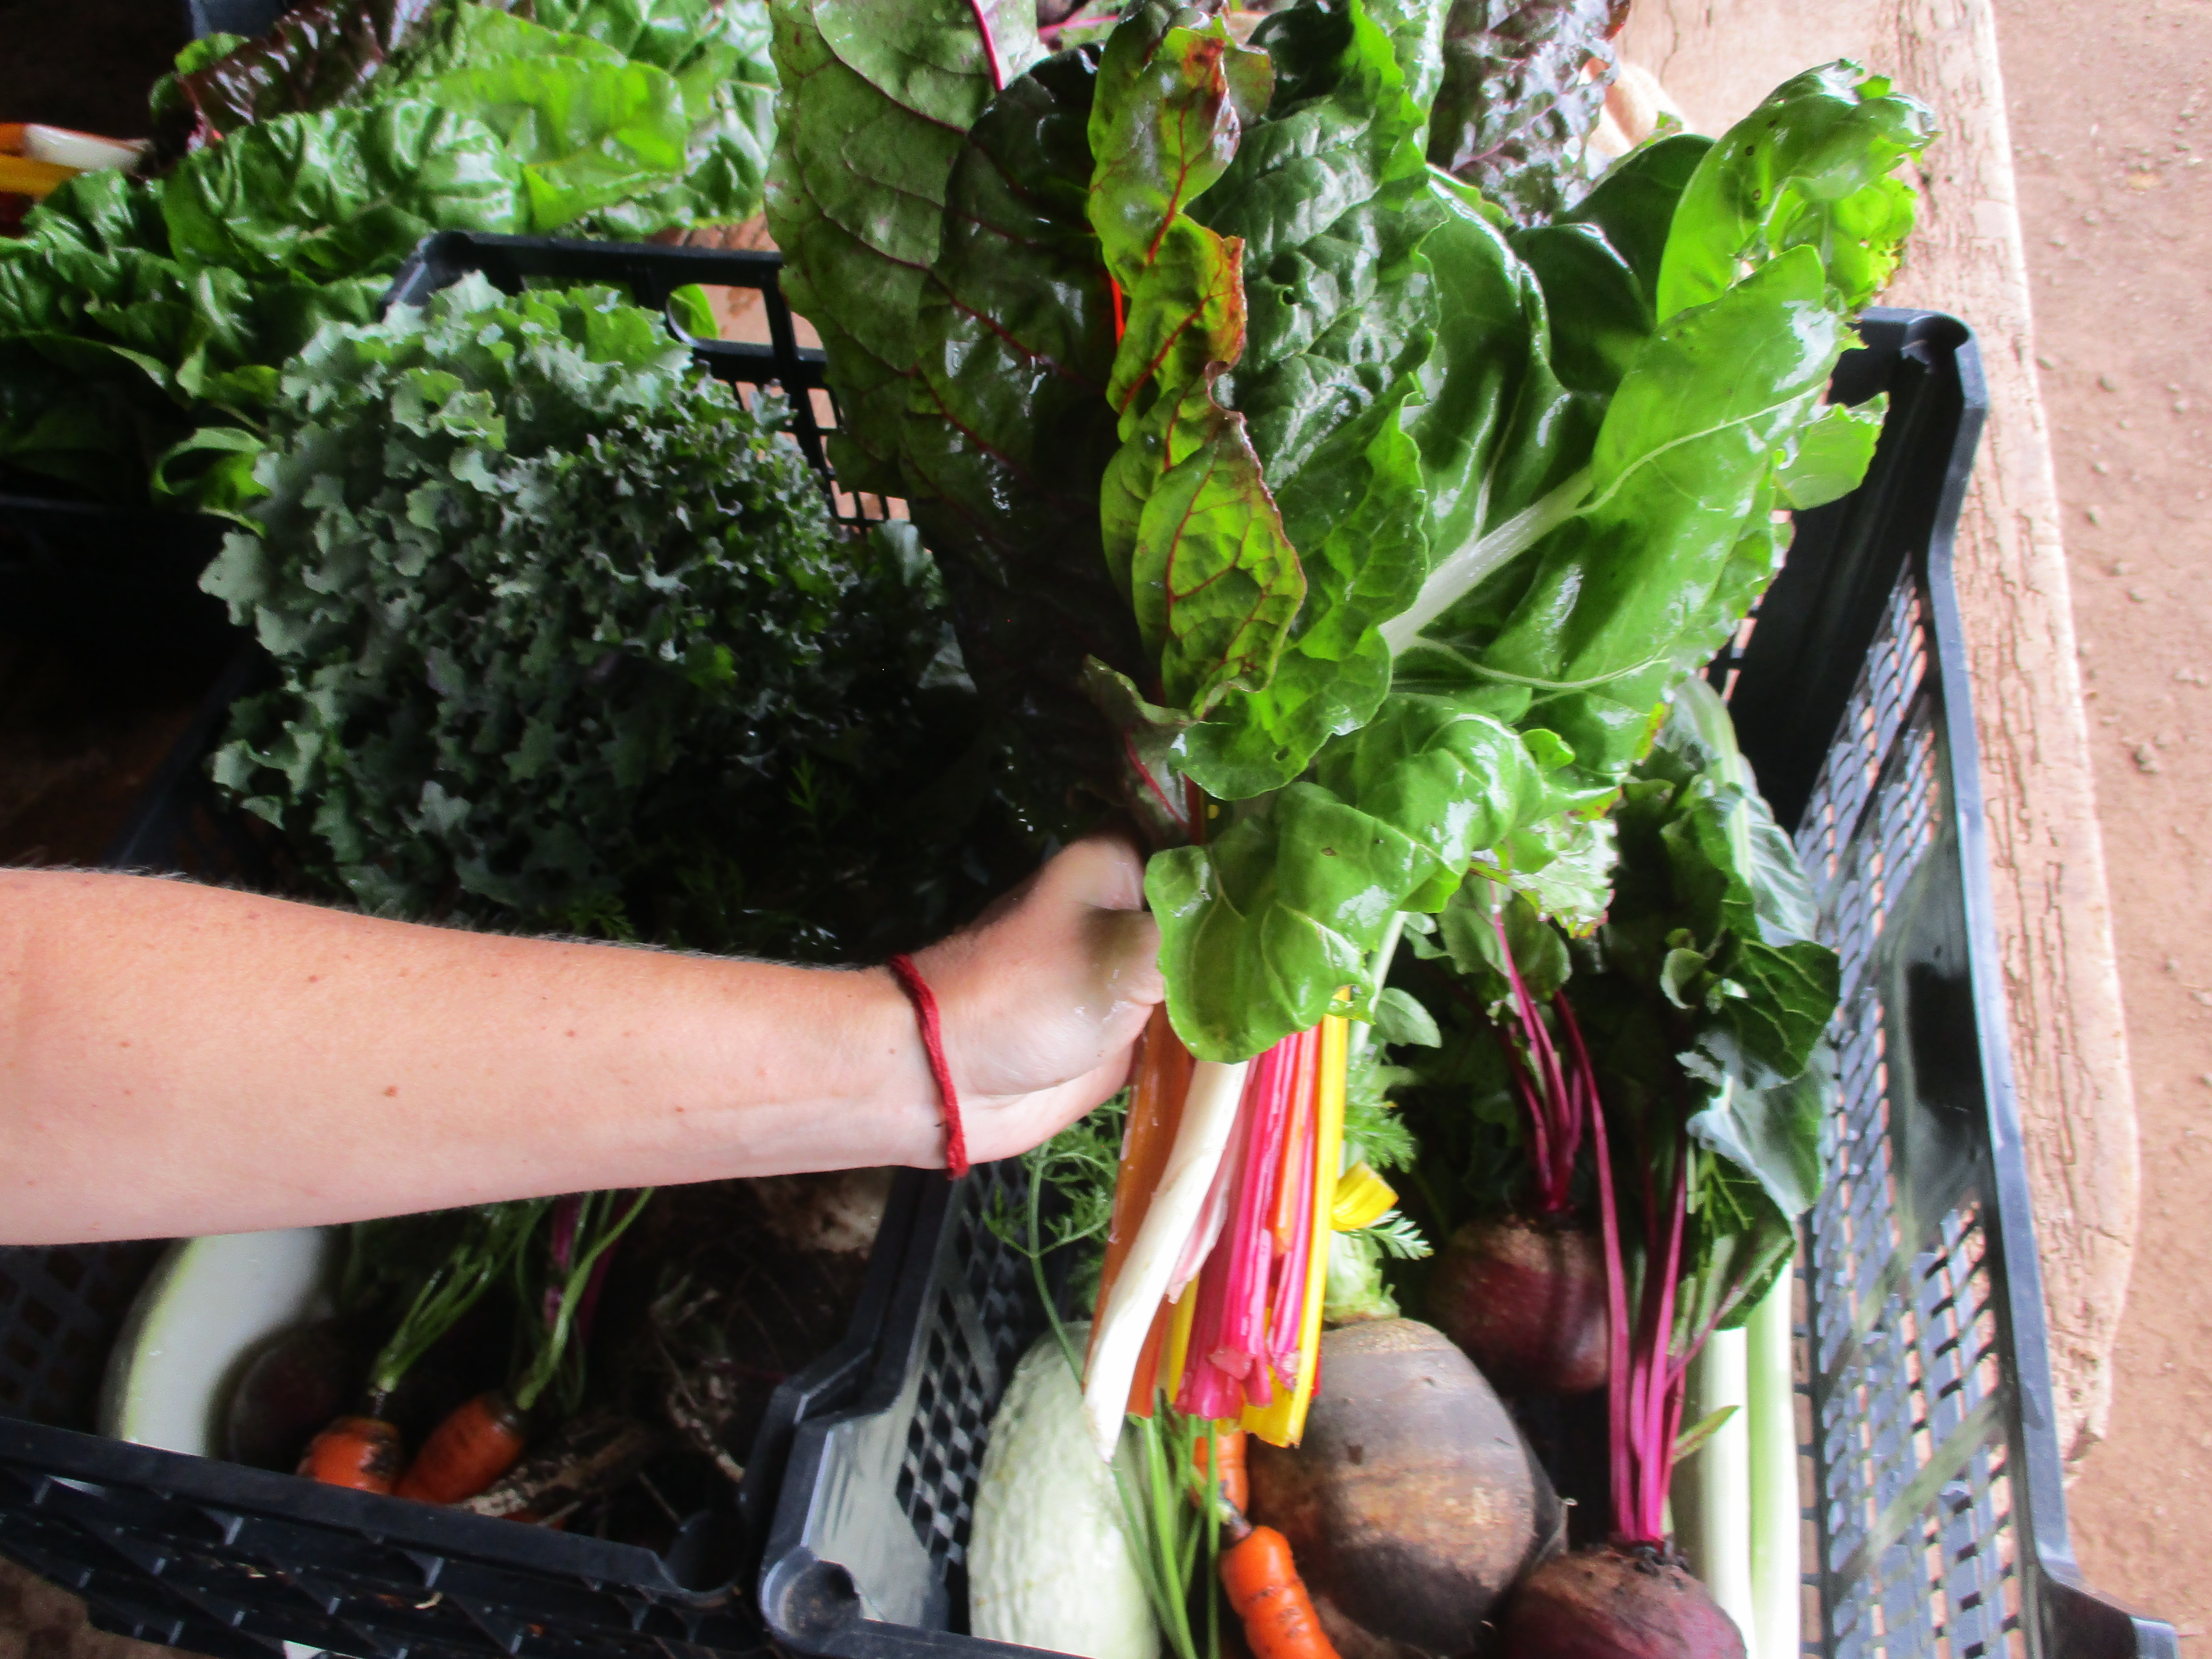
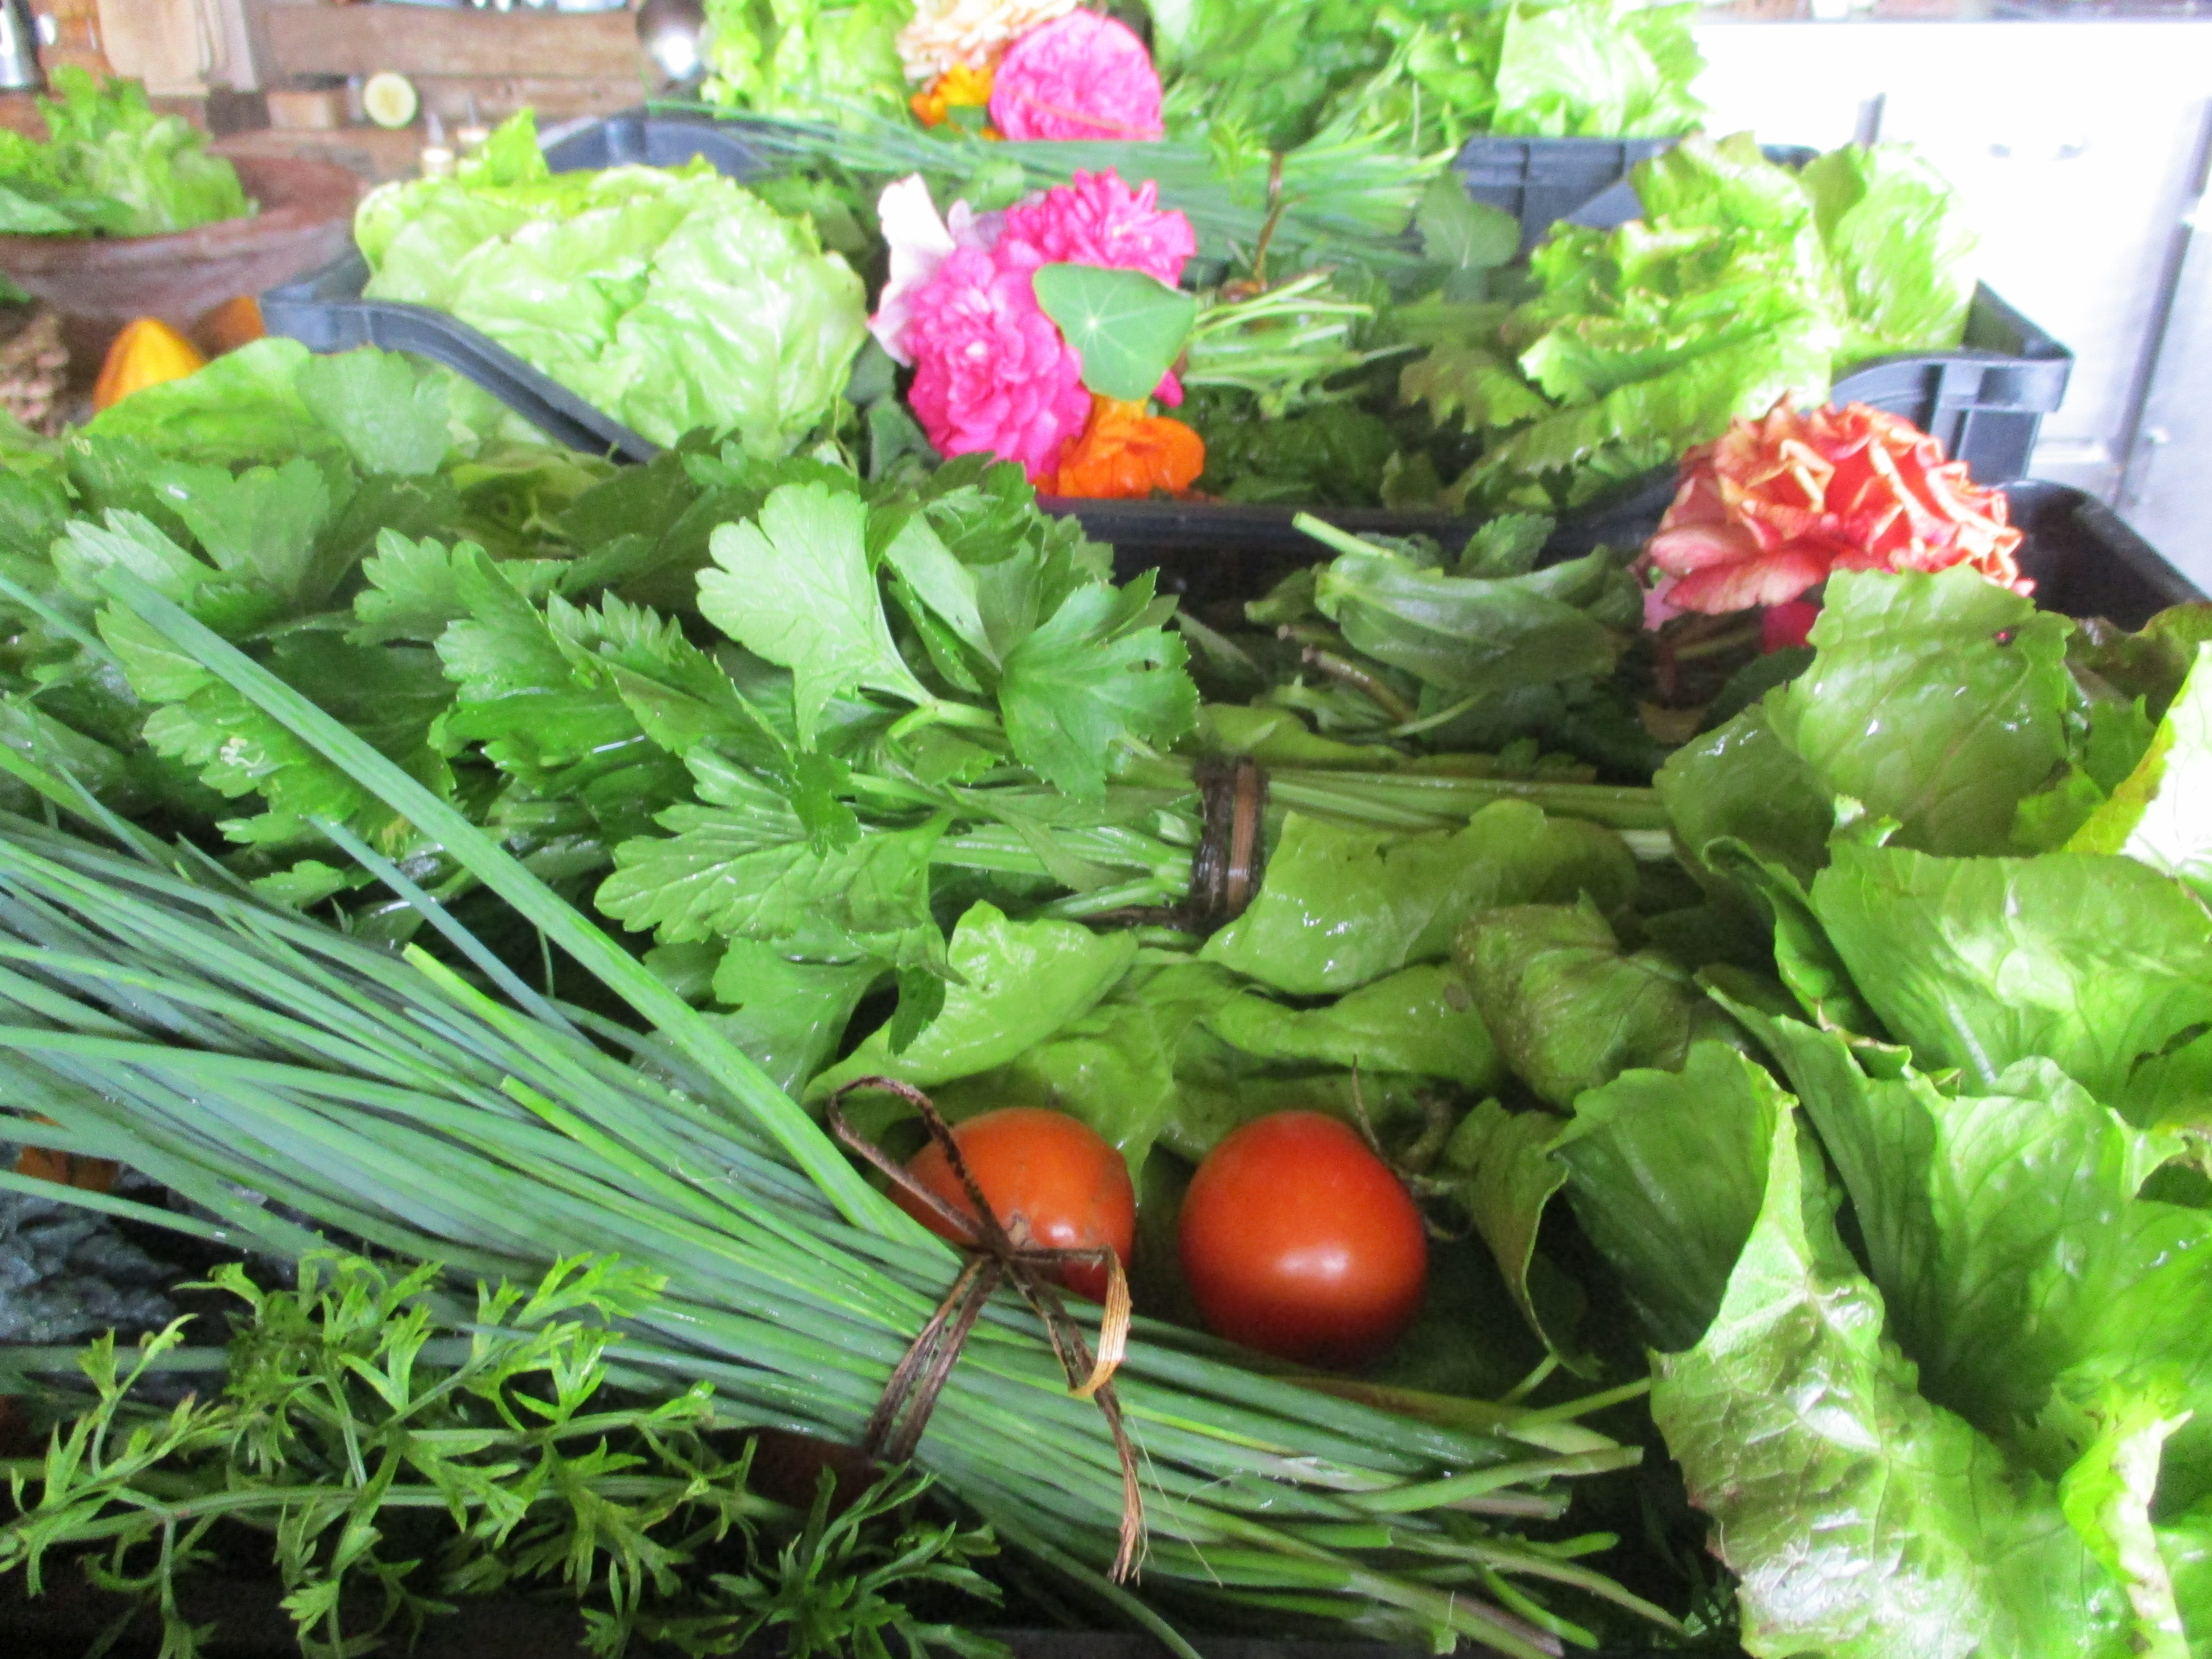
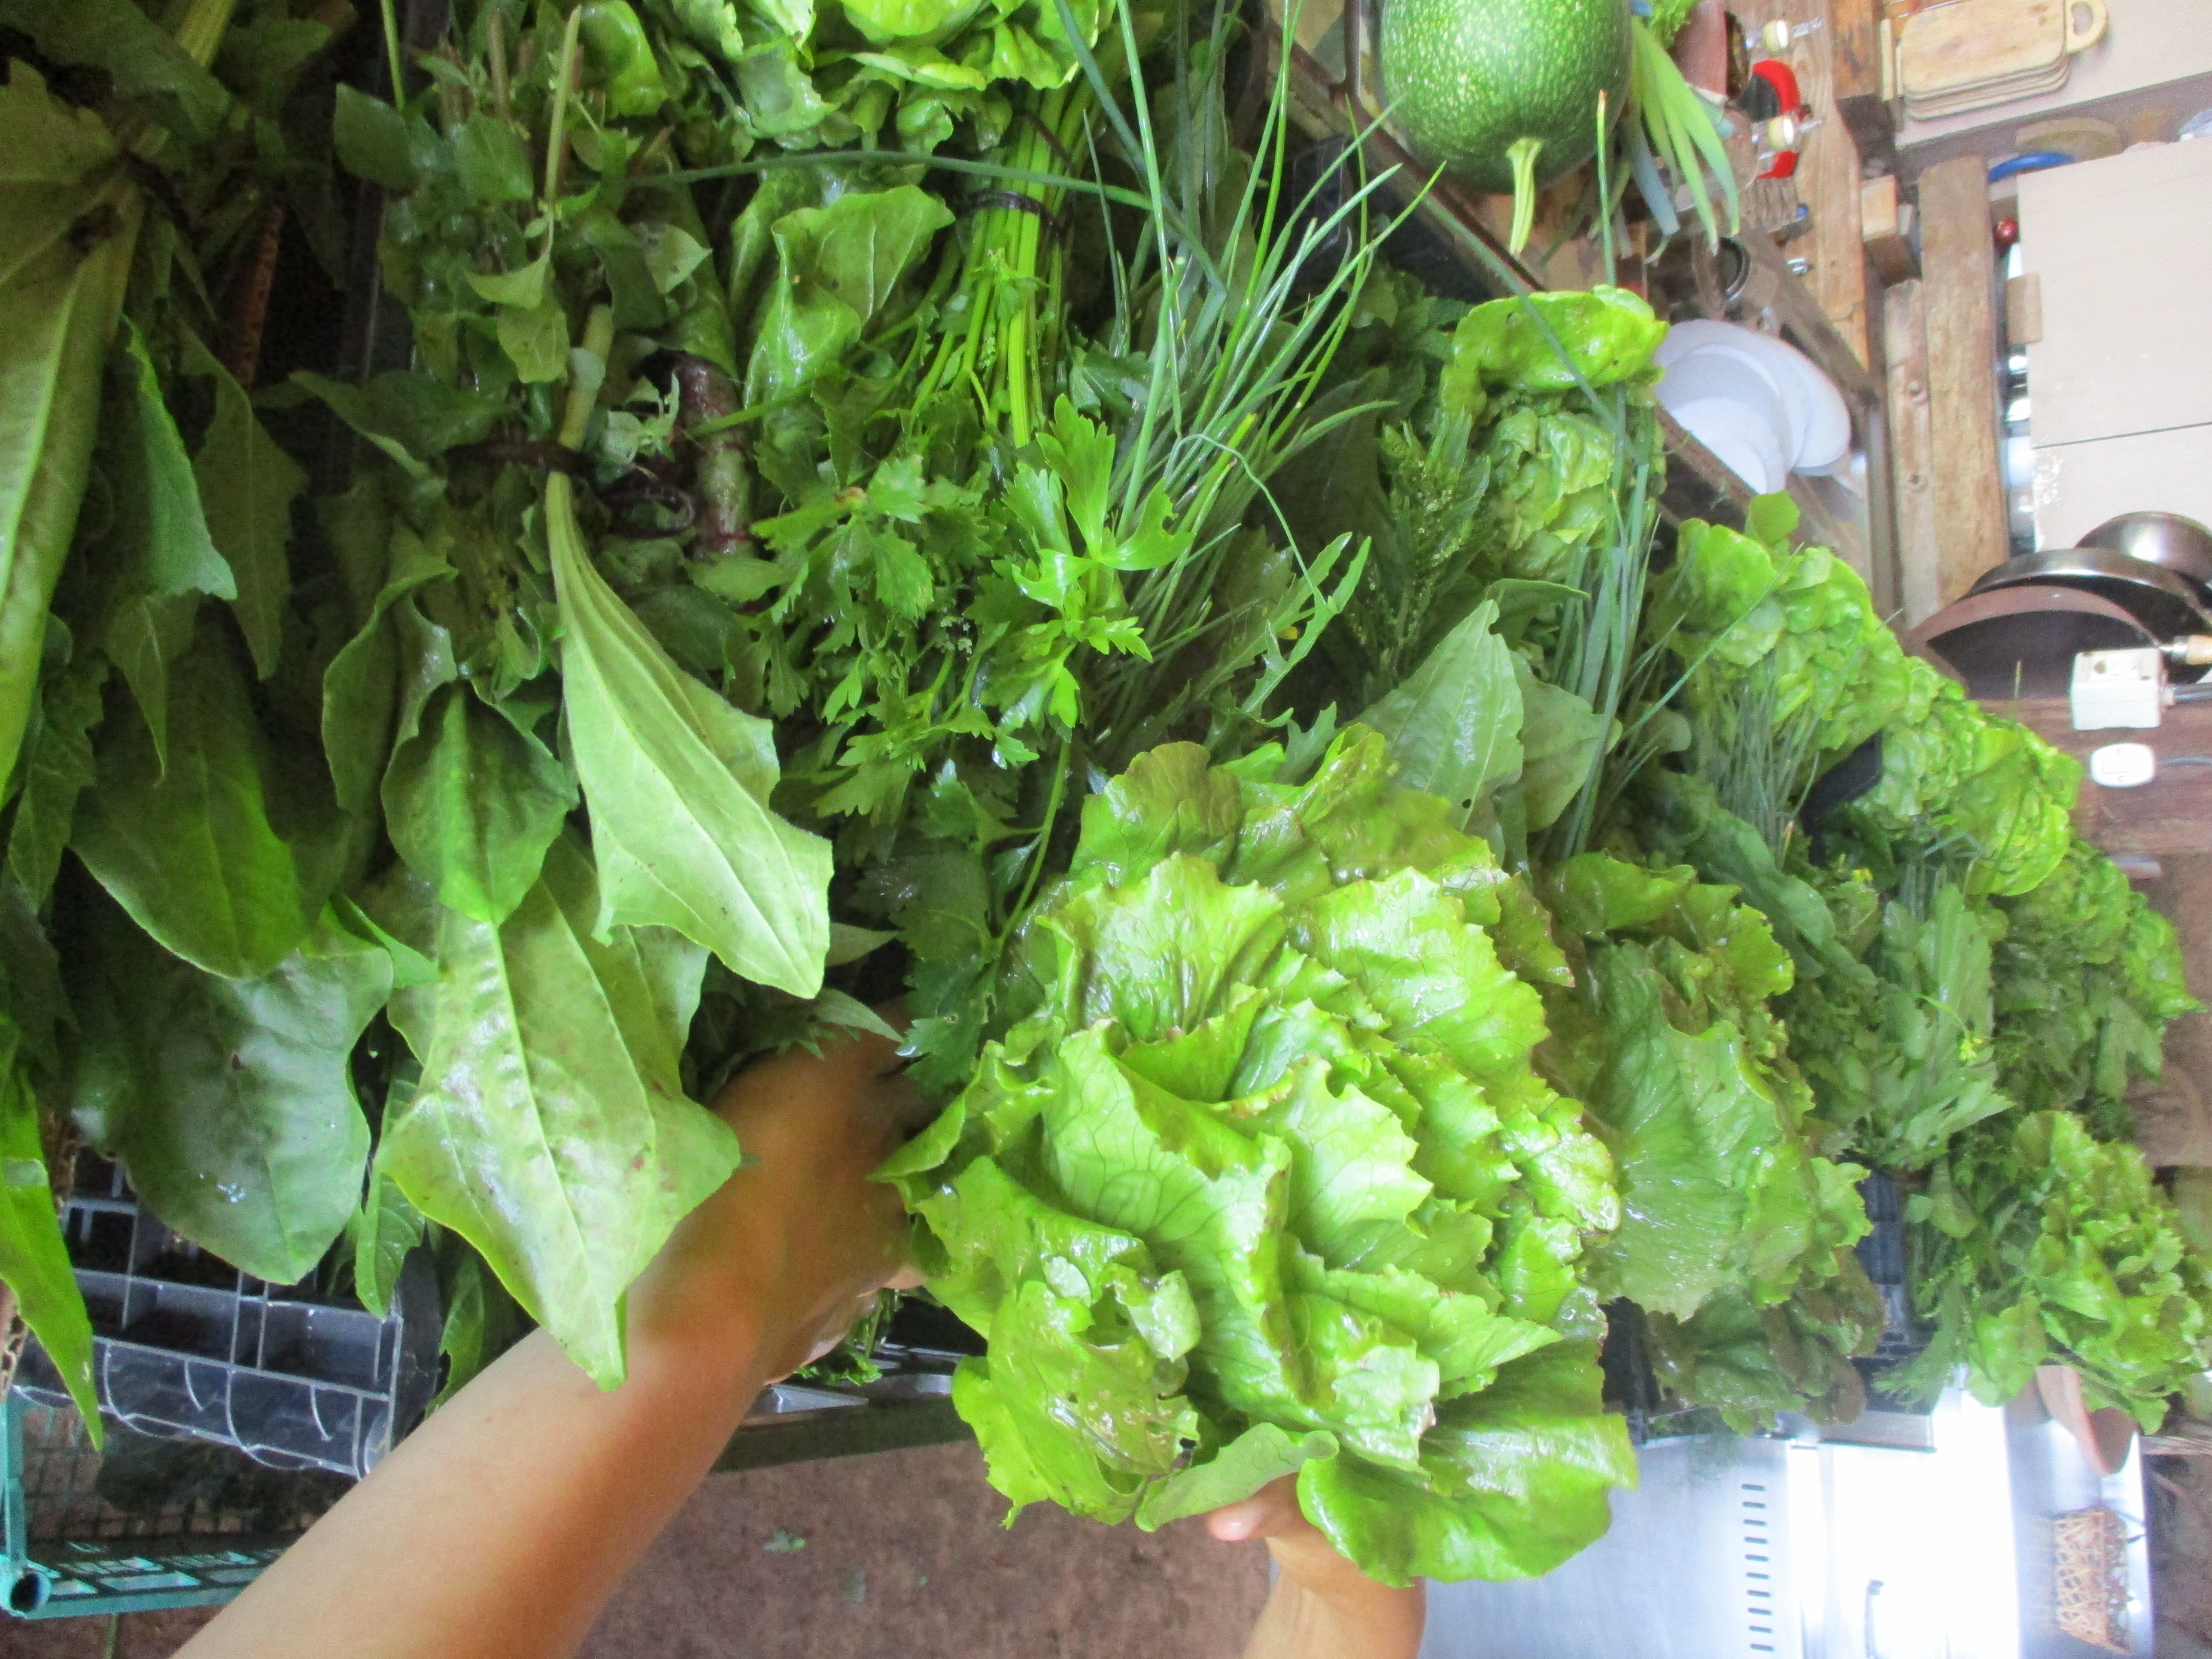
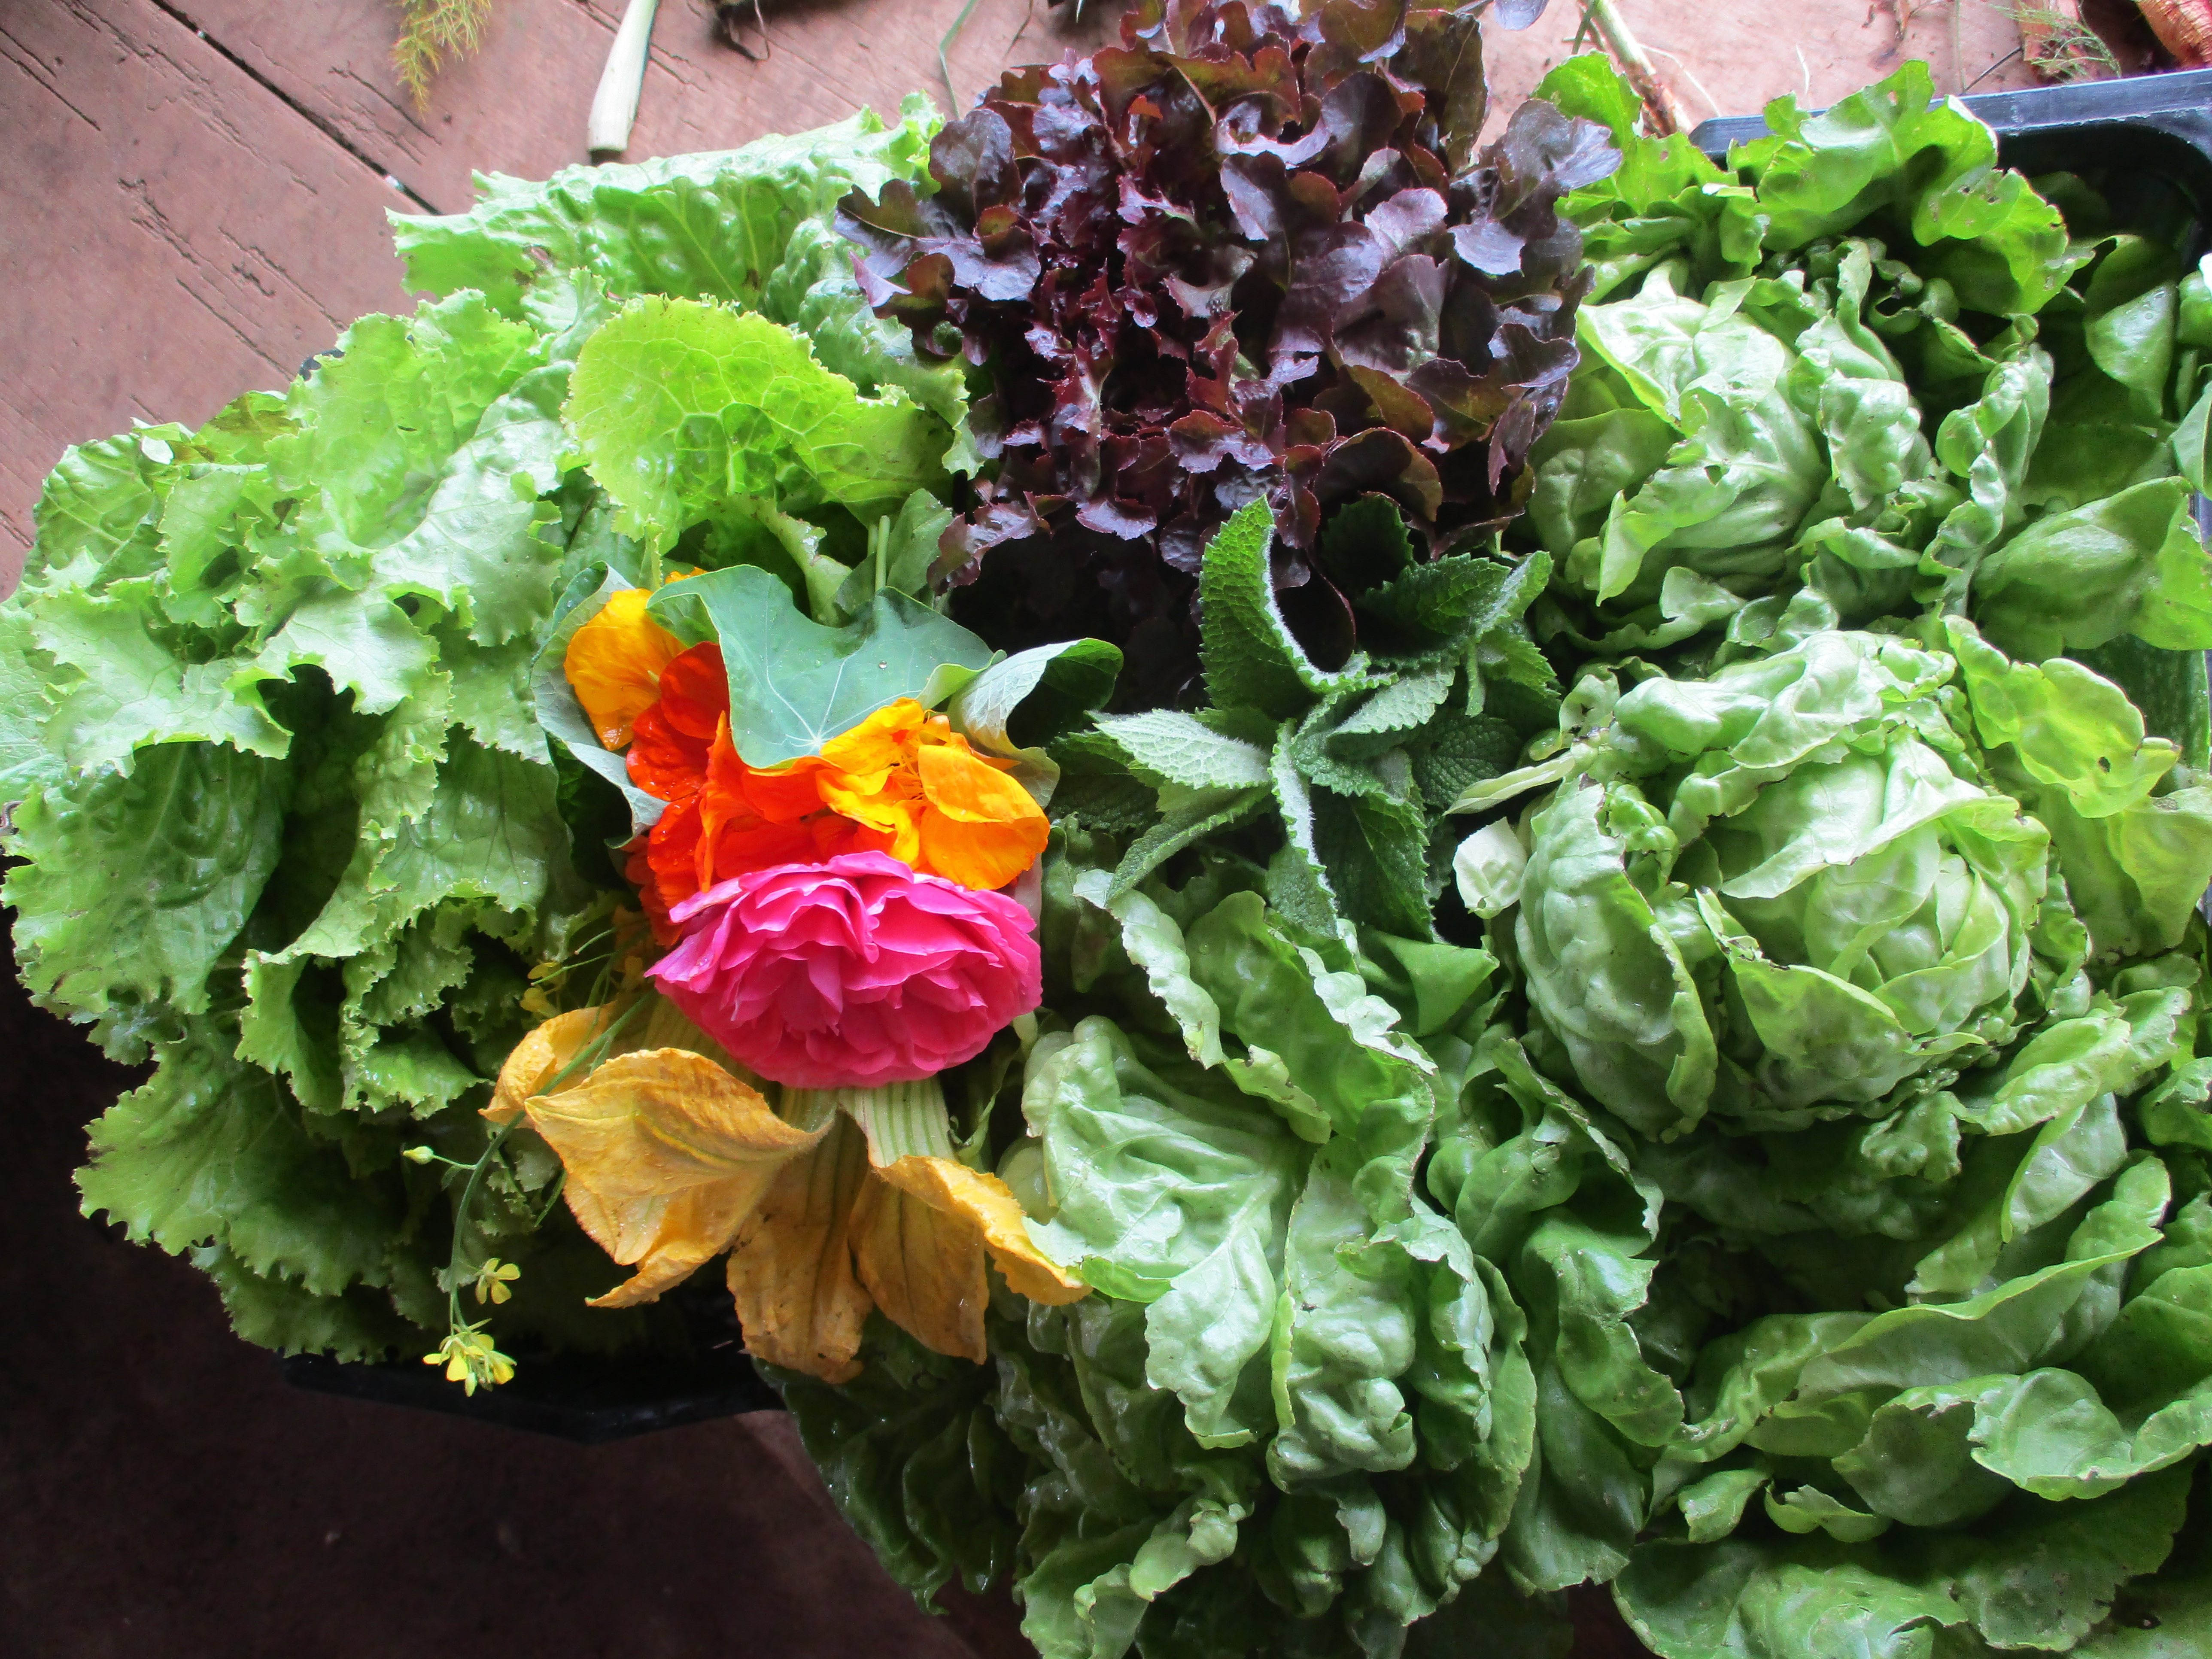
Figure VI.42.- Last steps in the process of assembling the bio-boxes
People can purchase the boxes by either choosing the option of having a fixed weekly box, which has been elaborated by the people that participate in the project according to the weekly production of our edible gardens and garden forests, with a previous price agreement that is maintained throughout time; the option of buying boxes with the products of their choice, which have variable and higher prices; or the option of only purchasing specific products.
We could say, based on our experience of selling bio-boxes, that the most convenient option in order to have a stable and profitable project is the fixed box option that depends on the production and harvest of each week, with a price agreement that is maintained throughout time and loyal collaborators that purchase the boxes once a week or every other week (Figure VI.43).
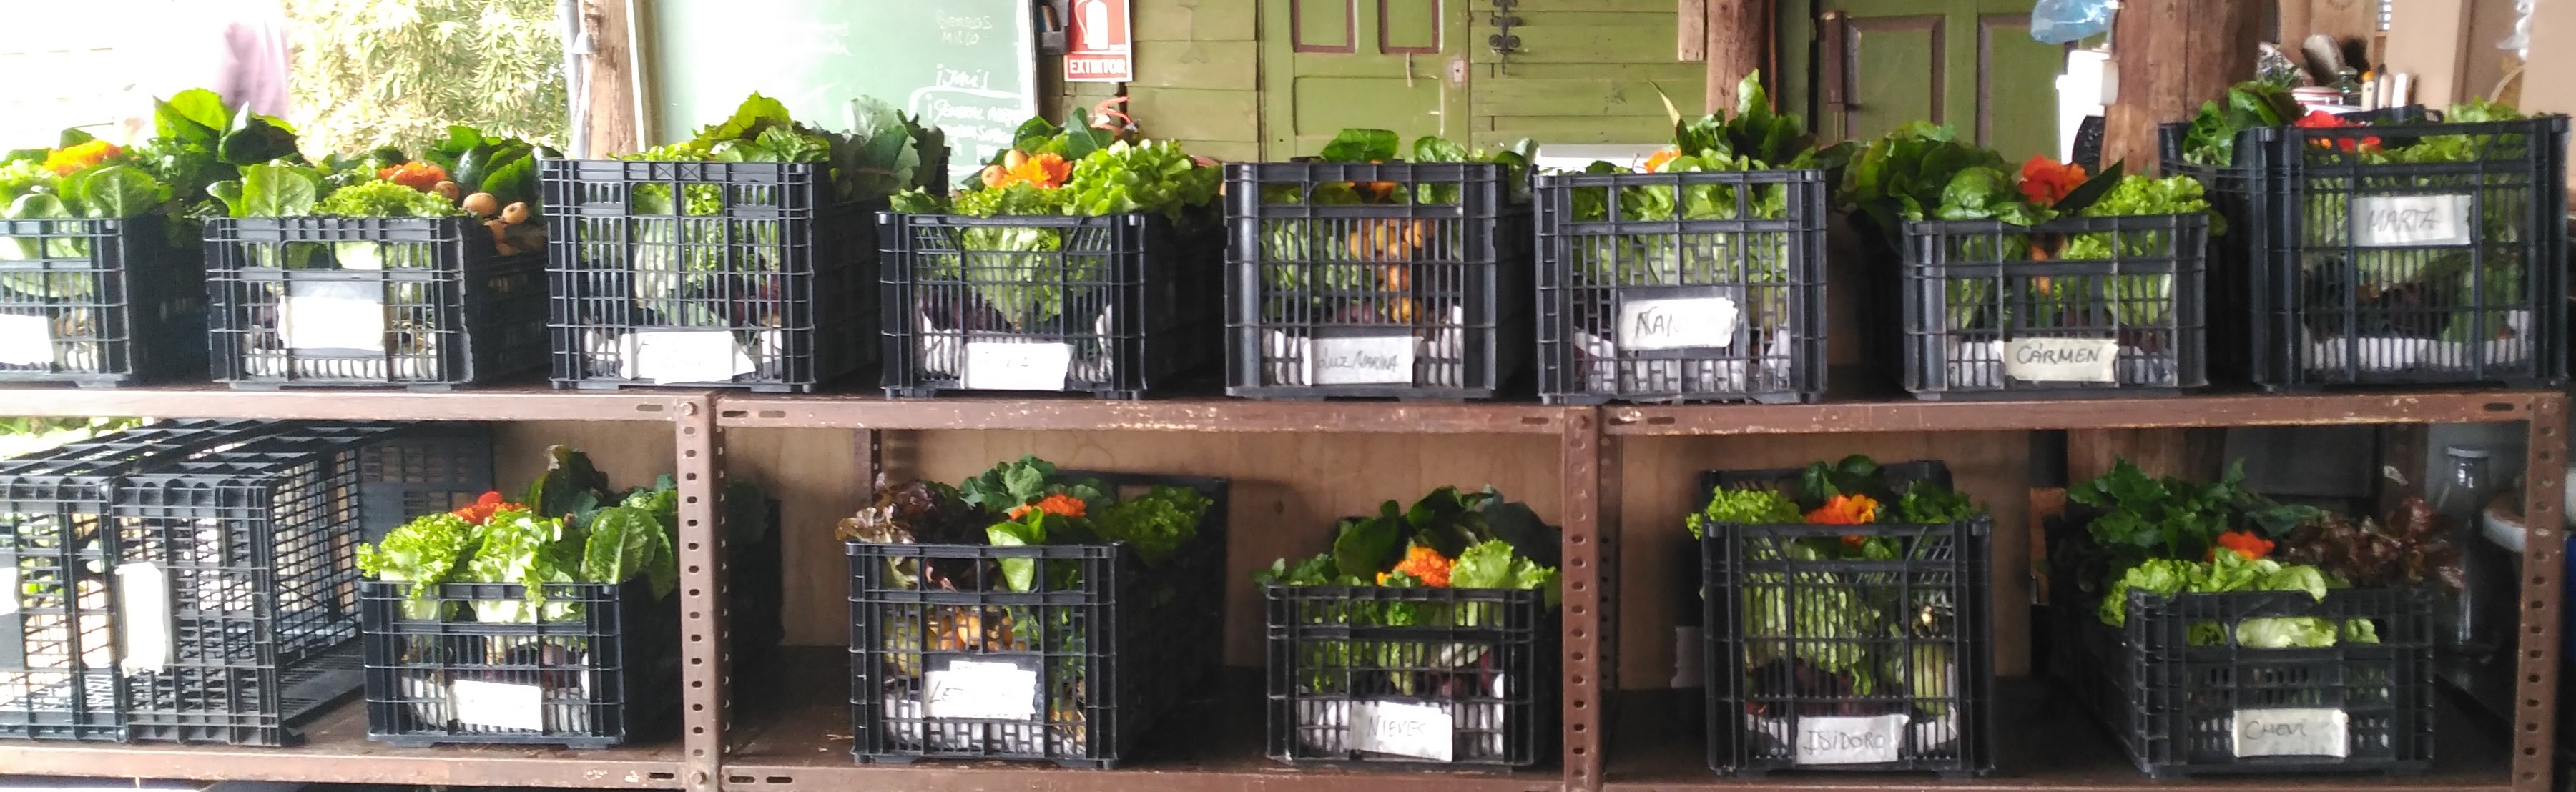
Figure VI.43.- Assembled bio-boxes, ready to be picked up
With this system we also make the collaborators of the project aware of the fact that boxes are not prepared by their demand, but according to what the garden offers us depending on the season of the year and the planning of the cultivations. This allows the collaborators to participate in a constant learning exercise by discovering new vegetables and fruit, and having a balanced diet with the appropriate nutritional variety (Figure VI.44).
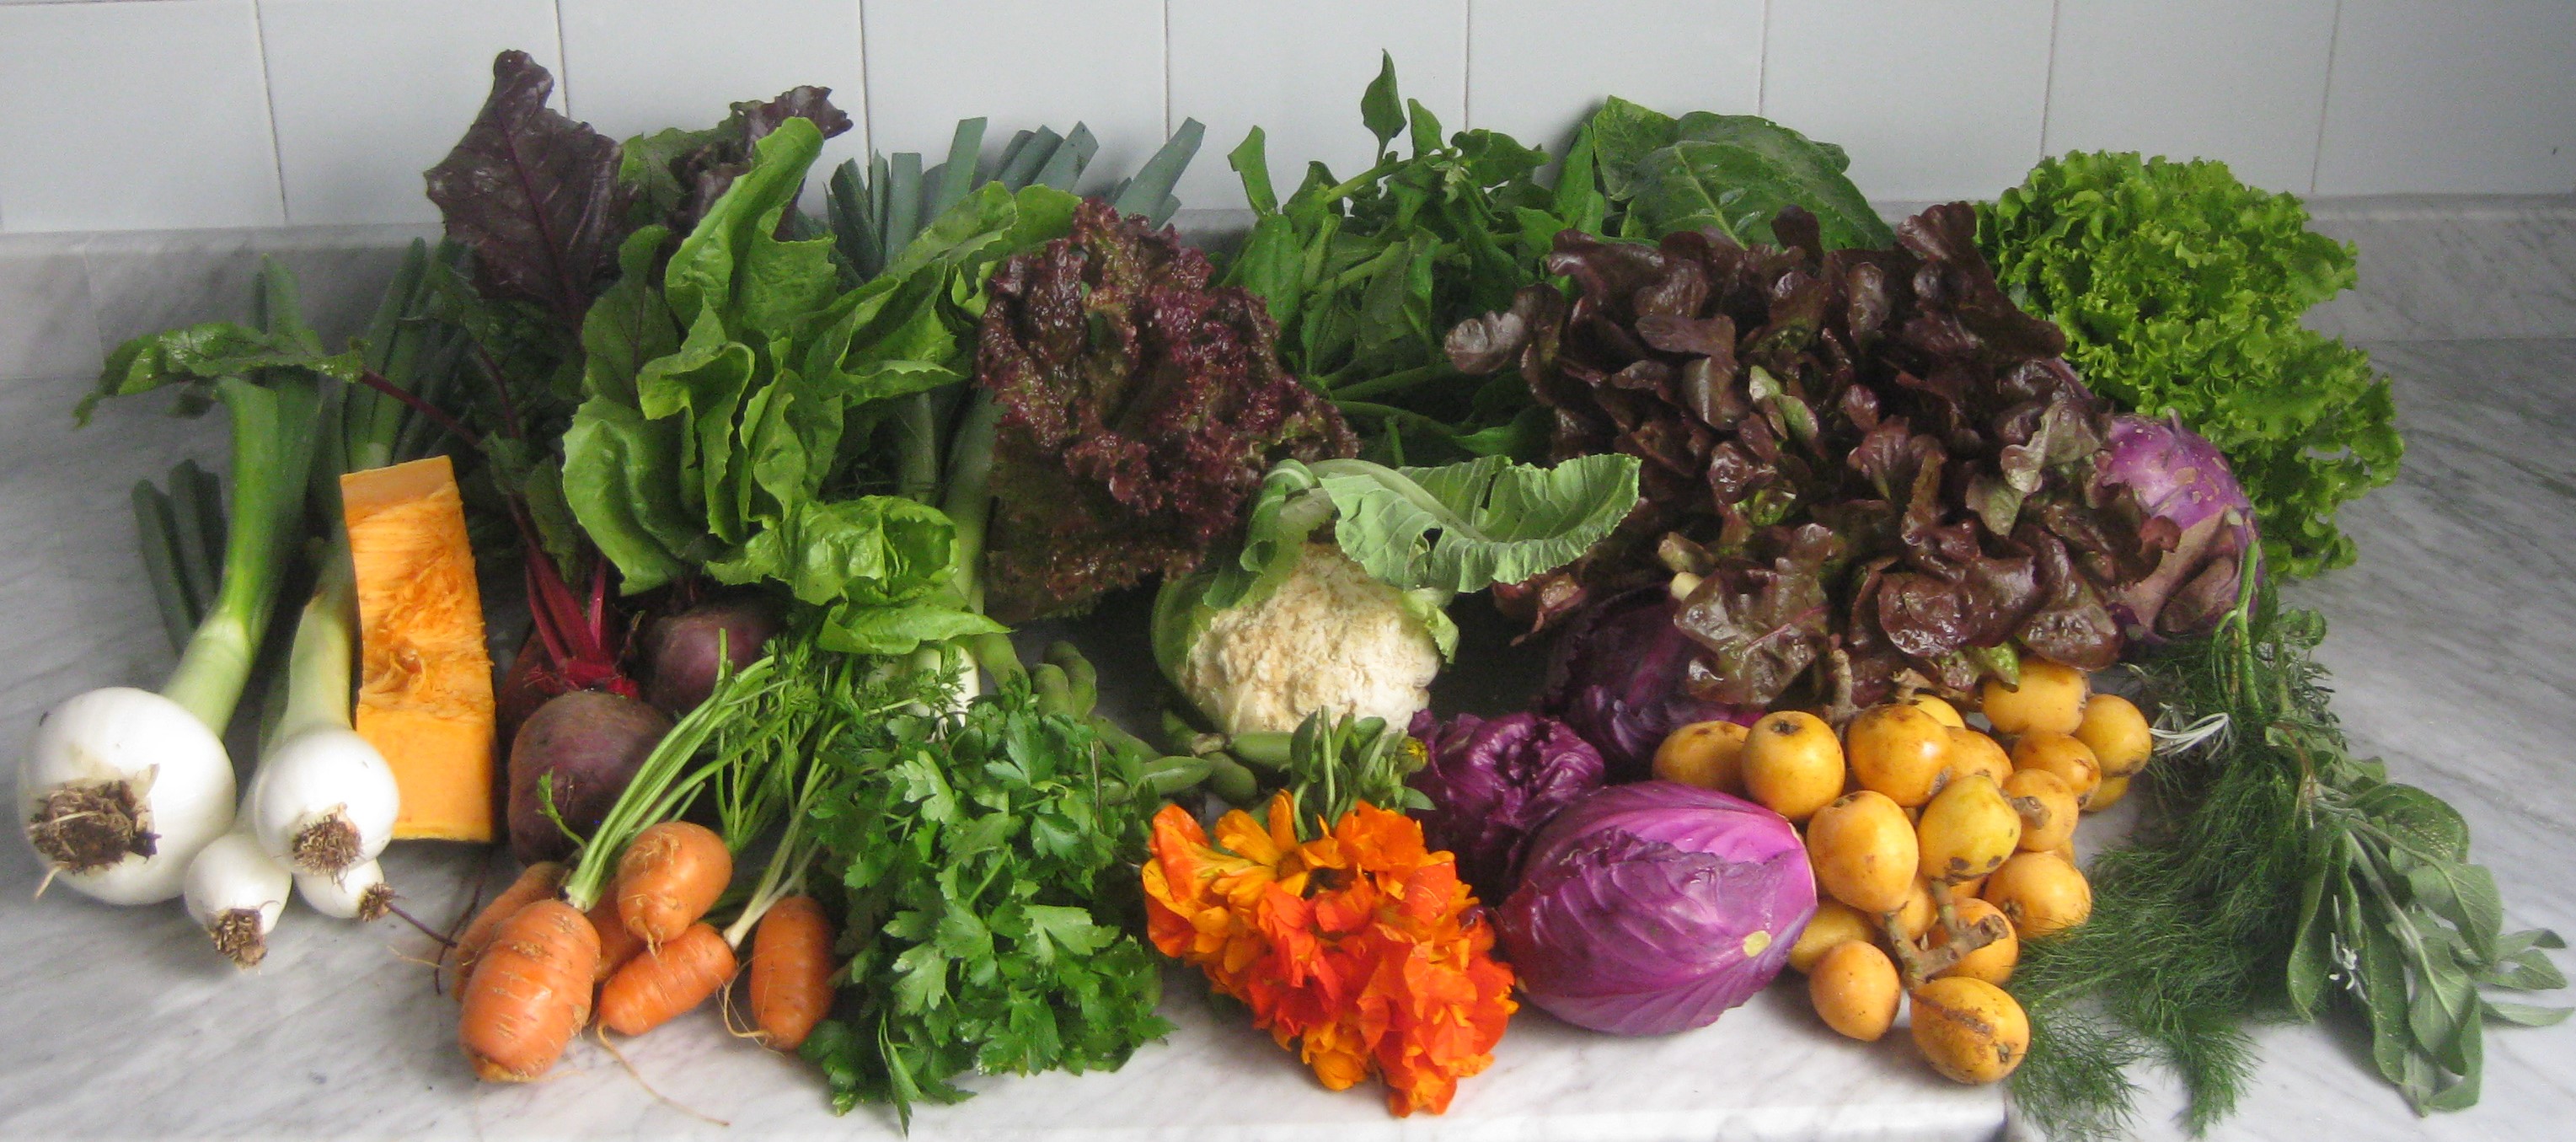
Figure VI.44.- Products of a bio-box in the house of a collaborator
In our case, collaborators receive more than a hundred edible and aromatic plants throughout the year from the more than 300 varieties that are produced in our edible gardens and garden forests.
Selling the boxes at our vegetable market is also a great opportunity to inform the collaborators about the properties of the flowers and aromatic plants by placing fact sheets in one section of the market with information about the ones that are put in the boxes of that week (Figure VI.45). The participants of the course can design these fact sheets in an artistic way with help of the instructors.
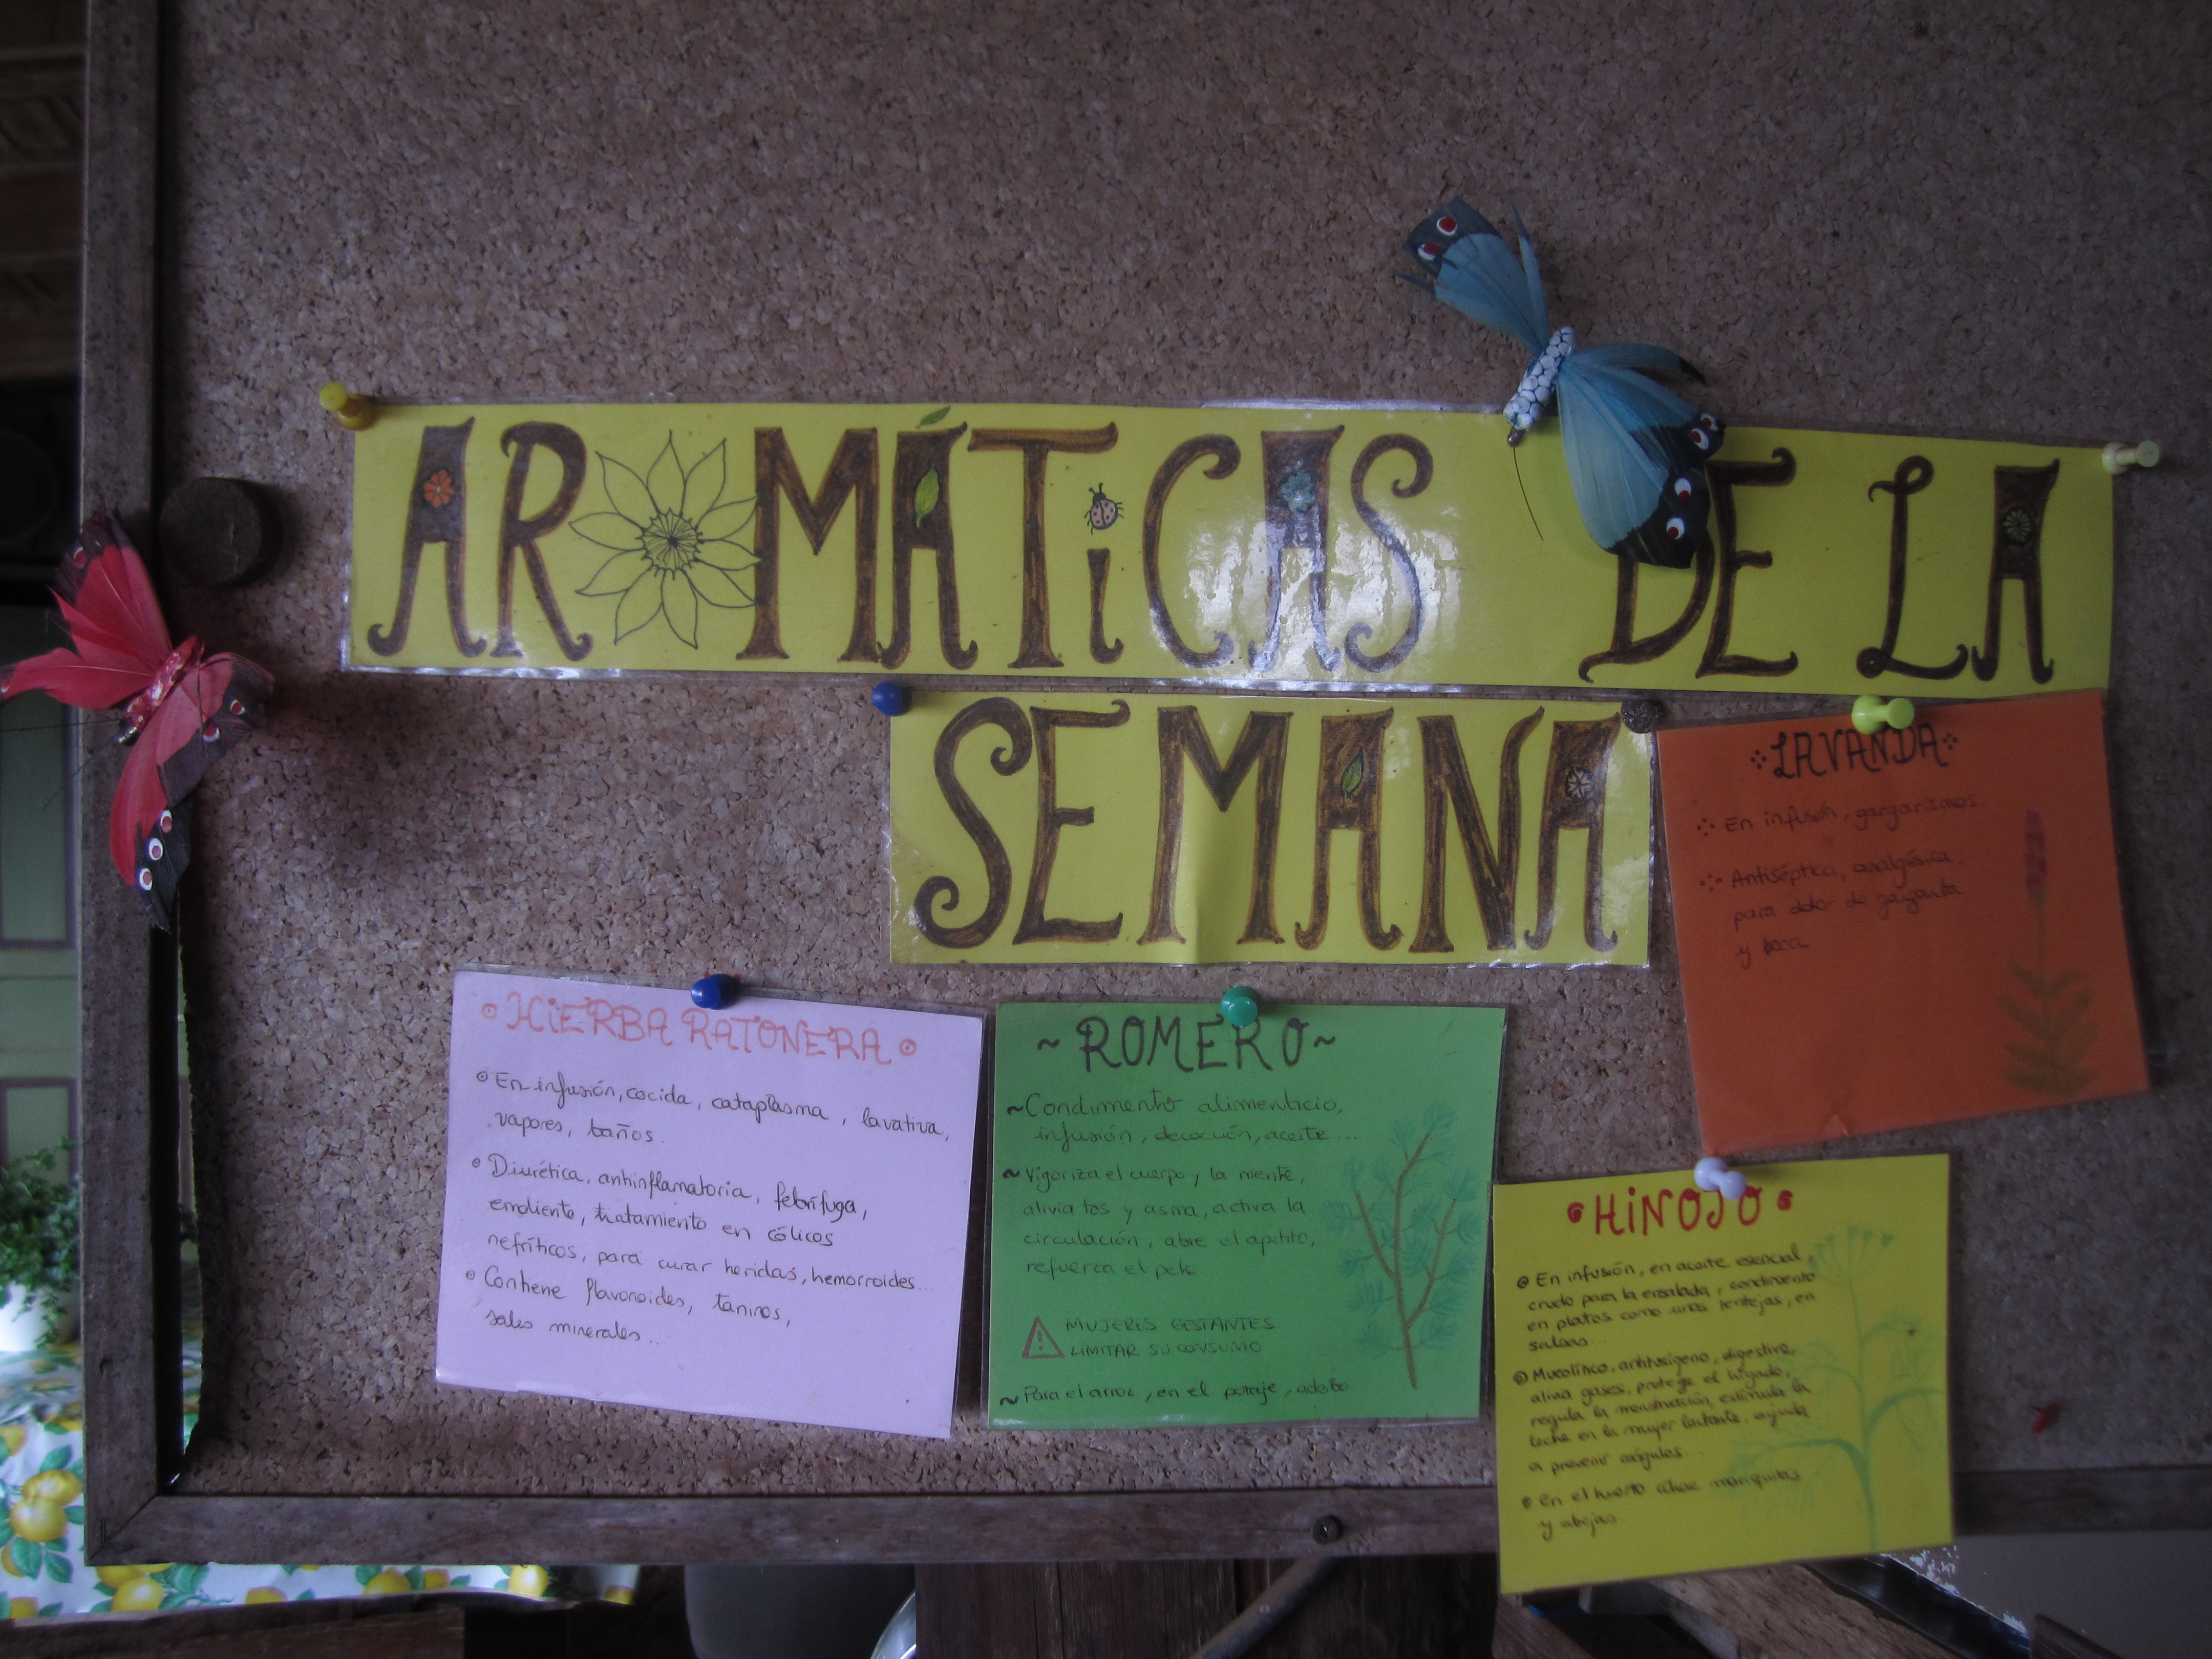
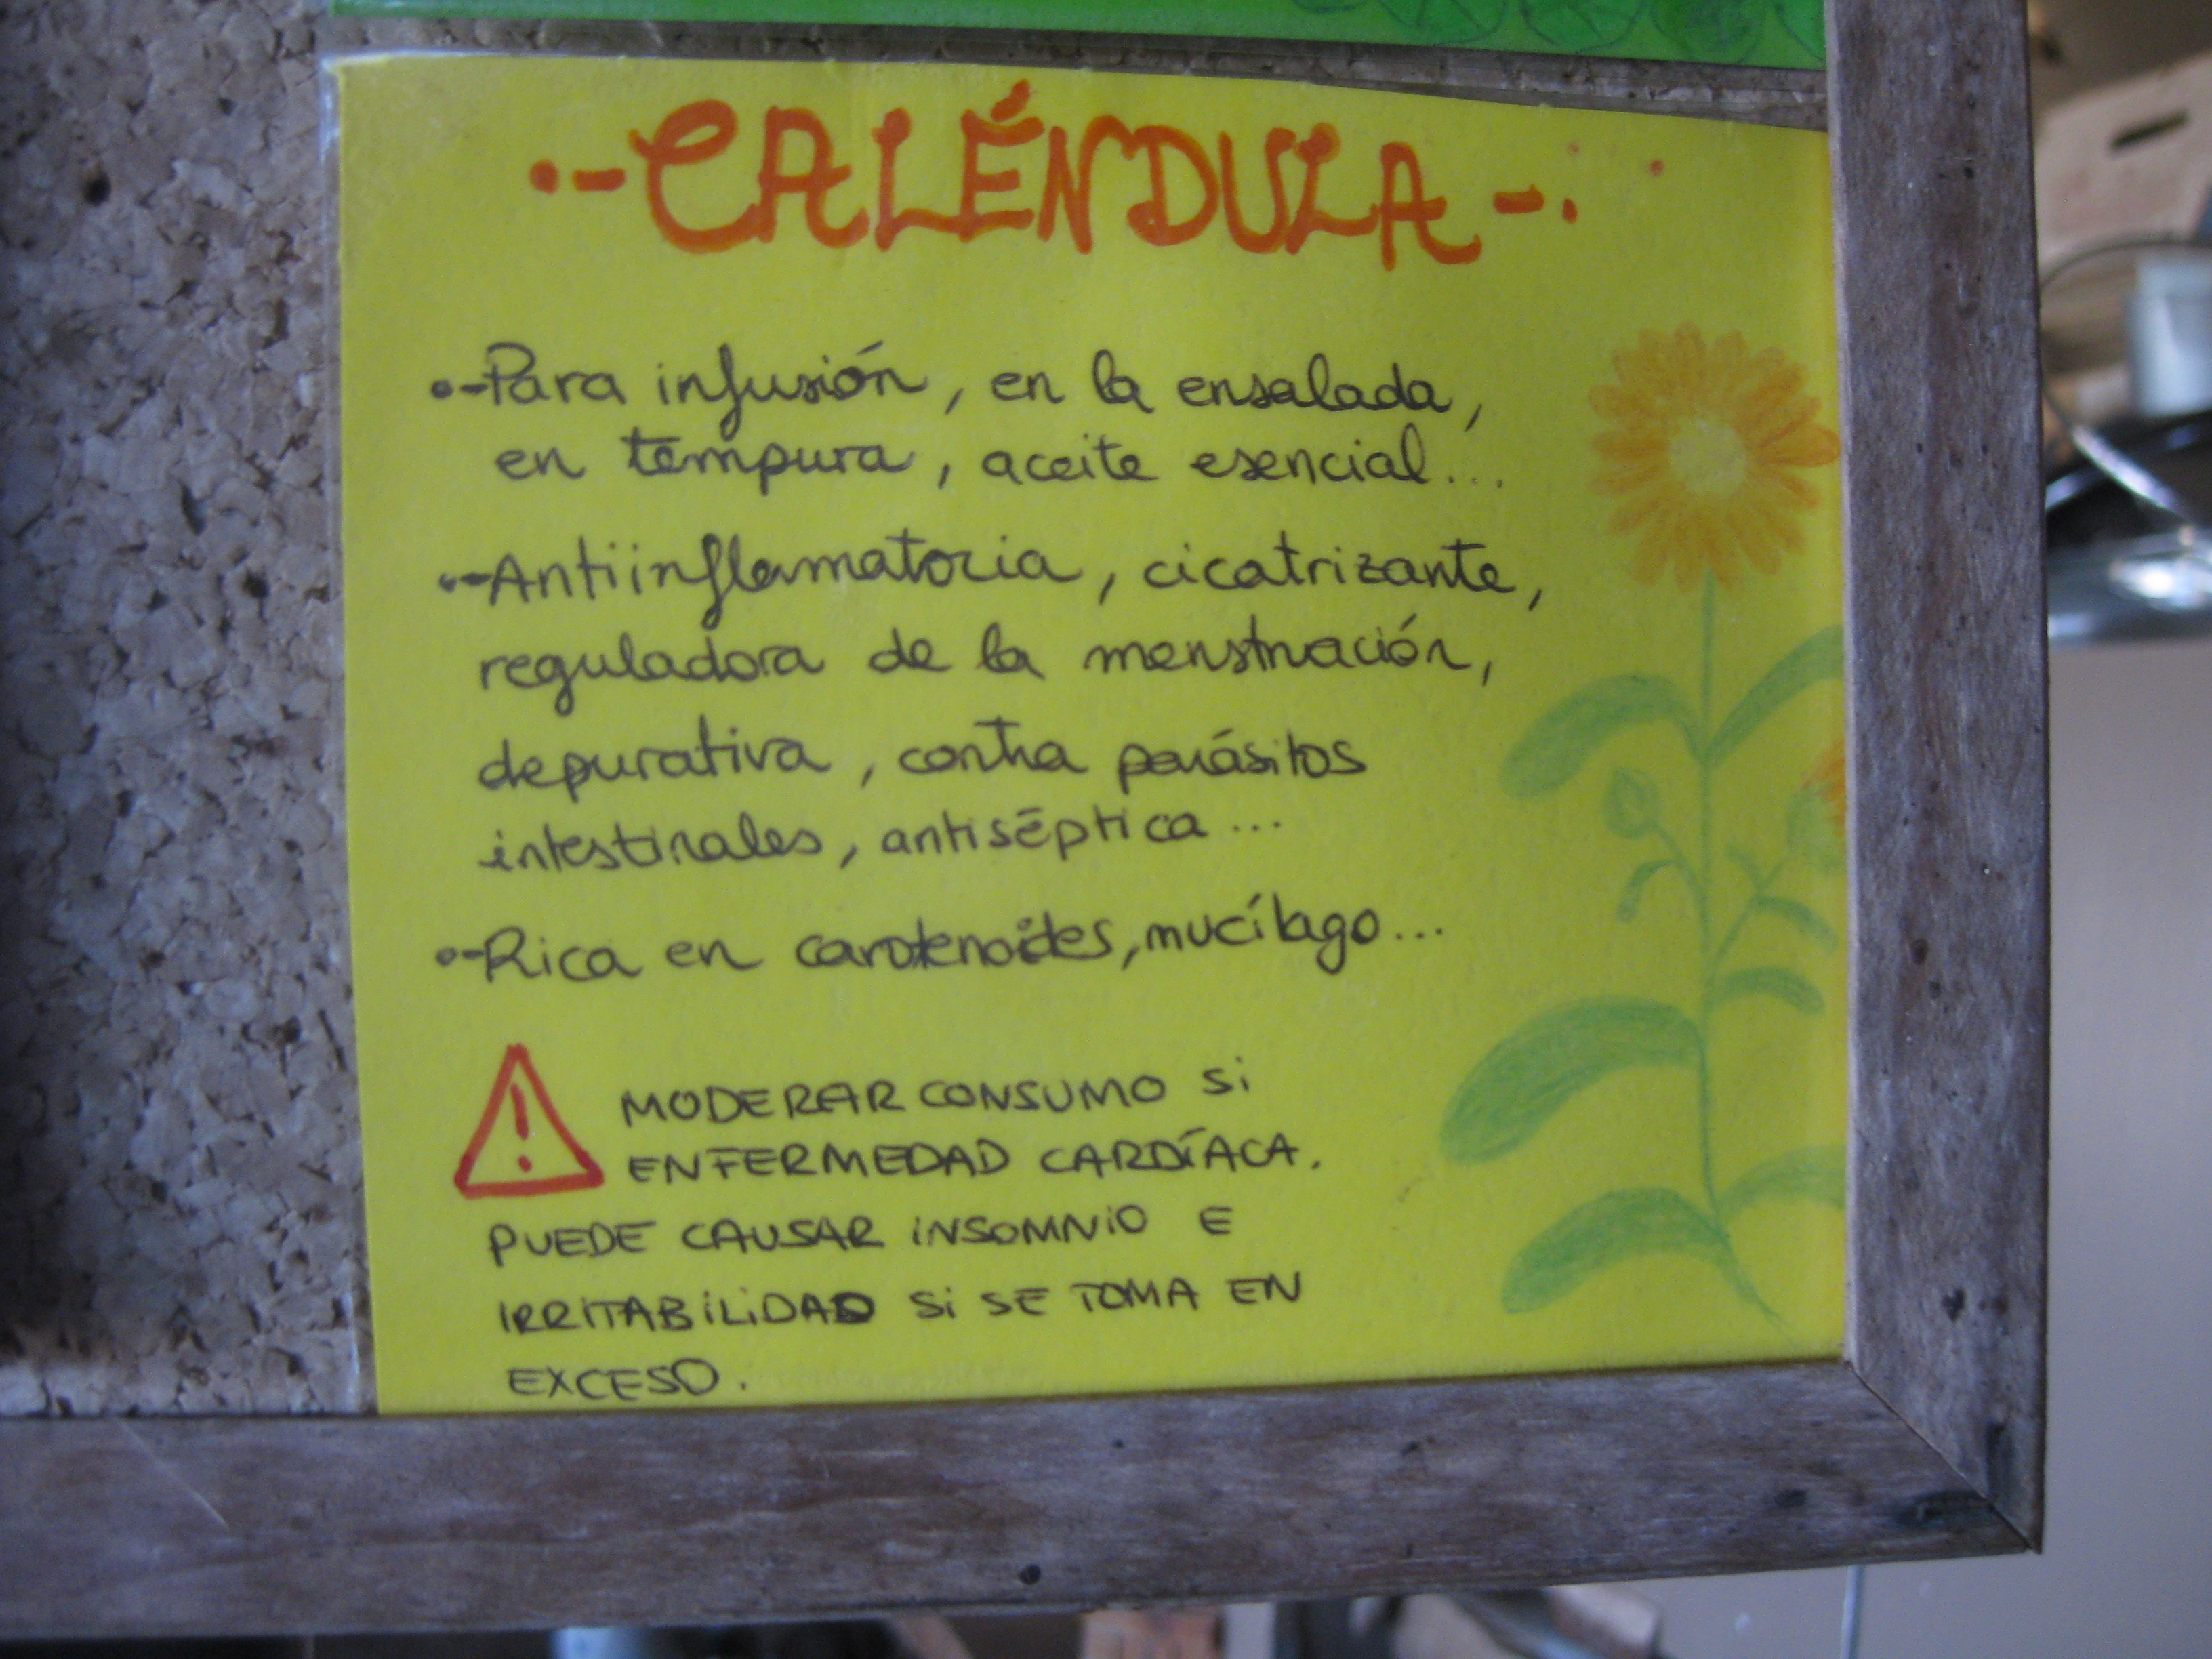
Figure VI.45.- Fact sheets of flowers and aromatic plants in our vegetable market
The moment of selling the bio-boxes is also another opportunity to carry out an interesting energy exchange.
When the collaborator comes to pick up his bio-box, he carries an empty box and a filled bucket from his house. The bucket, which he will leave in the farm, is filled with organic waste produced in his house that week. The empty box is the one he picked up the previous week with vegetables, fruit, aromatic plants and flowers, which were used by the collaborator´s family during the week.
The energy exchange is done when the collaborator leaves the farm with a filled box and an empty bucket: the box filled with vegetables, fruit, aromatic plants and flowers for the family´s consumption, and the empty bucket for the organic waste produced that week.
It is an interesting energy exchange of the project in terms of closing an energy cycle between food and organic waste management.
If we have vegetable and fruit surplus that week, we can sell it to organic operators from farmers markets, local shops, groups of people that purchase directly from the producers, slow food restaurants, hotel restaurants, school cafeterias that support healthy diets by using organic products, etc. By doing, so we strengthen the idea of a local development network.
In our case there is an extra value added, which is the social dimension of our therapeutic and rehabilitation center for people with mental illness: the value of the people we share knowledge with.
VI.8 To summarize
Along with the pleasure of growing our vegetables, we enjoy obtaining our own seeds and observe how the development cycle of each variety is carried out by looking at how the plants bolt, how they bloom, and how they are pollinated and form seeds. It is also a pleasure to have a wide plant and animal biodiversity that ensures and enriches life in our planet so that future generations can enjoy it as well (Figure VI.46).
The different stages of sowing, maintaining and harvesting offer us the perfect opportunity to remember what we are as a human species, to really feel being part of the environment. Of course, this also means that we have to respect and accept our nature inside of the natural system of the cycle of life, accepting the natural rhythm of all things. What might appear to be an inconvenience can even turn out to be a great advantage (for instance, weeds might seem bad at first, but they are not so bad after all).
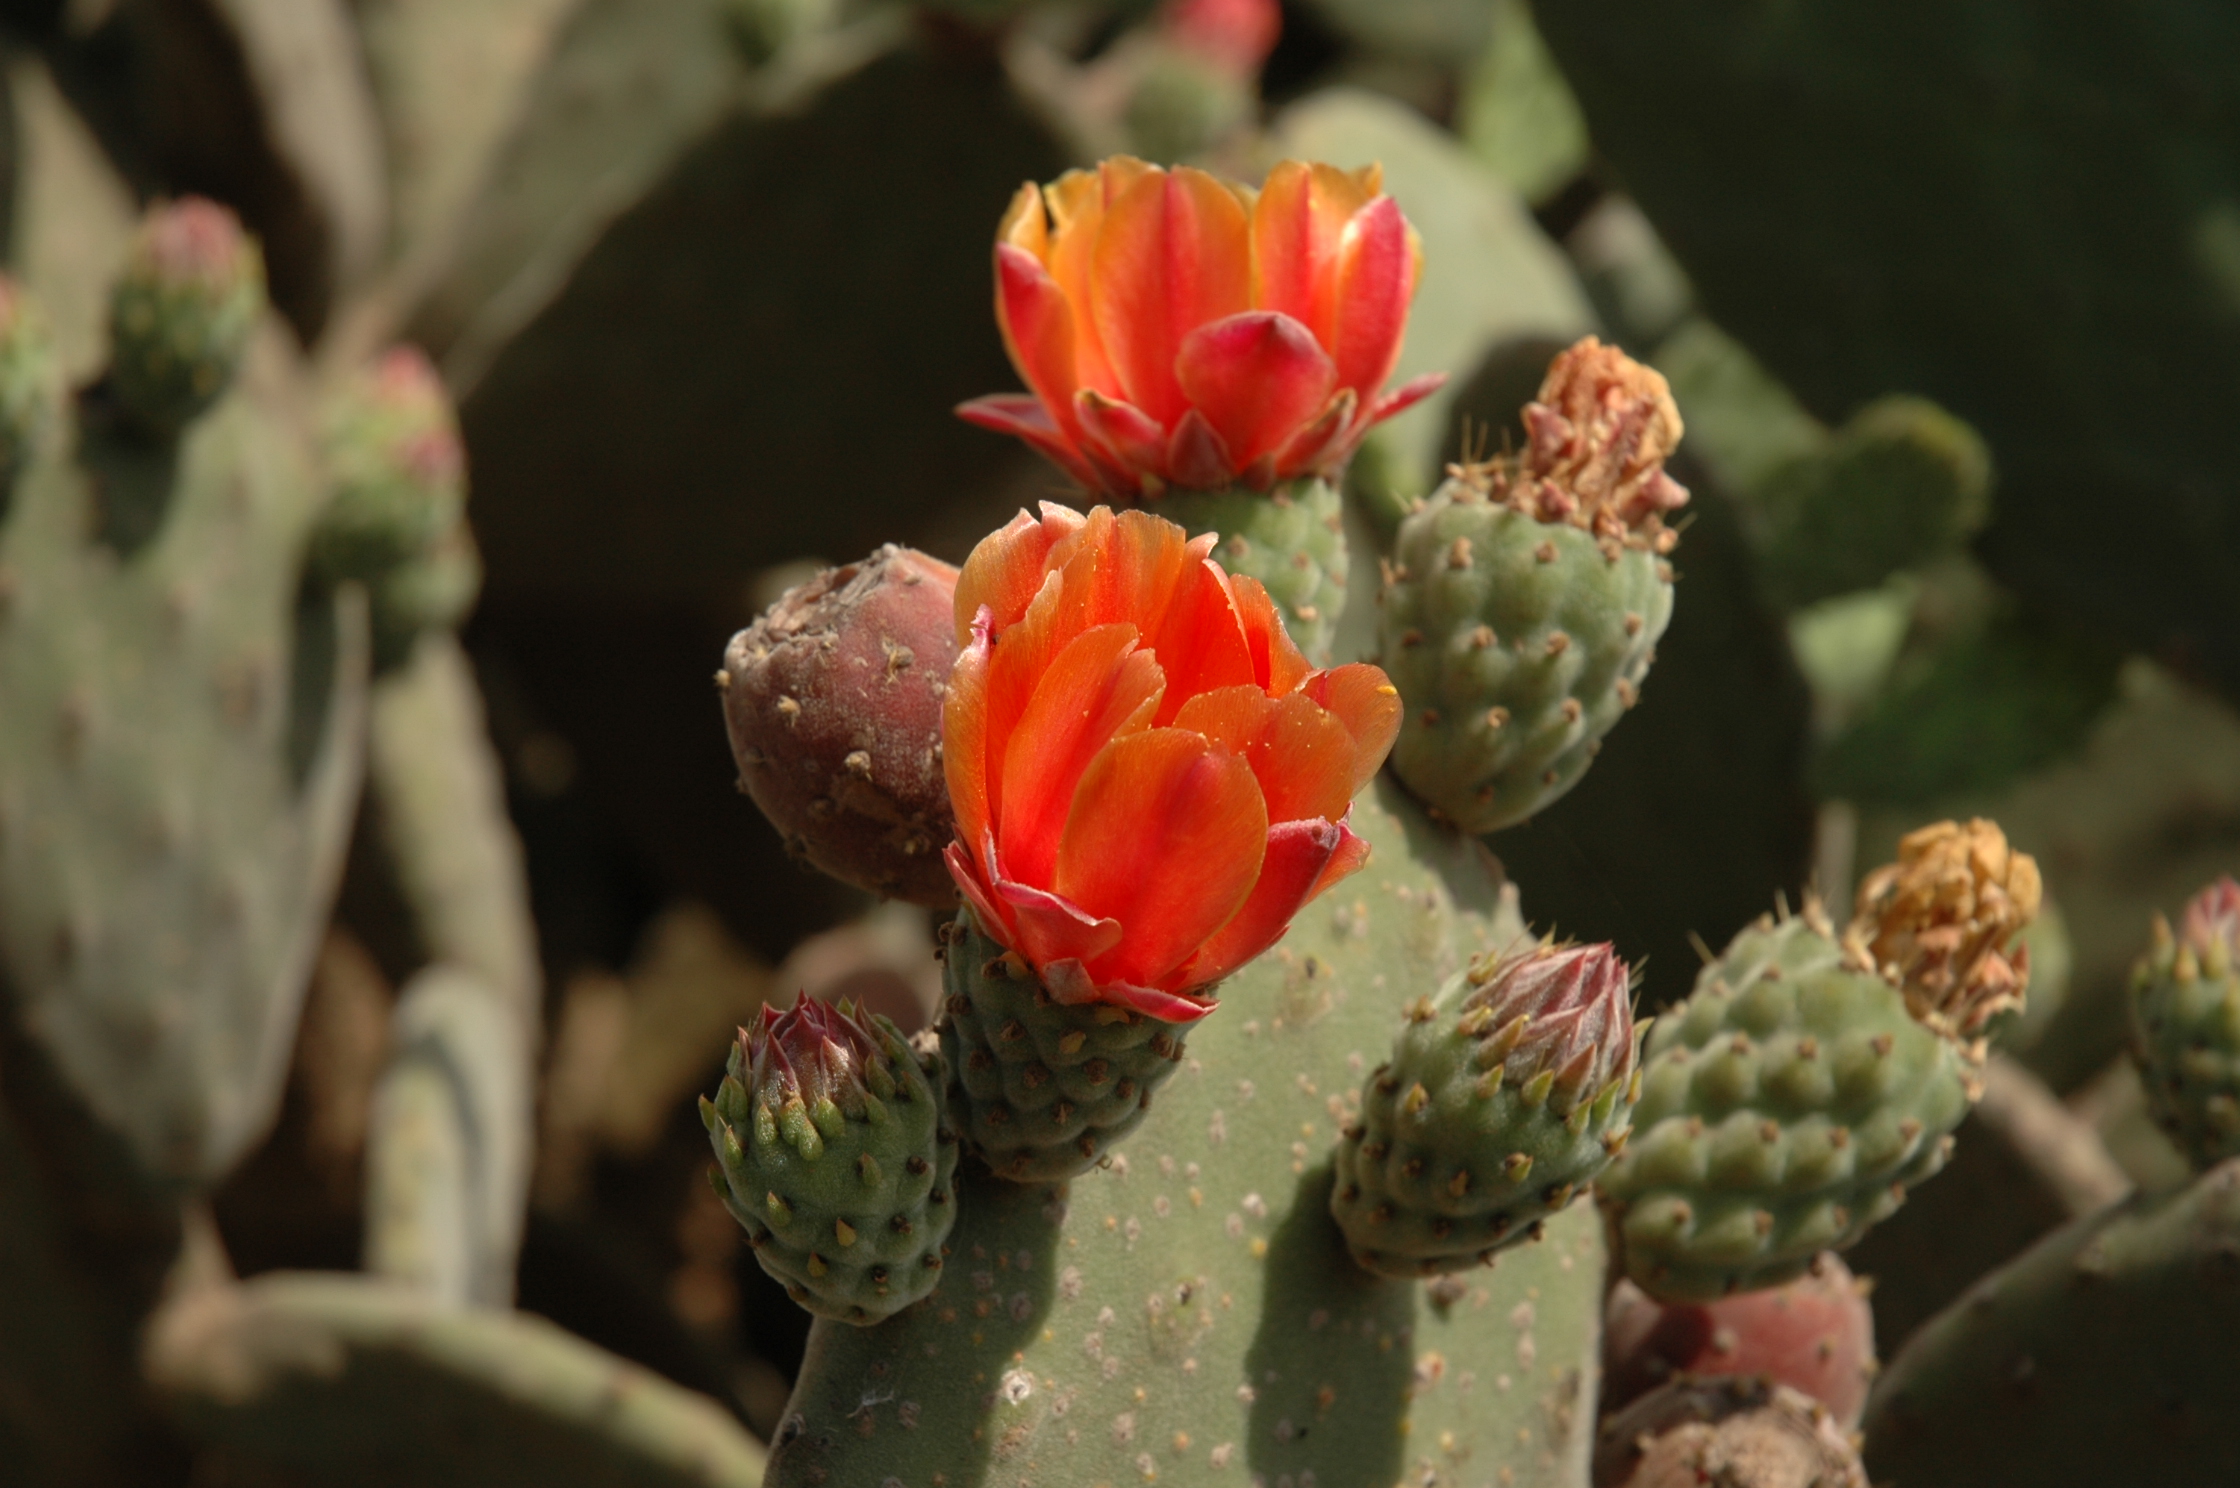
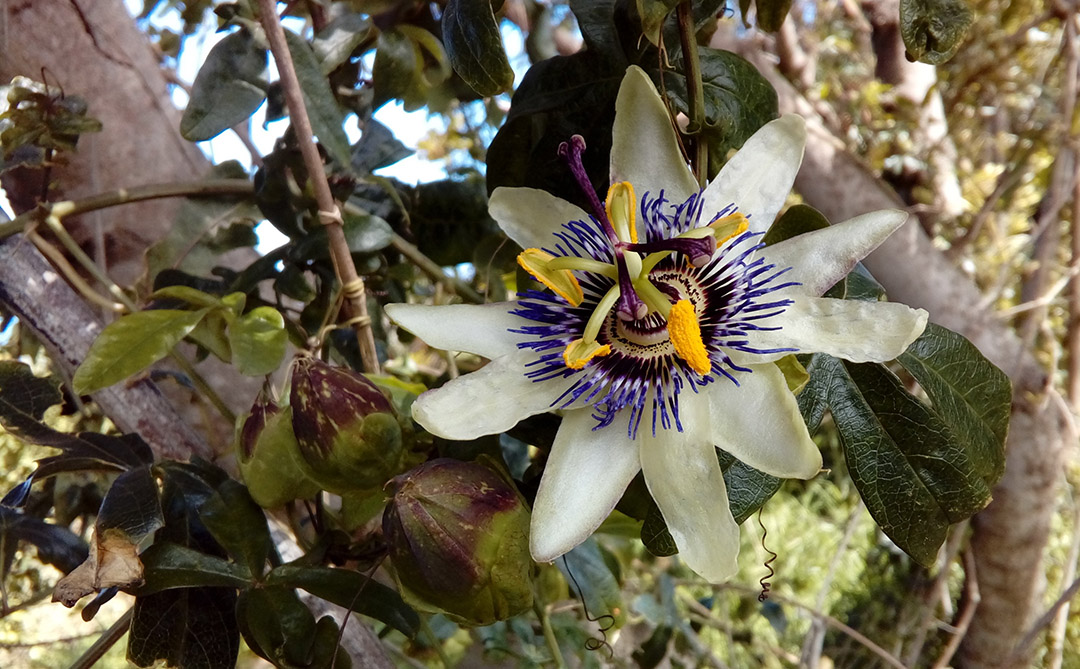


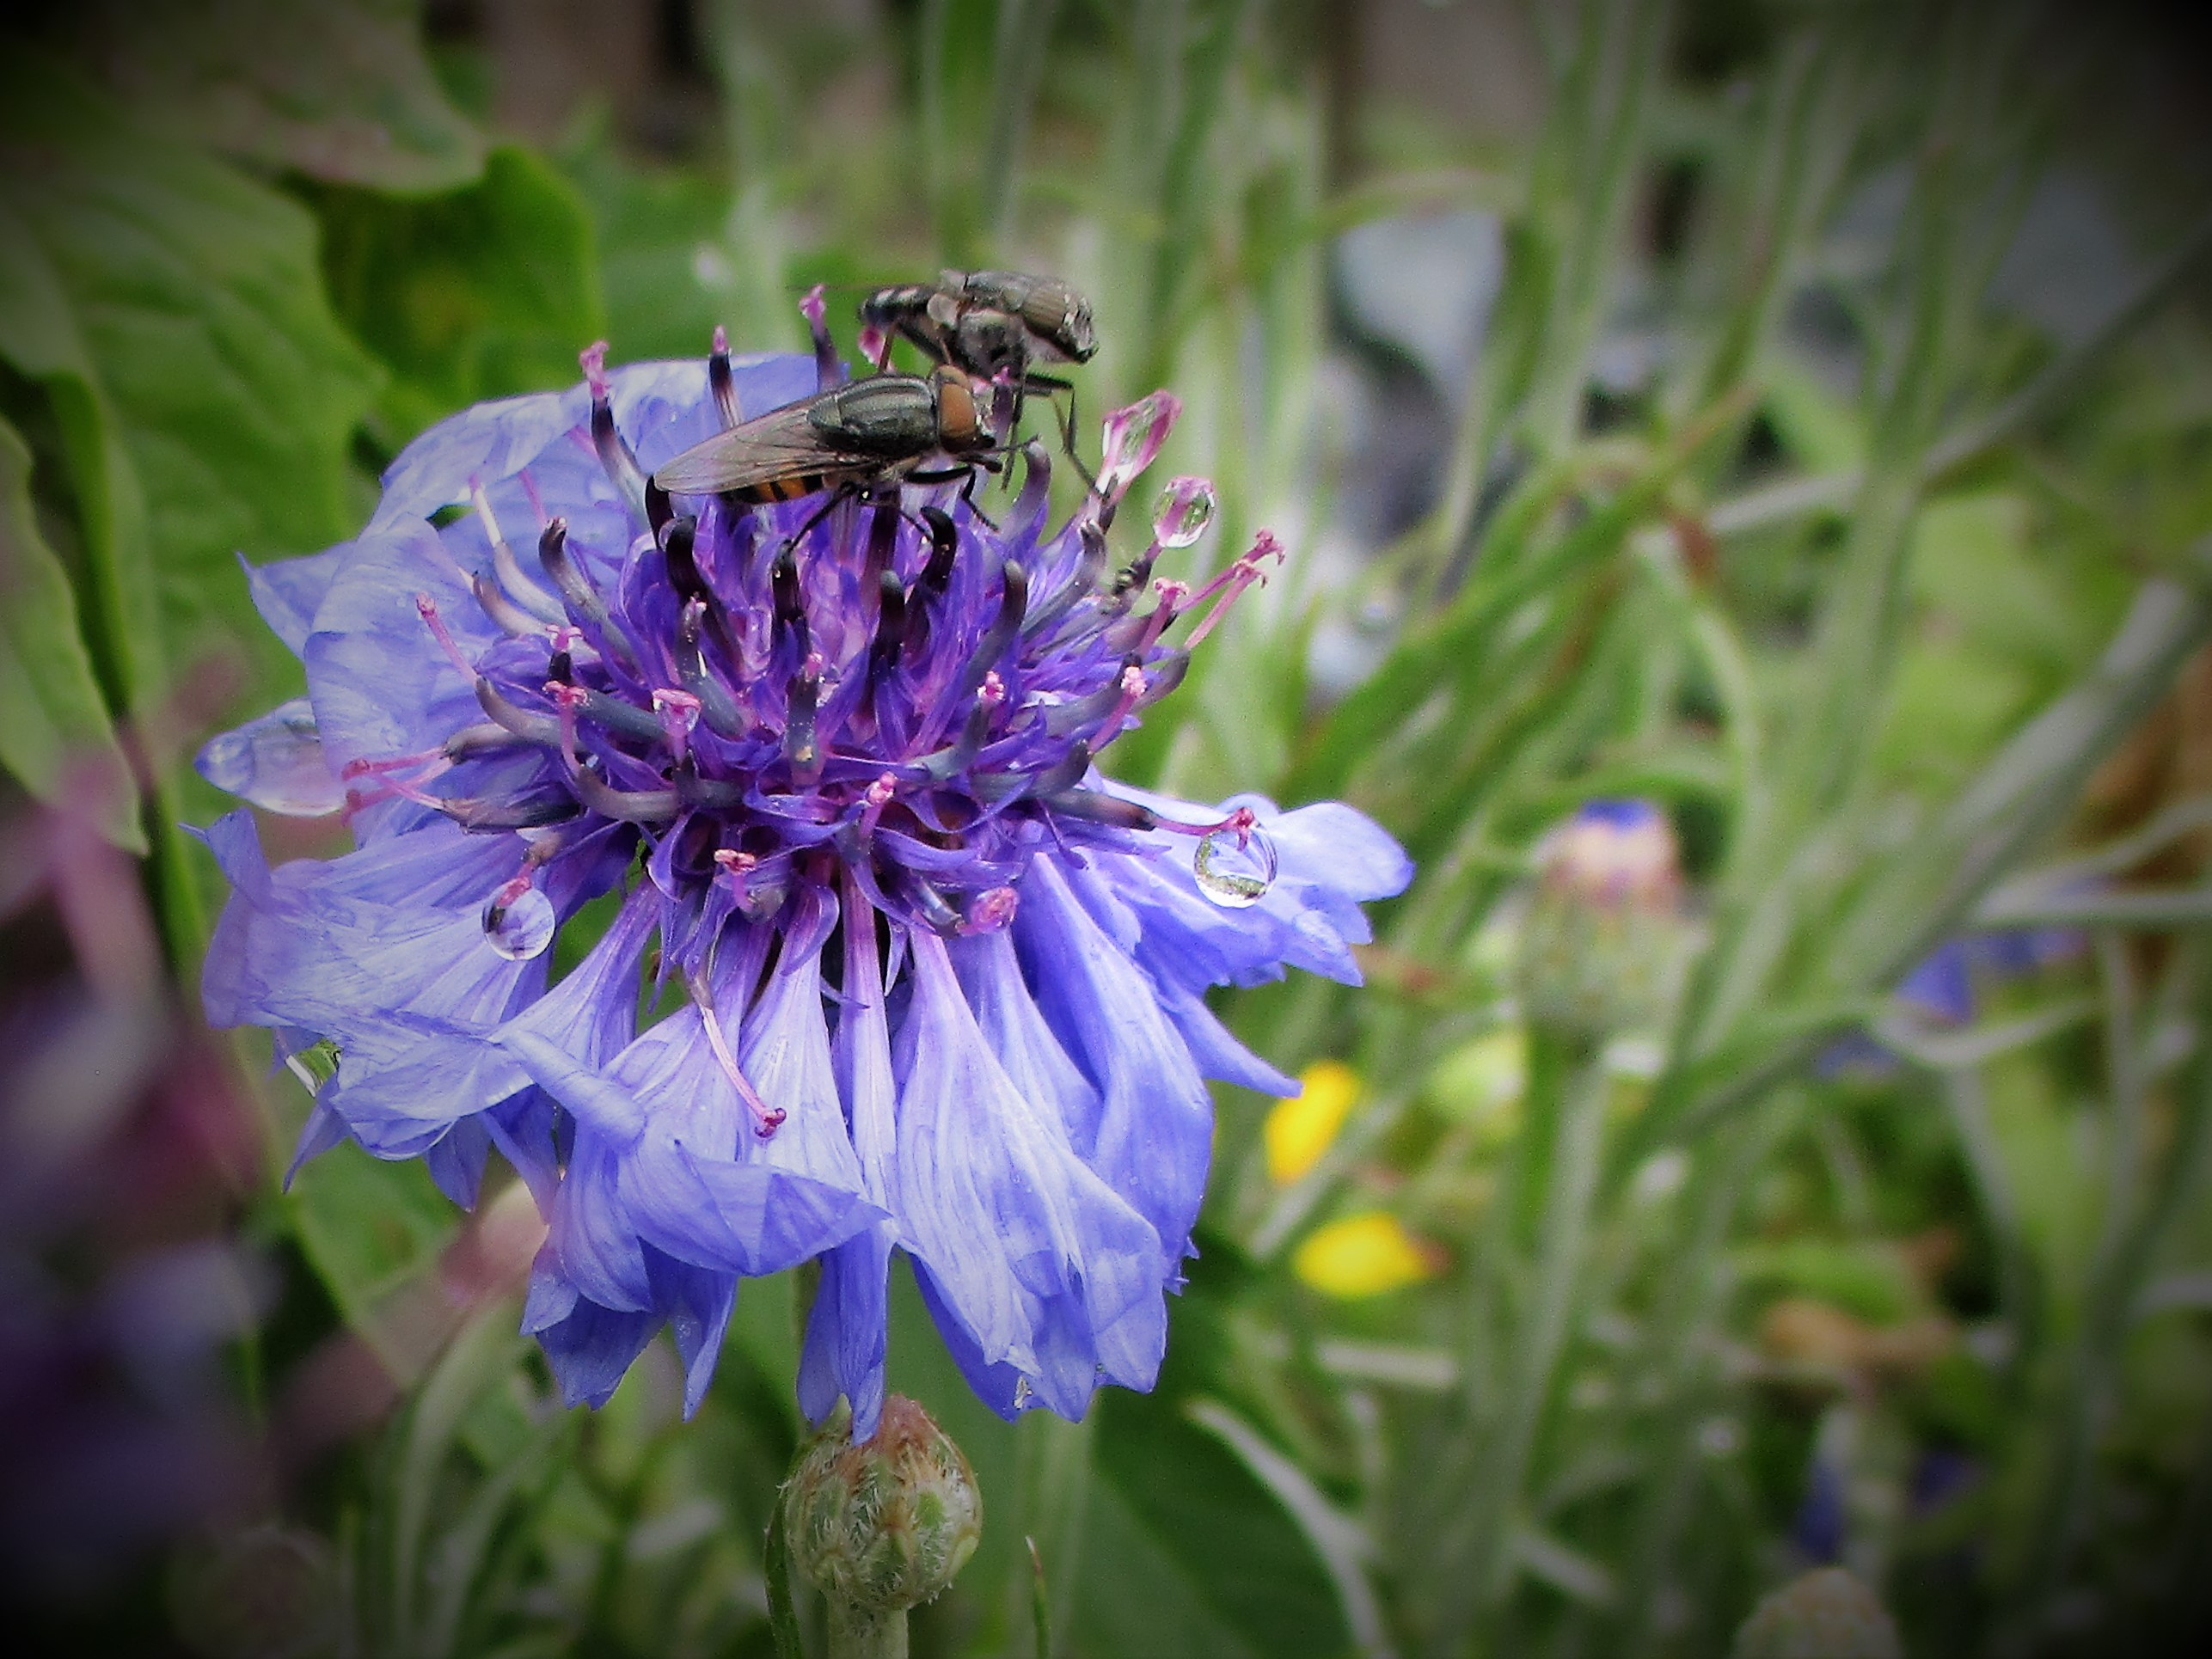

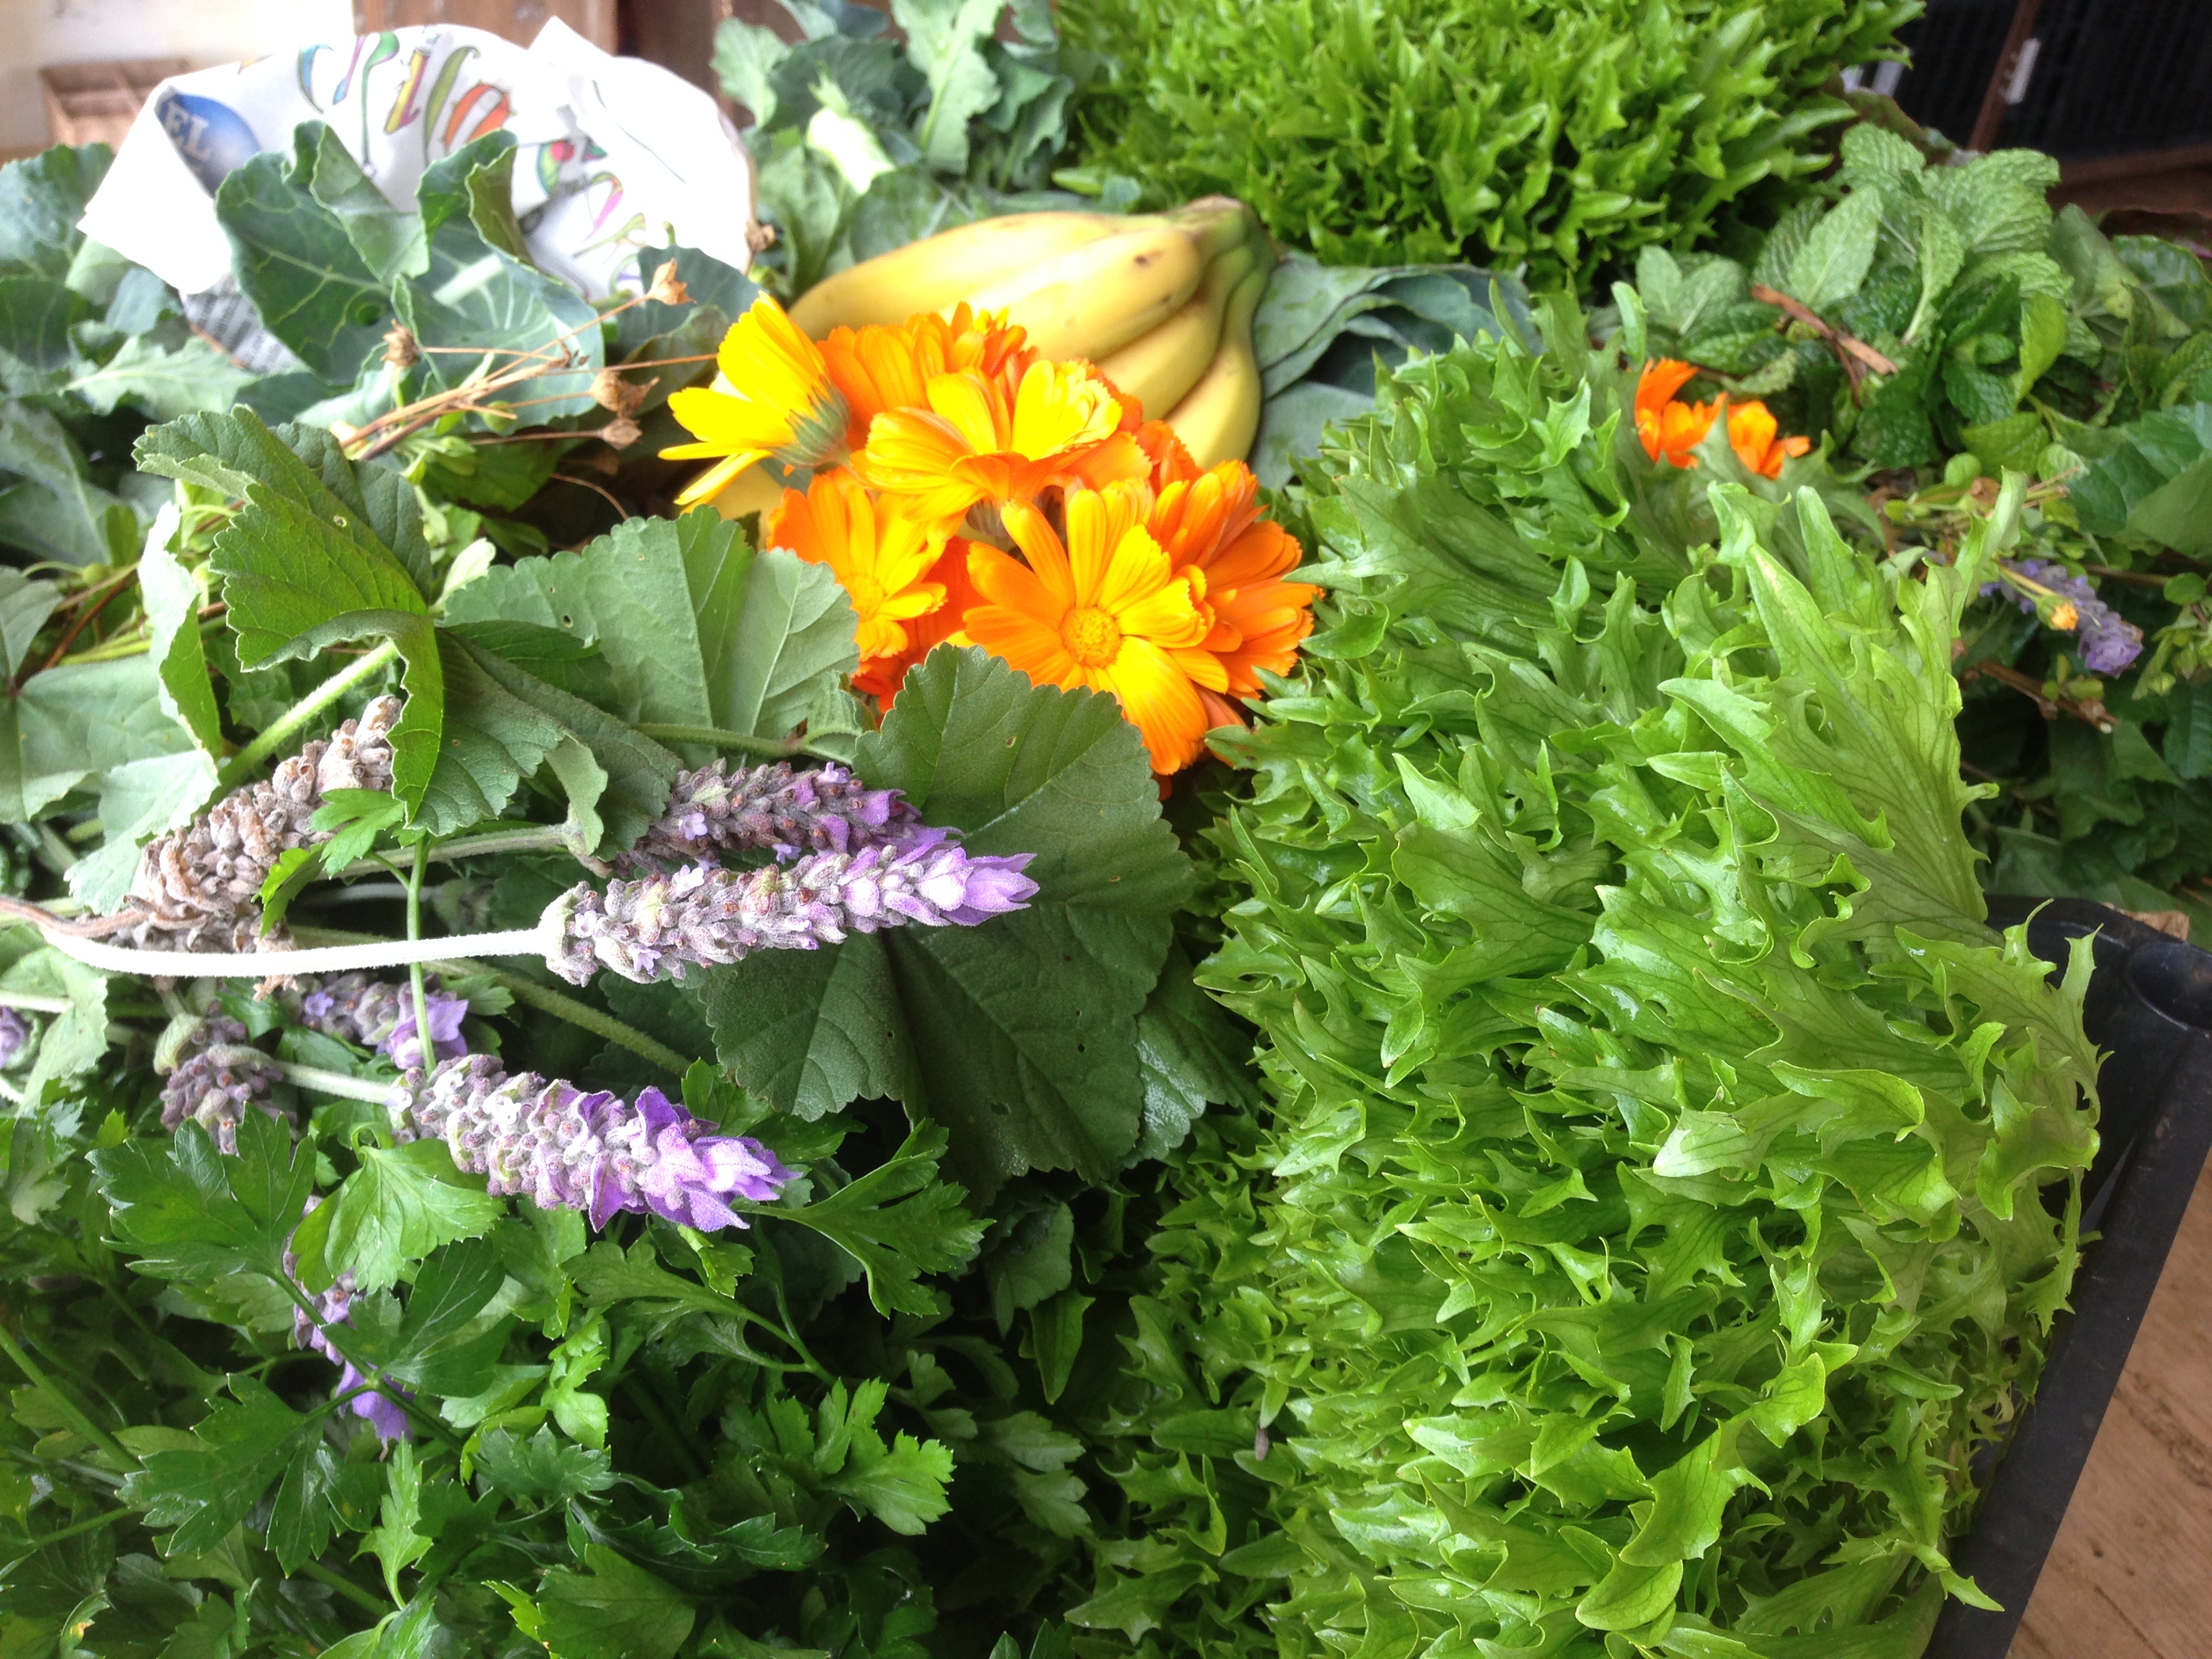

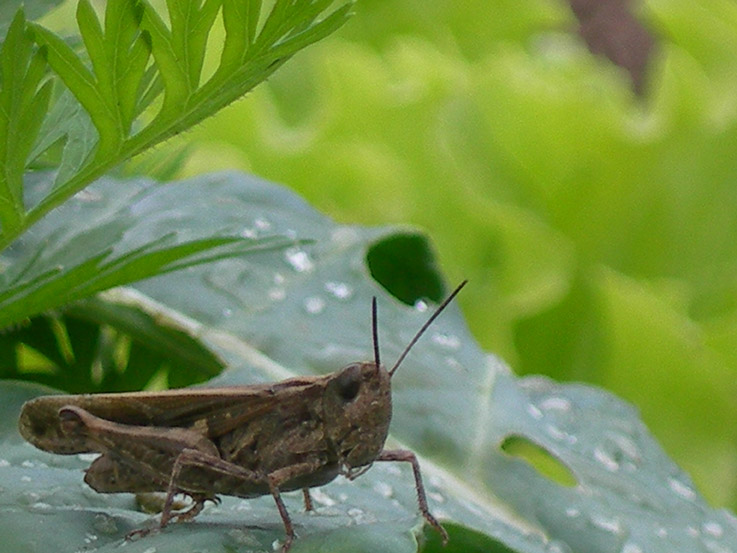

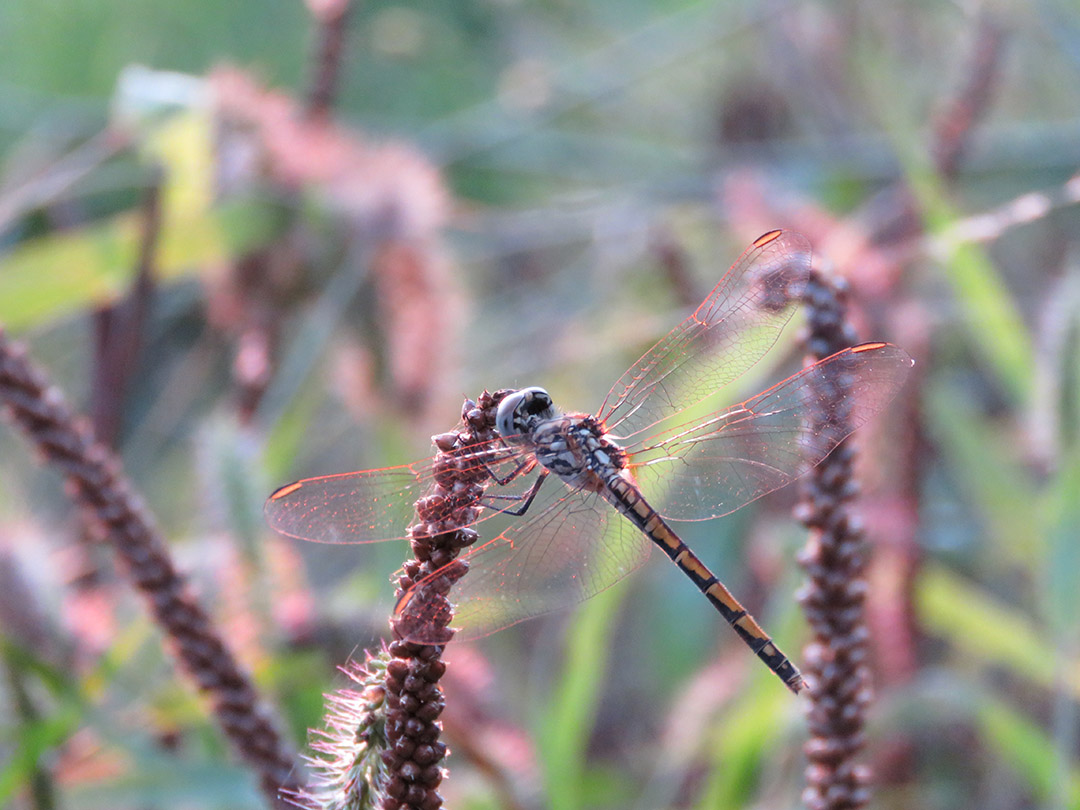
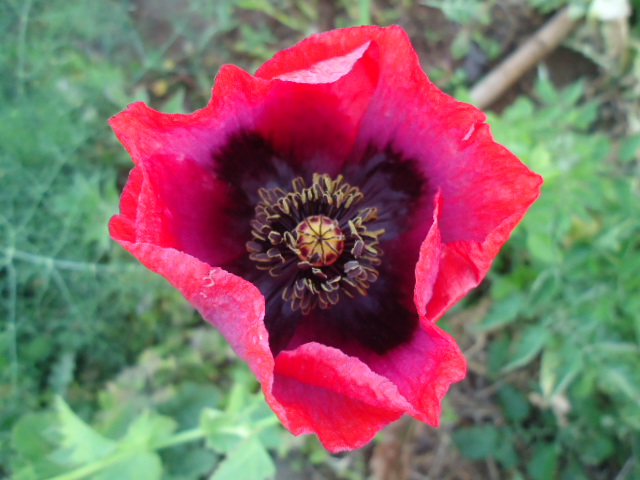
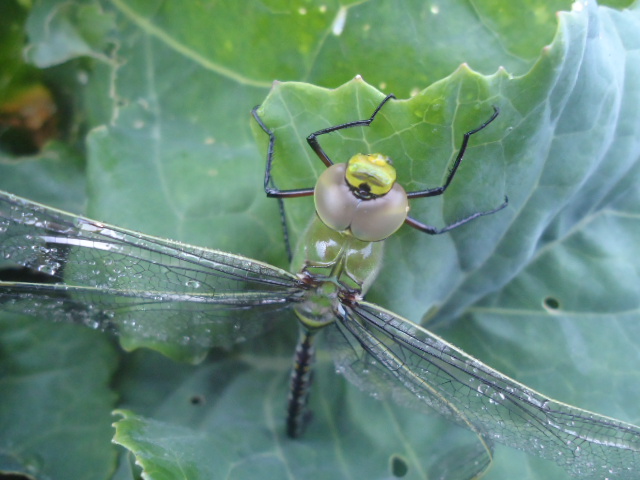
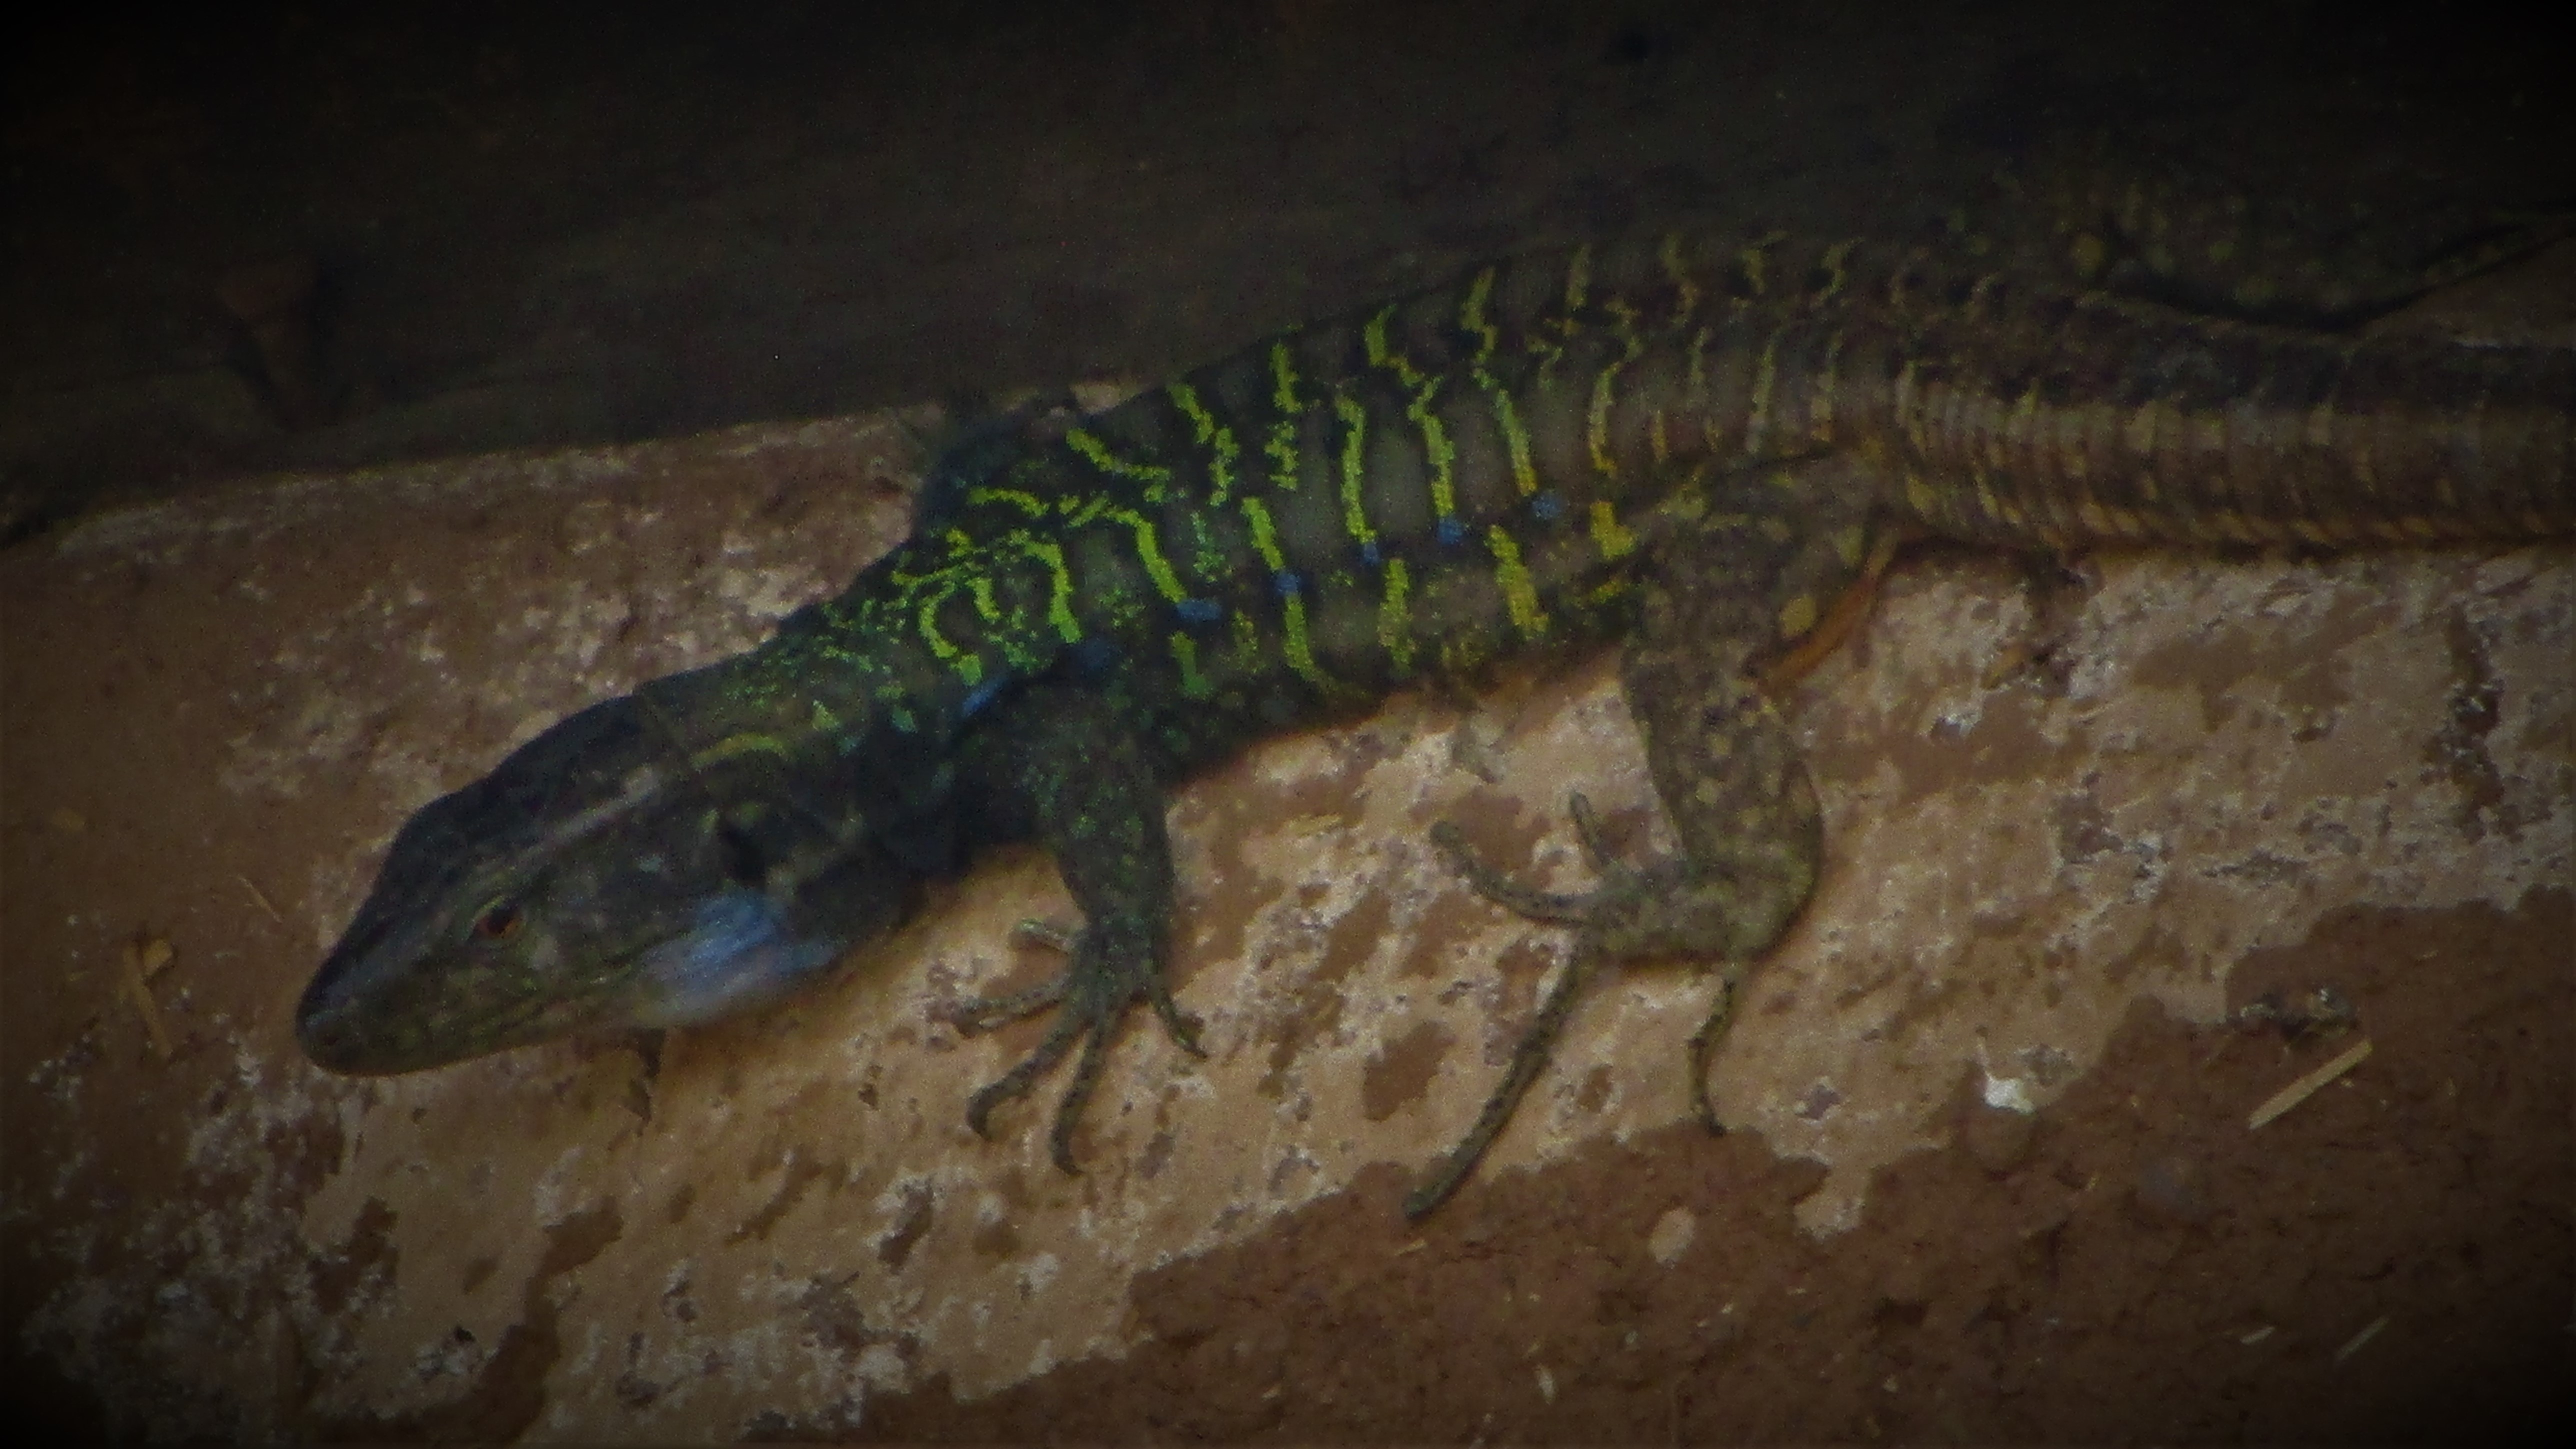
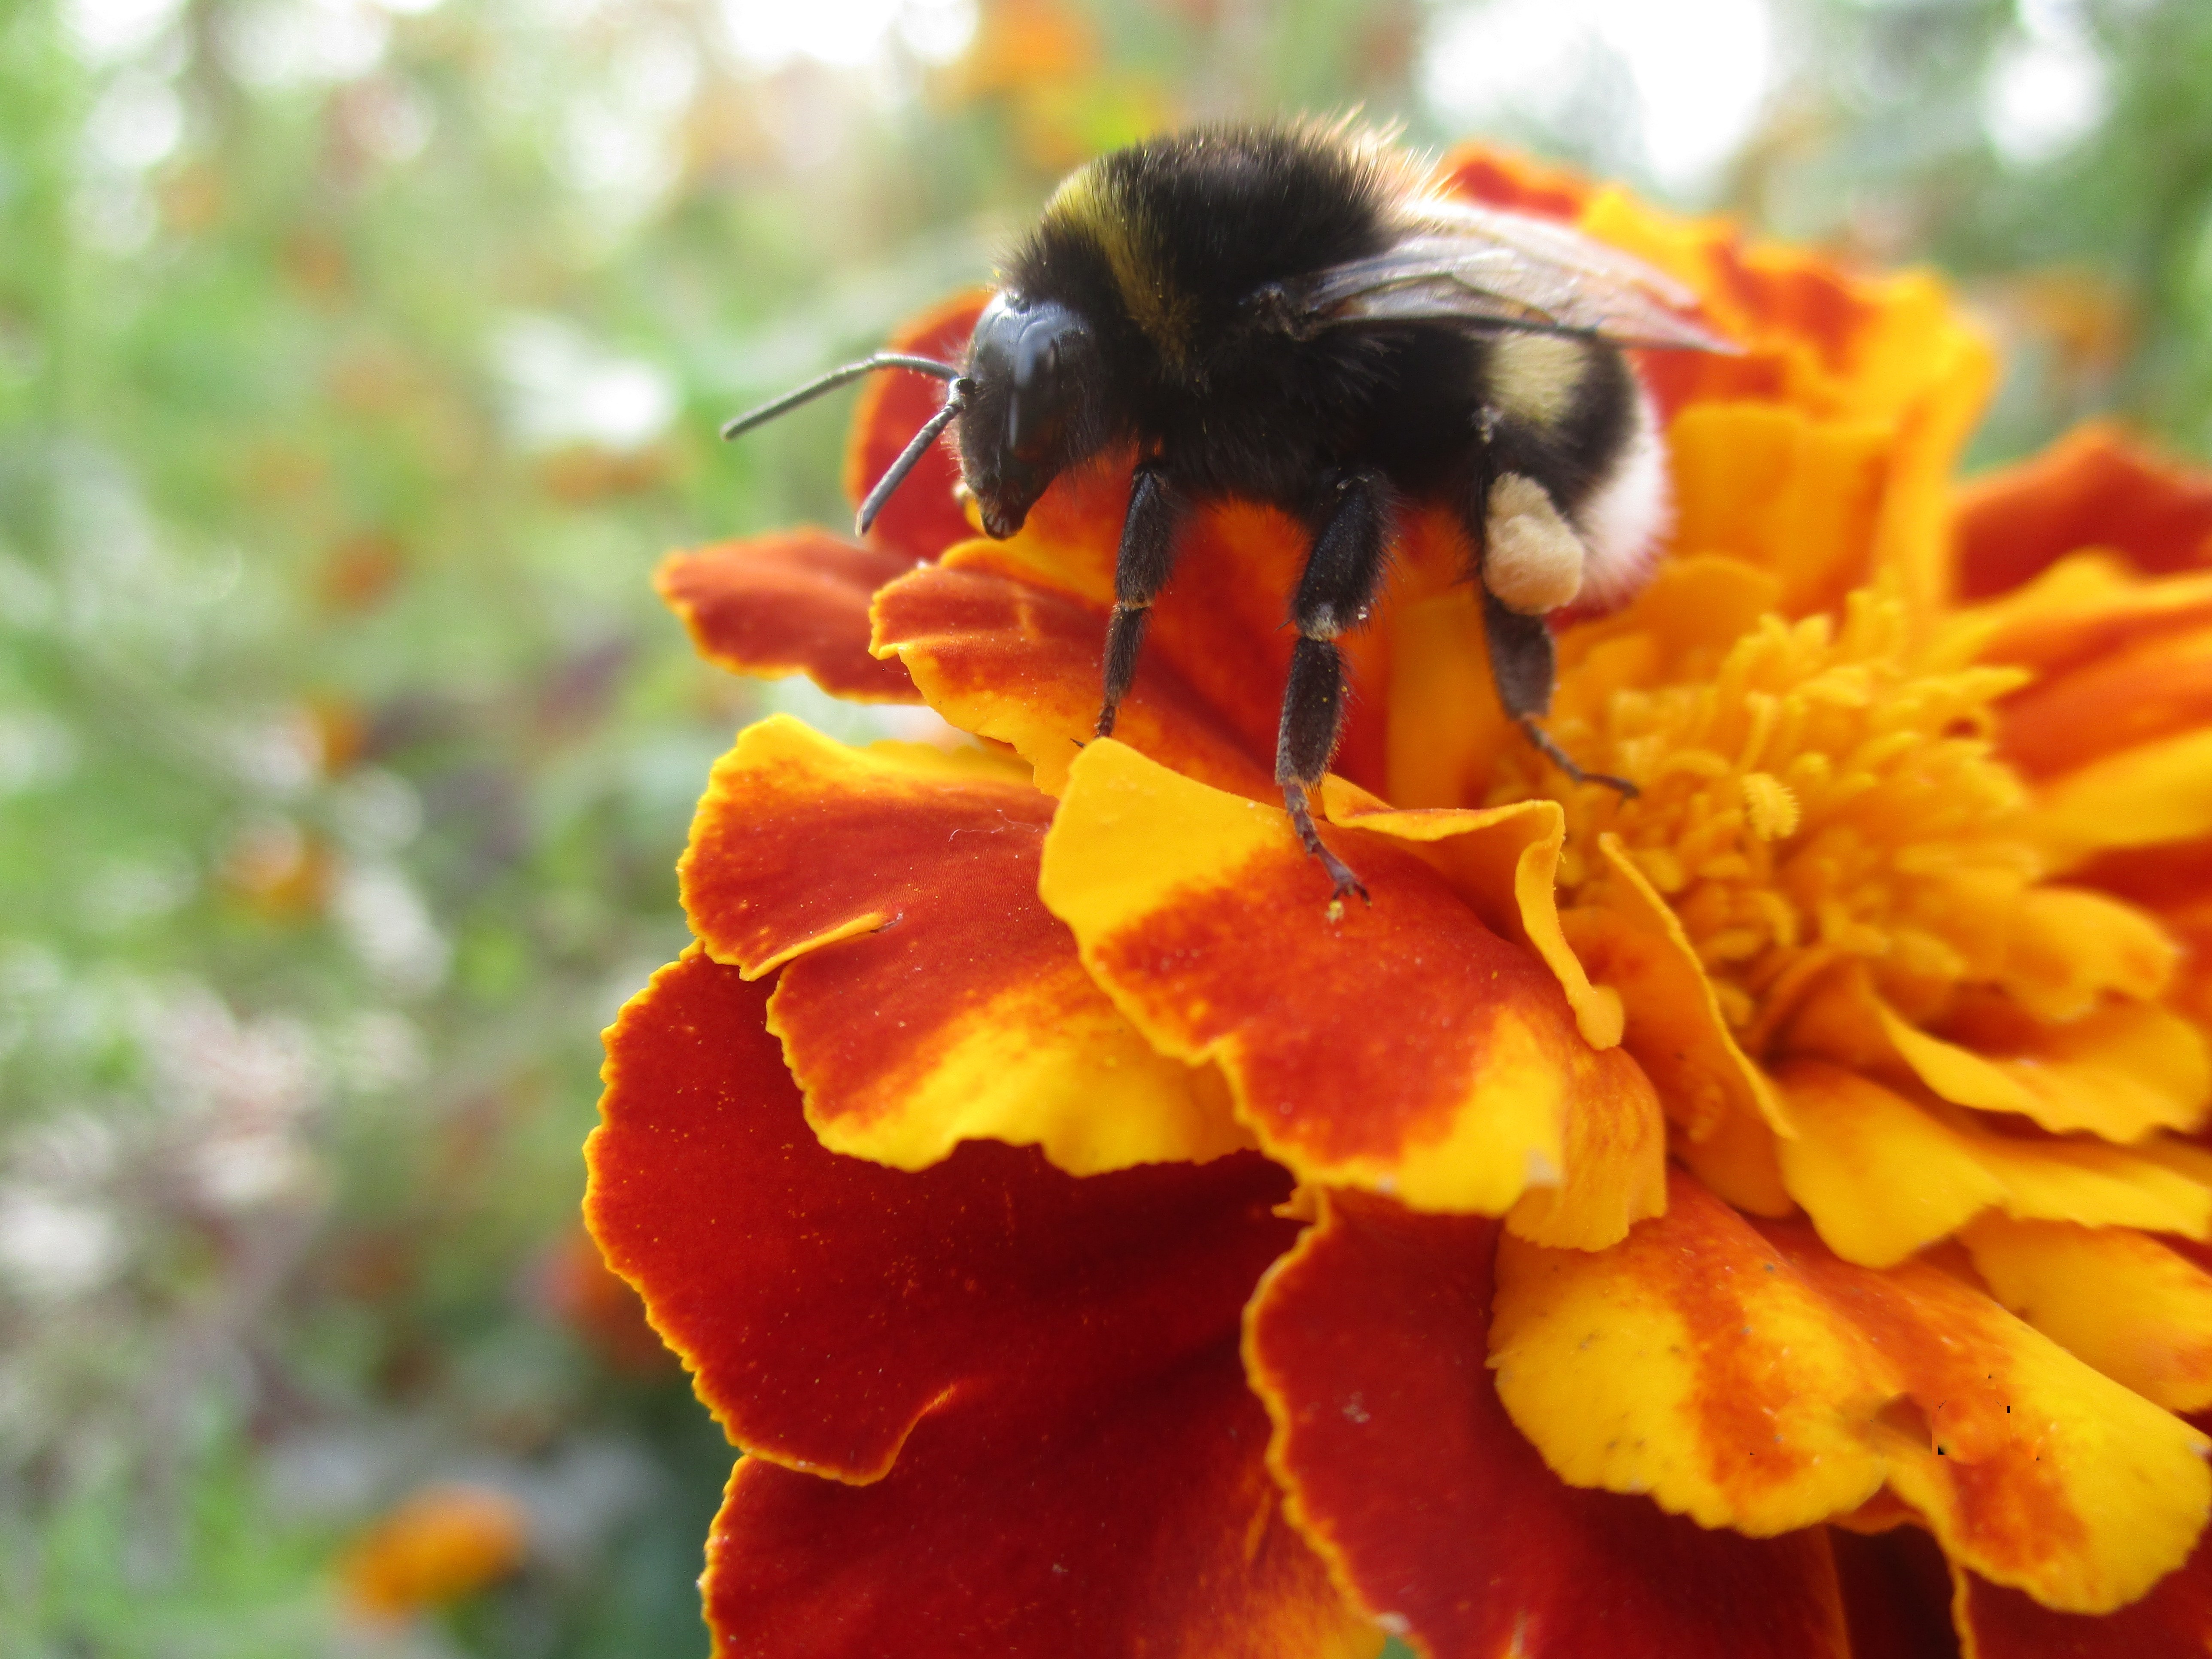
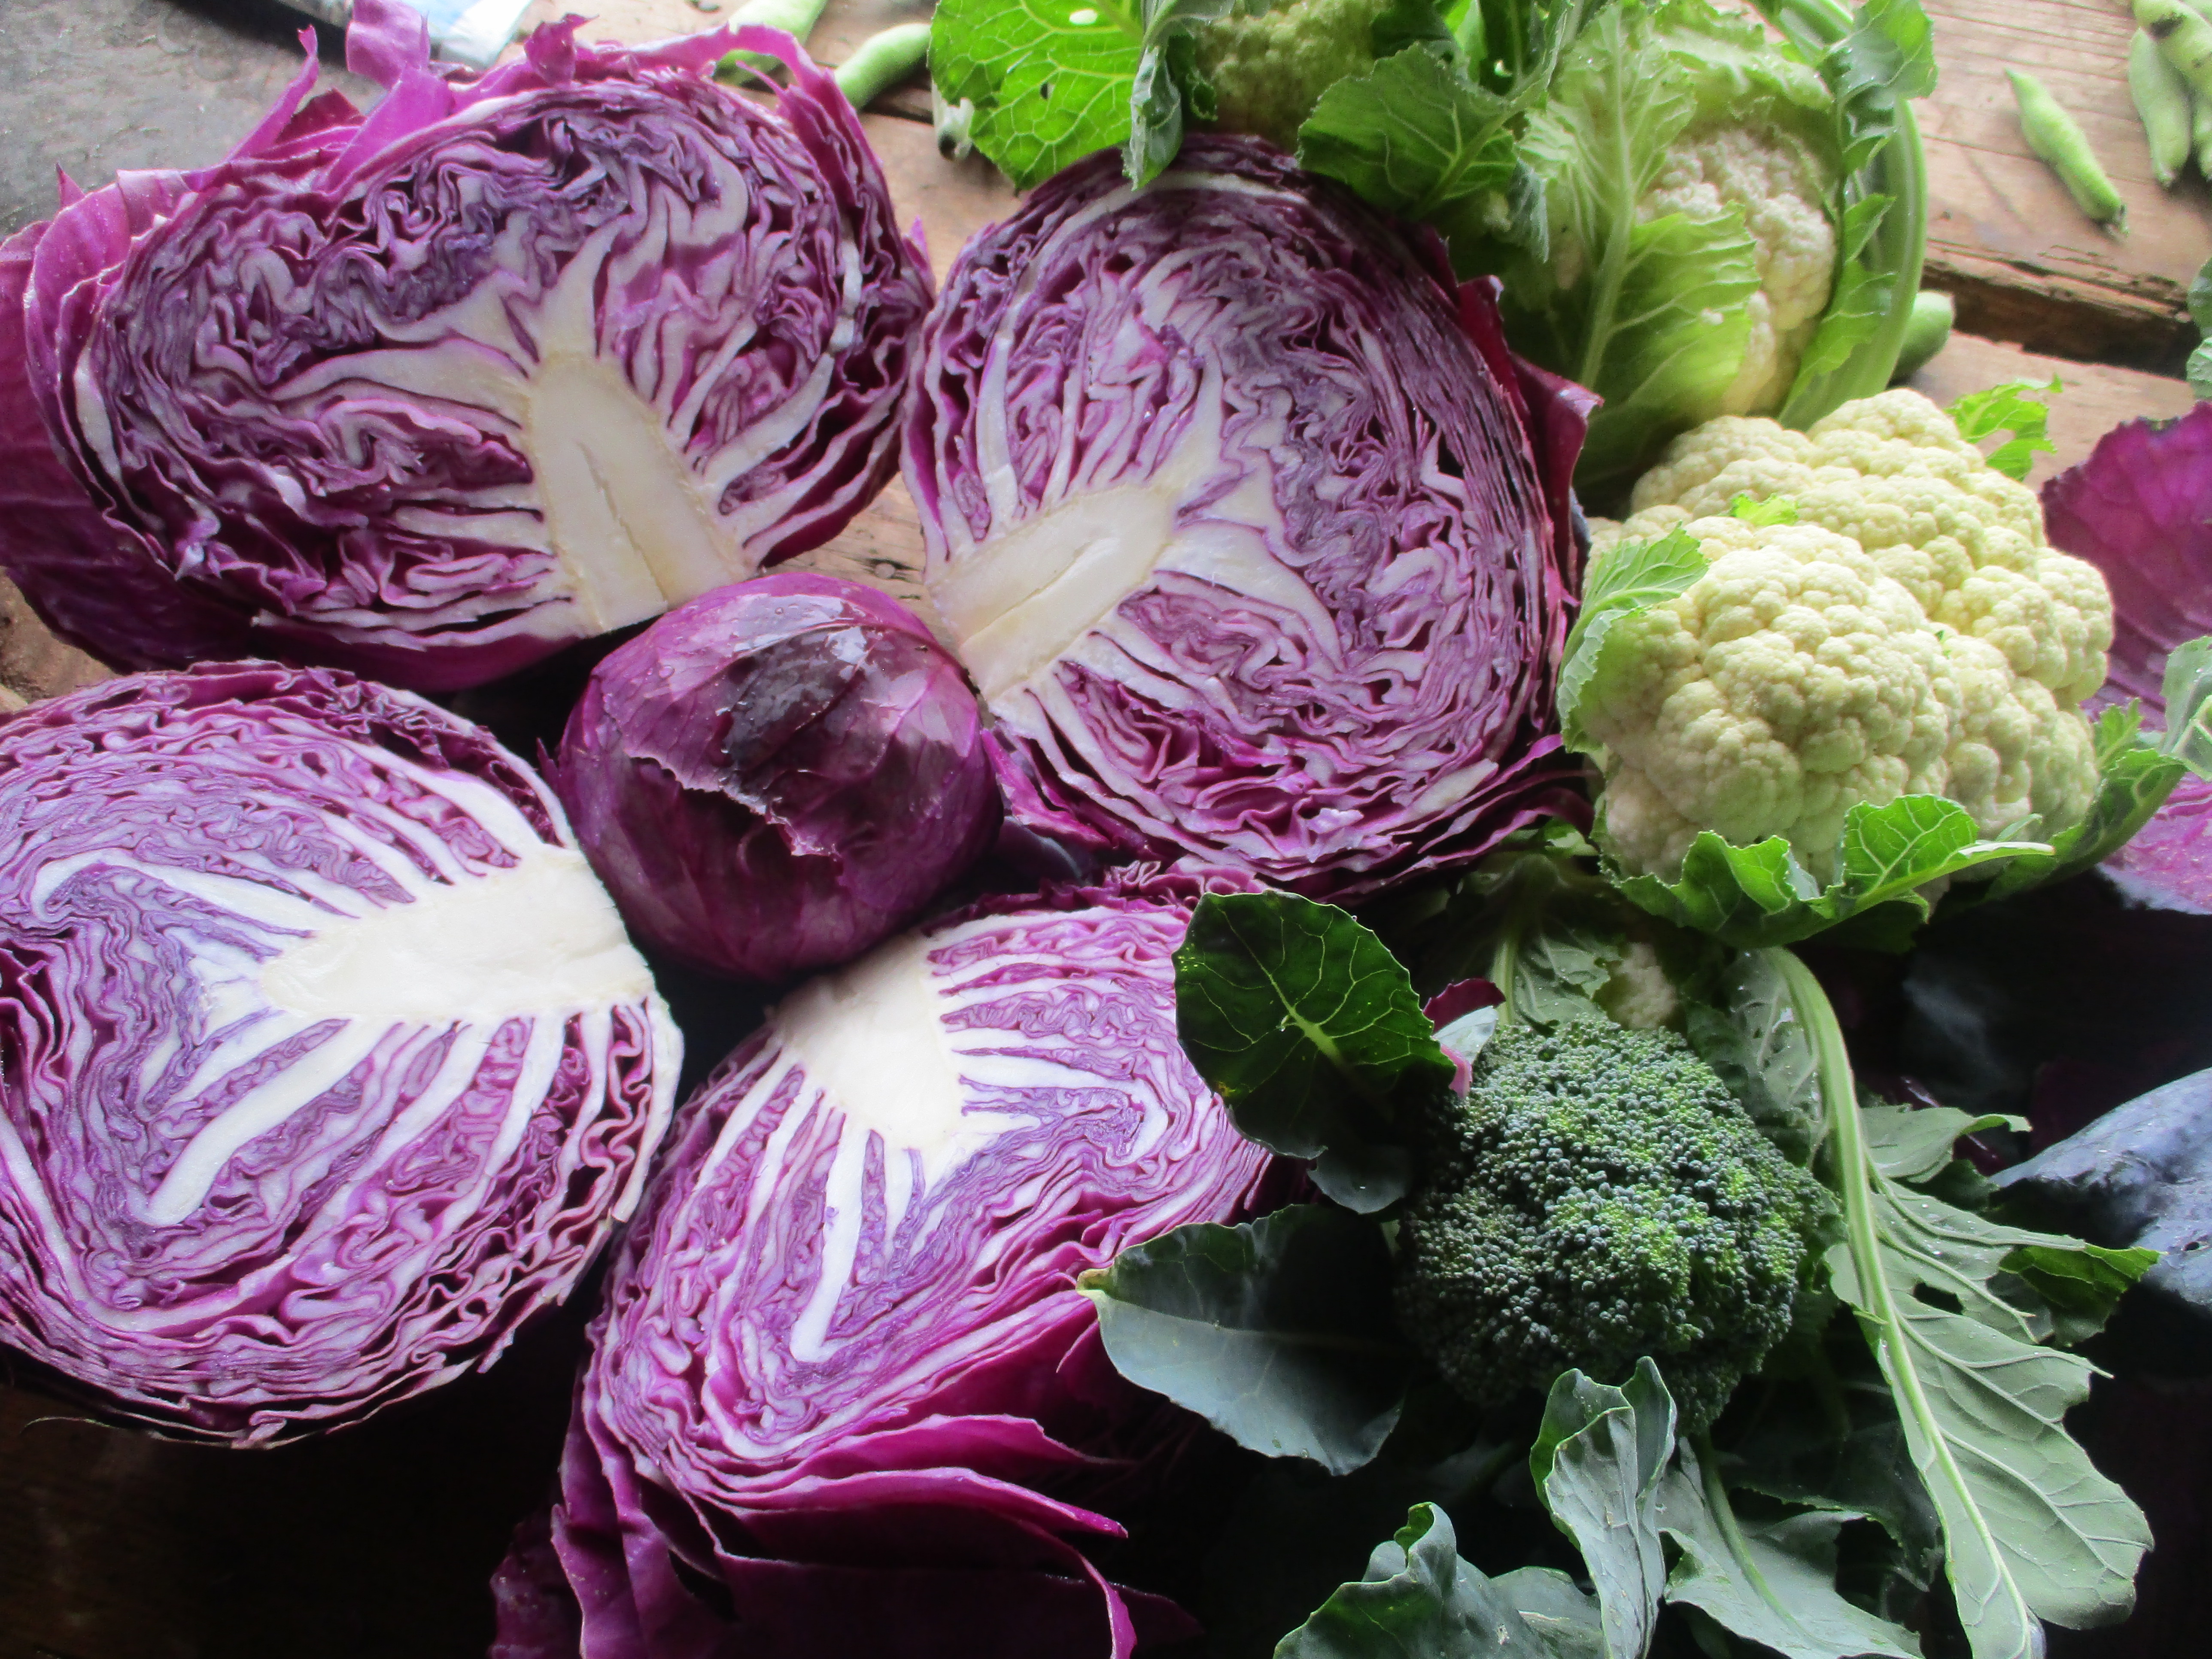
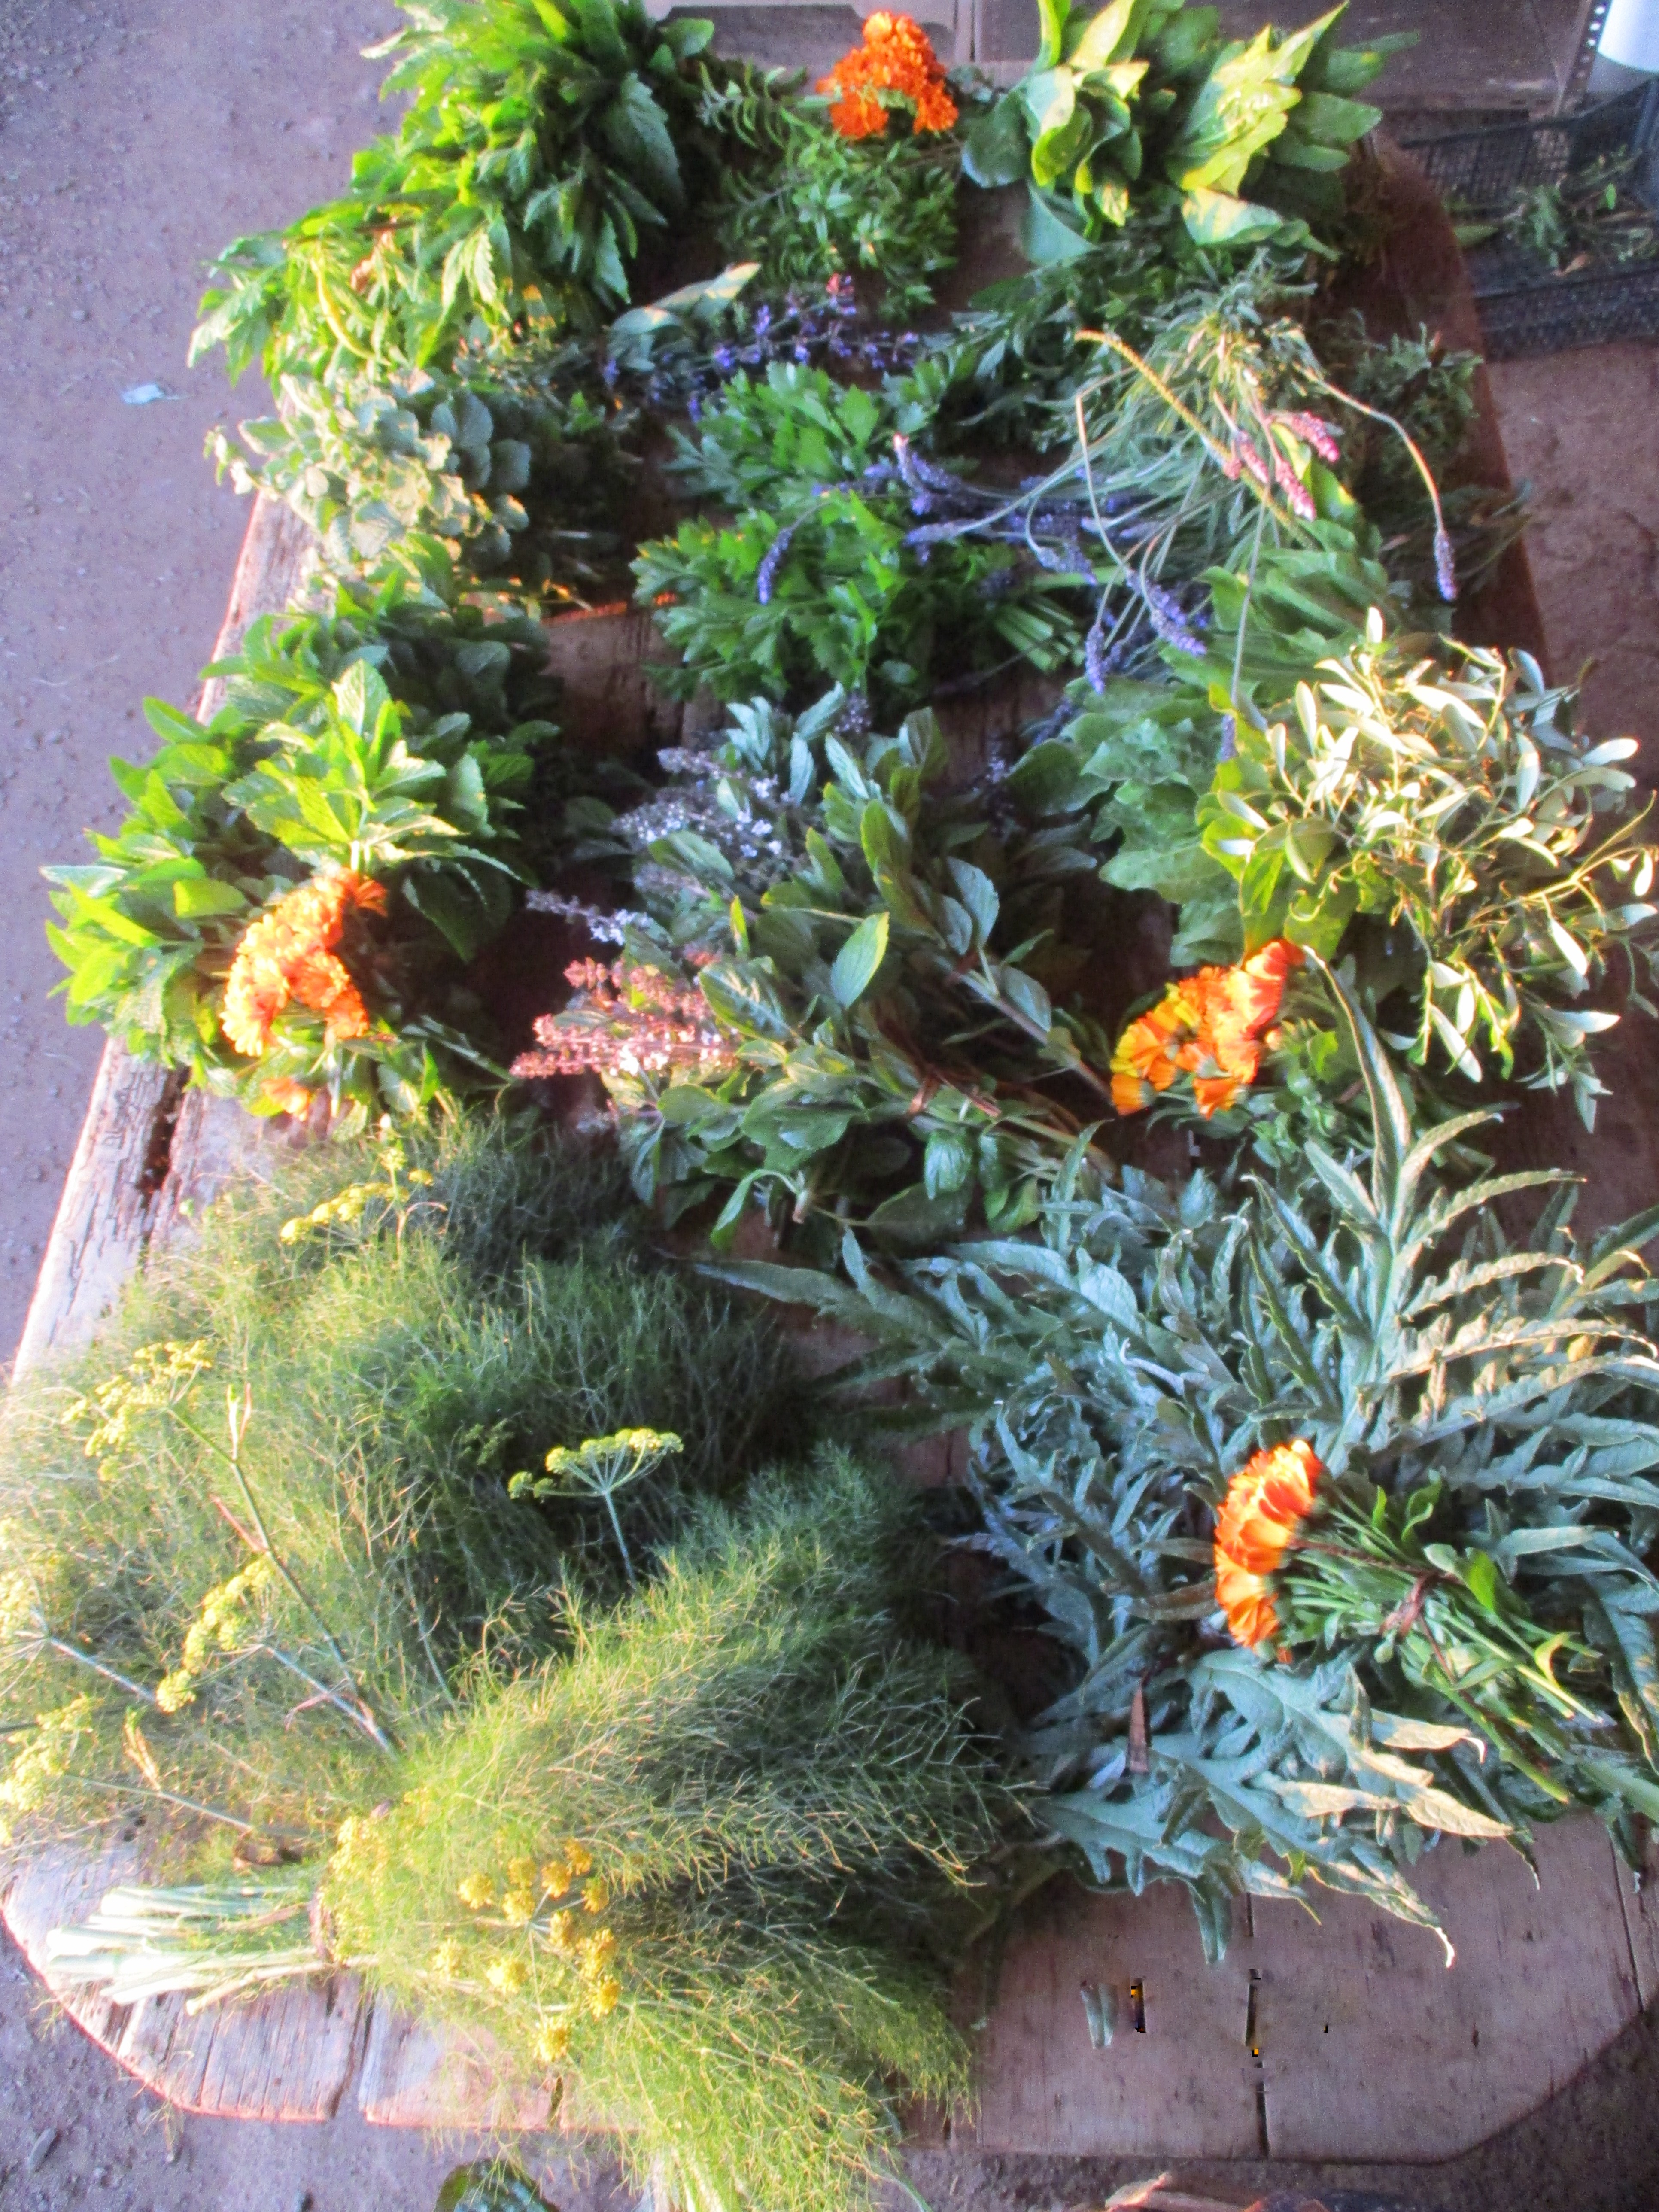
Figure VI.46.- Colorful in our edible garden and forest garden, and in our farm market